2011 DODGE GRAND CARAVAN reset
[x] Cancel search: resetPage 17 of 100

Recliner• Lift the recliner lever located on theoutboard side of the seat, lean back
and release at the desired position.
Memory Seats
• The memory seat feature allows you to save two different driver seating positions,
driver's outside mirror, adjustable brake and accelerator pedals, and radio station
preset settings. The memory seat buttons are located on the driver's door panel.
• Adjust all memory profile settings, press the SET button then press 1 or 2 within five seconds.
• To program a Key Fob to the memory position, press and release the LOCK button within 10 seconds on the Key Fob to be programmed.
• Place the ignition switch in the ON position, select Remote Linked to Memory in the Electronic Vehicle Information Center (EVIC) and enter Yes.
• Press 1 or 2 to recall the saved positions, or press UNLOCK on the programmed Key Fob.
CAUTION!
DO NOT place any article under a power seat or impede its ability to move as it
may cause damage to the seat controls. Seat travel may become limited if
movement is stopped by an obstruction in the seat's path.
WARNING!
• Adjusting a seat while the vehicle is moving is dangerous. The suddenmovement of the seat could cause you to lose control. The seat belt might
not be properly adjusted, and you could be severely injured or killed. Only
adjust a seat while the vehicle is parked.
• Do not ride with the seatback reclined so that the seat belt is no longer resting against your chest. In a collision, you could slide under the seat belt
and be severely injured or killed. Use the recliner only when the vehicle is
parked.
GETTING STARTED
15
Page 37 of 100

NOTE:Your radio may not be equipped with the Uconnect™ Voice Command and
Uconnect™ Phone features. To determine if your radio has these features, press the
Voice Command button on the radio. You will hear a voice prompt if you have the
feature, or see a message on the radio stating “Uconnect Phone not available” if you do
not.
• Your radio has many features that add to the comfort and convenience of you andyour passengers. Some of these radio features should not be used when driving
because they take your eyes from the road or your attention from driving.
• The radio sales code is located on the lower right side of the radio faceplate.
Seek Up/Down Buttons
• Press to seek through radio stations in AM, FM, or SAT bands. Seek through tracks in CD mode.
• Hold either button to bypass stations without stopping.
Audio Settings
• Press the TUNE/SCROLL control knob and BASS, MID, TREBLE, BALANCE and FADE will display. Rotate the TUNE/SCROLL control knob to select the desired
setting.
Audio Jack
• The Audio Jack allows a portable device, such as an MP3 player or a cassetteplayer, to be plugged into the radio and utilize the vehicle’s audio system, using a
3.5 mm audio cable to amplify the source and play through the vehicle speakers.
• Pressing the AUX button will change the mode to auxiliary device if the Audio Jack is connected, allowing the music from your portable device to play through the
vehicle's speakers.
• The functions of the portable device are controlled using the device buttons. The volume may be controlled using the radio or portable device.
Clock Setting
• Press and hold the TIME button until the hours blink; turn the TUNE/SCROLLcontrol knob to set the hours.
• Press the TUNE/SCROLL control knob until the minutes begin to blink; turn the TUNE/SCROLL control knob to set the minutes.
• Press the TUNE/SCROLL control knob to save the time change.
• To exit, press any button/knob or wait five seconds.
Store Radio Presets
• Press the SET/RND button once and SET 1 will show in the display. Then select button (1–6).
• A second station may be added to each push button. Press the SET/RND button twice and SET 2 will show in the display, then select button (1–6).
ELECTRONICS
35
Page 39 of 100

NOTE:Your radio may not be equipped with the Uconnect™ Voice Command and
Uconnect™ Phone features. To determine if your radio has these features, press the
Voice Command button on the radio. You will hear a voice prompt if you have the
feature, or see a message on the radio stating “Uconnect Phone not available” if you do
not.
• Your radio has many features that add to the comfort and convenience of you andyour passengers. Some of these radio features should not be used when driving
because they take your eyes from the road or your attention from driving.
• The radio sales code is located on the lower right side of the radio faceplate.
Seek Up/Down
• Media Center 730N: Press the SEEK hard-key to seek through radio stations in AM, FM, or SAT bands. Seek through tracks in CD or iPod®modes or through
songs in the HDD playlist.
• Media Center 430/430N: Press the SEEK up/down arrow soft-keys to change the currently playing station in AM, FM or SAT bands. Seek through tracks in CD or
iPod
®modes or through songs in the HDD playlist.
Audio Jack
• The Audio Jack allows a portable device, such as an MP3 player or a cassetteplayer, to be plugged into the radio and utilize the vehicle’s audio system, using a
3.5 mm audio cable, to amplify the source and play through the vehicle speakers.
• Pressing the AUX button will change the mode to auxiliary device if the Audio Jack is connected, allowing the music from your portable device to be heard through the
vehicle's speakers.
• The functions of the portable device are controlled using the device buttons. The volume may be controlled using the radio or portable device.
Clock Setting
• Turn the radio on, then touch the screen where the time is displayed.
• Touch the USER CLOCK soft-key (Navigation radio only).
• To adjust the hours, touch either the HOUR FORWARD or HOUR BACKWARDsoft-key.
• To adjust the minutes, touch either the MINUTE FORWARD or MINUTE BACKWARD soft-key.
• To save the new time setting, touch the screen where the word “Save” is displayed.
Store Radio Presets
• Media Center 730N: Press the RADIO/MEDIA hard-key until AM FM SAT is displayed in the upper left corner of the screen.
• Media Center 430/430N: Press the RADIO hard-key to display AM FM SAT in the upper left corner of the screen.
• Select the radio band by touching either the AM, FM, or SAT soft-key.
• Find the station to store by either pressing the SEEK UP/DOWN hard-keys (Media Center 730N), touching the right and left arrow soft-keys (Media Center
430/430N), touching the SCAN soft-key, or by using the DIRECT TUNE soft-key.
ELECTRONICS
37
Page 40 of 100

• Once the station is found, touch and hold one of the PRESET soft-keys in the listto the right, until you hear a confirmation beep.
Hard Disk Drive Operation
Copy Complete Audio Disc To Hard-Drive
• Media Center 730N: Press the OPEN/CLOSE hard-key.
• Media Center 430/430N: Press the LOAD hard-key.
• Insert a disc, then press the MENU hard-key.
• Touch the MY FILES soft-key, then select MY MUSIC.
• Touch the Add Music Files to HDD soft-key, then touch the From Disc soft-key in the next screen to start the process.
Copying From USB • The USB port on the radio face plate allows you to copying files to your hard drive. To access, lift up on the cover.
• Insert a USB device (e.g. thumb drive or memory stick), then select MY MUSIC.
• Touch the Add Music Files to HDD soft-key, then touch the From USB soft-key in the next screen.
• Select the folders or titles you would like to copy, then touch the DONE soft-key to start the copy process.
Copy Pictures To The Hard-Drive • Insert either a CD or a USB device containing your pictures in JPEG format into the USB port on the radio face.
• Touch the MY FILES soft-key, then go to the MANAGE MY FILES screen.
• Touch the MY PICTURES soft-key to get an overview of the currently stored images.
• Touch one of the ADD PICTURES soft-keys, then select the type of media inserted.
• Use the PAGE soft-keys to page through a list of pictures and press the picture you would like to import.
• Confirm your selection by touching the YES or SAVE soft-key. The imported picture is now available in the MANAGE MY PICTURES screen.
• In order to display the imported picture in the radio screen, touch the desired picture soft-key.
• Select this picture by pressing the PICTURE VIEW soft-key. A check mark indicates the currently used picture.
Cleaning Your Touch-Screen Radio
• Do not spray any liquid or caustic chemicals directly on the screen. Use a cleanand dry micro fiber lens cleaning cloth in order to clean the touch-screen.
• If necessary, use a lint-free cloth dampened with a cleaning solution such as isopropyl alcohol or an isopropyl alcohol and water solution ratio of 50:50. Be sure
to follow the solvent manufacturer's precautions and directions.
ELECTRONICS
38
Page 44 of 100

NOTE:SIRIUS Travel Link requires a subscription, sold separately after trial
subscription included with vehicle purchase.
• SIRIUS Travel Link brings a wealth of useful information into your vehicle and rightto your fingertips:
• Weather
• View detailed weather conditions at your current location.
• Ski Info
• View ski and snowboarding conditions at ski resorts.
• Fuel Prices
• Check detailed price information for fuel stations near your current location.
• Movie Listings
• Check which movies (includes start times, ratings, run lengths and summaries)
are playing at theaters near your current location.
• Sports Scores
• View scores and upcoming events for all major sports.
• Your favorite location, theater and sports teams can be stored for quick access.
• Refer to your Media Center 730N (RHR) User's Manual or Media Center 430/430N (RBZ/RHB) User's Manual for more details.
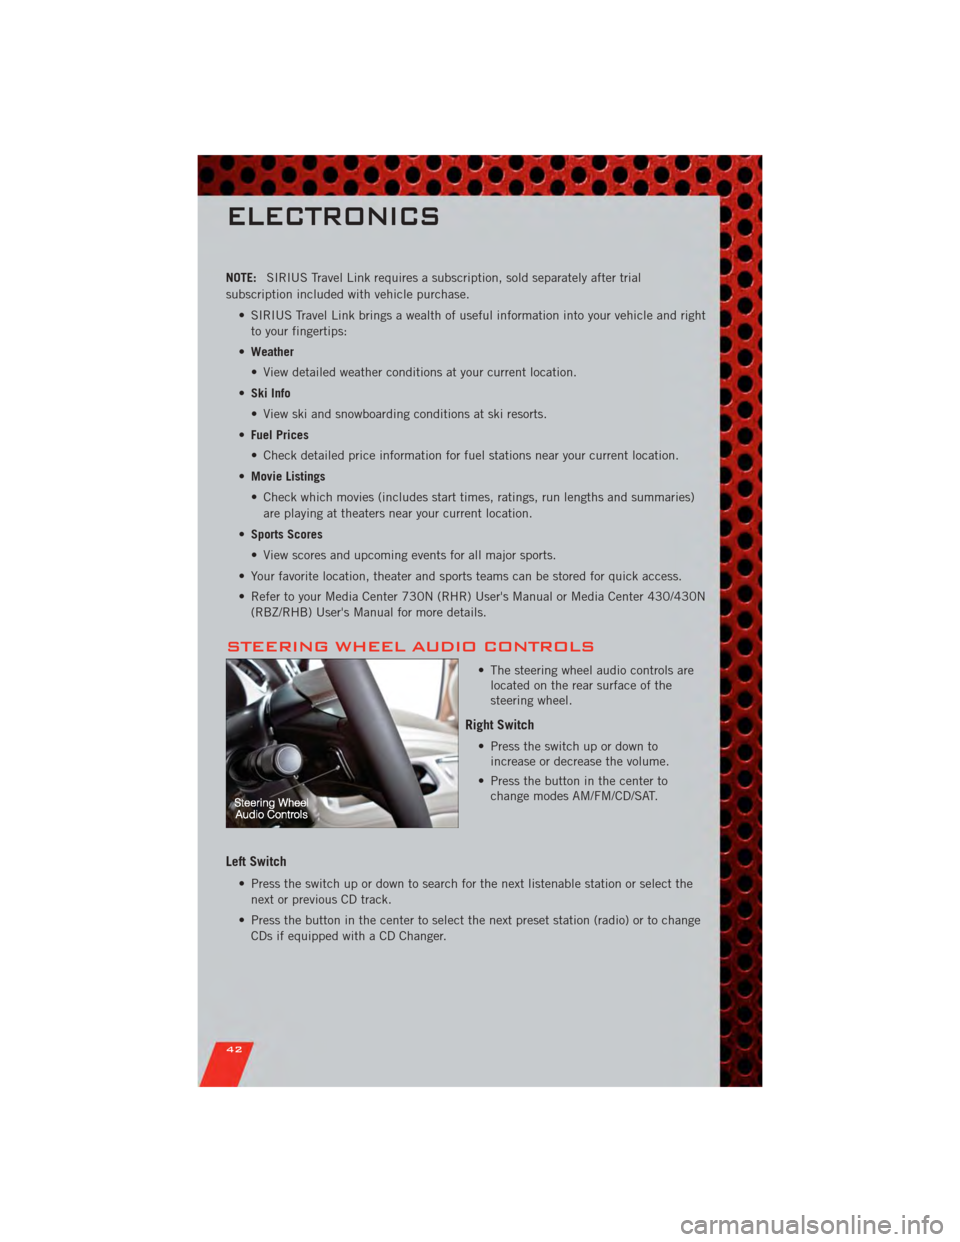
STEERING WHEEL AUDIO CONTROLS
• The steering wheel audio controls arelocated on the rear surface of the
steering wheel.
Right Switch
• Press the switch up or down toincrease or decrease the volume.
• Press the button in the center to change modes AM/FM/CD/SAT.
Left Switch
• Press the switch up or down to search for the next listenable station or select the
next or previous CD track.
• Press the button in the center to select the next preset station (radio) or to change CDs if equipped with a CD Changer.
ELECTRONICS
42
Page 55 of 100

POWER INVERTER
• There is a 115 Volt, 150 Watt powerinverter outlet located on the left rear
trim panel immediately behind the
second row left passenger seat. This
outlet can power cellular phones,
electronics and other low power
devices requiring power up to 150
Watts.
• Press the switch located in the center of the instrument panel to turn the
power to the outlet on.
• Press the switch again to turn the power off.
• The status indicator of the AC power inverter indicates whether the inverter is producing AC power.
NOTE: The power inverter is designed with built-in overload protection. If the power
rating of 150 Watts is exceeded, the power inverter will automatically shut down. Once
the electrical device has been removed from the outlet, the inverter should
automatically reset. If the power rating exceeds approximately 170 Watts, the power
inverter may have to be reset manually. To reset the inverter manually, unplug the
device and plug it in again. To avoid overloading the circuit, check the power ratings on
electrical devices prior to using the inverter.
WARNING!
To Avoid Serious Injury or Death: Do not use a three-prong adaptor. Do not
insert any objects into the receptacles. Do not touch with wet hands. Close the
lid when not in use. If this outlet is mishandled, it may cause an electric shock
and failure.
ELECTRONICS
53
Page 63 of 100

- Electronic Throttle Control (ETC) Light
• This light informs you of a problem with the Electronic Throttle Control (ETC)system.
• If a problem is detected, the light will come on while the engine is running. Cycle the ignition when the vehicle has completely stopped and the shift lever is placed
in the PARK position; the light should turn off.
• If the light remains lit with the engine running, your vehicle will usually be drivable; however, see an authorized service center immediately. If the light is
flashing when the engine is running, immediate service is required and you may
experience reduced performance, an elevated/rough idle or engine stall and your
vehicle may require towing.
- Air Bag Warning Light
• If the light is not on during starting, stays on, or turns on while driving, have thevehicle serviced by an authorized service center immediately.
Fuel Cap/Loose Gas Cap Message
• If a “gas cap” message (shown as gASCAP) appears, tighten the gas cap until a“clicking” sound is heard.
• Press the odometer reset button to turn the message off.
• If the message continues to appear for more than three days after tightening the gas cap, see your authorized service center.
Oil Change Indicator
Message
• If an “oil change” message (shown as CHAngE OIL) appears and a single chime sounds, it is time for your next required oil change.
Resetting The Light After Servicing
• Turn the ignition switch to the ON/RUN position (do not start engine).
• Fully depress the accelerator pedal three times within 10 seconds.
• Turn the ignition switch to the OFF/LOCK position.
WHAT TO DO IN EMERGENCIES
61
Page 96 of 100

iPod®/USB/MP3 Control........ 46
Bluetooth Streaming Audio ..... 46
Jack Location .............. 63
Jack Operation ............. 63
Jump Starting .............. 72
KeyFob .................. 8
Key Fob Programmable Features . . . 49
Lane Change Assist .......... 18
LATCH (Lower Anchors and Tether for
CHildren) ................ 12
Liftgate, Power .............. 8
Lights TurnSignal .............. 18
Warning (Instrument Cluster
Description) .............. 6
Luggage Rack (Roof Rack) ...... 55
Maintenance Record .......... 83
MaintenanceSchedule ........ 82
Media Center Radio ........ 34,36
MemorySeat .............. 15
MOPAR
®Accessories ......... 92
Navigation .............. 39,40
Non-Touch-Screen Radio ....... 34
Oil Change Indicator .......... 61
Oil, Engine Capacity ............... 81
Outlet Power ................. 54
Overheating, Engine .......... 62
Panic Alarm ............... 8
Pedals, Adjustable ........... 17
Phone (Pairing) ............. 43
Phone (Uconnect) ........... 43
Placard, Tire and Loading
Information ............... 88
Power Glass Sunroof ............ 30
Inverter ................ 53
LiftGate ................ 8
Outlet (Auxiliary Electrical Outlet) . 54 Seats
................. 14
SlidingDoor .............. 8
Steering ................ 81
Preparation for Jacking ........ 66
Programmable Electronic Features . . 49
Radio Non-Touch-Screen .......... 34
Touch-Screen ............ 36
Radio Operation .......... 34,36
Rain Sensitive Wiper System ..... 18
Rear Heated Seats ........... 16
Recreational Towing .......... 57
Remote Starting System ........ 9
Replacement Bulbs .......... 89
Reporting Safety Defects ....... 91
Restraints, Child ............ 12
Rocking Vehicle When Stuck ..... 76
Roof Rack (Luggage Rack) ...... 55
Seat Belts ................ 10
Seats ................... 14
Adjustment .............. 14
Fold in Floor (Stow `n Go) ..... 28
Heated ................ 16
Lumbar Support ........... 14
Memory ................ 15
Power ................. 14
Stow `n Go (Fold in Floor) ..... 28
Seek Button ............. 35,37
Setting the Clock .......... 35,37
Shift Lever Override .......... 74
Signals, Turn .............. 18
SIRIUS Travel Link ........... 41
SmartBeams .............. 20
SpareTire ................ 63
Spark Plugs ............... 81
Speed Control Accel/Decel .............. 21
Cancel ................ 21
Resume ................ 21
Speed Control (Cruise Control) .... 21
Starting Remote ................. 9
Steering Tilt Column .............. 17
Steering Wheel Audio Controls ....4
2
Store Radio Presets ........ 35,37
INDEX
94