Page 144 of 452
WARNING!
Sudden loss of visibility through the windshield
could lead to a collision. You might not see other
vehicles or other obstacles. To avoid sudden icing of
the windshield during freezing weather, warm the
windshield with the defroster before and during
windshield washer use.
TILT STEERING COLUMN
This feature allows you to tilt the steering column
upward or downward. The tilt lever is located on the
steering column, below the turn signal lever.
Pull the lever toward the steering wheel to unlock the
steering column. With one hand firmly on the steering
wheel, move the steering column up or down, as desired.
Push the lever away from the steering wheel to lock the
column firmly in place.
Tilt Steering Column Lever
142 UNDERSTANDING THE FEATURES OF YOUR VEHICLE
Page 145 of 452
WARNING!
Do not adjust the steering column while driving.
Adjusting the steering column while driving or driv-
ing with the steering column unlocked, could cause
the driver to lose control of the vehicle. Be sure the
steering column is locked before driving your ve-
hicle. Failure to follow this warning may result in
serious injury or death.
ELECTRONIC SPEED CONTROL — IF EQUIPPED
The control buttons for the Electronic Speed Control are
located on the steering wheel. When engaged, the Elec-
tronic Speed Control takes over the accelerator operation
at speeds greater than 25 mph (40 km/h).Electronic Speed Control Buttons
1 — Resume4 — Set
2 — Cancel 5 — On/Off
3 — Decel
3
UNDERSTANDING THE FEATURES OF YOUR VEHICLE 143
Page 174 of 452
Two-Position Tailgate/Upper Load Platform
Your tailgate can be opened to the full-open or the
partial-open position. The partial-open position is for
loading objects longer than the length of the bed (sheets
of plywood, etc.) by creating an upper load platform:
Installing Lumber
1. Place lumber across the box in the indentations pro-
vided above the wheel housings and in the bulkhead
dividers, to form the floor. There are indents in the sheet
metal (or bed liner if equipped) on the inner side of the
box in front (Club Cab�only) and behind both wheel
housings.
2. Secure the tailgate in the partially-open position:
3. Open the tailgate slightly.
1 — Bulkhead Divider Slot
2 — Wheel Housing Indentions
172 UNDERSTANDING THE FEATURES OF YOUR VEHICLE
Page 175 of 452
4. Snap the tailgate support cable between the cable
guide and the tailgate bumper. Do this on both sides of
the tailgate.
To return the tailgate to the full-open position:
1. Lift up on the tailgate.2. Remove both cables from between the cable guides
and the tailgate bumpers, and lower the tailgate.
CAUTION!
•Care should always be exercised when operating a
vehicle with cargo. Vehicle speeds may need to be
reduced. Severe turns or rough roads may cause
shifting or bouncing of the cargo that may result in
vehicle damage.
•Ensure the load is securely tied down and is
properly identified according to local laws if it
extends beyond the tail lights.
•Loading should not exceed 400 lbs (181 kg) of
material suspended above the wheelhouse and
partially open tailgate or vehicle damage may
result.
Tailgate Guide
3
UNDERSTANDING THE FEATURES OF YOUR VEHICLE 173
Page 178 of 452

▫Notes On Playing MP3 Files ............ 216
▫ Operation Instructions - Auxiliary Mode .... 219
� Media Center 130 With Satellite Radio
(Sales Code RES+RSC) ................... 220
▫ Operating Instructions — Radio Mode ..... 220
▫ Operation Instructions — CD Mode For CD
And MP3 Audio Play ................. 226
▫ Notes On Playing MP3 Files ............ 228
▫ List Button (CD Mode For MP3 Play) ...... 230
▫ Info Button (CD Mode For MP3 Play) ...... 230
▫ Uconnect™ Multimedia
(Satellite Radio) — If Equipped .......... 231�
Steering Wheel Audio
Controls — If Equipped .................. 236
▫ Radio Operation ..................... 236
▫ CD Player ......................... 237
� CD/DVD Disc Maintenance .............. 237
� Radio Operation And Mobile Phones ....... 238
� Climate Controls ...................... 238
▫ Air Conditioning And Heater ............ 238
▫ Operating Tips ...................... 241
▫ Operation Tips Chart ................. 244
176 UNDERSTANDING YOUR INSTRUMENT PANEL
Page 192 of 452

alternate tires or wheels on the vehicle that prevent the
TPMS from functioning properly. Always check the
TPMS malfunction telltale after replacing one or more
tires or wheels on your vehicle, to ensure that the
replacement or alternate tires and wheels allow the TPMS
to continue to function properly.
CAUTION!
The TPMS has been optimized for the original
equipment tires and wheels. TPMS pressures and
warning have been established for the tire size
equipped on your vehicle. Undesirable system opera-
tion or sensor damage may result when using re-
placement equipment that is not of the same size,
type, and/or style. Aftermarket wheels can cause
sensor damage. Do not use tire sealant from a can or
balance beads if your vehicle is equipped with a
TPMS, as damage to the sensors may result.23. Airbag Warning Light
This light will turn on for four to eight seconds
as a bulb check when the ignition switch is first
turned to ON/RUN. If the light is either not on
during starting, stays on, or turns on while
driving, have the system inspected at an authorized
dealer as soon as possible. Refer to “Occupant Restraints”
in “Things To Know Before Starting Your Vehicle” for
further information.
24. 4WD Indicator This light indicates the vehicle is in four-wheel
drive and 4LOCK. 4WD allows all four wheels
to receive torque from the engine simultane-
ously.
190 UNDERSTANDING YOUR INSTRUMENT PANEL
Page 193 of 452

25. SVC (Service) 4WD Indicator
The SVC 4WD illuminates when the ignition key is
turned to the ON/RUN position and will stay on for two
seconds. If the light stays on or illuminates during
driving, it means that the 4WD system is not functioning
properly and that service is required.
26. Cruise Indicator
The cruise indicator illuminates when the electronic
speed control system is turned on.
27. Cargo LampThe Cargo Lamp indicator will illuminate
when the Cargo Lamp is activated by pressing
the CARGO button, located on the headlight
switch.
28. TOW/HAUL
The TOW/HAUL button is located at the end of the gear
shift lever. This light will illuminate when the TOW/
HAUL button has been selected. 29. 4WD LOW Indicator
This light alerts the driver that the vehicle is in
the four-wheel drive LOW mode. The front and
rear driveshafts are mechanically locked to-
gether forcing the front and rear wheels to
rotate at the same speed. Low range provides a greater
gear reduction ratio to provide increased torque at the
wheels.
30. Odometer/Trip Odometer Button
Press the ODOMETER/TRIP ODOMETER button to
toggle between the odometer and the trip odometer
display. Holding the button in, resets the trip odometer
reading.
4
UNDERSTANDING YOUR INSTRUMENT PANEL 191
Page 238 of 452

STEERING WHEEL AUDIO CONTROLS —
IF EQUIPPED
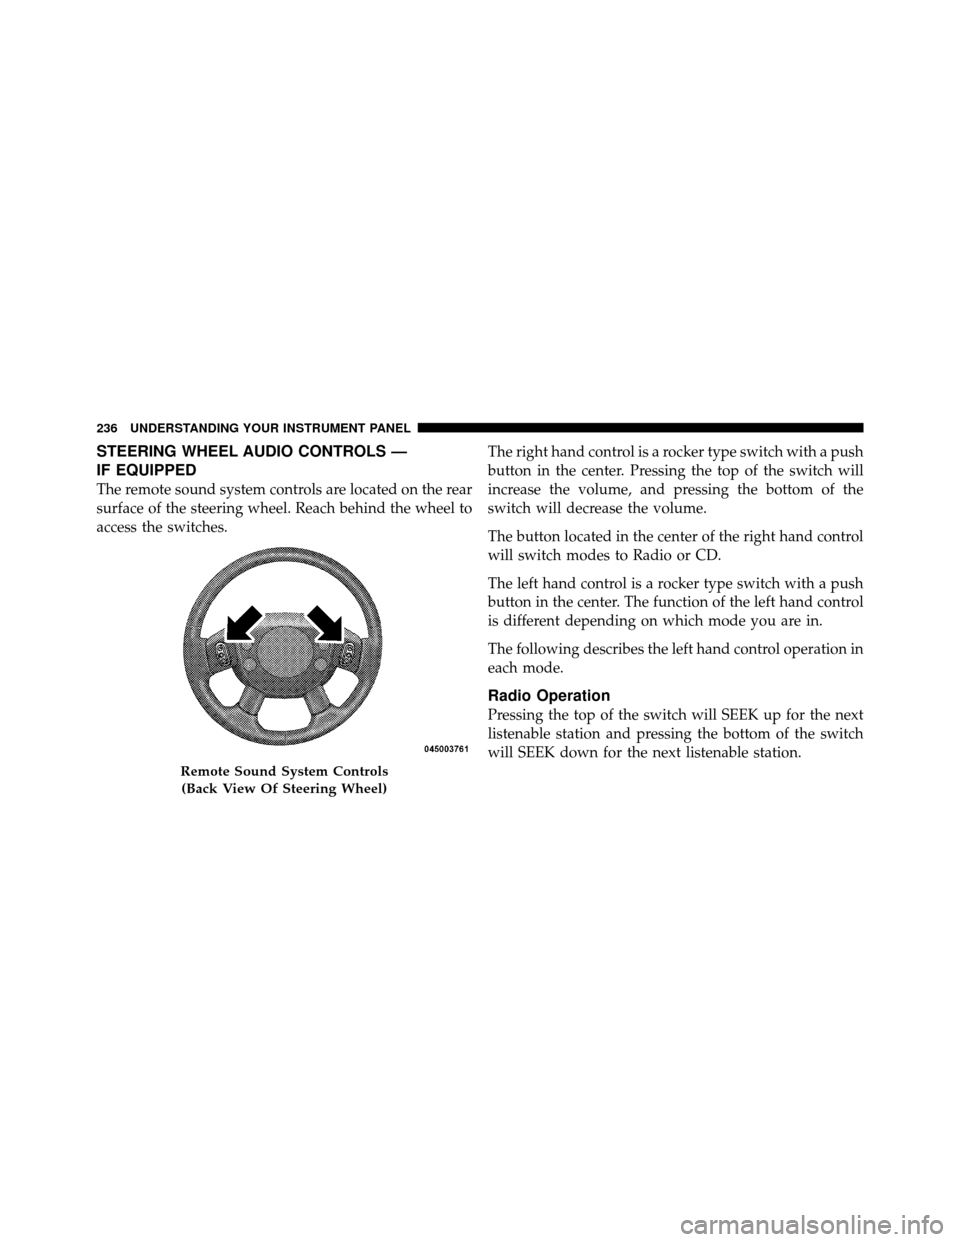
The remote sound system controls are located on the rear
surface of the steering wheel. Reach behind the wheel to
access the switches.The right hand control is a rocker type switch with a push
button in the center. Pressing the top of the switch will
increase the volume, and pressing the bottom of the
switch will decrease the volume.
The button located in the center of the right hand control
will switch modes to Radio or CD.
The left hand control is a rocker type switch with a push
button in the center. The function of the left hand control
is different depending on which mode you are in.
The following describes the left hand control operation in
each mode.
Radio Operation
Pressing the top of the switch will SEEK up for the next
listenable station and pressing the bottom of the switch
will SEEK down for the next listenable station.
Remote Sound System Controls
(Back View Of Steering Wheel)
236 UNDERSTANDING YOUR INSTRUMENT PANEL