2011 DODGE DAKOTA spare tire
[x] Cancel search: spare tirePage 340 of 452
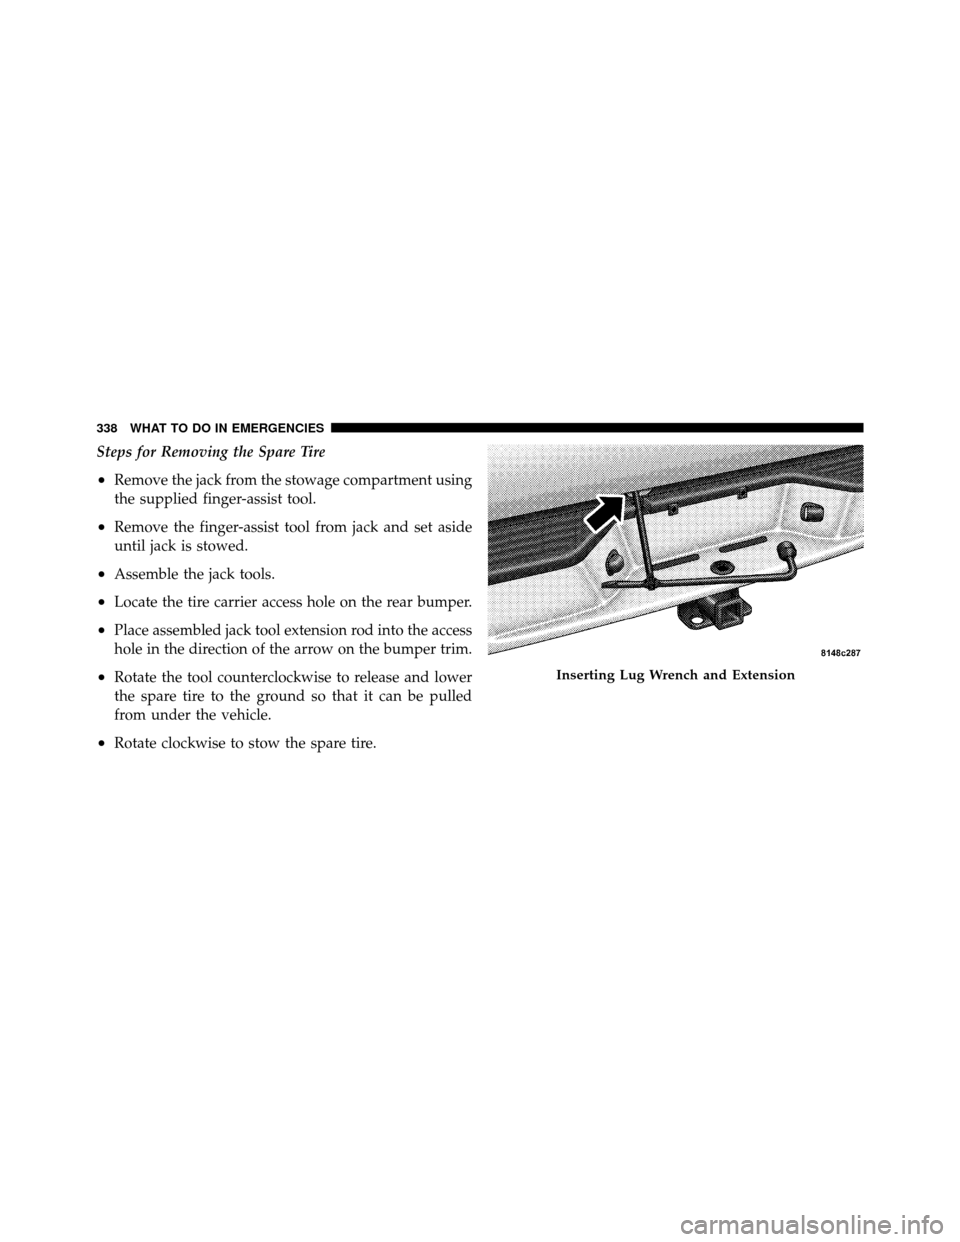
Steps for Removing the Spare Tire
•Remove the jack from the stowage compartment using
the supplied finger-assist tool.
•Remove the finger-assist tool from jack and set aside
until jack is stowed.
•Assemble the jack tools.
•Locate the tire carrier access hole on the rear bumper.
•Place assembled jack tool extension rod into the access
hole in the direction of the arrow on the bumper trim.
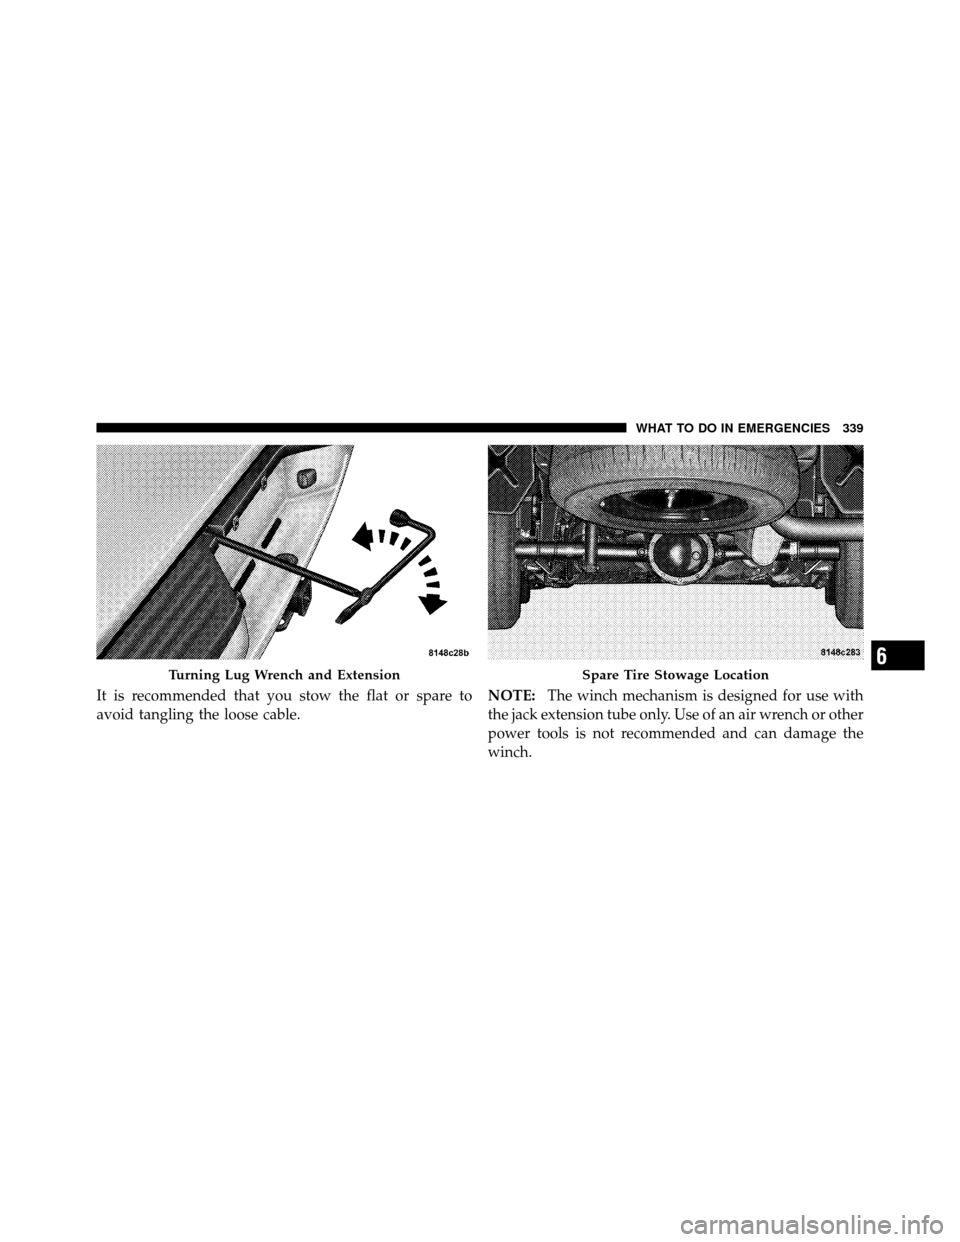
•Rotate the tool counterclockwise to release and lower
the spare tire to the ground so that it can be pulled
from under the vehicle.
•Rotate clockwise to stow the spare tire.
Inserting Lug Wrench and Extension
338 WHAT TO DO IN EMERGENCIES
Page 341 of 452
It is recommended that you stow the flat or spare to
avoid tangling the loose cable.NOTE:
The winch mechanism is designed for use with
the jack extension tube only. Use of an air wrench or other
power tools is not recommended and can damage the
winch.
Turning Lug Wrench and ExtensionSpare Tire Stowage Location6
WHAT TO DO IN EMERGENCIES 339
Page 343 of 452
Instructions
WARNING!
Carefully follow these tire changing warnings to
help prevent personal injury or damage to your
vehicle:
•Always park on a firm, level surface as far from
the edge of the roadway as possible before raising
the vehicle.
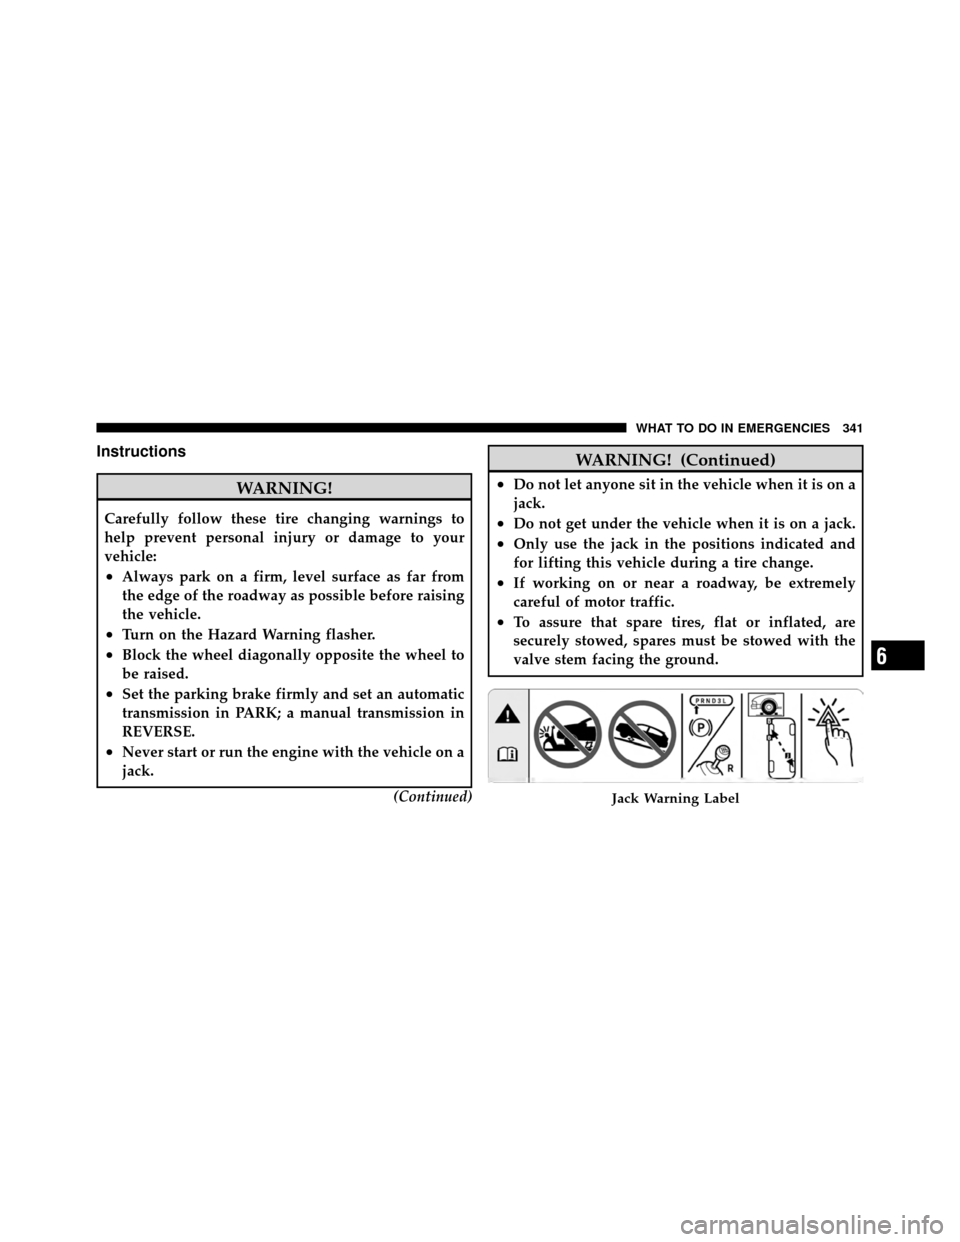
•Turn on the Hazard Warning flasher.
•Block the wheel diagonally opposite the wheel to
be raised.
•Set the parking brake firmly and set an automatic
transmission in PARK; a manual transmission in
REVERSE.
•Never start or run the engine with the vehicle on a
jack.(Continued)
WARNING! (Continued)
•Do not let anyone sit in the vehicle when it is on a
jack.
•Do not get under the vehicle when it is on a jack.
•Only use the jack in the positions indicated and
for lifting this vehicle during a tire change.
•If working on or near a roadway, be extremely
careful of motor traffic.
•To assure that spare tires, flat or inflated, are
securely stowed, spares must be stowed with the
valve stem facing the ground.
Jack Warning Label
6
WHAT TO DO IN EMERGENCIES 341
Page 346 of 452
WARNING!
Raising the vehicle higher than necessary can make
the vehicle unstable and cause a collision. It could
slip off the jack and hurt someone near it. Raise the
vehicle only enough to remove the tire.
6. Remove the wheel nuts and pull the wheel off. Install
the spare wheel and wheel nuts with the cone shaped end
of the nuts toward the wheel. Lightly tighten the nuts. To
avoid risk of forcing the vehicle off the jack, do not fully
tighten the nuts until the vehicle has been lowered.
7. Using the wheel wrench, finish tightening the nuts in
a crisscross pattern. The correct nut tightness is 120 to
160 ft lbs (163 to 217 N·m). If in doubt about the correct
tightness, have them checked with a torque wrench by
your authorized dealer or at a service station.
WARNING!
A loose tire or jack thrown forward in a collision or
hard stop could injure someone in the vehicle. Al-
ways stow the jack, tools and the extra tire and wheel
in the places provided.
8. Lower the jack to its fully closed position. Stow the
replaced tire, jack, and tools as previously described.
9. Adjust the tire pressure when possible.
NOTE: Do not oil wheel studs. For chrome wheels, do
not substitute with chrome plated wheel nuts.
WARNING!
Carefully follow these tire changing warnings to
help prevent personal injury or damage to your
vehicle:
(Continued)
344 WHAT TO DO IN EMERGENCIES
Page 347 of 452
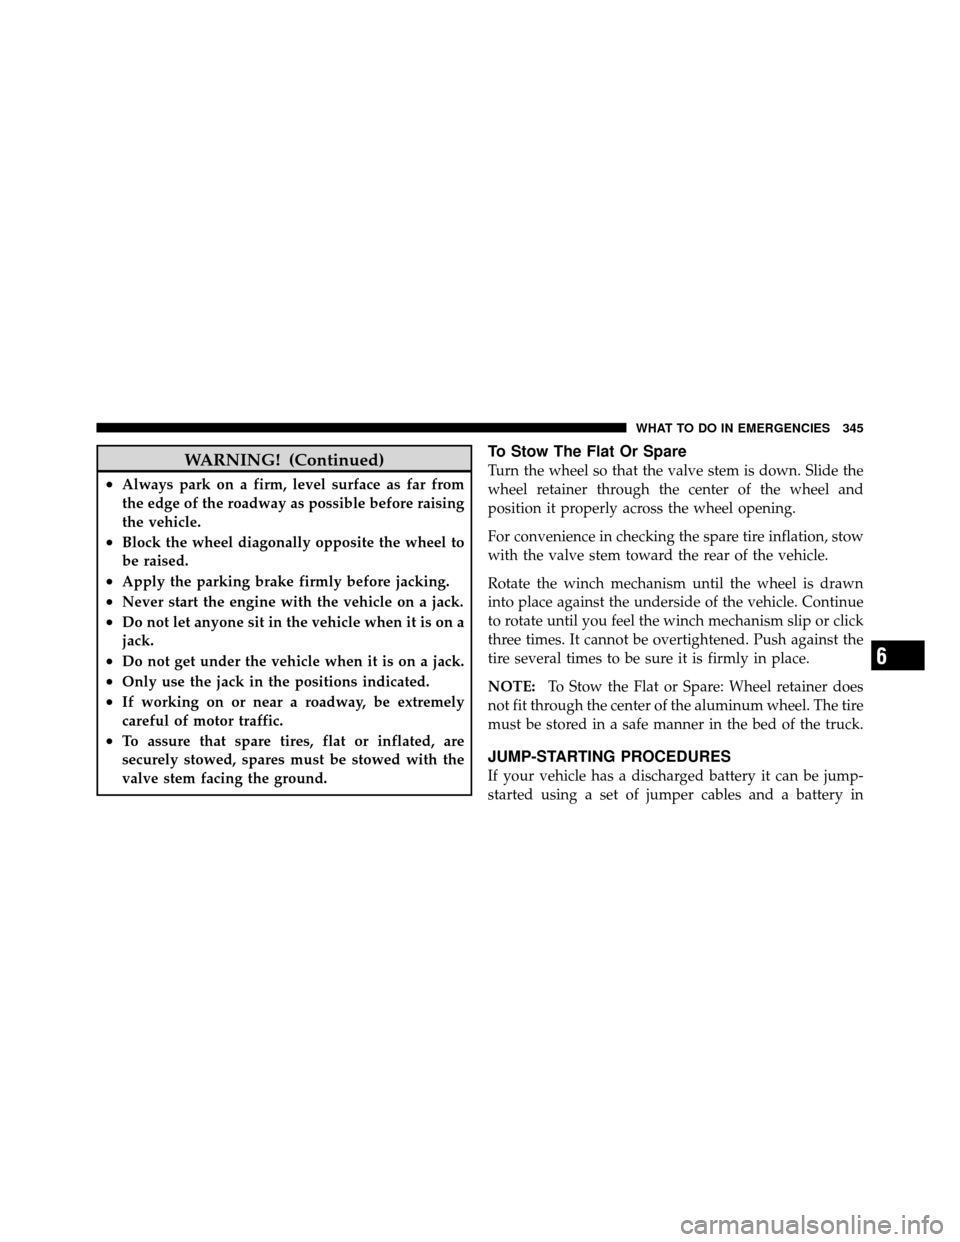
WARNING! (Continued)
•Always park on a firm, level surface as far from
the edge of the roadway as possible before raising
the vehicle.
•Block the wheel diagonally opposite the wheel to
be raised.
•Apply the parking brake firmly before jacking.
•Never start the engine with the vehicle on a jack.
•Do not let anyone sit in the vehicle when it is on a
jack.
•Do not get under the vehicle when it is on a jack.
•Only use the jack in the positions indicated.
•If working on or near a roadway, be extremely
careful of motor traffic.
•To assure that spare tires, flat or inflated, are
securely stowed, spares must be stowed with the
valve stem facing the ground.
To Stow The Flat Or Spare
Turn the wheel so that the valve stem is down. Slide the
wheel retainer through the center of the wheel and
position it properly across the wheel opening.
For convenience in checking the spare tire inflation, stow
with the valve stem toward the rear of the vehicle.
Rotate the winch mechanism until the wheel is drawn
into place against the underside of the vehicle. Continue
to rotate until you feel the winch mechanism slip or click
three times. It cannot be overtightened. Push against the
tire several times to be sure it is firmly in place.
NOTE:To Stow the Flat or Spare: Wheel retainer does
not fit through the center of the aluminum wheel. The tire
must be stored in a safe manner in the bed of the truck.
JUMP-STARTING PROCEDURES
If your vehicle has a discharged battery it can be jump-
started using a set of jumper cables and a battery in
6
WHAT TO DO IN EMERGENCIES 345
Page 436 of 452

Changing A Flat Tire..................... 335
Chart, Tire Sizing ........................ 276
Check Engine Light
(Malfunction Indicator Light) ............... 358
Checking Your Vehicle For Safety ............. 76
Checks, Safety ........................... 76
Child Restraint ...................... 63,64,65
Child Restraint Tether Anchors .............67,72
Child Seat .............................. 69
Cleaning Wheels ............................ 384
Climate Control ......................... 238
Clock ........................... 194,212,221
Compact Disc (CD) Maintenance ............. 237
Compact Spare Tire ...................... 288
Compass ........................... 151,152
Compass Calibration ..................... 152
Compass Variance ....................... 152
Computer, Trip/Travel .................... 147 Console, Floor
.......................... 165
Console, Overhead ....................... 146
Contract, Service ........................ 425
Coolant Pressure Cap (Radiator Cap) .......... 374
Cooling System ......................... 371
Adding Coolant (Antifreeze) ............. 373
Coolant Capacity ..................... 401
Coolant Level .................... 371,375
Disposal of Used Coolant ............... 374
Drain, Flush, and Refill ................ 372
Inspection .......................... 375
Points to Remember .................. 375
Pressure Cap ........................ 374
Radiator Cap ....................... 374
Selection of Coolant (Antifreeze) ....372,401,402
Temperature Gauge ................... 179
Crates Rear Convenience Storage .............. 163
Cruise Control (Speed Control) .............. 143
434 INDEX
Page 447 of 452
Signals, Turn................... 80,137,179,394
Snow Chains (Tire Chains) ................. 293
Snow Plow ............................ 327
Snow Tires ............................ 295
Spare Tire ....................... 288,289,337
Speed Control (Cruise Control) .............. 143
Speedometer ........................... 181
Starting ............................... 249
Engine Block Heater .................. 251
Engine Fails to Start .................. 250
Remote ............................ 25
Steering Column Controls ..................... 136
Power .......................... 269,270
Wheel Lock ......................... 15
Wheel, Tilt ......................... 142
Steering Wheel Audio Controls .............. 236
Steering Wheel Mounted Sound
System Controls ......................... 236 Storage
............................... 391
Storage Bin ............................ 163
Storage, Behind the Seat ................... 163
Storage, Vehicle ......................... 391
Storing Your Vehicle ...................... 391
Stuck, Freeing .......................... 349
Synthetic Engine Oil ...................... 363
System, Remote Starting .................... 25
Tachometer ............................ 182
Tailgate ............................... 171
Taillights .............................. 394
Temperature Gauge, Engine Coolant .......... 179
Tether Anchor, Child Restraint ............... 67
Tilt Steering Column ..................... 142
Tip Start .............................. 249
Tire and Loading Information Placard ......... 280
Tire Identification Number (TIN) ............. 278
Tire Markings .......................... 275
10
INDEX 445
Page 448 of 452
Tire Safety Information.................... 275
Tires ............................ 80,284,429
Aging (Life of Tires) .................. 291
Air Pressure ........................ 284
Chains ............................ 293
Changing .......................... 335
Compact Spare ...................... 288
General Information .................. 284
High Speed ......................... 286
Inflation Pressures .................... 285
Life of Tires ........................ 291
Load Capacity .................... 280,281
Pressure Monitor System (TPMS) ......... 296
Pressure Warning Light ................ 189
Quality Grading ..................... 429
Radial ............................ 287
Replacement ........................ 292
Rotation ........................... 295
Safety .......................... 275,284Sizes
............................. 276
Snow Tires ......................... 295
Spare Tire .......................... 337
Spinning ........................... 290
Tread Wear Indicators ................. 290
Wheel Nut Torque .................... 344
Tongue Weight/Trailer Weight .............. 320
Torque Converter Clutch .................. 257
Tow Hooks, Emergency ................... 351
Towing ............................... 314
24-Hour Towing Assistance ............. 102
Disabled Vehicle ..................... 352
Guide ............................. 320
Recreational ........................ 328
Weight ............................ 320
Towing Assistance ....................... 102
Traction .............................. 264
Trailer Towing .......................... 314
Cooling System Tips .................. 327
446 INDEX