Page 165 of 566

General Information
This device complies with Part 15 of the FCC rules and
RSS 210 of Industry Canada. Operation is subject to the
following conditions:
•Changes or modifications not expressly approved by
the party responsible for compliance could void the
user’s authority to operate the equipment.
•This device may not cause harmful interference.
•This device must accept any interference received,
including interference that may cause undesired
operation.
VOICE COMMAND
Uconnect Touch™ 8.4/8.4 Nav
The Uconnect™ Voice Command system al-
lows you to control your AM, FM radio, satel-
lite radio, disc player, SD Card, USB/iPod and
Sirius Travel Link.NOTE:
Take care to speak into the Voice Command
system as calmly and normally as possible. The ability of
the Voice Command system to recognize user voice
commands may be negatively affected by rapid speaking
or a raised voice level.
WARNING!
Any voice commanded system should be used only
in safe driving conditions following local laws. All
attention should be kept on the roadway ahead.
Failure to do so may result in a collision causing
serious injury or death.
When you press the Uconnect™ Voice Command
button, you will hear a beep. The beep is your signal to
give a command.
3
UNDERSTANDING THE FEATURES OF YOUR VEHICLE 163
Page 167 of 566

Natural Speech
Natural speech allows the user to speak commands in
phrases or complete sentences. The system filters out
certain non-word utterances and sounds such as “ah”
and “eh”. The system handles fill-in words such as “I
would like to”.
The system handles multiple inputs in the same phrase
or sentence such as “make a phone call” and “to Kelly
Smith”. For multiple inputs in the same phrase or sen-
tence, the system identifies the topic or context and
provides the associated follow-up prompt such as “Who
do you want to call?” in the case where a phone call was
requested but the specific name was not recognized.The system utilizes continuous dialog; when the system
requires more information from the user it will ask a
question to which the user can respond without pressing
the Uconnect™ Voice Command
button.
Uconnect™ Voice Commands
The Uconnect™ Voice Command system understands
two types of commands. Universal commands are avail-
able at all times. Local commands are available if the
supported radio mode is active.
Start a dialogue by pressing the Uconnect™ Voice
Command
button.
3
UNDERSTANDING THE FEATURES OF YOUR VEHICLE 165
Page 168 of 566
Changing the Volume
1. Start a dialogue by pressing the Voice Command
button.
2. Say a command (e.g., “Help”).
3. Use the ON/OFF VOLUME rotary knob to adjust the
volume to a comfortable level while the Voice Command
system is speaking. Please note the volume setting for
Voice Command is different than the audio system.
Starting Voice Recognition (VR) Session in
Radio/Player Modes
In this mode, you can say the following commands:
NOTE: The commands can be said on any screen when
a call is not active after pushing the Uconnect™ Voice
Command
button.
Disc
To switch to the disc mode, say “Change source to Disc”.
This command can be given in any mode or screen:
•“Track” (#) (to change the track)
166 UNDERSTANDING THE FEATURES OF YOUR VEHICLE
Page 185 of 566

WARNING!
•Be certain that the seatback is securely locked into
position. If the seatback is not securely locked into
position, the seat will not provide the proper
stability for child seats and/or passengers. An
improperly latched seat could cause serious injury.
•The cargo area in the rear of the vehicle (with the
rear seatbacks in the locked-up or folded down
position) should not be used as a play area by
children when the vehicle is in motion. They could
be seriously injured in a collision. Children
should be seated and using the proper restraint
system.
DRIVER MEMORY SEAT — IF EQUIPPED
This feature allows the driver to store up to two different
memory profiles for easy recall through a memory
switch. Each memory profile contains desired position
settings for the driver seat, side mirrors, adjustable
pedals (if equipped), and power tilt and telescopic steer-
ing column (if equipped) and a set of desired radio
station presets. Your Remote Keyless Entry (RKE) trans-
mitter can also be programmed to recall the same posi-
tions when the UNLOCK button is pressed.
NOTE:
•Only one RKE transmitter can be linked to each of the
memory positions.
•Passive Entry door handles cannot be linked to the
memory function. Use either the memory recall switch
or the RKE transmitter (if linked to the memory
feature) to recall memory positions 1 or 2.
3
UNDERSTANDING THE FEATURES OF YOUR VEHICLE 183
Page 186 of 566

button, which is used to activate the memory save
function and the (1) and (2) butto")
The memory seat switch is located on the driver ’s door
trim panel. The switch consists of three buttons: The (S)
button, which is used to activate the memory save
function and the (1) and (2) buttons which are used to
recall either of two pre-programmed memory profiles.Programming The Memory Feature
NOTE:Saving a new memory profile will erase an
existing profile from memory.
To create a new memory profile, perform the following:
1. Place the ignition into the RUN position.
2. Adjust all memory profile settings to desired prefer-
ences (i.e., seat, side mirror, adjustable pedals [if
equipped], power tilt and telescopic steering column [if
equipped], and radio station presets).
3. Press and release the SET (S) button on the memory
switch.
4. Within five seconds, press and release the MEMORY
button 1 or 2. The Electronic Vehicle Information Center
(EVIC) (if equipped) will display which memory position
has been set.
Memory Seat Switches
184 UNDERSTANDING THE FEATURES OF YOUR VEHICLE
Page 200 of 566
Parade Mode (Daytime Brightness Feature)
Rotate the dimmer control upward to the first detent.
This feature brightens all text displays such as the
odometer, EVIC (if equipped), and radio when the park-
ing lights or headlights are on.
WINDSHIELD WIPERS AND WASHERS
The multifunction lever operates the windshield wipers
and washer when the ignition switch is in the ON/RUN
or ACC position. The lever is located on the left side of
the steering column.
Windshield Wiper/Washer Control
198 UNDERSTANDING THE FEATURES OF YOUR VEHICLE
Page 245 of 566

PARKVIEW�REAR BACK UP CAMERA —
IF EQUIPPED
Your vehicle may be equipped with the ParkView� Rear
Back Up Camera that allows you to see an on-screen
image of the rear surroundings of your vehicle whenever
the shift lever is put into REVERSE. The image will be
displayed on the radio touchscreen display along with a
caution note to “check entire surroundings” across the
top of the screen. After five seconds this note will
disappear. The ParkView� camera is located on the rear
of the vehicle above the rear License plate. When the vehicle is shifted out of REVERSE, the rear
camera mode is exited and the navigation or audio screen
appears again.
When displayed, static grid lines will illustrate the width
of the vehicle while a dashed center-line will indicate the
center of the vehicle to assist with parking or aligning to
a hitch/receiver. The static grid lines will show separate
zones that will help indicate the distance to the rear of the
vehicle. The following table shows the approximate
distances for each zone:
Zone
Distance to the rear of the vehicle
Red 0-1ft(0-30cm)
Yellow 1 ft-3ft(30cm-1m)
Green 3 ft or greater (1 m or greater)
3
UNDERSTANDING THE FEATURES OF YOUR VEHICLE 243
Page 247 of 566
Turning ParkView�On Or Off —
With Touch Screen Radio
1. Turn the Radio on.
2. Press the “More” soft-key.
3. Press the “Settings” soft-key.
4. Press the “Safety & Driving Assistance” soft-key.
5. Press the check box soft key next to “Parkview�
Backup Camera” to enable/disable.
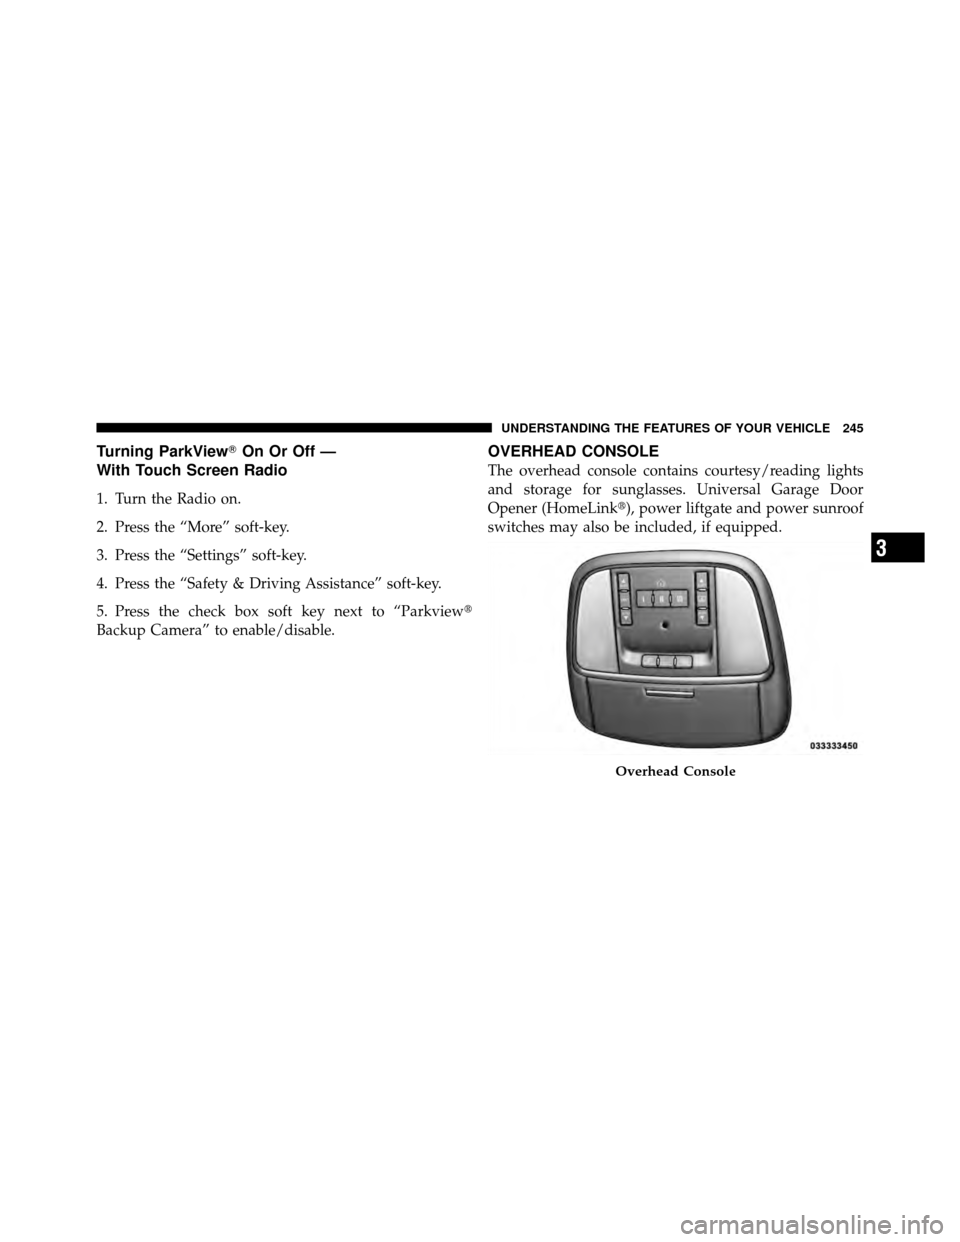
OVERHEAD CONSOLE
The overhead console contains courtesy/reading lights
and storage for sunglasses. Universal Garage Door
Opener (HomeLink�), power liftgate and power sunroof
switches may also be included, if equipped.
Overhead Console
3
UNDERSTANDING THE FEATURES OF YOUR VEHICLE 245
.
3. Use the ON/OFF VOLUME rotary knob to adjust the
volume to a comfortable level whil")

Rotate the dimmer control upward to the first detent.
This feature brightens all text displays such as the
odometer, EVIC (if equipped), and radio when the par")