Page 143 of 490

To activate the delay feature, place the ignition in the OFF
position while the headlights are still on. Then, turn off
the headlights within 45 seconds. The delay interval
begins when the headlight switch is turned off.
If you turn the headlights or parking lights on, or place
the ignition in the RUN position again, the system will
cancel the delay.
If you turn the headlights off before the ignition, they will
turn off in the normal manner.
NOTE:The lights must be turned off within 45 seconds
of placing the ignition in the OFF position to activate this
feature. The Headlight delay time is programmable. Refer to
“Electronic Vehicle Information Center (EVIC)/
Customer-Programmable Features” in “Understanding
Your Instrument Panel” for further information.
Daytime Running Lights — If Equipped
The high beam headlights will come on as Daytime
Running Lights whenever the ignition is placed in the
RUN position, the headlights are off and the parking
brake is released. The headlight switch must be used for
normal nighttime driving.3
UNDERSTANDING THE FEATURES OF YOUR VEHICLE 141
Page 147 of 490

Interior Lights
The interior lights come on when a door is opened.
To protect the battery, the interior lights will turn off
automatically 10 minutes after the ignition is placed in
the OFF position. This will occur if the interior lights
were switched on manually or are on because a door is
open. This includes the glove box light, but not the trunk
light. To restore interior light operation, either place the
ignition in the RUN position or cycle the light switch.
Dimmer Control
The dimmer control is located to the right of the head-
light switch. With the parking lights or headlights on,
rotating the dimmer control upward will increase the
brightness of the instrument panel lights and, if
equipped, the lighting in the door map pockets, door
handles and cupholders.
Dome Light Position
Rotate the dimmer control completely upward to the
second detent to turn on the interior lights. The interior
lights will remain on when the dimmer control is in this
position.
Interior Light Defeat (OFF)
Rotate the dimmer control to the extreme bottom off
position. The interior lights will remain off when the
doors are open.
Parade Mode (Daytime Brightness Feature)
Rotate the dimmer control upward to the first detent.
This feature brightens all text displays such as the
odometer, Electronic Vehicle Information Center (EVIC),
and radio when the parking lights or headlights are on.
3
UNDERSTANDING THE FEATURES OF YOUR VEHICLE 145
Page 150 of 490

Headlights On With Wipers (Available With
Automatic Headlights Only)
When this feature is active, the headlights will turn on
approximately 10 seconds after the wipers are turned on
if the headlight switch is placed in the A (AUTO)
position. In addition, the headlights will turn off when
the wipers are turned off if they were turned on by this
feature.
The Headlights On with Wipers feature can be enabled or
disabled. Refer to “Electronic Vehicle Information Center
(EVIC)/Personal Settings (Customer-Programmable Fea-
tures)” in “Understanding Your Instrument Panel” for
further information.
TILT/TELESCOPING STEERING COLUMN
This feature allows you to tilt the steering column
upward or downward. It also allows you to lengthen or
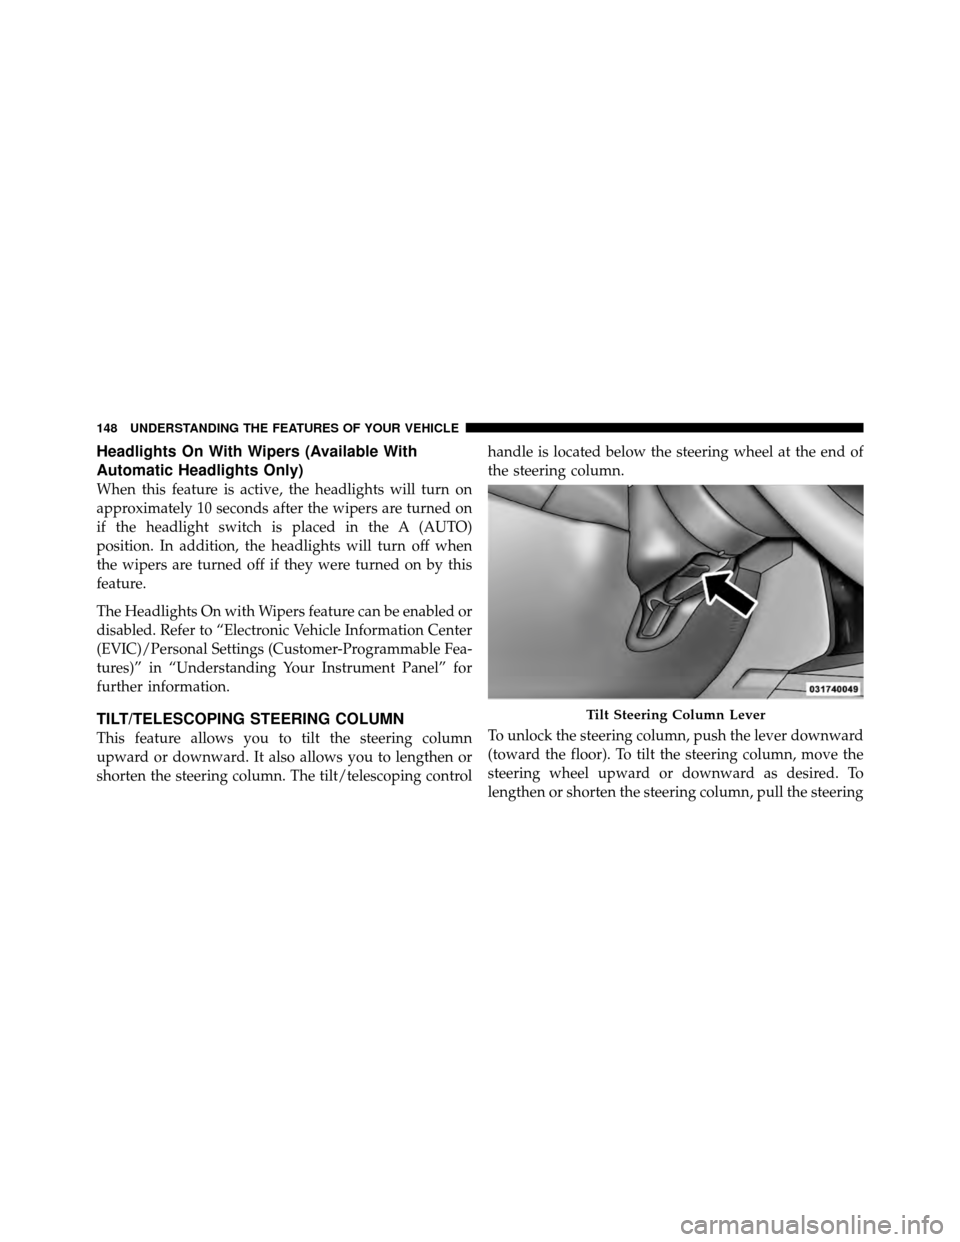
shorten the steering column. The tilt/telescoping controlhandle is located below the steering wheel at the end of
the steering column.
To unlock the steering column, push the lever downward
(toward the floor). To tilt the steering column, move the
steering wheel upward or downward as desired. To
lengthen or shorten the steering column, pull the steering
Tilt Steering Column Lever
148 UNDERSTANDING THE FEATURES OF YOUR VEHICLE
Page 166 of 490
The center console power outlet is powered directly from
the battery (power available at all times).Items plugged into this power outlet may discharge the
battery and/or prevent the engine from starting.
Center Console Power OutletPower Outlet Fuse Locations
1 — #18 Fuse 20 A Yellow Cigar Lighter Instrument Panel
2 — #9 Fuse 20 A Yellow Power Outlet Center Console
164 UNDERSTANDING THE FEATURES OF YOUR VEHICLE
Page 173 of 490
UNDERSTANDING YOUR INSTRUMENT PANEL
CONTENTS
�Instrument Panel Features ............... 174
� Instrument Cluster .................... 175
� Instrument Cluster Descriptions ........... 176
� Electronic Vehicle Information Center (EVIC) . . 188
▫ Electronic Vehicle Information Center (EVIC)
Displays ........................... 190
▫ Engine Oil Change Indicator System ....... 192
▫ Trip Functions ...................... 193 ▫
Keyless Enter-N-Go Display —
If Equipped ........................ 196
▫ Driver-Selectable Surround Sound (DSS) –
If Equipped ........................ 196
▫ Compass Display .................... 197
▫ System Warnings
(Customer Information Features) ......... 199
▫ Personal Settings
(Customer-Programmable Features) ....... 199
4
Page 174 of 490

�Media Center 730N/430/430N (RHR/RER/
RBZ/RHB) CD/DVD/HDD/NAV —
If Equipped .......................... 203
▫ Operating Instructions (Voice Command
System) — If Equipped ................ 203
▫ Operating Instructions (Uconnect™ Phone)
— If Equipped ...................... 203
� Media Center 130 (Sales Code RES) ......... 204
▫ Operating Instructions — Radio Mode ..... 204
▫ Operation Instructions — CD Mode For CD
And MP3 Audio Play ................. 207
▫ Notes On Playing MP3 Files ............ 209
▫ Operation Instructions - Auxiliary Mode .... 212�
Media Center 130 With Satellite Radio
(Sales Code RES+RSC) ................... 212
▫ Operating Instructions — Radio Mode ..... 213
▫ Operation Instructions — CD Mode For CD
And MP3 Audio Play ................. 218
▫ Notes On Playing MP3 Files ............ 220
▫ List Button (CD Mode For MP3 Play) ...... 223
▫ Info Button (CD Mode For MP3 Play) ...... 223
▫ Uconnect™ Multimedia (Satellite Radio) —
If Equipped ........................ 224
� iPod�/USB/MP3 Control — If Equipped ..... 228
▫ Connecting The iPod� Or External USB
Device ............................ 228
▫ Using This Feature ................... 229
172 UNDERSTANDING YOUR INSTRUMENT PANEL
Page 175 of 490
▫Controlling The iPod� Or External USB
Device Using Radio Buttons ............. 230
▫ Play Mode ......................... 230
▫ List Or Browse Mode ................. 231
▫ Bluetooth Streaming Audio (BTSA) ........ 233
� Kicker� High Performance Sound System With
Driver-Selectable Surround (DSS) –
If Equipped .......................... 234
� Steering Wheel Audio Controls —
If Equipped .......................... 236
▫ Radio Operation ..................... 236 ▫
CD Player ......................... 237
� CD/DVD Disc Maintenance .............. 237
� Radio Operation And Mobile Phones ....... 238
� Climate Controls ...................... 238
▫ Automatic Temperature Control (ATC) ..... 238
▫ Automatic Operation .................. 239
▫ Blower Control ...................... 240
▫ Manual Operation .................... 240
▫ Operating Tips ...................... 244
4
UNDERSTANDING YOUR INSTRUMENT PANEL 173
Page 176 of 490
INSTRUMENT PANEL FEATURES
1 — Air Outlets5 — Heated Seat Switch9 — Ignition Switch
2 — Instrument Cluster 6 — ESP OFF Switch10 — Trunk Release Button
3 — Glove Compartment 7 — Hazard Warning Switch11 — Headlight Switch
4 — Radio 8 — Climate Control
174 UNDERSTANDING YOUR INSTRUMENT PANEL