Page 83 of 494

between the two posts. If not possible, lower the head
restraint and pass the tether strap around the outboard
side of the head restraint.
3. Attach the tether strap hook (A) of the child restraint
to the anchor (B) and remove slack in the tether strap
according to the child restraint manufacturer’s
instructions.
WARNING!
An incorrectly anchored tether strap could lead to
increased head motion and possible injury to the
child. Use only the anchor positions directly behind
the child seat to secure a child restraint top tether
strap.
Installing Child Restraints Using The Vehicle Seat
Belt
The seat belts in the passenger seating positions are
equipped with an Automatic Locking Retractor to secure
a Child Restraint System (CRS). These types of seat belts
are designed to keep the lap portion of the seat belt tight
around the child restraint so that it is not necessary to use
a locking clip. The ALR will make a ratcheting noise if
you extract the entire belt from the retractor and then
allow the belt to retract into the retractor. For additional
information on ALR, refer to “Automatic Locking Mode”
description under “Seat Belts In Passenger Seating Posi-
tions” section. The chart below defines the seating posi-
tions with an Automatic Locking Retractor (ALR) or a
cinching latch plate.
Driver Center Passenger
CRS Lock CRS Lock CRS Lock
First Row N/A N/A ALR
Second Row ALR ALR ALR
2
THINGS TO KNOW BEFORE STARTING YOUR VEHICLE 81
Page 84 of 494

•N/A — Not Applicable
•ALR — Automatic Locking Retractor
Installing a Child Restraint with an ALR:
1. To install a child restraint with ALR, first, pull enough
of the seat belt webbing from the retractor to route it
through the belt path of the child restraint. Slide the latch
plate into the buckle until you hear a “click.” Next,
extract all the seat belt webbing out of the retractor and
then allow the belt to retract into the retractor. As the belt
retracts, you will hear a ratcheting sound. This indicates
the safety belt is now in the Automatic Locking mode.
2. Finally, pull on any excess webbing to tighten the lap
portion around the child restraint. Any seat belt system
will loosen with time, so check the belt occasionally, and
pull it tight if necessary.
In the rear seat, you may have trouble tightening the
lap/shoulder belt on the child restraint because the buckle or latch plate is too close to the belt path opening
on the restraint. Disconnect the latch plate from the
buckle and twist the short buckle-end belt several times
to shorten it. Insert the latch plate into the buckle with the
release button facing out.
If the belt still can’t be tightened, or if pulling and
pushing on the restraint loosens the belt, disconnect the
latch plate from the buckle, turn the buckle around, and
insert the latch plate into the buckle again. If you still
can’t make the child restraint secure, try a different
seating position.
Children Too Large For Booster Seats
Children who are large enough to wear the shoulder belt
comfortably, and whose legs are long enough to bend
over the front of the seat when their back is against the
seatback, should use the lap/shoulder belt in a rear seat.
Make sure that:
•The child is upright in the seat.
82 THINGS TO KNOW BEFORE STARTING YOUR VEHICLE
Page 90 of 494
Periodic Safety Checks You Should Make Outside
The Vehicle
Tires
Examine tires for excessive tread wear and uneven wear
patterns. Check for stones, nails, glass, or other objects
lodged in the tread or sidewall. Inspect the tread for cuts
and cracks. Inspect sidewalls for cuts, cracks and bulges.
Check the wheel nuts for tightness. Check the tires
(including spare) for proper cold inflation pressure.
Lights
Have someone observe the operation of exterior lights
while you work the controls. Check turn signal and high
beam indicator lights on the instrument panel.
Door Latches
Check for positive closing, latching, and locking.
Fluid Leaks
Check area under vehicle after overnight parking for fuel,
engine coolant, oil, or other fluid leaks. Also, if gasoline
fumes are detected or if fuel, power steering fluid, or
brake fluid leaks are suspected, the cause should be
located and corrected immediately.
88 THINGS TO KNOW BEFORE STARTING YOUR VEHICLE
Page 147 of 494
Folding Rear Seat
To provide additional storage area, the rear seatback can
be folded forward. Pull on the loops shown in the picture
to fold down either or both seatbacks.
When returning the rear seat back to the upright position,
be sure the seatback is latched.WARNING!
•Be certain that the seatback is securely locked into
position. If the seatback is not securely locked into
position the seat will not provide the proper
stability for child seats and/or passengers. An
improperly latched seat could cause serious injury.
•The rear cargo area of the vehicle (with the rear
seatbacks in the locked-up or folded down posi-
tion) should not be used as a play area by children.
They could be seriously injured in a collision.
Children should be seated and using the proper
restraint system.
Folding Rear Seats
3
UNDERSTANDING THE FEATURES OF YOUR VEHICLE 145
Page 150 of 494
CAUTION!
To prevent possible damage, do not slam the hood to
close it. Use a firm downward push at the center of
the hood to ensure that both latches engage.
WARNING!
Be sure the hood is fully latched before driving your
vehicle. If the hood is not fully latched, it could open
when the vehicle is in motion and block your vision.
Failure to follow this warning could result in serious
injury or death.
LIGHTS
Multifunction Lever
The multifunction lever controls the operation of the
parking lights, headlights, headlight beam selection,passing light, fog lights, instrument panel light dimming
and turn signals. The multifunction lever is located on
the left side of the steering column.
Multifunction Lever
148 UNDERSTANDING THE FEATURES OF YOUR VEHICLE
Page 156 of 494
There is a second light located midway back in the
headliner.
To protect the battery, the interior lights will turn off
automatically 10 minutes after the ignition switch is
moved to the LOCK position. This will occur if the
interior lights were switched on manually or are on
because a door is open. To restore interior light operation,
either turn the ignition switch ON or cycle the light
switch.
WINDSHIELD WIPERS AND WASHERS
The wipers and washers are operated by a switch
on the control lever. The lever is located on the
right side of the steering column.Rotate the end of the lever to the LO position for
low-speed wiper operation, or to the HI position for
high-speed wiper operation.Windshield Wiper/Washer Lever
154 UNDERSTANDING THE FEATURES OF YOUR VEHICLE
Page 160 of 494

column) is placed in the AUTO position. In addition, the
headlights will turn off when the wipers are turned off if
they were turned on by this feature.
The headlights with wipers feature can be turned on or
off through the Electronic Vehicle Information Center
(EVIC) — if equipped. Refer to “Electronic Vehicle Infor-
mation Center (EVIC)/Personal Settings (Customer-
Programmable Features)” in “Understanding Your In-
strument Panel” for further information.
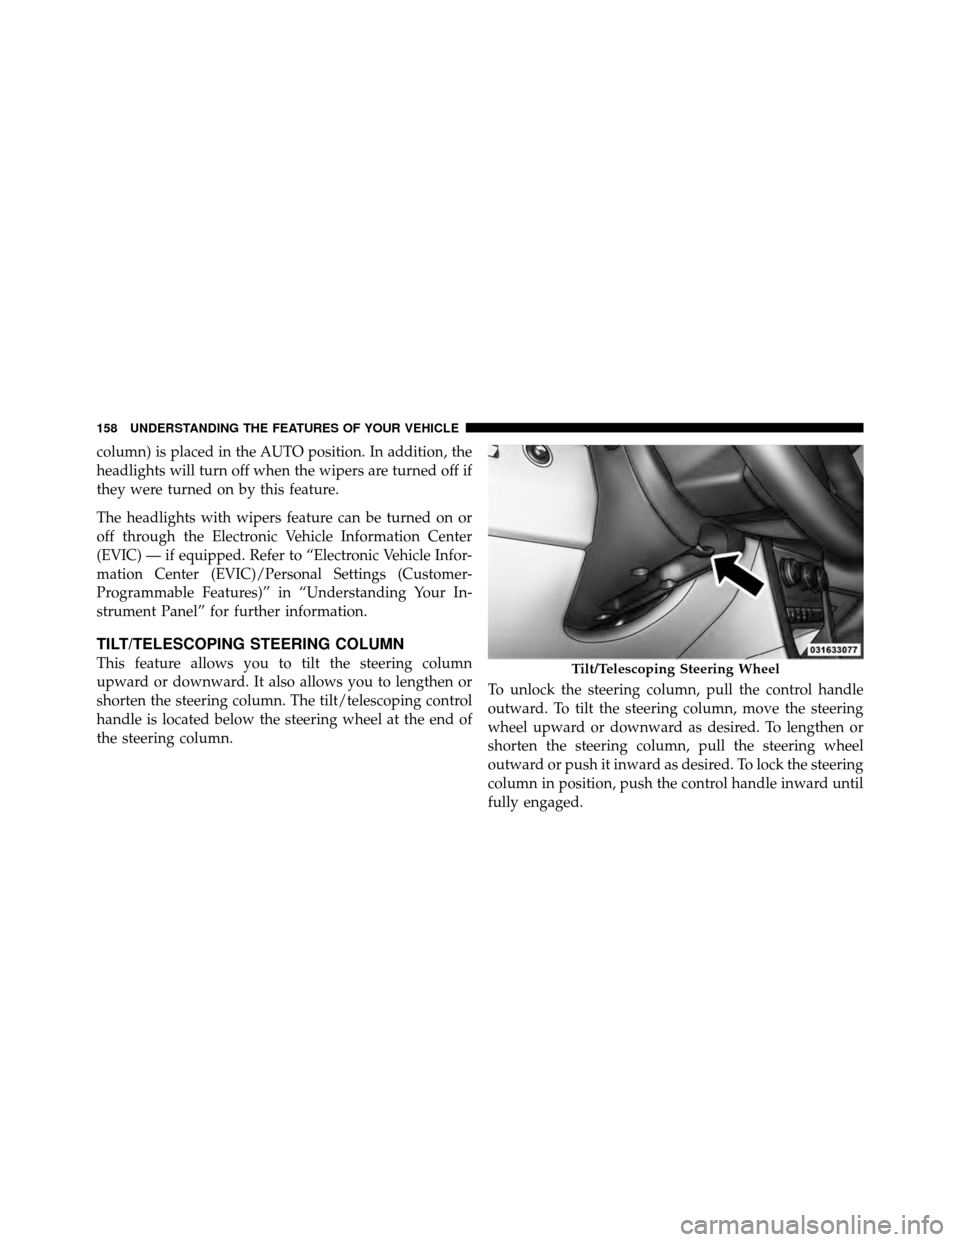
TILT/TELESCOPING STEERING COLUMN
This feature allows you to tilt the steering column
upward or downward. It also allows you to lengthen or
shorten the steering column. The tilt/telescoping control
handle is located below the steering wheel at the end of
the steering column.To unlock the steering column, pull the control handle
outward. To tilt the steering column, move the steering
wheel upward or downward as desired. To lengthen or
shorten the steering column, pull the steering wheel
outward or push it inward as desired. To lock the steering
column in position, push the control handle inward until
fully engaged.Tilt/Telescoping Steering Wheel
158 UNDERSTANDING THE FEATURES OF YOUR VEHICLE
Page 161 of 494
WARNING!
Do not adjust the steering column while driving.
Adjusting the steering column while driving or driv-
ing with the steering column unlocked, could cause
the driver to lose control of the vehicle. Be sure the
steering column is locked before driving your ve-
hicle. Failure to follow this warning may result in
serious injury or death.
ELECTRONIC SPEED CONTROL — IF EQUIPPED
When engaged, the Electronic Speed Control takes over
accelerator operations at speeds greater than 25 mph
(40 km/h).
The Electronic Speed Control buttons are located on the
right side of the steering wheel.NOTE:
In order to ensure proper operation, the Elec-
tronic Speed Control System has been designed to shut
down if multiple Speed Control functions are operated at
the same time. If this occurs, the Electronic Speed Control1 — ON/OFF 2 — RES +
4 — CANCEL 3 — SET -
3
UNDERSTANDING THE FEATURES OF YOUR VEHICLE 159