Page 139 of 494
WARNING!
•Persons who are unable to feel pain to the skin
because of advanced age, chronic illness, diabetes,
spinal cord injury, medication, alcohol use, ex-
haustion or other physical condition must exercise
care when using the seat heater. It may cause burns
even at low temperatures, especially if used for
long periods of time.
•Do not place anything on the seat that insulates
against heat, such as a blanket or cushion. This
may cause the seat heater to overheat. Sitting in a
seat that has been overheated could cause serious
burns due to the increased surface temperature of
the seat.
Manual Front Seat Adjustments
The adjusting bar is located at the front of the seats, near
the floor. Pull the bar upward to move the seat to the
desired position. After releasing the adjusting bar, apply
forward and rearward body pressure to be sure the seat
is latched.
Manual Seat Adjusting Bar
3
UNDERSTANDING THE FEATURES OF YOUR VEHICLE 137
Page 141 of 494
Reclining Seats
The recliner control is on the side of the seat. To recline,
lean forward slightly before lifting the lever, then lean
back to the desired position and release the lever. Lean
forward and lift the lever to return the seatback to its
normal position.WARNING!
•Adjusting a seat while the vehicle is moving is
dangerous. The sudden movement of the seat
could cause you to lose control. The seat belt might
not be properly adjusted and you could be injured.
Adjust the seat only while the vehicle is parked.
•Do not ride with the seatback reclined so that the
shoulder belt is no longer resting against your
chest. In a collision you could slide under the seat
belt and be seriously or even fatally injured. Use
the recliner only when the vehicle is parked.
Seatback Adjustment
3
UNDERSTANDING THE FEATURES OF YOUR VEHICLE 139
Page 144 of 494

Active Head Restraints — Front Seats
Active Head Restraints are passive, deployable compo-
nents, and vehicles with this equipment cannot be readily
identified by any markings, only through visual inspec-
tion of the head restraint. The head restraint will be split
in two halves, with the front half being soft foam and
trim, the back half being decorative plastic.
When AHRs deploy during a rear impact, the front half
of the head restraint extends forward to minimize the gap
between the back of the occupant’s head and the AHR.
This system is designed to help prevent or reduce the
extent of injuries to the driver and front passenger in
certain types of rear impacts. Refer to “Occupant Re-
straints” in “Things To Know Before Starting Your Ve-
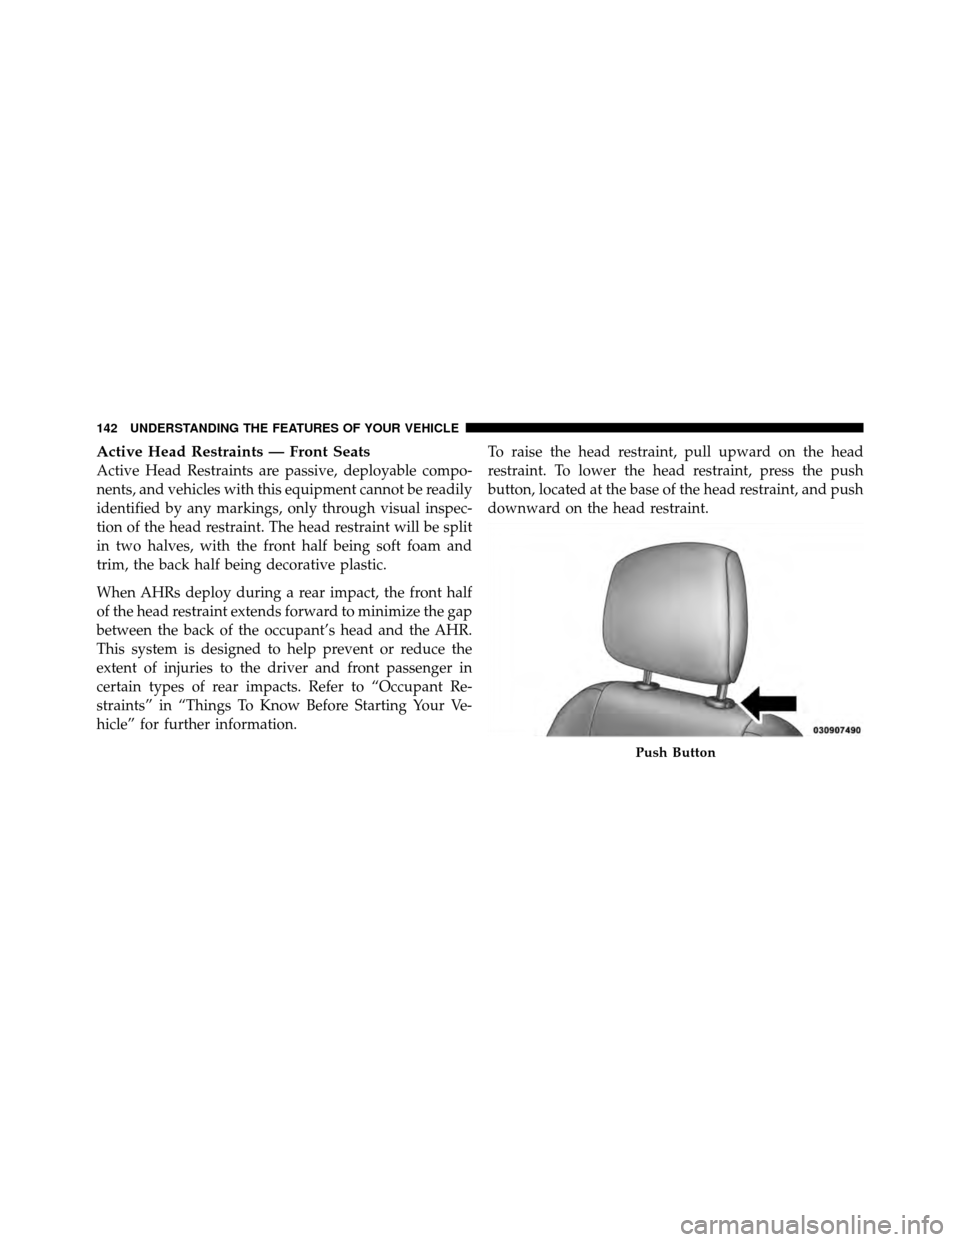
hicle” for further information.To raise the head restraint, pull upward on the head
restraint. To lower the head restraint, press the push
button, located at the base of the head restraint, and push
downward on the head restraint.
Push Button
142 UNDERSTANDING THE FEATURES OF YOUR VEHICLE
Page 146 of 494

•In the event of deployment of an Active Head Re-
straint, refer to “Occupant Restraints/Resetting Active
Head Restraints (AHR)” in “Things to Know Before
Starting Your Vehicle” for further information.
WARNING!
•Do not place items over the top of the Active Head
Restraint, such as coats, seat covers or portable
DVD players. These items may interfere with the
operation of the Active Head Restraint in the event
of a collision and could result in serious injury or
death.(Continued)
WARNING! (Continued)
•Active Head Restraints may be deployed if they
are struck by an object such as a hand, foot or loose
cargo. To avoid accidental deployment of the Ac-
tive Head Restraint ensure that all cargo is se-
cured, as loose cargo could contact the Active Head
Restraint during sudden stops. Failure to follow
this warning could cause personal injury if the
Active Head Restraint is deployed.
Head Restraints — Rear Seats
The rear seat head restraints are fixed and cannot be
adjusted. For proper routing of a Child Seat Tether refer
to “Occupant Restraints” in “Things to Know Before
Starting Your Vehicle” for further information.
144 UNDERSTANDING THE FEATURES OF YOUR VEHICLE
Page 147 of 494
Folding Rear Seat
To provide additional storage area, the rear seatback can
be folded forward. Pull on the loops shown in the picture
to fold down either or both seatbacks.
When returning the rear seat back to the upright position,
be sure the seatback is latched.WARNING!
•Be certain that the seatback is securely locked into
position. If the seatback is not securely locked into
position the seat will not provide the proper
stability for child seats and/or passengers. An
improperly latched seat could cause serious injury.
•The rear cargo area of the vehicle (with the rear
seatbacks in the locked-up or folded down posi-
tion) should not be used as a play area by children.
They could be seriously injured in a collision.
Children should be seated and using the proper
restraint system.
Folding Rear Seats
3
UNDERSTANDING THE FEATURES OF YOUR VEHICLE 145
Page 179 of 494
Pull on the handle to open the glovebox.CONSOLE FEATURES
The center console is located between the front driver
and passenger seats. The center console armrest slides
forward from design position to provide added user
comfort. The center console can be used for storage and
is also equipped with an electrical power outlet. Refer to
Glovebox Storage CompartmentOpened Glovebox
3
UNDERSTANDING THE FEATURES OF YOUR VEHICLE 177
Page 181 of 494

WARNING!
Do not operate this vehicle with a console compart-
ment lid in the open position. Cellular phones, music
players, and other handheld electronic devices
should be stowed while driving. Use of these devices
while driving can cause an accident due to distrac-
tion, resulting in death or injury.
CARGO AREA FEATURES
The 60/40 split-folding rear seat provides cargo-carrying
versatility. The seatbacks fold down easily by pulling
nylon tabs between the seatbacks and the bolsters. When
the seats are folded down, they provide a continuous,
nearly flat extension of the load floor.
When the seatback is folded to the upright position, make
sure it is latched by strongly pulling on the top of the
seatback above the seat strap.
WARNING!
•Be certain that the seatback is securely locked into
position. If the seatback in not securely locked
into position, the seat will not provide the proper
stability for child seats and/or passengers. An
improperly latched seat could cause serious injury.
•The cargo area in the rear of the vehicle (with the
rear seatbacks in the locked-up or folded down
position) should not be used as a play area by
children when the vehicle is in motion. They could
be seriously injured in a collision. Children should
be seated and using the proper restraint system.
•To help protect against personal injury, passengers
should not be seated in the rear cargo area. The
rear cargo space is intended for load carrying
purposes only, not for passengers, who should sit
in seats and use seat belts.(Continued)
3
UNDERSTANDING THE FEATURES OF YOUR VEHICLE 179
Page 431 of 494

Wheel And Wheel Trim Care
All wheels and wheel trim, especially aluminum and
chrome-plated wheels, should be cleaned regularly with
a mild soap and water to prevent corrosion. To remove
heavy soil and/or excessive brake dust, use MOPAR�
Wheel Cleaner or equivalent or select a nonabrasive,
non-acidic cleaner. Do not use scouring pads, steel wool,
a bristle brush, or metal polishes. Only MOPAR�or
equivalent is recommended. Do not use oven cleaner.
Avoid automatic car washes that use acidic solutions or
harsh brushes that may damage the wheels’ protective
finish.
Cleaning Headlights
Your vehicle has plastic headlights that are lighter and
less susceptible to stone breakage than glass headlights.
Plastic is not as scratch resistant as glass and therefore
different lens cleaning procedures must be followed. To minimize the possibility of scratching the lenses and
reducing light output, avoid wiping with a dry cloth. To
remove road dirt, wash with a mild soap solution fol-
lowed by rinsing.
Do not use abrasive cleaning components, solvents, steel
wool or other aggressive material to clean the lenses.
Stain Repel Fabric Cleaning Procedure – If
Equipped
Stain Repel seats may be cleaned in the following man-
ner:
•Remove as much of the stain as possible by blotting
with a clean, dry towel.
•Blot any remaining stain with a clean, damp towel.
•For tough stains, apply MOPAR�
Total Clean or
equivalent, or a mild soap solution to a clean, damp
cloth and remove the stain. Use a fresh, damp towel to
remove soap residue.
7
MAINTAINING YOUR VEHICLE 429