2011 CHRYSLER TOWN AND COUNTRY warning
[x] Cancel search: warningPage 34 of 100

Pinch Protection Feature
• This feature will detect an obstruction in the opening of the sunroof or the shade duringExpress Close operation. If an obstruction in the path of the sunroof or shade is detected, the
sunroof or shade will automatically return to the open position.
NOTE: Pinch protection is disabled while the switch is pressed and held during manual opening
and closing of the sunroof or shade.
WARNING!
• Never leave children in a vehicle with the key in the ignition switch. Occupants, particularly unattended children, can become entrapped by the power sunroof while
operating the power sunroof switch. Such entrapment may result in serious injury or
death.
• In a collision, there is a greater risk of being thrown from a vehicle with an open sunroof. You could also be severely injured or killed. Always fasten your seat belt properly and
make sure all passengers are properly secured.
• Do not allow small children to operate the sunroof. Never allow your fingers, other body parts, or any object to project through the sunroof opening. Injury may result.
OPERATING YOUR VEHICLE
32
Page 48 of 100

Changing The Volume
• Start a dialogue by pressing the Phone button, then adjust the volume during a normal
call.
• Use the radio ON/OFF VOLUME rotary knob to adjust the volume to a comfortable level while the Uconnect™ system is speaking. Please note the volume setting for Uconnect™ is
different than the audio system.
NOTE: To access the tutorial, press the Uconnect™ hard-key. After the BEEP, say “tutorial”.
Press any hard-key/button or touch the display (Touch-Screen radio) to cancel the tutorial.
WARNING!
• Any voice commanded system should be used only in safe driving conditions following local laws and phone use. All attention should be kept on the roadway ahead. Failure to
do so may result in a collision causing you and others to be severely injured or killed.
• In an emergency, to use Uconnect™ Phone, your mobile phone must be: • turned on,
• paired to Uconnect™ Phone,
• and have network coverage.
Uconnect™ VOICE COMMAND
• The Uconnect™ Voice Command system allows you to control your AM, FM radio, satelliteradio, disc player, Uconnect™ Phone, a memo recorder, and supported portable media devices.
• When you press the Voice Command button
located on the radio faceplate or
steering wheel, you will hear a beep. The beep is your signal to give a command. If you do not
say a command within a few seconds, the system will present you with a list of options. If you
ever wish to interrupt the system while it lists options, press the Voice Command
button
, listen for the BEEP, and say your command.
Voice Command for Text Messaging
• If equipped with Uconnect™ Voice Command, your Media Center 430N radio may be able to play incoming SMS messages through the vehicle sound system.
• It also allows you to respond by selecting from various pre-defined phrases.
• Not all phones are compatible with this feature. Refer to the phone compatibility list at www.chrysler.com/uconnect. Connected mobile phones must be bluetooth-compatible, and
paired with your radio.
Changing The Volume
• Start a dialogue by pressing the Voice Command button, then say a command (for
example, “tutorial”).
• Use the radio ON/OFF VOLUME rotary knob to adjust the volume to a comfortable level while the Voice Command system is speaking. The volume setting for Voice Command is
different than the audio system. ELECTRONICS
46
Page 49 of 100

• For vehicles equipped with Video Entertainment System (VES)™, refer to the Uconnect™ VoiceCommand section of the Uconnect™ User's Manual on the DVD for further details.
• For vehicles not equipped with VES™, refer to your vehicle Owner's Manual on the DVD for Uconnect™ Voice Command information.
NOTE: To access the tutorial, press the Voice Command button
. After the BEEP, say
“tutorial”. Press any hard-key/button or touch the display (Touch-Screen radio) to cancel the
tutorial.
WARNING!
Any voice commanded system should be used only in safe driving conditions following
local laws and phone use. All attention should be kept on the roadway ahead. Failure to do
so may result in a collision causing you and others to be severely injured or killed.
VIDEO ENTERTAINMENT SYSTEM (VES)™
System Operation
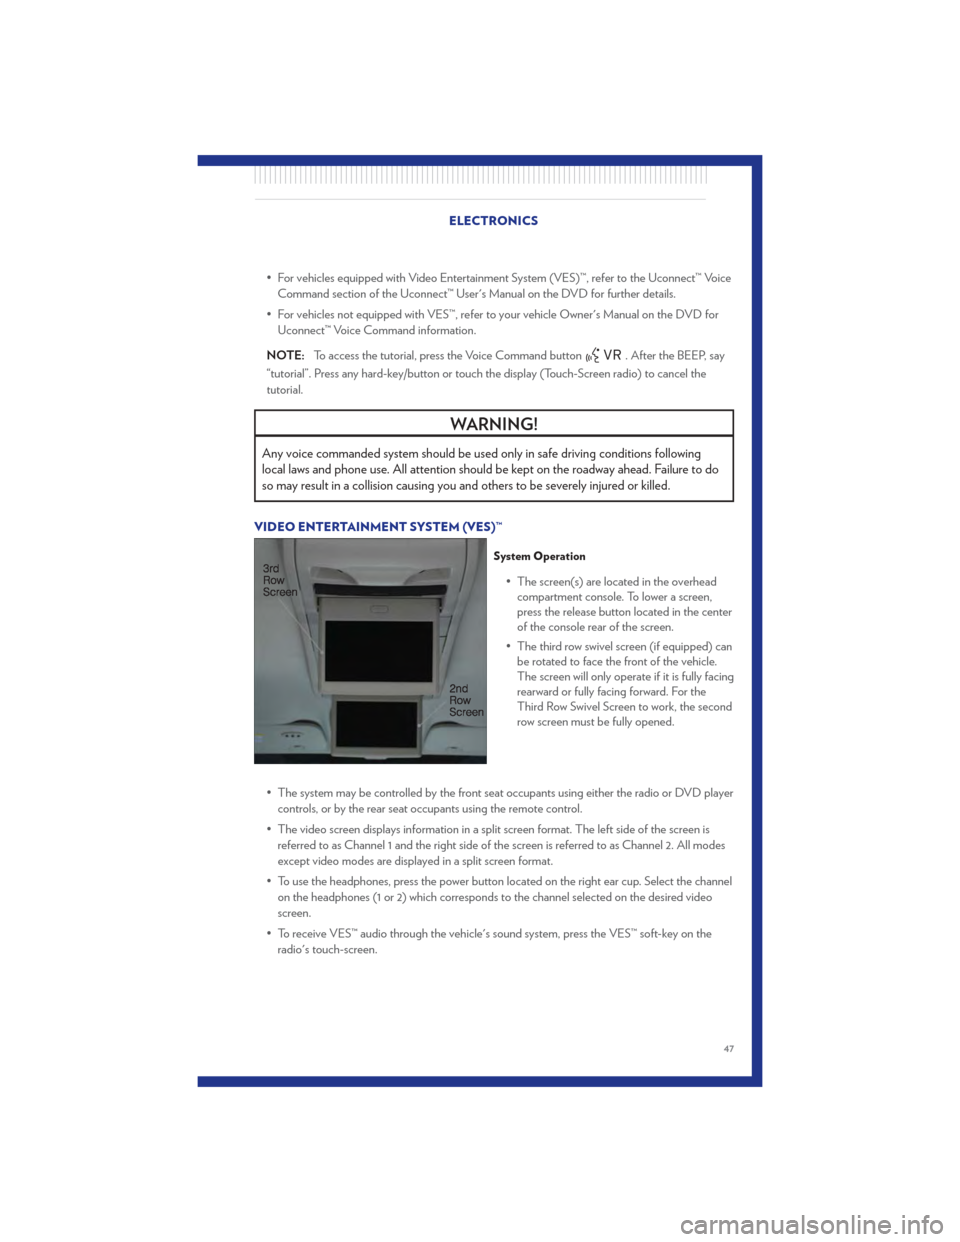
• The screen(s) are located in the overhead compartment console. To lower a screen,
press the release button located in the center
of the console rear of the screen.
• The third row swivel screen (if equipped) can be rotated to face the front of the vehicle.
The screen will only operate if it is fully facing
rearward or fully facing forward. For the
Third Row Swivel Screen to work, the second
row screen must be fully opened.
• The system may be controlled by the front seat occupants using either the radio or DVD player controls, or by the rear seat occupants using the remote control.
• The video screen displays information in a split screen format. The left side of the screen is referred to as Channel 1 and the right side of the screen is referred to as Channel 2. All modes
except video modes are displayed in a split screen format.
• To use the headphones, press the power button located on the right ear cup. Select the channel on the headphones (1 or 2) which corresponds to the channel selected on the desired video
screen.
• To receive VES™ audio through the vehicle's sound system, press the VES™ soft-key on the radio's touch-screen.
ELECTRONICS
47
Page 51 of 100

• To hear audio from devices connected to this port from a non-touch-screen radio, press theAUX button on the radio faceplate. From a touch-screen radio, press the MEDIA hard-key,
then touch the AUX or iPod® soft-key.
• When connected to this feature: • The iPod® can be controlled using the radio buttons to Play, Browse, and List the iPod® orexternal devices contents. Refer to the Owner's Manual on the DVD for details.
• The iPod® battery charges when plugged into the USB port (if supported by the specific audio device).
• Compatible iPod® devices may also be controllable using voice commands. Refer to the Owner's Manual on the DVD for details.
NOTE:
• The USB port supports certain Mini, Classic, Nano, Touch, and iPhone® devices. The USB port also supports playing music from compatible external USB Mass Storage Class memory
devices. For supported audio file formats, refer to the USB Port section in the Owner's Manual
on the DVD. Refer to www.chrysler.com/uconnect website for a list of tested iPod®s. Some
iPod® software versions may not fully support the USB port features. Please visit Apple’s
website for iPod® software updates.
Bluetooth® Streaming Audio
• If equipped with Uconnect™ Voice Command, your Bluetooth-equipped iPod® devices, cellphones or other media players, may also be able to stream music to your vehicle's speakers.
Your connected device must be Bluetooth-compatible, and paired with your Media Center
radio (see Uconnect™ Phone for pairing instructions). Press the AUX button on the radio
faceplate until "BT" is displayed on the radio screen.
WARNING!
Do not plug in or remove the iPod® or external device while driving. Failure to follow this
warning could result in a collision.
ELECTRONIC VEHICLE INFORMATION CENTER (EVIC)
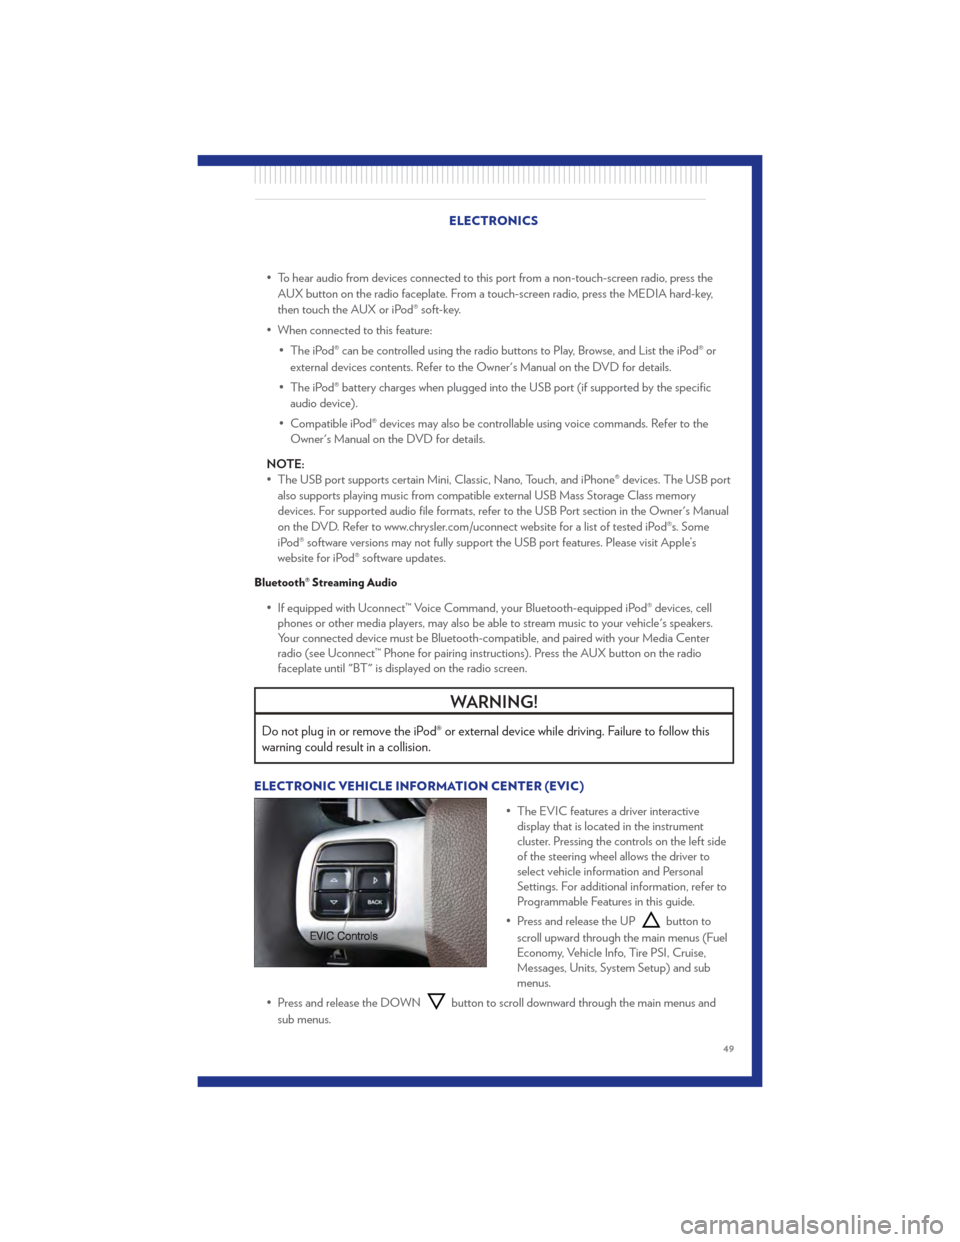
• The EVIC features a driver interactivedisplay that is located in the instrument
cluster. Pressing the controls on the left side
of the steering wheel allows the driver to
select vehicle information and Personal
Settings. For additional information, refer to
Programmable Features in this guide.
• Press and release the UP
button to
scroll upward through the main menus (Fuel
Economy, Vehicle Info, Tire PSI, Cruise,
Messages, Units, System Setup) and sub
menus.
• Press and release the DOWN
button to scroll downward through the main menus and
sub menus.
ELECTRONICS
49
Page 54 of 100

• Simultaneously, press and hold both the chosen HomeLink® button and the hand-heldtransmitter button until the HomeLink® indicator flash rate changes from a slow to a rapidly
blinking light, then release both the HomeLink® and the hand-held transmitter buttons. This
may take up to 30 seconds, or longer in rare cases.
• Press and hold the just-programmed HomeLink® button; if the indicator light stays on constantly, programming is complete and the garage door should open.
NOTE:
• Only use this transceiver with a garage door opener that has a “stop and reverse” feature as required by Federal safety standards. This includes most garage door opener models
manufactured after 1982. Do not use a garage door opener without these safety features. Call
toll-free 1–800–355–3515 or, on the Internet, at www.HomeLink.com for safety information or
assistance.
• If you are having difficulty programming your HomeLink® and your garage door opener was manufactured after 1995, you may have a rolling code. Follow the steps below for Programming A
Rolling Code System.
Programming A Rolling Code System • At the garage door opener motor (in the garage), locate the “learn” or “programming” button. This can usually be found where the hanging antenna wire is attached to the garage door
opener motor (it is NOT the button normally used to open and close the door).
• Firmly press and release the “learn” or “programming” button. The name and color of the button may vary by manufacturer. Within 30 seconds, return to the vehicle and press the
programmed HomeLink® button twice (holding the button for two seconds each time). If the
device is plugged in and activates, programming is complete.
• If the device does not activate, press the button a third time (for two seconds) to complete the programming.
Using HomeLink® • To operate, simply press and release the programmed HomeLink® button and the programmed device will operate.
• Refer to your Owner’s Manual on the DVD for further details. If you have any problems programming HomeLink®, or require assistance, please call toll-free 1–800–355–3515 or, on the
Internet, at www.HomeLink.com.
WARNING!
• Your motorized door or gate will open and close while you are programming the universaltransceiver. Do not program the transceiver if people or pets are in the path of the door
or gate.
• Do not run your vehicle in a closed garage or confined area while programming the transceiver. Exhaust gas from your vehicle contains Carbon Monoxide (CO) which is
odorless and colorless. Carbon Monoxide is poisonous when inhaled and can cause you
and others to be severely injured or killed.
ELECTRONICS
52
Page 55 of 100

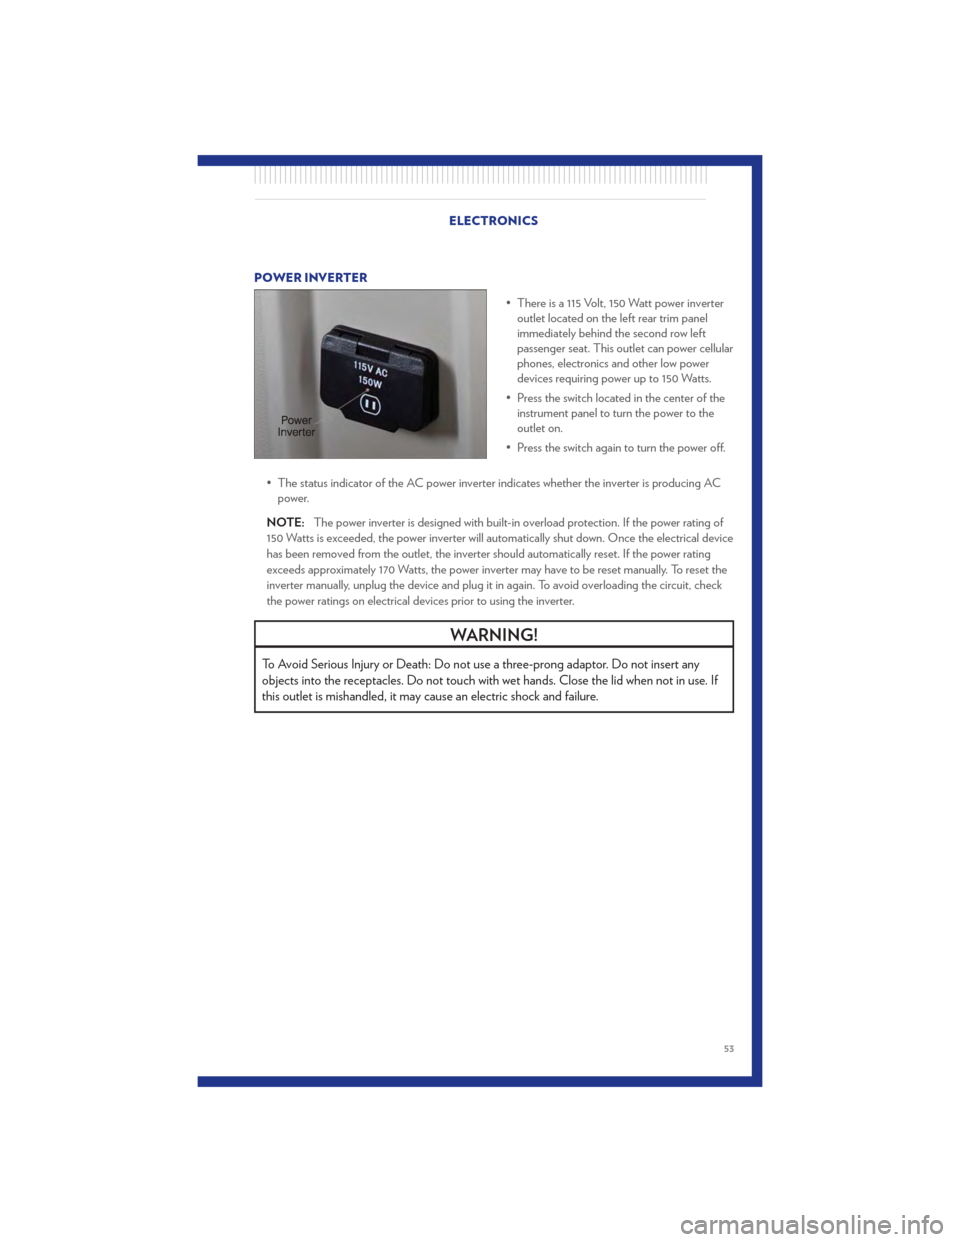
POWER INVERTER• There is a 115 Volt, 150 Watt power inverteroutlet located on the left rear trim panel
immediately behind the second row left
passenger seat. This outlet can power cellular
phones, electronics and other low power
devices requiring power up to 150 Watts.
• Press the switch located in the center of the instrument panel to turn the power to the
outlet on.
• Press the switch again to turn the power off.
• The status indicator of the AC power inverter indicates whether the inverter is producing AC power.
NOTE: The power inverter is designed with built-in overload protection. If the power rating of
150 Watts is exceeded, the power inverter will automatically shut down. Once the electrical device
has been removed from the outlet, the inverter should automatically reset. If the power rating
exceeds approximately 170 Watts, the power inverter may have to be reset manually. To reset the
inverter manually, unplug the device and plug it in again. To avoid overloading the circuit, check
the power ratings on electrical devices prior to using the inverter.
WARNING!
To Avoid Serious Injury or Death: Do not use a three-prong adaptor. Do not insert any
objects into the receptacles. Do not touch with wet hands. Close the lid when not in use. If
this outlet is mishandled, it may cause an electric shock and failure.
ELECTRONICS
53
Page 57 of 100

IN-FLOOR STORAGE – STOW 'N GO®
Second Row Seat Storage Bins
• Storage bins are located in the floor infront of the second row seats that can be
used when the second row seat is in the
upright position. Pull up on the storage bin
latch to open the cover. Slide the storage
bin locking mechanism to the "Lock"
position to allow greater access to the
storage bin.
Cargo Area Storage
• The liftgate sill plate has a raised line withthe statement “Load To This Line”. This
line indicates how far rearward cargo can
be placed without interfering with liftgate
closing.
WARNING!
In a collision, serious injury could result if
the seat storage bin covers are not
properly latched. Do not drive the vehicle
with the storage bin covers open. Keep
the storage bin covers closed and latched
while the vehicle is in motion. Do not use
a storage bin latch as a tie down.
ROOF LUGGAGE RACK
• The crossbars on your vehicle are deliveredstowed within the roof rack side rails. When
installed, the roof rack can hold a
maximum of 150 lbs (68 kg) of evenly
distributed weight.
Installing The Crossbars
• To install the crossbars, completely loosen the thumb screws at both ends and lift the
crossbar from its stowed position.
• Bend the pivot points at each end of the crossbar and slide the thumb screw down.
• Set the crossbars into position and tighten the thumb screws.
NOTE: Make sure the directional arrow on
the crossbar aligns with the directional arrow
on the side rail.
• Refer to the Owner's Manual on the DVD for further details.
UTILITY
55
Page 60 of 100

24-HOUR TOWING ASSISTANCE• Dial toll-free 1-800-521-2779 or 1-800-363-4869 for Canadian residents.
• Provide your name, vehicle identification number and license plate number.
• Provide your location, including telephone number, from which you are calling.
• Briefly describe the nature of the problem and answer a few simple questions.
• You will be given the name of the service provider and an estimated time of arrival. If you feelyou are in an “unsafe situation”, please let us know. With your consent, we will contact local
police or safety authorities.
INSTRUMENT CLUSTER WARNING LIGHTS
- Electronic Stability Control (ESC) Indicator Light
• If this indicator light flashes during acceleration, apply as little throttle as possible. While driving, ease up on the accelerator. Adapt your speed and driving to the prevailing road
conditions. To improve the vehicle's traction when starting off in deep snow, sand or gravel, it
may be desirable to switch the ESC system off.
- Tire Pressure Monitoring System (TPMS) Light
• Each tire, including the spare (if provided), should be checked monthly, when cold and inflatedto the inflation pressure recommended by the vehicle manufacturer on the vehicle placard or
tire inflation pressure label. (If your vehicle has tires of a different size than the size indicated on
the vehicle placard or tire inflation pressure label, you should determine the proper tire inflation
pressure for those tires.)
• As an added safety feature, your vehicle has been equipped with a Tire Pressure Monitoring System (TPMS) that illuminates a low tire pressure telltale when one or more of your tires is
significantly under-inflated. Accordingly, when the low tire pressure telltale illuminates, you
should stop and check your tires as soon as possible, and inflate them to the proper pressure.
Driving on a significantly under-inflated tire causes the tire to overheat and can lead to tire
failure. Under-inflation also reduces fuel efficiency and tire tread life, and may affect the
vehicle’s handling and stopping ability.
• IF THE LIGHT STARTS FLASHING INDICATING A LOW TIRE PRESSURE, ADJUST
THE AIR PRESSURE IN THE LOW TIRE TO THE AIR PRESSURE SHOWN ON THE
VEHICLE PLACARD OR TIRE INFLATION PRESSURE LABEL LOCATED ON THE
DRIVER'S DOOR. NOTE: AFTER INFLATION, THE VEHICLE MAY NEED TO BE
DRIVEN FOR 20 MINUTES BEFORE THE FLASHING LIGHT WILL TURN OFF.
• Please note that the TPMS is not a substitute for proper tire maintenance, and it is the driver’s responsibility to maintain correct tire pressure, even if under-inflation has not reached the level
to trigger illumination of the TPMS low tire pressure telltale.
• Your vehicle has also been equipped with a TPMS malfunction indicator to indicate when the system is not operating properly. The TPMS malfunction indicator is combined with the low tire
pressure telltale. When the system detects a malfunction, the telltale will flash for approximately
one minute and then remain continuously illuminated. This sequence will continue each time
the vehicle is restarted as long as the malfunction exists. WHAT TO DO IN EMERGENCIES
58