Page 177 of 573
•Headlight Beams Low/High
•Flash-To-Pass (Optical Horn)
•Front and Rear Wipers — Washer Functions
Turn Signals
Move the multifunction lever up or down and the arrows
on each side of the instrument cluster flash to show
proper operation of the front and rear turn signal lights.
NOTE:If either light remains on and does not flash, or
there is a very fast flash rate, check for a defective outside
light bulb. If an indicator fails to light when the lever is
moved, it would suggest that the indicator bulb is
defective.
Lane Change Assist
Tap the lever up or down once, without moving beyond
the detent, and the turn signal (right or left) will flash
three times then automatically turn off.
Turn Signal Warning
If the vehicle electronics sense that the vehicle has
traveled at over 18 mph (29 km/h) for approximately
1 mile (1.6 km) with the turn signals on, a chime will
sound to alert the driver.
High/Low Beam Switch
When the headlights are turned on, pushing the multi-
function lever toward the instrument panel will switch
from low beams to high beams. Pulling back to the
neutral position returns the headlights to the low beam
operation.
Flash-To-Pass
You can signal another vehicle with your headlights by
lightly pulling the multifunction lever toward you. This
will turn on the high beam headlights until the lever is
released.
174 UNDERSTANDING THE FEATURES OF YOUR VEHICLE
Page 178 of 573
SmartBeam™ — If Equipped
The SmartBeam™ system provides increased forward
lighting at night by automating high beam control
through the use of a digital camera mounted on the
inside rearview mirror. This camera detects vehicle spe-
cific light and automatically switches from high beams to
low beams until the approaching vehicle is out of view.
To Activate
1. Select “Automatic High Beams — ON” through the
EVIC. Refer to “Electronic Vehicle Information Center
(EVIC)/Customer-Programmable Features” in “Under-
standing Your Instrument Panel” for further information.
2. Rotate the headlight switch counterclockwise to the
AUTO (A) position.
3. Push the multifunction lever away from you to switch
the headlights to the high beam position. Refer to “Mul-
tifunction Lever” in this section for further information.NOTE:
This system will not activate until the vehicle is
at, or above, 25 mph (40 km/h).
To Deactivate
Perform either of the following steps to deactivate the
SmartBeam™ system.
1. Select “Automatic High Beams — OFF” through the
EVIC. Refer to “Electronic Vehicle Information Center
(EVIC)/Customer-Programmable Features” in “Under-
standing Your Instrument Panel” for further information.
2. Pull the multifunction lever toward you to switch the
headlights from the high beam to the low beam position.
3. Rotate the headlight switch clockwise from the AUTO
(A) to the on position.
NOTE: Broken, muddy or obstructed headlights and
taillights of vehicles in the field of view will cause
headlights to remain on longer (closer to the vehicle).
3
UNDERSTANDING THE FEATURES OF YOUR VEHICLE 175
Page 184 of 573

HEATED STEERING WHEEL — IF EQUIPPED
The steering wheel contains a heating element that helps
warm your hands in cold weather. The heated steering
wheel has only one temperature setting. Once the heated
steering wheel has been turned on it will operate for
approximately 58 to 70 minutes before automatically
shutting off. The heated steering wheel can shut off early
or may not turn on when the steering wheel is already
warm.
The heated steering wheel switch is located on the switch
bank below the climate controls.Press the switch to turn on the heated
steering wheel. The light on the switch
will illuminate to indicate the steering
wheel heater is on. Pressing the switch
a second time will turn off the heated
steering wheel and light indicator. NOTE:
The engine must be running for the heated
steering wheel to operate.
Vehicles Equipped With Remote Start
On models that are equipped with remote start, the
heated steering wheel can be programmed to come on
during a remote start. Refer to “Remote Starting System
— If Equipped” in “Things to Know Before Starting Your
Vehicle” for further information.
WARNING!
•Persons who are unable to feel pain to the skin
because of advanced age, chronic illness, diabetes,
spinal cord injury, medication, alcohol use, ex-
haustion, or other physical conditions must exer-
cise care when using the steering wheel heater. It
may cause burns even at low temperatures, espe-
cially if used for long periods.
(Continued)
3
UNDERSTANDING THE FEATURES OF YOUR VEHICLE 181
Page 187 of 573
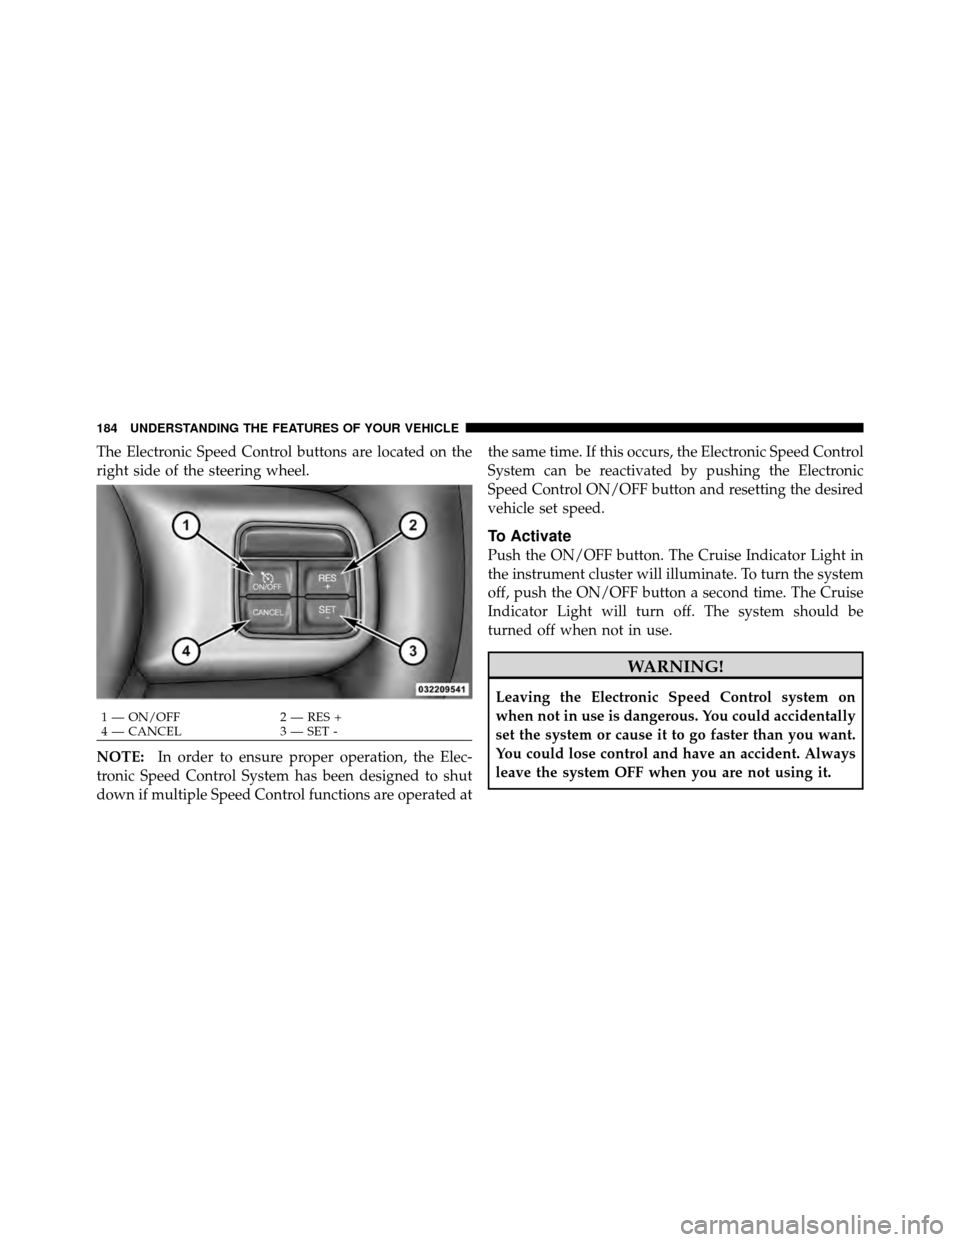
The Electronic Speed Control buttons are located on the
right side of the steering wheel.
NOTE:In order to ensure proper operation, the Elec-
tronic Speed Control System has been designed to shut
down if multiple Speed Control functions are operated at the same time. If this occurs, the Electronic Speed Control
System can be reactivated by pushing the Electronic
Speed Control ON/OFF button and resetting the desired
vehicle set speed.
To Activate
Push the ON/OFF button. The Cruise Indicator Light in
the instrument cluster will illuminate. To turn the system
off, push the ON/OFF button a second time. The Cruise
Indicator Light will turn off. The system should be
turned off when not in use.
WARNING!
Leaving the Electronic Speed Control system on
when not in use is dangerous. You could accidentally
set the system or cause it to go faster than you want.
You could lose control and have an accident. Always
leave the system OFF when you are not using it.
1 — ON/OFF
2 — RES +
4 — CANCEL 3 — SET -
184 UNDERSTANDING THE FEATURES OF YOUR VEHICLE
Page 189 of 573
To Accelerate For Passing
Press the accelerator as you would normally. When the
pedal is released, the vehicle will return to the set speed.
Using Electronic Speed Control On Hills
The transmission may downshift on hills to maintain the
vehicle set speed.
NOTE:The Electronic Speed Control system maintains
speed up and down hills. A slight speed change on
moderate hills is normal.
On steep hills, a greater speed loss or gain may occur so
it may be preferable to drive without Electronic Speed
Control.
WARNING!
Electronic Speed Control can be dangerous where the
system cannot maintain a constant speed. Your ve-
hicle could go too fast for the conditions, and you
could lose control and have an accident. Do not use
Electronic Speed Control in heavy traffic or on roads
that are winding, icy, snow-covered or slippery.
PARKSENSE� REAR PARK ASSIST —
IF EQUIPPED
The ParkSense� Rear Park Assist system provides visual
and audible indications of the distance between the rear
fascia and a detected obstacle when backing up, e.g.
during a parking maneuver. Refer to ParkSense� System
Usage Precautions for limitations of this system and
recommendations.
186 UNDERSTANDING THE FEATURES OF YOUR VEHICLE
Page 201 of 573
4. Enable or disable the rear camera feature by selecting
“enable rear camera in reverse” soft key and pressing the
“save” soft-key.
Turning ParkView�On Or Off —
Without Navigation/Multimedia Radio
1. Press the “menu” hard-key.
2. Select “system setup” soft-key.
3. Enable or disable the rear camera feature by selecting
“enable rear camera in reverse” soft-key.
OVERHEAD CONSOLES
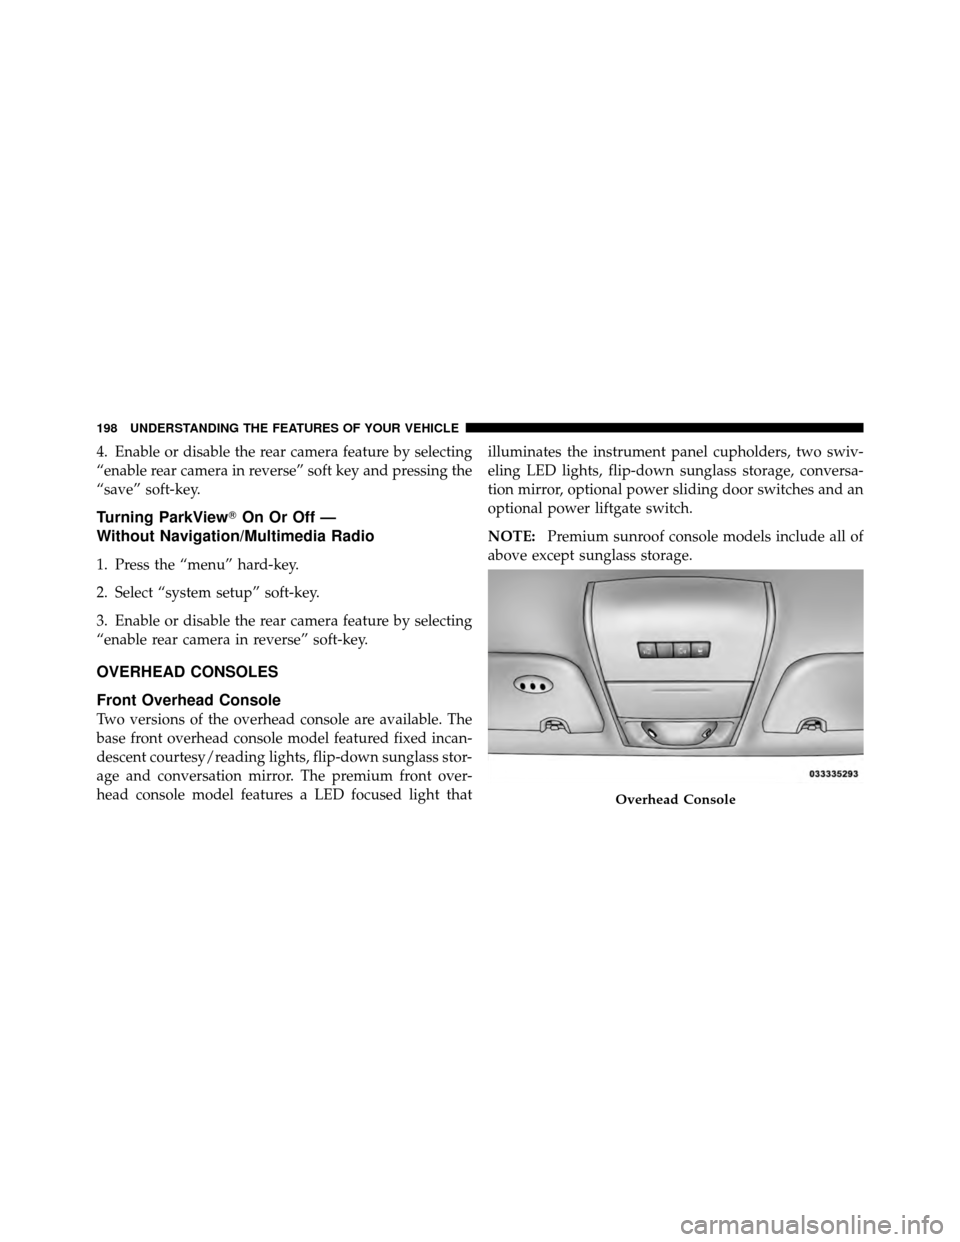
Front Overhead Console
Two versions of the overhead console are available. The
base front overhead console model featured fixed incan-
descent courtesy/reading lights, flip-down sunglass stor-
age and conversation mirror. The premium front over-
head console model features a LED focused light that illuminates the instrument panel cupholders, two swiv-
eling LED lights, flip-down sunglass storage, conversa-
tion mirror, optional power sliding door switches and an
optional power liftgate switch.
NOTE:
Premium sunroof console models include all of
above except sunglass storage.
Overhead Console
198 UNDERSTANDING THE FEATURES OF YOUR VEHICLE
Page 202 of 573
Courtesy/Interior Lighting
At the forward end of the console are two courtesy lights
(standard dome light has two buttons). The lights turn on
when a front door, a sliding door or the liftgate is opened.
If your vehicle is equipped with Remote Keyless Entry
(RKE) the lights will also turn on when the UNLOCK
button on the RKE transmitter is pressed.
The courtesy lights also function as reading lights. Press
in on each lens to turn these lights on while inside the
vehicle. Press a second time to turn each light off. You
may adjust the direction of these lights by pressing the
outside ring, which is identified with four directional
arrows (LED lamps only).
The area around the instrument panel cupholders is also
illuminated from a light in the overhead console (pre-
mium console only). This light is turned on when the
headlight switch is on, and will adjust in brightness when
the dimmer control is rotated up or down.
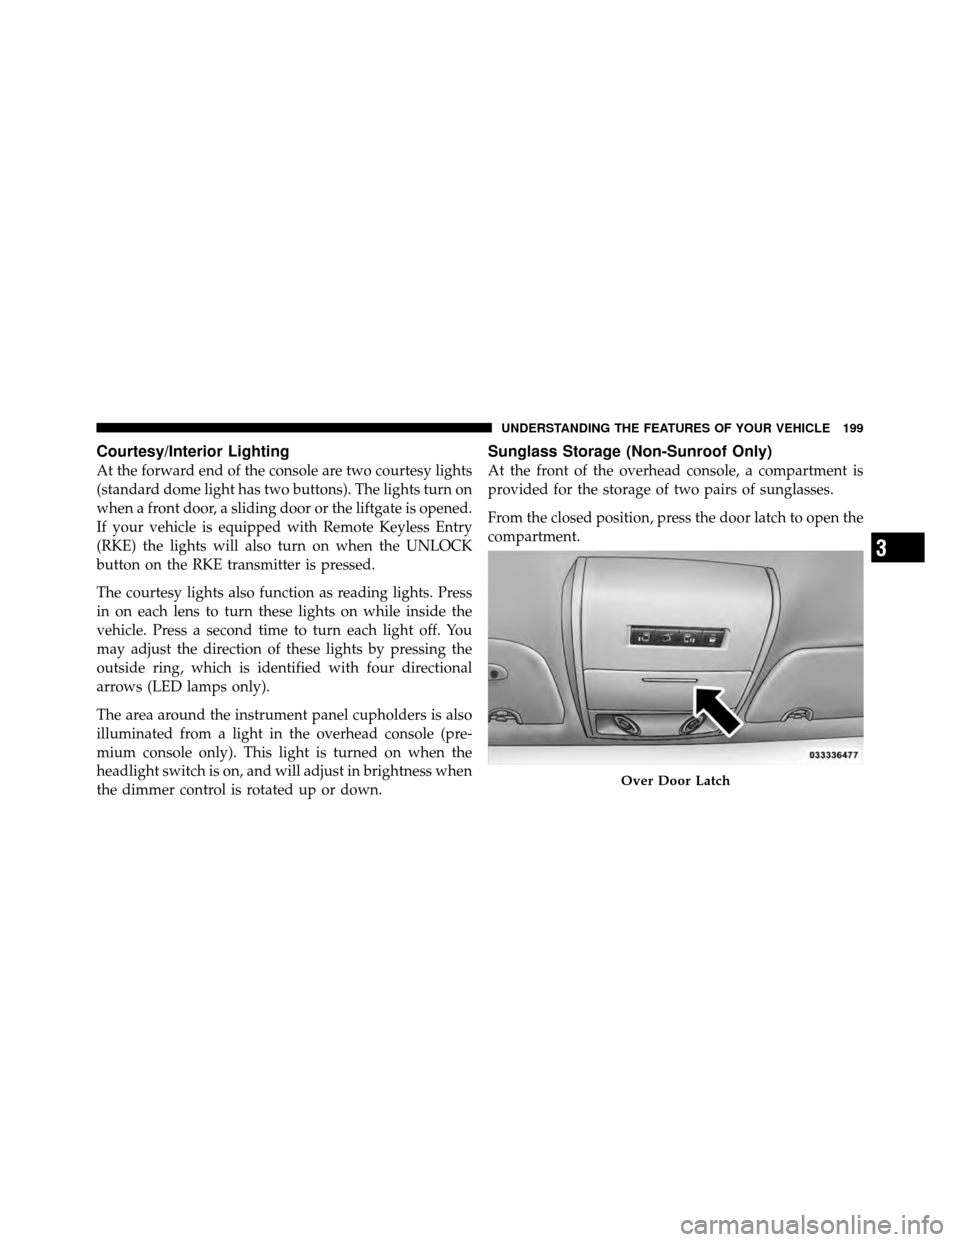
Sunglass Storage (Non-Sunroof Only)
At the front of the overhead console, a compartment is
provided for the storage of two pairs of sunglasses.
From the closed position, press the door latch to open the
compartment.
Over Door Latch
3
UNDERSTANDING THE FEATURES OF YOUR VEHICLE 199
Page 204 of 573
Rear Courtesy/Reading Lights — If Equipped
The overhead console has two sets of courtesy lights. The
lights turn on when a front door, a sliding door or the
liftgate is opened. If your vehicle is equipped with
Remote Keyless Entry (RKE) the lights will also turn on
when the UNLOCK button on the RKE transmitter is
pressed.
The courtesy lights also function as reading lights. Press
in on each lens to turn these lights on while inside the
vehicle. Press the lens a second time to turn each light off.
You may adjust the direction of these lights by pressing
the outside ring, which is identified with four directional
arrows.
Rear Overhead Consoles — If Equipped
The rear overhead storage system is available in two
versions: with or without sunroof.
Reading Lights
3
UNDERSTANDING THE FEATURES OF YOUR VEHICLE 201