Page 53 of 573

Power Sliding Side Door Open Flash
The left and right exterior hazard lights will flash for
12 seconds when either sliding door is opened. This will
alert other drivers in the area that passenger(s) could be
entering or exiting the vehicle.
The Sliding Side Door Open Flash can be enabled or
disabled by performing the following procedure:
1. Place the Key Fob in the ignition switch.
2. Cycle the ignition switch from ON/RUN to OFF five
times ending in the ON/RUN position(do not start the
engine).
3. Within 10 seconds of the final cycle, press the HAZ-
ARD switch ON.
4. A single chime will sound to signify that you have
successfully completed the programming. You can turn the feature back on by repeating the
previous procedure.
Power Sliding Side Door Master Lock Switch
To provide a safer environment for small children riding
in the rear seats, the second row sliding door switches
and handles may be overridden by pressing the OFF side
of the Master Lock Out Switch located in the front
overhead console.
When the power sliding door master lock switch is in the
OFF position, the power sliding side door may not be
opened or closed by pressing the switch located on the
b-pillar trim panel, just in front of the sliding door or
activating the inside power sliding door handle.
50 THINGS TO KNOW BEFORE STARTING YOUR VEHICLE
Page 54 of 573
Sliding Side Door Child Protection Lock
To provide a safer environment for small children riding
in the rear seats, the sliding doors are equipped with a
Child Protection Door Lock system.
NOTE:When the Child Protection Door Lock system is
engaged, the door can be opened only by using the
outside door handle even though the inside door lock is
in the unlocked position.
To Engage the Child Protection Door Lock
1. Open the sliding side door.
Overhead Console Power Sliding Door Master Switch
1 — Left Door 3 — Right Door
2 — Liftgate 4 — Master Lock
2
THINGS TO KNOW BEFORE STARTING YOUR VEHICLE 51
Page 55 of 573

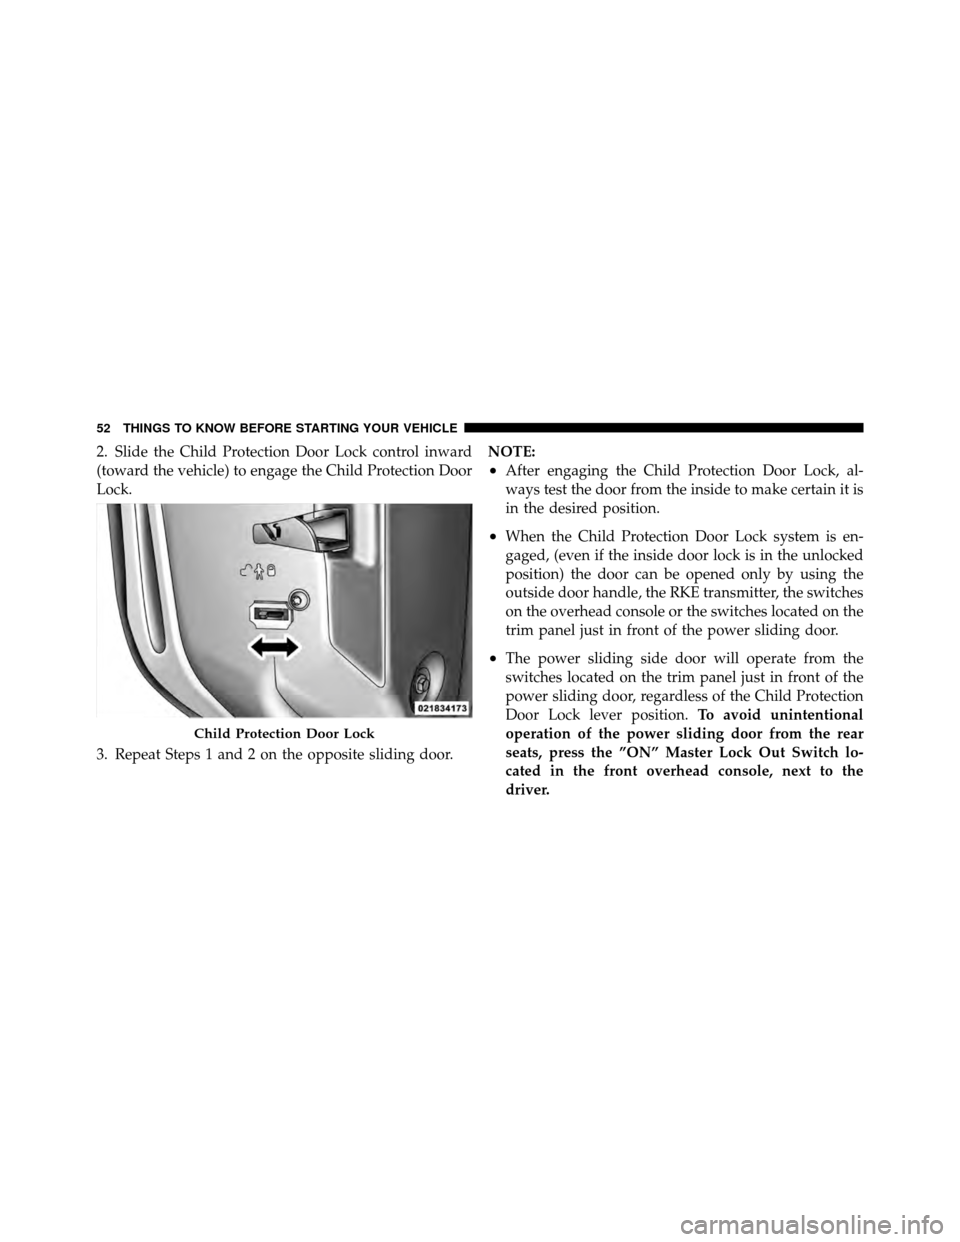
2. Slide the Child Protection Door Lock control inward
(toward the vehicle) to engage the Child Protection Door
Lock.
3. Repeat Steps 1 and 2 on the opposite sliding door.NOTE:
•After engaging the Child Protection Door Lock, al-
ways test the door from the inside to make certain it is
in the desired position.
•When the Child Protection Door Lock system is en-
gaged, (even if the inside door lock is in the unlocked
position) the door can be opened only by using the
outside door handle, the RKE transmitter, the switches
on the overhead console or the switches located on the
trim panel just in front of the power sliding door.
•The power sliding side door will operate from the
switches located on the trim panel just in front of the
power sliding door, regardless of the Child Protection
Door Lock lever position.
To avoid unintentional
operation of the power sliding door from the rear
seats, press the ”ON” Master Lock Out Switch lo-
cated in the front overhead console, next to the
driver.
Child Protection Door Lock
52 THINGS TO KNOW BEFORE STARTING YOUR VEHICLE
Page 56 of 573

WARNING!
Avoid trapping anyone in the vehicle in a collision.
Remember that the sliding doors can only be opened
from the outside door handle or the switches located
on the trim panel just in front of the power sliding
door when the Child Protection Door Locks are
engaged.
To Disengage the Child Protection Door Lock
1. Open the sliding side door.
2. Slide the Child Protection Door Lock control outward
(away from the vehicle) to disengage the Child Protection
Door Lock.
3. Repeat Steps 1 and 2 on the opposite sliding door (if
equipped).NOTE:
•After setting the Child Protection Door Lock system,
always test the door from the inside to make certain it
is in the desired position.
•The power sliding side door switches will not open the
power sliding doors if the vehicle is in gear or the
vehicle speed is above 0 mph (0 km/h).
•The power sliding door will operate from the outside
door handle, the RKE transmitter, the switches on the
overhead console, or the switches located on the trim
panel just in front of the power sliding door when the
shift lever is in PARK, regardless of the child lock lever
position.
LIFTGATE
On vehicles equipped with power locks, the liftgate can
be unlocked using the Remote Keyless Entry (RKE)
transmitter button, or by activating the power door lock
switches located on the front doors.
2
THINGS TO KNOW BEFORE STARTING YOUR VEHICLE 53
Page 57 of 573
To open the liftgate, press the liftgate release handle
located on the underside of the license plate bar and pull
the liftgate open with one fluid motion.If the liftgate is locked and is not equipped with the
power liftgate feature, pressing the button on the RKE
transmitter will result in the liftgate becoming unlocked
for 30 seconds allowing you to manually access the
liftgate area.
Power Liftgate — If Equipped
The power liftgate may be opened manually or by using
the button on the Remote Keyless Entry (RKE) transmit-
ter. Press the button on the transmitter twice within five
seconds, to open the power liftgate. When the liftgate is
fully open, pressing the button twice within five seconds,
a second time, will close the liftgate.
The power liftgate may also be opened and closed by
pressing the button located on the overhead console.
Liftgate Handle Location
54 THINGS TO KNOW BEFORE STARTING YOUR VEHICLE
Page 58 of 573
The power liftgate may be closed by pressing the button,
located in the upper left trim in the liftgate opening.
Pushing once will only close the liftgate. This button
cannot be used to open the liftgate.When the RKE transmitter button is pressed and the
Flash Lights feature is enabled, the tail lights will flash
and several audible beeps will occur to signal that the
liftgate is opening or closing.
Overhead Console Master Power Switch
1 — Left Door
3 — Right Door
2 — Liftgate 4 — Master Lock
Rear Power Liftgate Switch
2
THINGS TO KNOW BEFORE STARTING YOUR VEHICLE 55
Page 61 of 573

•An energy-absorbing steering column and steering
wheel
•Knee bolsters/blockers for front seat occupants
•Front seat belts incorporate pretensioners that may
enhance occupant protection by managing occupant
energy during an impact event
•All seat belt systems (except the driver ’s and third row
center) include Automatic Locking Retractors (ALRs),
which lock the seat belt webbing into position by
extending the belt all the way out and then adjusting
the belt to the desired length to restrain a child seat or
secure a large item in a seat
Please pay close attention to the information in this
section. It tells you how to use your restraint system
properly, to keep you and your passengers as safe as
possible. If you will be carrying children too small for adult-sized
seat belts, the seat belts or the Lower Anchors and Tether
for CHildren (LATCH) feature also can be used to hold
infant and child restraint systems. For more information
on LATCH, refer to Lower Anchors and Tether for
CHildren (LATCH).
NOTE:
The Advanced Front Air Bags have a multistage
inflator design. This allows the air bag to have different
rates of inflation based on the severity and type of
collision.
Here are some simple steps you can take to minimize the
risk of harm from a deploying air bag:
1. Children 12 years old and under should always ride
buckled up in a rear seat.
58 THINGS TO KNOW BEFORE STARTING YOUR VEHICLE
Page 64 of 573

Buckle up even though you are an excellent driver, even
on short trips. Someone on the road may be a poor driver
and cause an accident that includes you. This can happen
far away from home or on your own street.
Research has shown that seat belts save lives, and they
can reduce the seriousness of injuries in an accident.
Some of the worst injuries happen when people are
thrown from the vehicle. Seat belts reduce the possibility
of ejection and the risk of injury caused by striking the
inside of the vehicle. Everyone in a motor vehicle should
be belted at all times.
Lap/Shoulder Belts
All seats in your vehicle are equipped with lap/shoulder
belts.The belt webbing in the retractor is designed to lock
during very sudden stops or accidents. This feature
allows the shoulder part of the belt to move freely with
you under normal conditions. However, in an accident
the belt will lock and reduce the risk of you striking the
inside of the vehicle or being thrown out.
WARNING!
•It is dangerous to ride in a cargo area, inside or
outside of a vehicle. In an accident, people riding
in these areas are more likely to be seriously
injured or killed.
•Do not allow people to ride in any area of your
vehicle that is not equipped with seats and seat
belts.
•Be sure everyone in your vehicle is in a seat and
using a seat belt properly.
(Continued)
2
THINGS TO KNOW BEFORE STARTING YOUR VEHICLE 61