Page 138 of 573
Vehicles Equipped With Remote Start
On models that are equipped with remote start, the
driver ’s heated seat and Heated Steering Wheel can be
programmed to come on during a remote start. Refer to
“Remote Starting System — If Equipped” in “Things To
Know Before Starting Your Vehicle” for further
information.
Front Heated Seats
There are two heated seat switches that allow the driver
and passenger to operate the seats independently. The
controls for each heater are located on the switch bank
below the climate controls.
You can choose from HIGH, LOW or OFF heat settings.
Amber indicator lights in each switch indicate the level of
heat in use. Two indicator lights will illuminate for
HIGH, one for LOW and none for OFF.Press the switch once to select HIGH-level
heating. Press the switch a second time to select
LOW-level heating. Press the switch a third
time to shut the heating elements OFF.
NOTE: Once a heat setting is selected, heat will be felt
within two to five minutes.
When the HIGH-level setting is selected, the heater will
provide a boosted heat level during the initial stages of
operation. Then, the heat output will drop to the normal
HIGH-level. If the HIGH-level setting is selected, the
system will automatically switch to LOW-level after
approximately 30 minutes of continuous operation. At
that time, the number of illuminated LEDs changes from
two to one, indicating the change. The LOW-level setting
will turn OFF automatically after approximately
45 minutes.
3
UNDERSTANDING THE FEATURES OF YOUR VEHICLE 135
Page 139 of 573
Rear Heated Seats
On some models, the second row seats are equipped with
heaters. There are two heated seat switches that allow the
second row passengers to operate the seats indepen-
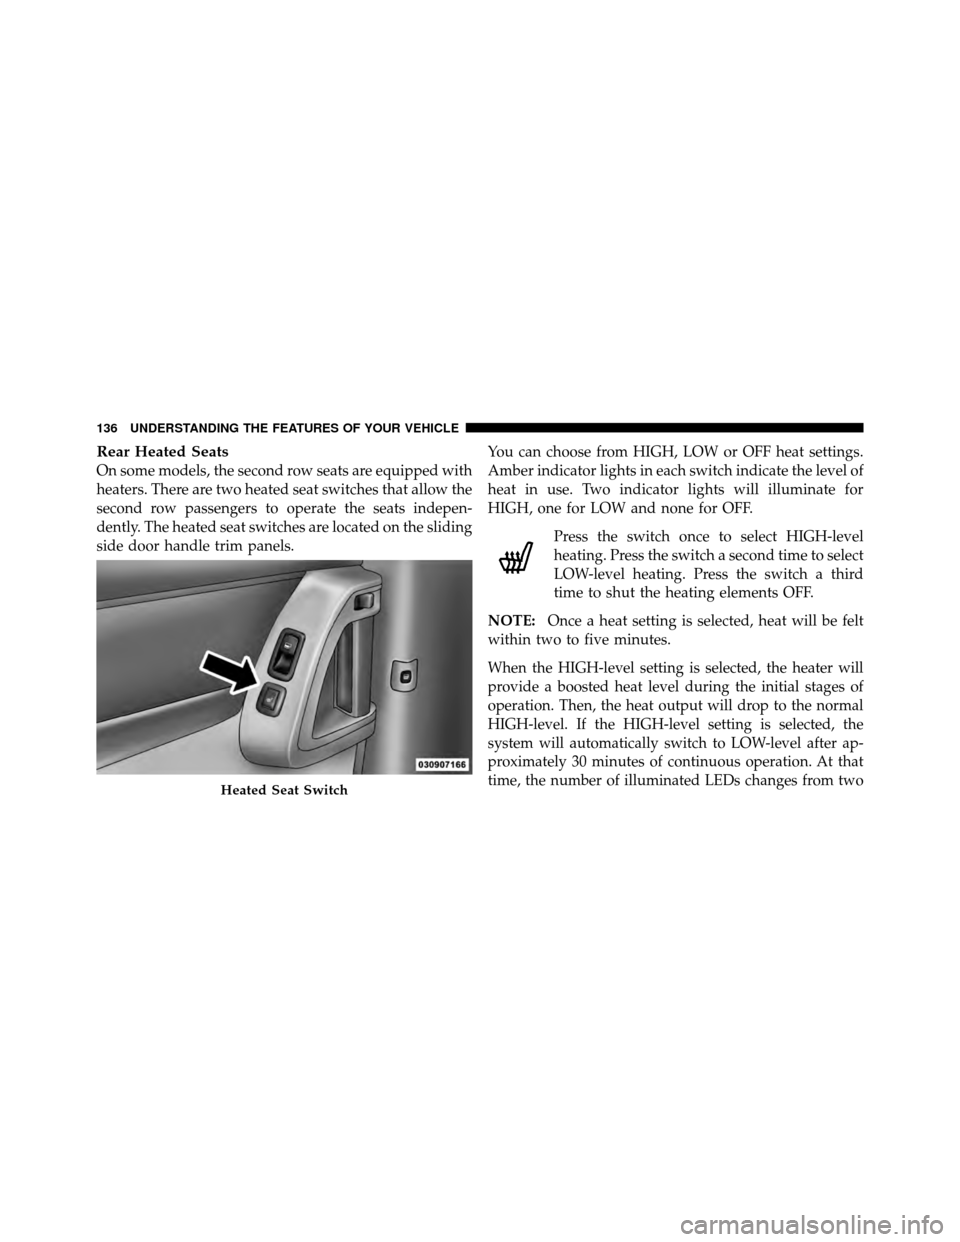
dently. The heated seat switches are located on the sliding
side door handle trim panels.You can choose from HIGH, LOW or OFF heat settings.
Amber indicator lights in each switch indicate the level of
heat in use. Two indicator lights will illuminate for
HIGH, one for LOW and none for OFF.
Press the switch once to select HIGH-level
heating. Press the switch a second time to select
LOW-level heating. Press the switch a third
time to shut the heating elements OFF.
NOTE: Once a heat setting is selected, heat will be felt
within two to five minutes.
When the HIGH-level setting is selected, the heater will
provide a boosted heat level during the initial stages of
operation. Then, the heat output will drop to the normal
HIGH-level. If the HIGH-level setting is selected, the
system will automatically switch to LOW-level after ap-
proximately 30 minutes of continuous operation. At that
time, the number of illuminated LEDs changes from two
Heated Seat Switch
136 UNDERSTANDING THE FEATURES OF YOUR VEHICLE
Page 168 of 573
A recall can be cancelled by pressing any of the
MEMORY buttons on the driver’s door during a recall (S,
1, or 2). When a recall is cancelled, the driver’s seat,
driver’s mirror, and the pedals stop moving. A delay of
one second will occur before another recall can be
selected.
To Disable RKE Transmitter Linked To Memory
1. Turn the ignition switch to the OFF position and
remove the key.
2. Press and release MEMORY button 1. The system will
recall any memory settings stored in position 1. Wait for
the system to complete the memory recall before continu-
ing to Step 3.
3. Press and release the memory SET (S) button located
on the driver’s door. A chime will sound signaling that
you are in the memory set mode.4. Within five seconds, press and release MEMORY
button 1 on the driver’s door. A chime will sound
signaling to you that the driver memory has been set.
5. Within five seconds, press and release the UNLOCK
button on the RKE transmitter. A chime will sound
signaling to you that the RKE transmitter link has been
successfully disabled.
To disable another RKE transmitter linked to either
Memory Position, repeat Steps 1 to 5 for each RKE
transmitter.
NOTE:
Once programmed, all RKE transmitters linked
to memory can be easily enabled or disabled at one time.
Refer to “Electronic Vehicle Information Center (EVIC)/
Customer-Programmable Features� in “Understanding
Your Instrument Panel” for further information.
3
UNDERSTANDING THE FEATURES OF YOUR VEHICLE 165
Page 173 of 573
Dimmer Control
With the parking lights or headlights on, rotating the
dimmer control for the interior lights on the instrument
panel upward will increase the brightness of the instru-
ment panel lights.
Parade Mode (Daytime Brightness Feature)
Rotate the dimmer control to the first detent. This feature
brightens the odometer, radio and overhead displays
when the parking lights or headlights are on.
Interior Lights On
Rotate the dimmer control completely upward to the
second detent (extreme top position) to turn on the
interior lights. The interior lights will remain on when the
dimmer control is in this position.
Halo Lights — If Equipped
Halo lights are strategically placed soft lighting that help
to illuminate specific areas to aid the occupants in
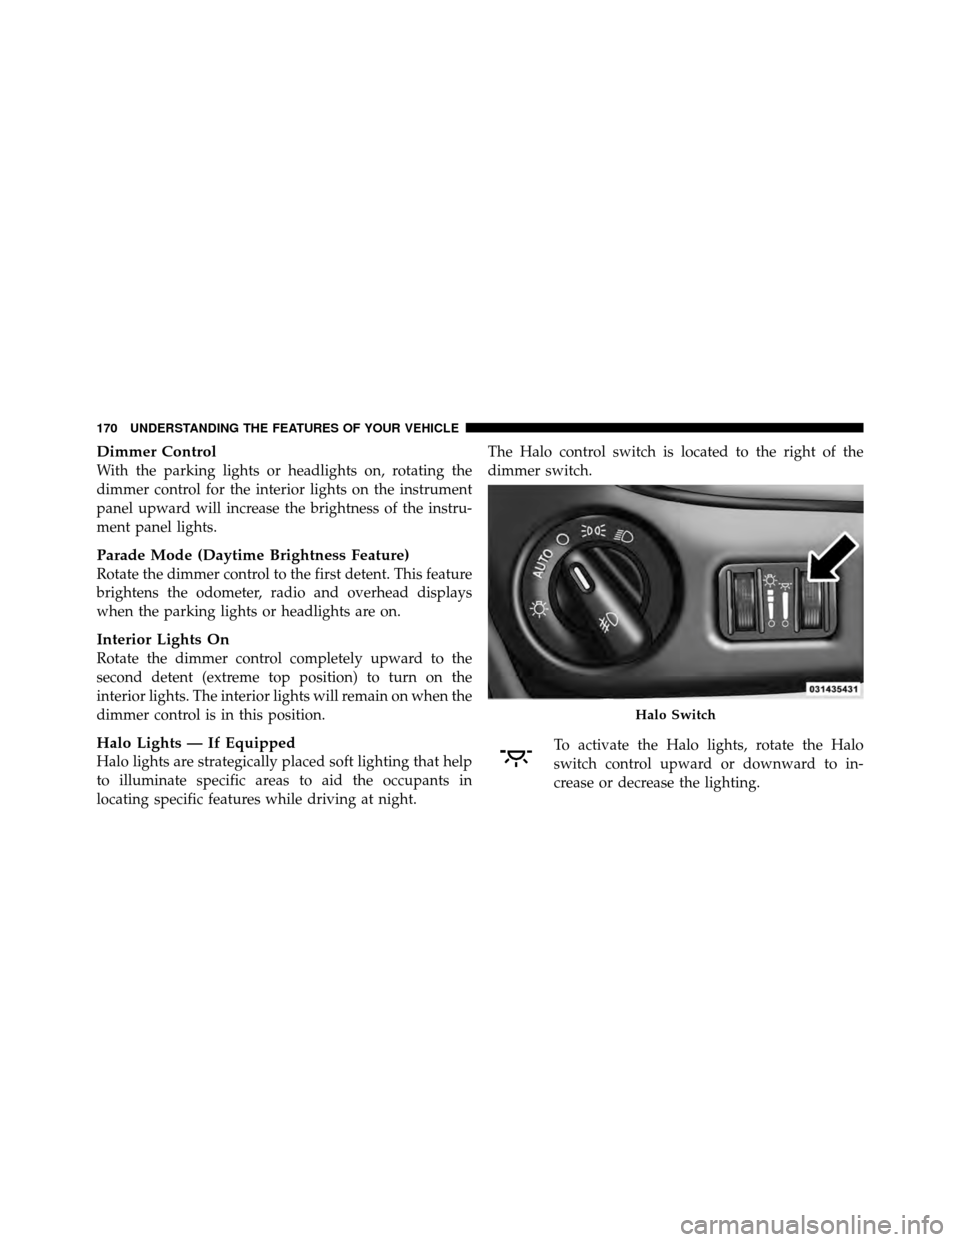
locating specific features while driving at night.The Halo control switch is located to the right of the
dimmer switch.
To activate the Halo lights, rotate the Halo
switch control upward or downward to in-
crease or decrease the lighting.
Halo Switch
170 UNDERSTANDING THE FEATURES OF YOUR VEHICLE
Page 174 of 573
Parking Lights
Turn the headlight switch knob to the first detent
to turn the parking lights on. This also turns on all
instrument panel lighting.
Headlights
Turn the headlight switch knob to the second
detent to turn the headlights and parking lights
on. This also turns on all instrument panel
lighting.
To change the brightness of the instrument panel lights,
rotate the dimmer control up or down.
Automatic Headlights — If Equipped
This system automatically turns your headlights on or off
based on ambient light levels. To turn the system on, turn
the headlight switch to the extreme counterclockwise
position aligning the indicator with AUTO on the head-
light switch. When the system is on, the Headlight Time
Delay feature is also on. This means your headlights will stay on for up to 90 seconds after you turn the ignition
switch OFF. To turn the Automatic System off, turn the
headlight switch clockwise to the O (Off) position.
NOTE:
The engine must be running before the head-
lights will come on in the Automatic mode.
Headlights On With Wipers — If Equipped
When your headlights are in the Automatic mode and the
engine is running, the headlights will automatically turn
on when the wiper system is also turned on. Headlights
on when windshield wipers are on may be found on
vehicles equipped with an automatic headlight system.
Refer to “Electronic Vehicle Information Center (EVIC)/
Customer-Programmable Features” in “Understanding
Your Instrument Panel” for further information.
Headlight Delay — If Equipped
This feature provides the safety of headlight illumination
for up to 90 seconds after exiting your vehicle.
3
UNDERSTANDING THE FEATURES OF YOUR VEHICLE 171
Page 182 of 573
The Rain Sensing system has protective features for the
wiper blades and arms. It will not operate under the
following conditions:
•Low Temperature Wipe Inhibit— The Rain Sensing
feature will not operate when the ignition is first
switched ON, and the vehicle is stationary, and the
outside temperature is below 32°F (0°C), unless the
wiper control on the multifunction lever is moved, or
the vehicle speed becomes greater than 0 mph
(0 km/h), or the outside temperature rises above
freezing.
•Neutral Wipe Inhibit — The Rain Sensing feature will
not operate when the ignition is ON, and the trans-
mission shift lever is in the NEUTRAL position, and the vehicle speed is less than 5 mph (8 km/h), unless
the wiper control on the multifunction lever is moved
or the shift lever is moved out of the NEUTRAL
position.
•Remote Start Mode Inhibit
— On vehicles equipped
with Remote Starting system, Rain Sensing wipers are
not operational when the vehicle is in the remote start
mode. Once the operator is in the vehicle and has
placed the ignition switch in the RUN position, rain
sensing wiper operation can resume, if it has been
selected, and no other inhibit conditions (mentioned
previously) exist.3
UNDERSTANDING THE FEATURES OF YOUR VEHICLE 179
Page 184 of 573

HEATED STEERING WHEEL — IF EQUIPPED
The steering wheel contains a heating element that helps
warm your hands in cold weather. The heated steering
wheel has only one temperature setting. Once the heated
steering wheel has been turned on it will operate for
approximately 58 to 70 minutes before automatically
shutting off. The heated steering wheel can shut off early
or may not turn on when the steering wheel is already
warm.
The heated steering wheel switch is located on the switch
bank below the climate controls.Press the switch to turn on the heated
steering wheel. The light on the switch
will illuminate to indicate the steering
wheel heater is on. Pressing the switch
a second time will turn off the heated
steering wheel and light indicator. NOTE:
The engine must be running for the heated
steering wheel to operate.
Vehicles Equipped With Remote Start
On models that are equipped with remote start, the
heated steering wheel can be programmed to come on
during a remote start. Refer to “Remote Starting System
— If Equipped” in “Things to Know Before Starting Your
Vehicle” for further information.
WARNING!
•Persons who are unable to feel pain to the skin
because of advanced age, chronic illness, diabetes,
spinal cord injury, medication, alcohol use, ex-
haustion, or other physical conditions must exer-
cise care when using the steering wheel heater. It
may cause burns even at low temperatures, espe-
cially if used for long periods.
(Continued)
3
UNDERSTANDING THE FEATURES OF YOUR VEHICLE 181
Page 189 of 573
To Accelerate For Passing
Press the accelerator as you would normally. When the
pedal is released, the vehicle will return to the set speed.
Using Electronic Speed Control On Hills
The transmission may downshift on hills to maintain the
vehicle set speed.
NOTE:The Electronic Speed Control system maintains
speed up and down hills. A slight speed change on
moderate hills is normal.
On steep hills, a greater speed loss or gain may occur so
it may be preferable to drive without Electronic Speed
Control.
WARNING!
Electronic Speed Control can be dangerous where the
system cannot maintain a constant speed. Your ve-
hicle could go too fast for the conditions, and you
could lose control and have an accident. Do not use
Electronic Speed Control in heavy traffic or on roads
that are winding, icy, snow-covered or slippery.
PARKSENSE� REAR PARK ASSIST —
IF EQUIPPED
The ParkSense� Rear Park Assist system provides visual
and audible indications of the distance between the rear
fascia and a detected obstacle when backing up, e.g.
during a parking maneuver. Refer to ParkSense� System
Usage Precautions for limitations of this system and
recommendations.
186 UNDERSTANDING THE FEATURES OF YOUR VEHICLE