Page 493 of 573
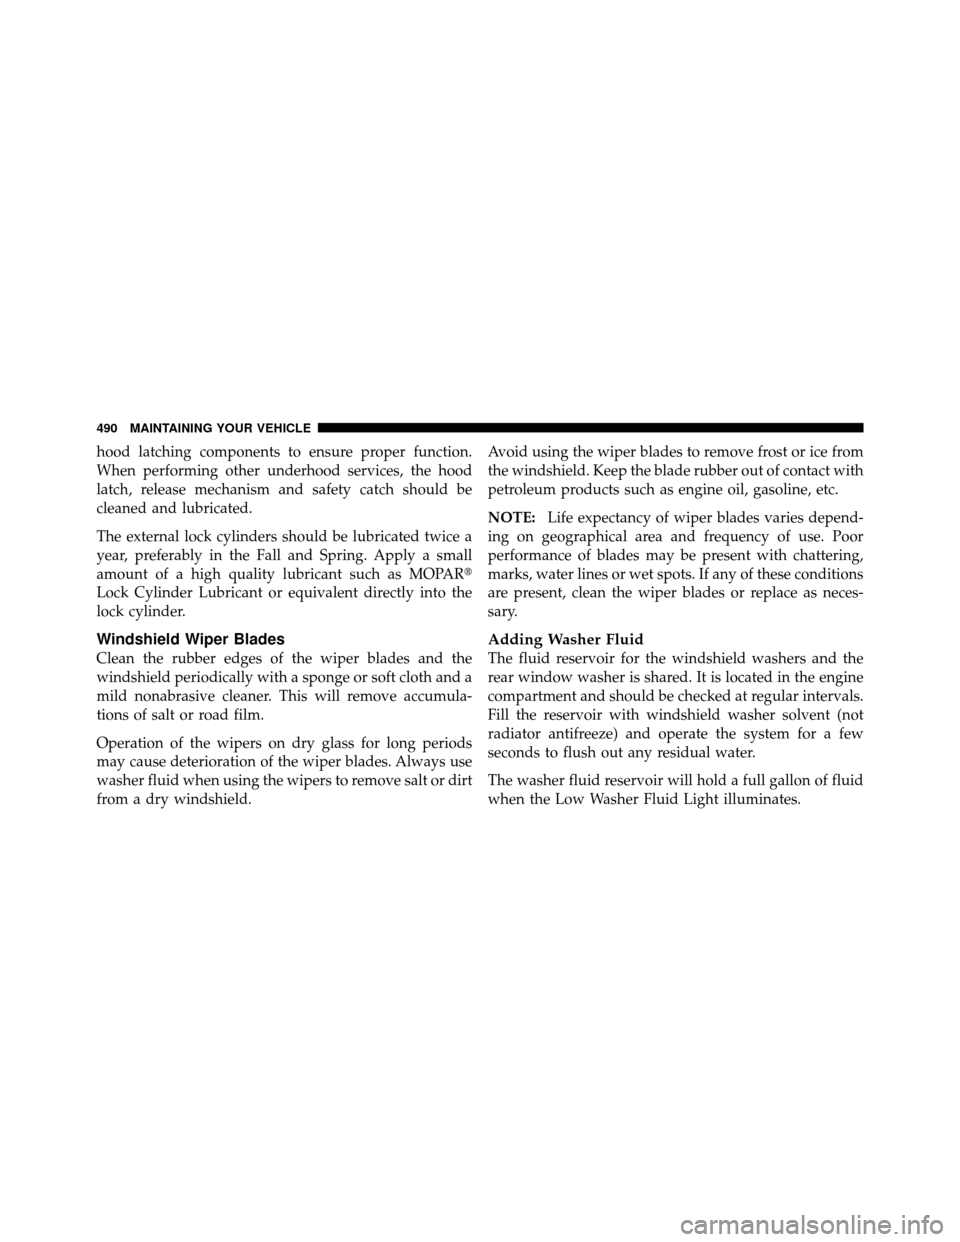
hood latching components to ensure proper function.
When performing other underhood services, the hood
latch, release mechanism and safety catch should be
cleaned and lubricated.
The external lock cylinders should be lubricated twice a
year, preferably in the Fall and Spring. Apply a small
amount of a high quality lubricant such as MOPAR�
Lock Cylinder Lubricant or equivalent directly into the
lock cylinder.
Windshield Wiper Blades
Clean the rubber edges of the wiper blades and the
windshield periodically with a sponge or soft cloth and a
mild nonabrasive cleaner. This will remove accumula-
tions of salt or road film.
Operation of the wipers on dry glass for long periods
may cause deterioration of the wiper blades. Always use
washer fluid when using the wipers to remove salt or dirt
from a dry windshield.Avoid using the wiper blades to remove frost or ice from
the windshield. Keep the blade rubber out of contact with
petroleum products such as engine oil, gasoline, etc.
NOTE:
Life expectancy of wiper blades varies depend-
ing on geographical area and frequency of use. Poor
performance of blades may be present with chattering,
marks, water lines or wet spots. If any of these conditions
are present, clean the wiper blades or replace as neces-
sary.
Adding Washer Fluid
The fluid reservoir for the windshield washers and the
rear window washer is shared. It is located in the engine
compartment and should be checked at regular intervals.
Fill the reservoir with windshield washer solvent (not
radiator antifreeze) and operate the system for a few
seconds to flush out any residual water.
The washer fluid reservoir will hold a full gallon of fluid
when the Low Washer Fluid Light illuminates.
490 MAINTAINING YOUR VEHICLE
Page 500 of 573
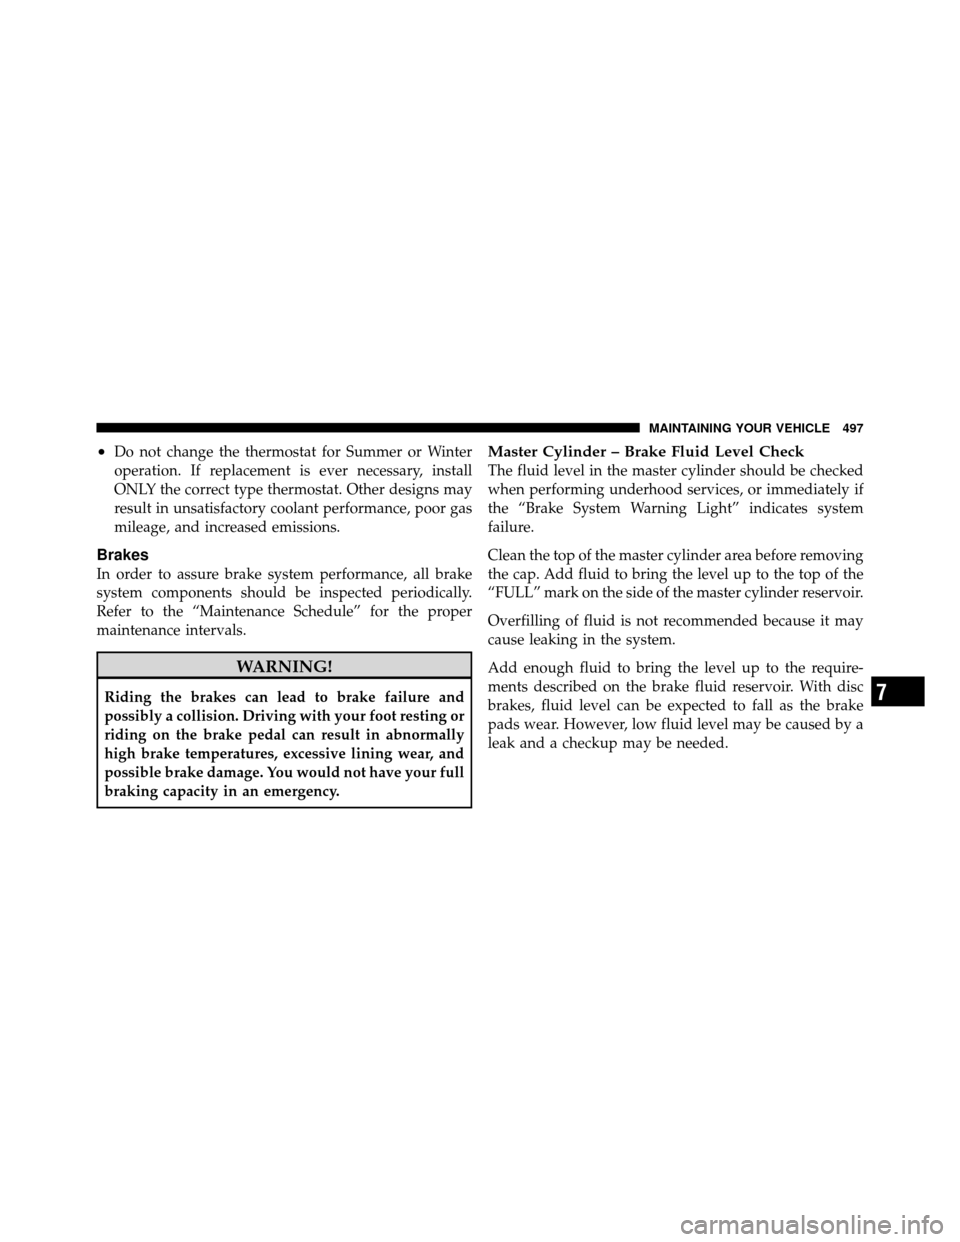
•Do not change the thermostat for Summer or Winter
operation. If replacement is ever necessary, install
ONLY the correct type thermostat. Other designs may
result in unsatisfactory coolant performance, poor gas
mileage, and increased emissions.
Brakes
In order to assure brake system performance, all brake
system components should be inspected periodically.
Refer to the “Maintenance Schedule” for the proper
maintenance intervals.
WARNING!
Riding the brakes can lead to brake failure and
possibly a collision. Driving with your foot resting or
riding on the brake pedal can result in abnormally
high brake temperatures, excessive lining wear, and
possible brake damage. You would not have your full
braking capacity in an emergency.
Master Cylinder – Brake Fluid Level Check
The fluid level in the master cylinder should be checked
when performing underhood services, or immediately if
the “Brake System Warning Light” indicates system
failure.
Clean the top of the master cylinder area before removing
the cap. Add fluid to bring the level up to the top of the
“FULL” mark on the side of the master cylinder reservoir.
Overfilling of fluid is not recommended because it may
cause leaking in the system.
Add enough fluid to bring the level up to the require-
ments described on the brake fluid reservoir. With disc
brakes, fluid level can be expected to fall as the brake
pads wear. However, low fluid level may be caused by a
leak and a checkup may be needed.
7
MAINTAINING YOUR VEHICLE 497
Page 508 of 573
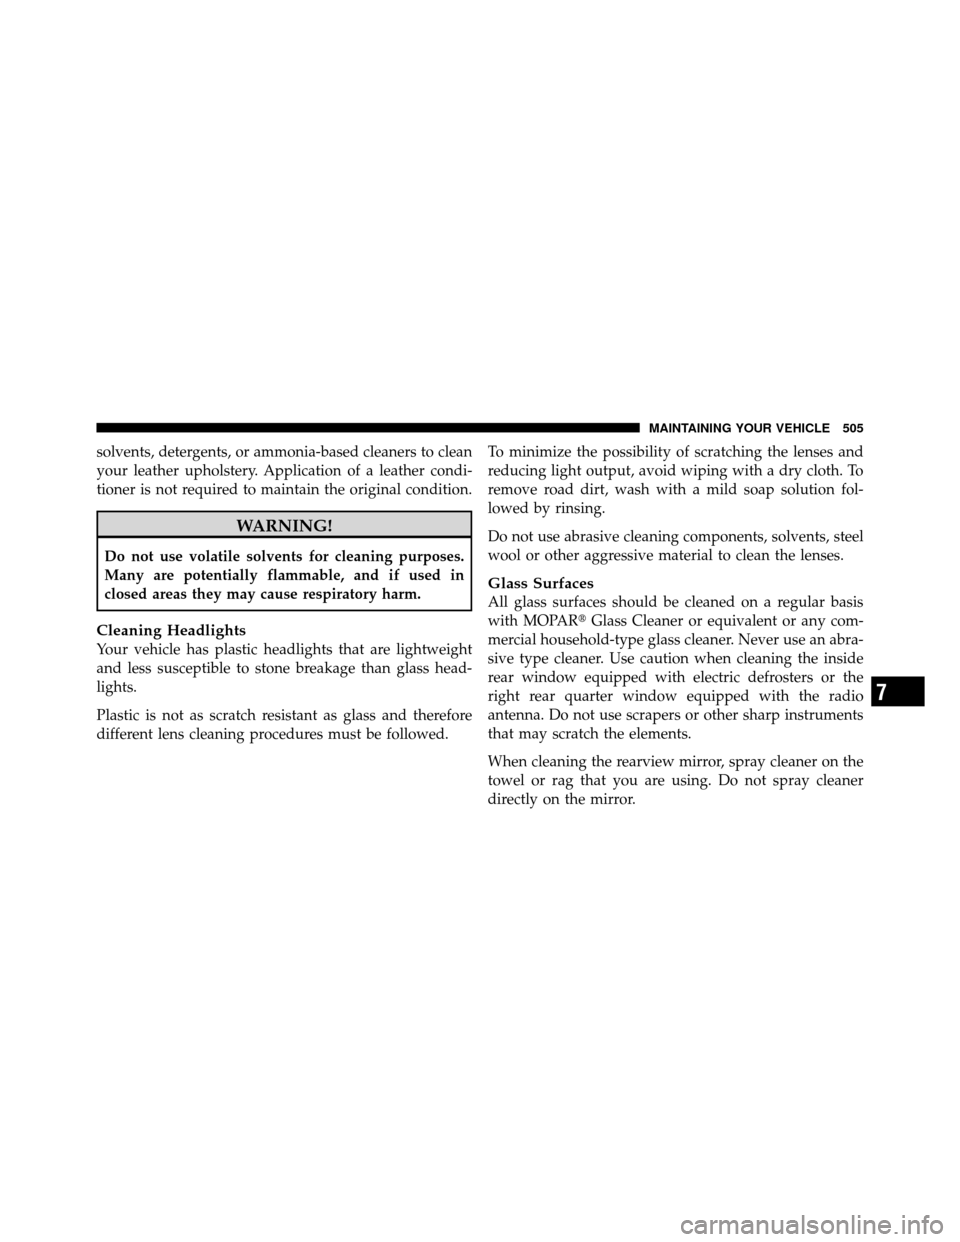
solvents, detergents, or ammonia-based cleaners to clean
your leather upholstery. Application of a leather condi-
tioner is not required to maintain the original condition.
WARNING!
Do not use volatile solvents for cleaning purposes.
Many are potentially flammable, and if used in
closed areas they may cause respiratory harm.
Cleaning Headlights
Your vehicle has plastic headlights that are lightweight
and less susceptible to stone breakage than glass head-
lights.
Plastic is not as scratch resistant as glass and therefore
different lens cleaning procedures must be followed.To minimize the possibility of scratching the lenses and
reducing light output, avoid wiping with a dry cloth. To
remove road dirt, wash with a mild soap solution fol-
lowed by rinsing.
Do not use abrasive cleaning components, solvents, steel
wool or other aggressive material to clean the lenses.
Glass Surfaces
All glass surfaces should be cleaned on a regular basis
with MOPAR�
Glass Cleaner or equivalent or any com-
mercial household-type glass cleaner. Never use an abra-
sive type cleaner. Use caution when cleaning the inside
rear window equipped with electric defrosters or the
right rear quarter window equipped with the radio
antenna. Do not use scrapers or other sharp instruments
that may scratch the elements.
When cleaning the rearview mirror, spray cleaner on the
towel or rag that you are using. Do not spray cleaner
directly on the mirror.
7
MAINTAINING YOUR VEHICLE 505
Page 514 of 573
CavityCartridge
Fuse Mini-
Fuse Description
M13 — 20 Amp YellowIgnition Off Draw—
Instrument Cluster,
SIREN, Clock Mod-
ule, Multi-Function
Control Switch/ITM
M14 — 20 Amp YellowSpare Fuse
M15 — 20 Amp YellowRear View Mirror,
Instrument Cluster,
Multi-Function Con-
trol Switch, Tire Pres-
sure Monitor, Glow
Plug Module – Export
Diesel Only, Assy-
Shifter (Hall Effect),
Acoustic Noise Can-
cellationCavity
Cartridge
Fuse Mini-
Fuse Description
M16 — 10 Amp RedAirbag Module/
Occupant Classifica-
tion Module
M17 — 15 Amp BlueLeft Tail/License/
Park Lamp, Running
Lamps
M18 — 15 Amp BlueRight Tail/Park/Run
Lamp
M19 — 25 Amp NaturalAutomatic Shutdown
#1 and #2
M20 — 15 Amp BlueInstrument Cluster
Interior Light, Switch
Bank, Steering Col-
umn Module, Switch
Steering Wheel
M21 — 20 Amp YellowAutomatic Shutdown
#3
7
MAINTAINING YOUR VEHICLE 511
Page 516 of 573
CavityCartridge
Fuse Mini-
Fuse Description
M34 — 10 Amp RedPark Assist, Heater
Climate Control Sys-
tem Module, Head-
lamp Wash, Compass,
IR Sensor, Rear Cam-
era, Lamp Door FT
Drv/Pass, Lamp
Flashlight, AHLM,
Relay Diesel Cabin
Heater, Rad Fan Die-
sel
M35 — 10 Amp RedHeated Mirrors
M36 — 20 Amp YellowPower Outlet #3Cavity
Cartridge
Fuse Mini-
Fuse Description
M37 — 10 Amp RedAntilock Brakes, Sta-
bility Control System,
Stop Lamp Switch,
Fuel Pump Rly Hi
Control
M38 — 25 Amp NaturalDoor Lock/Unlock
Motors, Liftgate
Lock/Unlock Motors
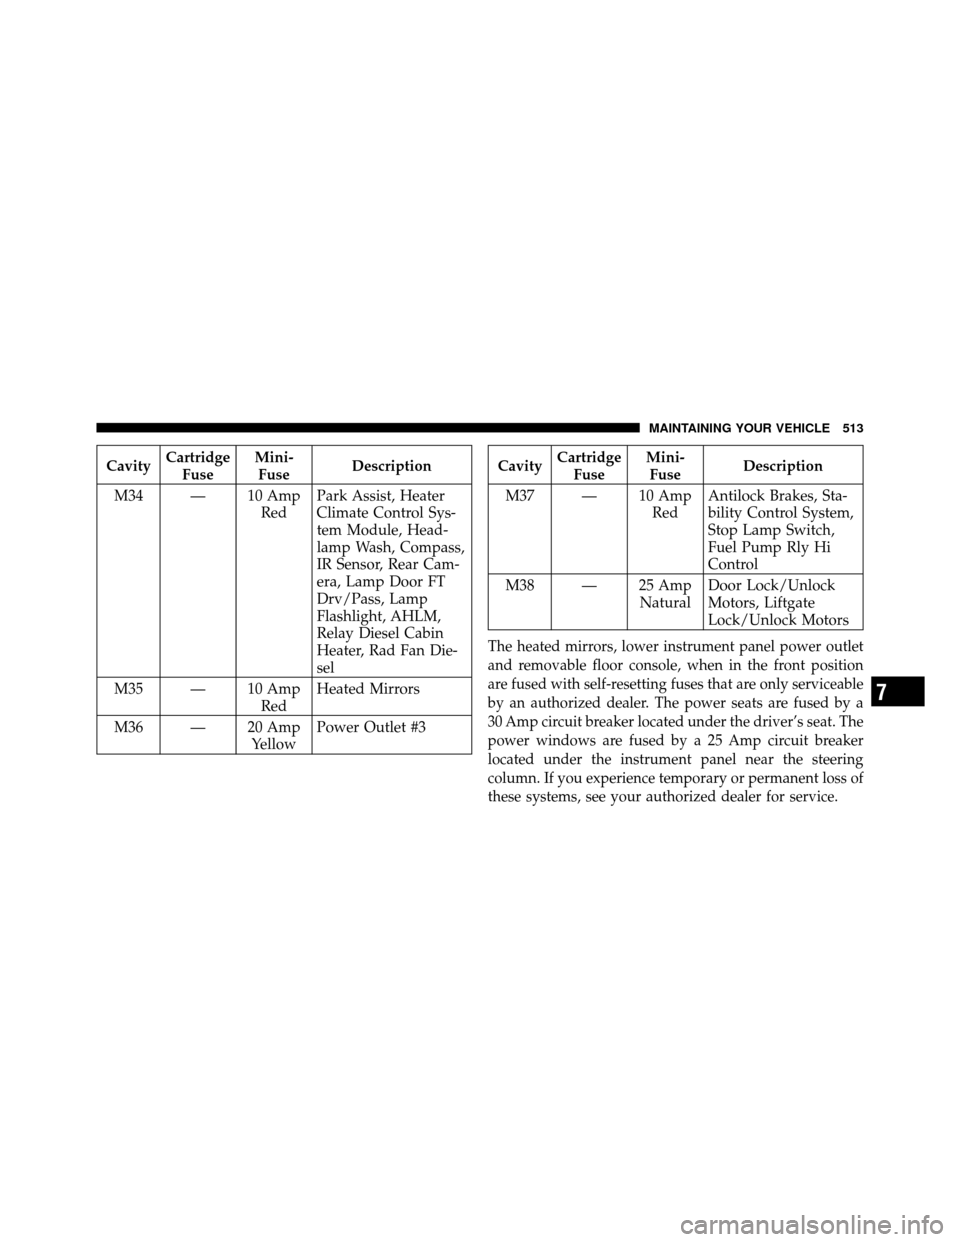
The heated mirrors, lower instrument panel power outlet
and removable floor console, when in the front position
are fused with self-resetting fuses that are only serviceable
by an authorized dealer. The power seats are fused by a
30 Amp circuit breaker located under the driver’s seat. The
power windows are fused by a 25 Amp circuit breaker
located under the instrument panel near the steering
column. If you experience temporary or permanent loss of
these systems, see your authorized dealer for service.
7
MAINTAINING YOUR VEHICLE 513
Page 517 of 573
VEHICLE STORAGE
If you are leaving your vehicle dormant for more than
21 days, you may want to take steps to protect your
battery. You may do the following:
•Remove the 20 Amp mini-fuse in the Totally Inte-
grated Power Module (TIPM) labeled Ignition-Off
Draw (IOD).
•Or, disconnect the negative cable from the battery.
•Anytime you store your vehicle, or keep it out of
service for two weeks or more, run the air conditioning
system at idle for about five minutes in the fresh air
and high blower setting. This will ensure adequate
system lubrication to minimize the possibility of com-
pressor damage when the system is started again.
REPLACEMENT BULBS
LIGHT BULBS – InteriorBulb Number
Center & Rear Dome Lamp ................. 578
Center & Rear Reading Lamps ............... 578
Front Door Courtesy Lamp .................. 578
Front Header Reading Lamps – If Equipped ..... 578
Instrument Cluster Lamps .................PC74
Liftgate Lamp(s) ......................... 578
Overhead Console Reading Lamps ..........PC579
Removable Console Lamp – If Equipped ........ 194
Visor Vanity Lamps .................... 6501966
NOTE: For lighted switches, see your authorized dealer
for replacement instructions.
All of the interior bulbs are glass wedge base or glass
cartridge types. Aluminum base bulbs are not approved
and should not be used for replacement.
514 MAINTAINING YOUR VEHICLE
Page 518 of 573
LIGHT BULBS – ExteriorBulb Number
Headlamp – (Low and High Beam Halogen) ..... H11
Headlamp (HID – If Equipped) Low Beam ...... D1S
Fog Lamp – If Equipped ................PSX24W
Front Side Marker ...................... W5W
Front Park/Turn Signal Lamp .....PY27/7W or 3757A
Rear Turn Signal Lamp .................. 3757A
Rear Tail, Stop, and Side Marker Lamp ........ LED
(Serviced at Authorized Dealer)
Backup ............................... 3157
Center High-Mounted Stop Lamp ............ LED
(Serviced at Authorized Dealer)
License ................................ 168
BULB REPLACEMENT
High Intensity Discharge Headlamps (HID) —
If Equipped
The headlamps are a type of high voltage discharge tube.
High voltage can remain in the circuit even with the headlamp switch off and the key removed.
Because of
this, you should not attempt to service a headlamp bulb
yourself. If a headlamp bulb fails, take your vehicle to
an authorized dealer for service.
WARNING!
A transient high voltage occurs at the bulb sockets of
High Intensity Discharge (HID) headlamps when the
headlamp switch is turned ON. It may cause serious
electrical shock or electrocution if not serviced prop-
erly. See your authorized dealer for service.
NOTE: On vehicles equipped with High Intensity Dis-
charge (HID) headlamps, when the headlamps are
turned on, there is a blue hue to the lamps. This dimin-
ishes and becomes more white after approximately
10 seconds, as the system charges.
7
MAINTAINING YOUR VEHICLE 515
Page 521 of 573
2. Remove the tail lamp assembly by removing the two
screws from the inboard side. Use a fiber stick or similar
tool to gently pry the light on the outboard side to
disengage the two ball studs.NOTE:
•If a screwdriver is used, make sure a soft material is
placed between the vehicle body and tool so not to
scratch the paint.
•The PRY location is best closest to the studs while
dislodging them separately.
3. Twist the socket and remove it from the lamp assem-
bly.
4. Pull the bulb to remove it from the socket.
5. Replace the bulb, reinstall the socket, and reattach the
lamp assembly.
Center High-Mounted Stop Lamp (CHMSL)
The CHMSL uses LED lamps that are not serviceable
separately. The CHMSL must be replaced as an assembly,
see your authorized dealer.
518 MAINTAINING YOUR VEHICLE