2011 CHEVROLET SUBURBAN wiring
[x] Cancel search: wiringPage 376 of 542

Black plate (88,1)Chevrolet Tahoe/Suburban Owner Manual - 2011
9-88 Driving and Operating
Weight‐Distributing Hitch
Adjustment
A:Body to Ground Distance
B: Front of Vehicle
When using a weight-distributing
hitch, the spring bars should be
adjusted so the distance (A) is the
same after coupling the trailer to the
tow vehicle and adjusting the hitch.
Safety Chains
Always attach chains between the
vehicle and the trailer. Cross the
safety chains under the tongue of
the trailer to help prevent the tongue
from contacting the road if it
becomes separated from the hitch.
Instructions about safety chains
may be provided by the hitch
manufacturer or by the trailer
manufacturer. If the trailer being
towed weighs up to 2 271 kg
(5,000 lbs) with a factory-installed
step bumper, safety chains may be
attached to the attaching points on
the bumper, otherwise, safety
chains should be attached to holes
on the trailer hitch platform. Always
leave just enough slack so the
combination can turn. Never allow
safety chains to drag on the ground.
Trailer Brakes
A loaded trailer that weighs more
than 900 kg (2,000 lbs) needs to
have its own brake system that is
adequate for the weight of the
trailer. Be sure to read and follow
the instructions for the trailer brakes
so they are installed, adjusted and
maintained properly.
Since the vehicle is equipped with
StabiliTrak
®, the trailer brakes
cannot tap into the vehicle's
hydraulic system.
Trailer Wiring Harness
The vehicle is equipped with the
following wiring harnesses for
towing a trailer.
Basic Trailer Wiring
The trailer wiring harness, with a
seven-pin connector, is located at
the rear of the vehicle and is tied to
the vehicle's frame. The harness
connector can be plugged into a
seven-pin universal heavy-duty
trailer connector available through
your dealer.
Page 377 of 542
Black plate (89,1)Chevrolet Tahoe/Suburban Owner Manual - 2011
Driving and Operating 9-89
The seven-wire harness contains
the following trailer circuits:
.Yellow: Left Stop/Turn Signal
.Dark Green: Right Stop/Turn
Signal
.Brown: Taillamps
.White: Ground
.Light Green: Back-up Lamps
.Red: Battery Feed*
.Dark Blue: Trailer Brake*
*The fuses for these two circuits are
installed in the underhood electrical
center, but the wires are not
connected. They should be
connected by your dealer or a
qualified service center. Heavy-Duty Trailer Wiring Harness
Package
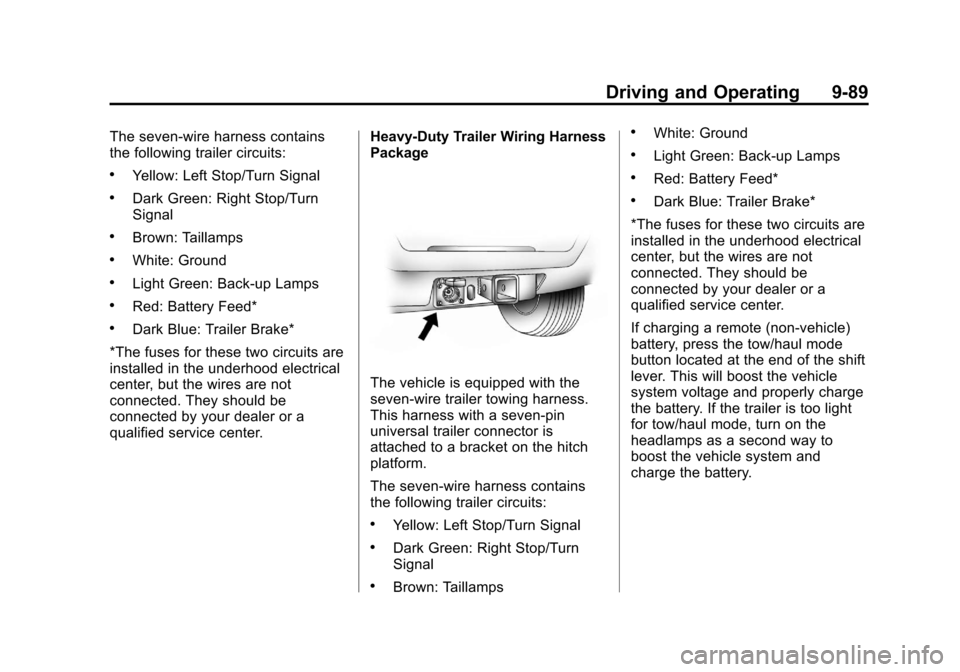
The vehicle is equipped with the
seven-wire trailer towing harness.
This harness with a seven-pin
universal trailer connector is
attached to a bracket on the hitch
platform.
The seven-wire harness contains
the following trailer circuits:
.Yellow: Left Stop/Turn Signal
.Dark Green: Right Stop/Turn
Signal
.Brown: Taillamps
.White: Ground
.Light Green: Back-up Lamps
.Red: Battery Feed*
.Dark Blue: Trailer Brake*
*The fuses for these two circuits are
installed in the underhood electrical
center, but the wires are not
connected. They should be
connected by your dealer or a
qualified service center.
If charging a remote (non-vehicle)
battery, press the tow/haul mode
button located at the end of the shift
lever. This will boost the vehicle
system voltage and properly charge
the battery. If the trailer is too light
for tow/haul mode, turn on the
headlamps as a second way to
boost the vehicle system and
charge the battery.
Page 378 of 542
Black plate (90,1)Chevrolet Tahoe/Suburban Owner Manual - 2011
9-90 Driving and Operating
Electric Brake Control Wiring
Provisions
These wiring provisions are
included with the vehicle as part of
the trailer wiring package. These
provisions are for an electric brake
controller. The instrument panel
contains blunt cut wires near the
data link connector for the trailer
brake controller. The harness
contains the following wires:
.Dark Blue: Brake Signal to
Trailer Connector
.Red/Black: Battery
.Light Blue/White: Brake Switch
.White: Ground
It should be installed by your dealer
or a qualified service center.
If the vehicle is equipped with an
ITBC, the blunt cuts exist, but are
not connected further in the
harness. If an aftermarket trailer
brake controller is installed, the
ITBC must be disconnected. Do not power both ITBC and aftermarket
controllers to control the trailer
brakes at the same time.
Tow/Haul Mode
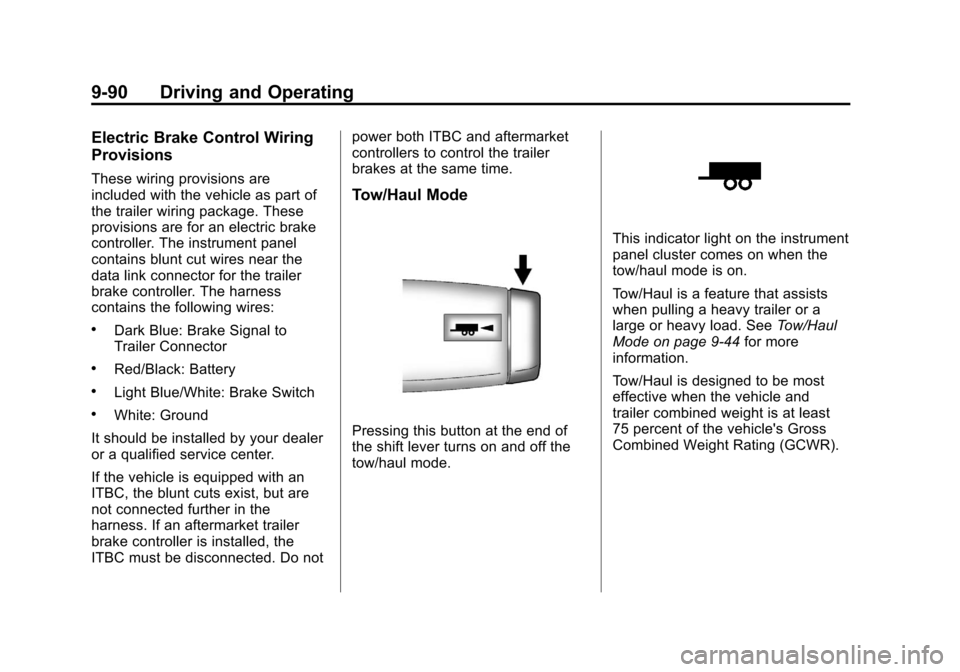
Pressing this button at the end of
the shift lever turns on and off the
tow/haul mode.
This indicator light on the instrument
panel cluster comes on when the
tow/haul mode is on.
Tow/Haul is a feature that assists
when pulling a heavy trailer or a
large or heavy load. See
Tow/Haul
Mode on page 9‑44 for more
information.
Tow/Haul is designed to be most
effective when the vehicle and
trailer combined weight is at least
75 percent of the vehicle's Gross
Combined Weight Rating (GCWR).
Page 382 of 542
Black plate (94,1)Chevrolet Tahoe/Suburban Owner Manual - 2011
9-94 Driving and Operating
0.0 (zero) gain is the factory default
setting. To properly adjust trailer
gain, see the Trailer Gain
Adjustment Procedure later in this
section.
TRAILER OUTPUT–This is
displayed any time a trailer with
electric brakes is connected. Output
to the electric brakes is based on
the amount of vehicle braking
present and relative to the Trailer
Gain setting. Output is displayed
from 0 to 10 bars for each gain
setting.
The Trailer Output will indicate
“- - - - - -“ on the Trailer Brake
Display Page whenever the
following occur:
.No trailer is connected.
.A trailer without electric brakes
is connected (no DIC message
is displayed).
.A trailer with electric brakes
has become disconnected
(a CHECK TRAILER WIRING
message will also be displayed
on the DIC).
.There is a fault present in the
wiring to the electric trailer
brakes (a CHECK TRAILER
WIRING message will also be
displayed on the DIC).
.There is a fault in the ITBC
system (a SERVICE TRAILER
BRAKE SYSTEM message will
also be displayed in the DIC).
Manual Trailer Brake Apply
The Manual Trailer Brake Apply
Lever is located on the Trailer Brake
Control Panel and is used to apply
the trailer ’s electric brakes
independent of the vehicle’s brakes.
This lever is used in the Trailer Gain
Adjustment Procedure to properly
adjust the power output to the trailer
brakes. Sliding the lever to the left
will apply only the trailer brakes.
The power output to the trailer is
indicated in the Trailer Brake Display Page in the DIC. If the
vehicle’s service brakes are applied
while using the Manual Trailer Brake
Apply Lever, the trailer output power
will be the greater of the two.
The trailer and the vehicle's brake
lamps will come on when either
vehicle braking or manual trailer
brakes are applied.
Trailer Gain Adjustment Procedure
Trailer Gain should be set for a
specific trailering condition and must
be adjusted any time vehicle
loading, trailer loading or road
surface conditions change.
Setting the Trailer Gain properly is
needed for the best trailer stopping
performance. A trailer that is
over-gained may result in locked
trailer brakes. A trailer that is
under-gained may result in not
enough trailer braking. Both of these
conditions may result in poorer
stopping and stability of the vehicle
and trailer.
Page 384 of 542
Black plate (96,1)Chevrolet Tahoe/Suburban Owner Manual - 2011
9-96 Driving and Operating
Other ITBC Related DIC Messages
In addition to displaying TRAILER
GAIN and TRAILER OUTPUT
through the DIC, trailer connection
and ITBC system status is displayed
in the DIC.
TRAILER CONNECTED–This
message will be briefly displayed
when a trailer with electric brakes is
first connected to the vehicle. This
message will automatically turn off
in about ten seconds. The driver
can also acknowledge this message
before it automatically turns off.
CHECK TRAILER WIRING –This
message will be displayed if:
1. The ITBC system first determines connection to a
trailer with electric brakes and
then the trailer harness becomes
disconnected from the vehicle. If the disconnect occurs while
the vehicle is stationary, this
message will automatically turn
off in about thirty seconds. This
message will also turn off if the
driver acknowledges this
message off or if the trailer
harness is re-connected.
If the disconnect occurs while
the vehicle is moving, this
message will continue until the
ignition is turned off. This
message will also turn off if the
driver acknowledges this
message off or if the trailer
harness is re-connected.
2. There is an electrical fault in the wiring to the electric trailer
brakes. This message will
continue as long as there is an
electrical fault in the trailer
wiring. This message will
also turn off if the driver
acknowledges this message off. To determine if the electrical fault is
on the vehicle side or trailer side of
the trailer wiring harness
connection, do the following:
1. Disconnect the trailer wiring
harness from the vehicle.
2. Turn the ignition OFF.
3. Wait ten seconds, then turn the ignition back to RUN.
4. If the CHECK TRAILER WIRING message re-appears, the
electrical fault is on the
vehicle side.
If the CHECK TRAILER WIRING
message only re-appears when
connecting the trailer wiring
harness to the vehicle, the
electrical fault is on the
trailer side.
SERVICE TRAILER BRAKE
SYSTEM –This message will be
displayed when there is a problem
with the ITBC system. If this
message persists over multiple
ignition cycles there is problem with
the ITBC system. Take the vehicle
Page 385 of 542
Black plate (97,1)Chevrolet Tahoe/Suburban Owner Manual - 2011
Driving and Operating 9-97
to an authorized GM dealer to have
the ITBC system diagnosed and
repaired.
If either the CHECK TRAILER
WIRING or SERVICE TRAILER
BRAKE SYSTEM message is
displayed while driving the vehicle,
power is no longer available to the
trailer brakes. When traffic
conditions allow, carefully pull the
vehicle over to the side of the road
and turn the ignition off. Check the
wiring connection to the trailer and
turn the ignition back on. If either of
these messages continues, either
the vehicle or trailer needs service.
An authorized GM dealer may be
able to diagnose and repair
problems with the trailer. However,
any diagnosis and repair of the
trailer is not covered under the
vehicle warranty. Please contact
your trailer dealer for assistance
with trailer repairs and trailer
warranty information.Conversions and
Add-Ons
Add-On Electrical
Equipment
Notice:Do not add anything
electrical to the vehicle unless
you check with your dealer first.
Some electrical equipment can
damage the vehicle and the
damage would not be covered by
the vehicle's warranty. Some
add-on electrical equipment can
keep other components from
working as they should.
Add-on equipment can drain the
vehicle's 12‐volt battery, even if the
vehicle is not operating.
The vehicle has an airbag system.
Before attempting to add anything
electrical to the vehicle, see
Servicing the Airbag-Equipped
Vehicle on page 3‑54 andAdding
Equipment to the Airbag-Equipped
Vehicle on page 3‑54.
Adding a Snow Plow or
Similar Equipment
Before installing a snow plow on
your vehicle, here are some things
you will need to know:
Notice: If your vehicle does not
have the snow plow prep
package, adding a plow can
damage your vehicle, and the
repairs would not be covered by
warranty. Unless your vehicle was
built to carry a snow plow, do not
add one to your vehicle. If your
vehicle has the snow plow prep
package, called RPO VYU, then
the payload your vehicle can
carry will be reduced when a
snow plow is installed. Your
vehicle can be damaged if either
the front or rear axle ratings or
the Gross Vehicle Weight (GVW)
are exceeded.
Some vehicles are built with a
special snow plow prep package,
called RPO VYU. If your vehicle has
this option, you can add a plow to it,
provided certain weights, such as
Page 389 of 542
Black plate (101,1)Chevrolet Tahoe/Suburban Owner Manual - 2011
Driving and Operating 9-101
Total vehicle reserve capacity is the
difference between your GVWR and
the weight of your vehicle with full
fuel and passengers. It is the
amount of weight you can add to
your vehicle before reaching your
GVWR. Keep in mind that reserve
capacity numbers are intended as a
guide when selecting the amount of
equipment or cargo your vehicle can
carry. If you are unsure of your
vehicle's front, rear, or total weight,
go to a weigh station and weigh
your vehicle. Your dealer can also
help you with this.
The total vehicle reserve capacity
for your vehicle can be found
in the lower right corner of the
Certification/Tire label as shown
previously.
See your dealer for additional
advice and information about using
a snow plow on your vehicle. Also,
seeVehicle Load Limits on
page 9‑23.Emergency Roof Lamp
Provisions
Vehicles with the RPO VYU snow
plow prep package also have an
emergency roof lamp provision
package, RPO TRW. Wiring for the
emergency roof lamp is provided
above the overhead console. See
Auxiliary Roof-Mounted Lamp on
page 6‑6 for switch location.
Page 430 of 542
Black plate (40,1)Chevrolet Tahoe/Suburban Owner Manual - 2011
10-40 Vehicle Care
4. Install the new bulb.
5. Reverse Steps 1 through 3 toreinstall the license plate lamp.
Replacement Bulbs
If the vehicle is a Hybrid, see the
Hybrid Supplement for more
information.
Exterior Lamp Bulb
Number
Back-up Lamp 7441
License Plate Lamp W5WLL
Rear Turn Signal
Lamp, Taillamp, and
Stoplamp 3057K
Side Marker Lamp 194
For replacement bulbs not listed
here, contact your dealer.
Electrical System
Electrical System
Overload
The vehicle has fuses and circuit
breakers to protect against an
electrical system overload.
When the current electrical load is
too heavy, the circuit breaker opens
and closes, protecting the circuit
until the current load returns to
normal or the problem is fixed. This
greatly reduces the chance of circuit
overload and fire caused by
electrical problems. Fuses and circuit breakers protect
the following in the vehicle:
.Headlamp Wiring
.Windshield Wiper Motor
.Power Windows and Other
Power Accessories
Replace a bad fuse with a new one
of the identical size and rating.
If there is a problem on the road and
a fuse needs to be replaced, the
same amperage fuse can be
borrowed. Choose some feature of
the vehicle that is not needed to use
and replace it as soon as possible.
Headlamp Wiring
An electrical overload may cause
the lamps to go on and off, or in
some cases to remain off. Have the
headlamp wiring checked right away
if the lamps go on and off or
remain off.