2011 CHEVROLET MALIBU key
[x] Cancel search: keyPage 47 of 382
Black plate (19,1)Chevrolet Malibu Owner Manual - 2011
Keys, Doors and Windows 2-19
Sun Visors
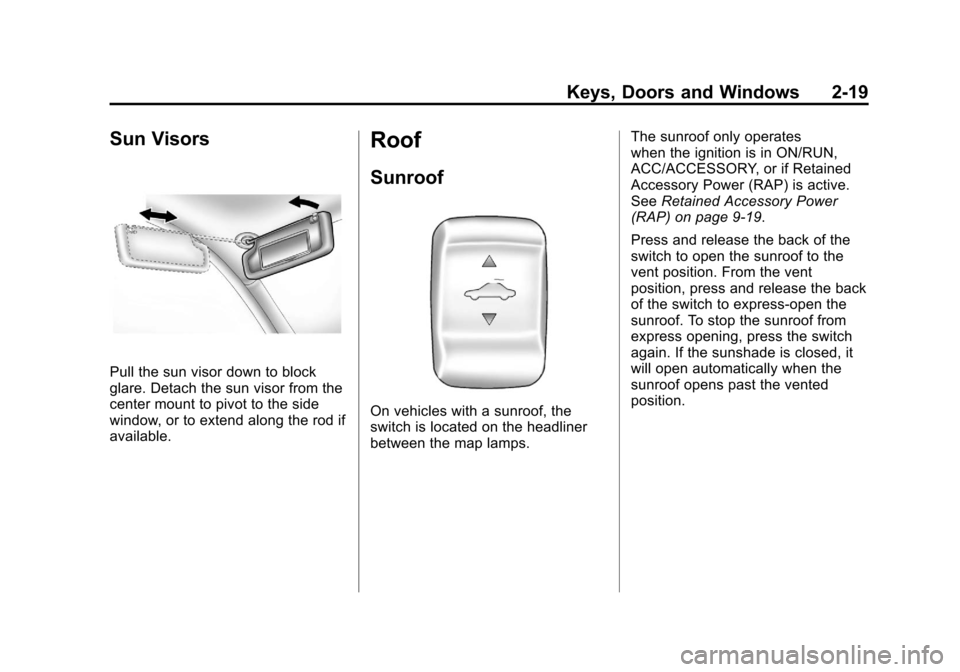
Pull the sun visor down to block
glare. Detach the sun visor from the
center mount to pivot to the side
window, or to extend along the rod if
available.
Roof
Sunroof
On vehicles with a sunroof, the
switch is located on the headliner
between the map lamps.The sunroof only operates
when the ignition is in ON/RUN,
ACC/ACCESSORY, or if Retained
Accessory Power (RAP) is active.
See
Retained Accessory Power
(RAP) on page 9‑19.
Press and release the back of the
switch to open the sunroof to the
vent position. From the vent
position, press and release the back
of the switch to express-open the
sunroof. To stop the sunroof from
express opening, press the switch
again. If the sunshade is closed, it
will open automatically when the
sunroof opens past the vented
position.
Page 48 of 382
Black plate (20,1)Chevrolet Malibu Owner Manual - 2011
2-20 Keys, Doors and Windows
A deflector will automatically raise
when the sunroof is opened. The
deflector will retract when the
sunroof is closed.
To close the sunroof, press the front
of the switch and hold it until the
sunroof is closed. The sunroof will
stop if the switch is released. Close
the sunshade by hand.
The sunroof glass panel cannot be
opened or closed if the vehicle has
an electrical failure.Notice:
Forcing the sunshade
forward of the sliding glass panel
may cause damage and the
sunroof may not operate properly.
Always close the glass panel
before closing the sunshade.
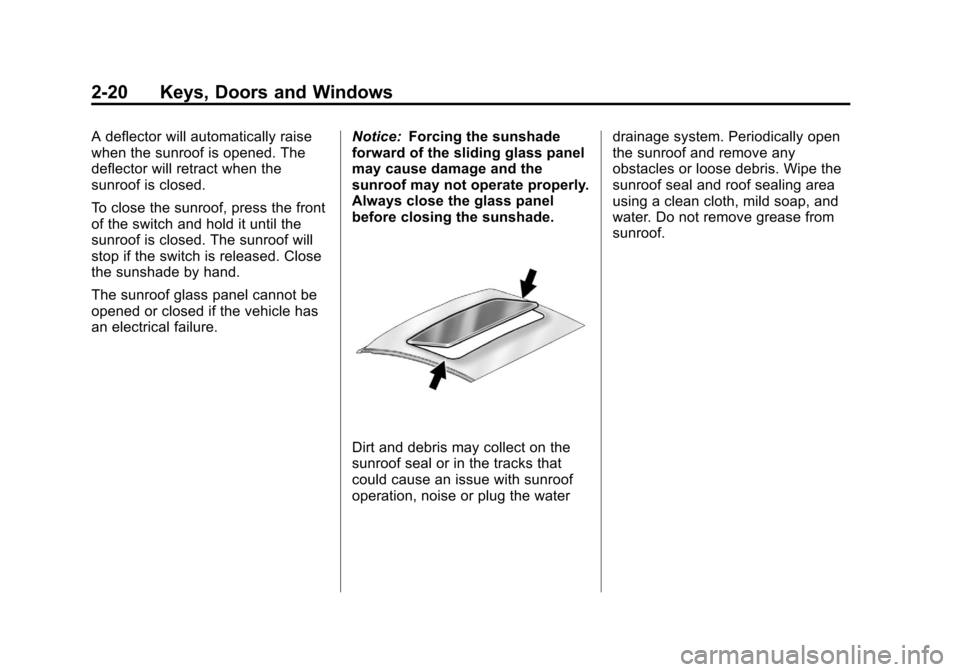
Dirt and debris may collect on the
sunroof seal or in the tracks that
could cause an issue with sunroof
operation, noise or plug the water drainage system. Periodically open
the sunroof and remove any
obstacles or loose debris. Wipe the
sunroof seal and roof sealing area
using a clean cloth, mild soap, and
water. Do not remove grease from
sunroof.
Page 70 of 382
Black plate (22,1)Chevrolet Malibu Owner Manual - 2011
3-22 Seats and Restraints
Safety Belt Use During
Pregnancy
Safety belts work for everyone,
including pregnant women. Like all
occupants, they are more likely to
be seriously injured if they do not
wear safety belts.
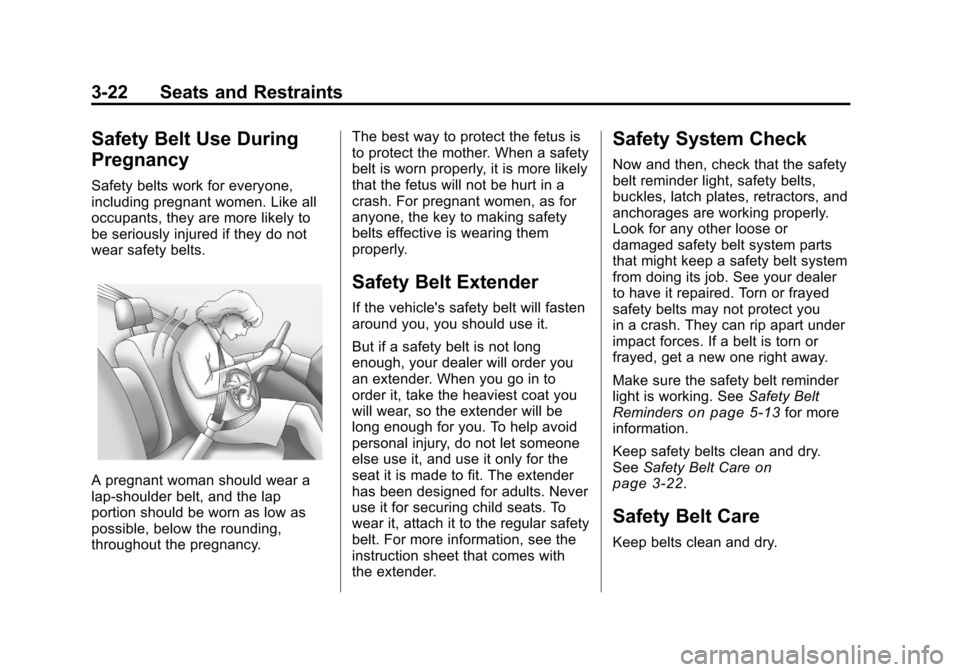
A pregnant woman should wear a
lap-shoulder belt, and the lap
portion should be worn as low as
possible, below the rounding,
throughout the pregnancy.The best way to protect the fetus is
to protect the mother. When a safety
belt is worn properly, it is more likely
that the fetus will not be hurt in a
crash. For pregnant women, as for
anyone, the key to making safety
belts effective is wearing them
properly.
Safety Belt Extender
If the vehicle's safety belt will fasten
around you, you should use it.
But if a safety belt is not long
enough, your dealer will order you
an extender. When you go in to
order it, take the heaviest coat you
will wear, so the extender will be
long enough for you. To help avoid
personal injury, do not let someone
else use it, and use it only for the
seat it is made to fit. The extender
has been designed for adults. Never
use it for securing child seats. To
wear it, attach it to the regular safety
belt. For more information, see the
instruction sheet that comes with
the extender.
Safety System Check
Now and then, check that the safety
belt reminder light, safety belts,
buckles, latch plates, retractors, and
anchorages are working properly.
Look for any other loose or
damaged safety belt system parts
that might keep a safety belt system
from doing its job. See your dealer
to have it repaired. Torn or frayed
safety belts may not protect you
in a crash. They can rip apart under
impact forces. If a belt is torn or
frayed, get a new one right away.
Make sure the safety belt reminder
light is working. See
Safety Belt
Reminders
on page 5‑13for more
information.
Keep safety belts clean and dry.
See Safety Belt Care
on
page 3‑22.
Safety Belt Care
Keep belts clean and dry.
Page 111 of 382
Black plate (1,1)Chevrolet Malibu Owner Manual - 2011
Instruments and Controls 5-1
Instruments and
Controls
Controls
Steering Wheel Adjustment . . . 5-2
Steering Wheel Controls . . . . . . 5-2
Horn . . . . . . . . . . . . . . . . . . . . . . . . . . 5-3
Windshield Wiper/Washer . . . . . 5-4
Compass . . . . . . . . . . . . . . . . . . . . . 5-5
Clock . . . . . . . . . . . . . . . . . . . . . . . . . 5-6
Power Outlets . . . . . . . . . . . . . . . . . 5-7
Warning Lights, Gauges, and
Indicators
Warning Lights, Gauges, andIndicators . . . . . . . . . . . . . . . . . . . . 5-9
Instrument Cluster . . . . . . . . . . . 5-10
Speedometer . . . . . . . . . . . . . . . . 5-11
Odometer . . . . . . . . . . . . . . . . . . . . 5-11
Trip Odometer . . . . . . . . . . . . . . . 5-11
Tachometer . . . . . . . . . . . . . . . . . . 5-11
Fuel Gauge . . . . . . . . . . . . . . . . . . 5-11
Engine Coolant Temperature Gauge . . . . . . . . . . . . . . . . . . . . . . 5-12 Safety Belt Reminders . . . . . . . 5-13
Airbag Readiness Light . . . . . . 5-14
Passenger Airbag Status
Indicator . . . . . . . . . . . . . . . . . . . . 5-14
Charging System Light . . . . . . 5-15
Malfunction
Indicator Lamp . . . . . . . . . . . . . 5-16
Brake System Warning Light . . . . . . . . . . . . . . . . . . . . . . . 5-18
Antilock Brake System (ABS) Warning Light . . . . . . . . . . . . . . 5-19
Electronic Stability Control (ESC)/Traction Control
System (TCS) Indicator/
Warning Light . . . . . . . . . . . . . . 5-20
Engine Coolant Temperature Warning Light . . . . . . . . . . . . . . 5-20
Tire Pressure Light . . . . . . . . . . 5-21
Engine Oil Pressure Light . . . . 5-22
Security Light . . . . . . . . . . . . . . . . 5-22
High-Beam on Light . . . . . . . . . 5-23
Cruise Control Light . . . . . . . . . 5-23
Information Displays
Driver Information Center (DIC) . . . . . . . . . . . . . . . 5-23
Vehicle Messages
Vehicle Messages . . . . . . . . . . . 5-26
Brake System Messages . . . . 5-27
Cruise Control Messages . . . . 5-27
Door Ajar Messages . . . . . . . . . 5-27
Engine Oil Messages . . . . . . . . 5-27
Engine Power Messages . . . . 5-27
Fuel System Messages . . . . . . 5-28
Key and Lock Messages . . . . . 5-28
Lamp Messages . . . . . . . . . . . . . 5-28
Ride Control SystemMessages . . . . . . . . . . . . . . . . . . 5-28
Airbag System Messages . . . . 5-30
Service Vehicle Messages . . . 5-30
Tire Messages . . . . . . . . . . . . . . . 5-30
Vehicle Reminder Messages . . . . . . . . . . . . . . . . . . 5-31
Washer Fluid Messages . . . . . 5-31
Vehicle Personalization
Vehicle Personalization . . . . . . 5-31
Page 116 of 382
Black plate (6,1)Chevrolet Malibu Owner Manual - 2011
5-6 Instruments and Controls
Clock
Without Date Display
AM/FM Base Radio with a Single
CD Player
To set the time:
1. Turn the ignition key to ACC/ACCESSORY or ON/RUN.
Press the
Oknob to turn the
radio on.
2. Press the
Hbutton until the hour
begins flashing on the display.
Press the
Hbutton a second
time and the minute begins
flashing on the display.
3. While either the hour or the minute numbers are flashing,
turn the
fknob to increase or
decrease the time. 4. Press the
Hbutton again until
the clock display stops flashing
to set the currently displayed
time; otherwise, the flashing
stops after five seconds and the
current time displayed is
automatically set.
To change the time default setting
from 12 hour to 24 hour, press the
Hbutton until 12H or 24H is
displayed. Once 12H or 24H is
displayed, turn the
fknob to the
desired option to select the setting.
Press the
Hbutton again to apply
the setting, or let the screen
time out.
With Date Display
Radio with CD (MP3) and USB
Port, and Radio with Single CD
(MP3) Player
To set the time and date:
1. Turn the ignition key to ACC/ ACCESSORY or ON/RUN.
Press the
Oknob to turn the
radio on.
2. Press the
Hbutton and the HR,
MIN, MM, DD, YYYY (hour,
minute, month, day, and year)
displays.
3. Press the softkey located below any one of the tabs that you
want to change.
Page 117 of 382
Black plate (7,1)Chevrolet Malibu Owner Manual - 2011
Instruments and Controls 5-7
4. To increase the time or date doone of the following:
.Press the softkey located
below the selected tab.
.Press the¨SEEK, or
\FWD button.
.Turn thefknob clockwise.
5. To decrease the time or date do one of the following:
.Press the©SEEK or
sREV button.
.Turn thefknob
counterclockwise.
The date does not automatically
display. To see the date press
Hwhile the radio is on. The date
with display times out after a few
seconds and goes back to the
normal radio and time display. To change the time default setting
from 12 hour to 24 hour or to
change the date default setting from
month/day/year to day/month/year:
1. Press the
Hbutton and then the
softkey located below the
forward arrow label. Once the
time 12H and 24H, and the date
MM/DD/YYYY (month, day, and
year) and DD/MM/YYYY (day,
month, and year) displays.
2. Press the softkey located below the desired option.
3. Press the
Hbutton again to
apply the selected default, or let
the screen time out.
Power Outlets
Accessory power outlets can be
used to plug in electrical equipment,
such as a cell phone or MP3 player.
There are two accessory power
outlets. One accessory power outlet
is located inside the storage bin below the climate controls and the
other outlet is on the rear of the
center storage console.
Remove the cover to access
and replace when not in use.
The accessory power outlet is
operational at all times.
{WARNING
Power is always supplied to the
outlets. Do not leave electrical
equipment plugged in when the
vehicle is not in use because the
vehicle could catch fire and cause
injury or death.
Notice: Leaving electrical
equipment plugged in for an
extended period of time while
the vehicle is off will drain the
battery. Always unplug electrical
equipment when not in use and
do not plug in equipment that
exceeds the maximum 20 ampere
rating.
Page 125 of 382
Black plate (15,1)Chevrolet Malibu Owner Manual - 2011
Instruments and Controls 5-15
as a system check. If you are using
remote start to start the vehicle from
a distance, if equipped, you may not
see the system check. Then, after
several more seconds, the status
indicator will light either ON or OFF,
or either the on or off symbol to let
you know the status of the right front
passenger frontal and seat-mounted
side impact airbags.
If the word ON or the on symbol is
lit on the passenger airbag status
indicator, it means that the right
front passenger frontal airbag and
seat-mounted side impact airbag
are enabled (may inflate).
If the word OFF or the off symbol is
lit on the passenger airbag status
indicator, it means that the
passenger sensing system has
turned off the right front passenger
frontal and seat-mounted side
impact airbag.If, after several seconds, both status
indicator lights remain on, or if there
are no lights at all, there may be a
problem with the lights or the
passenger sensing system. See
your dealer for service.
{WARNING
If the airbag readiness light ever
comes on and stays on, it means
that something may be wrong
with the airbag system. To help
avoid injury to yourself or others,
have the vehicle serviced right
away. See
Airbag Readiness
Light
on page 5‑14for more
information, including important
safety information.
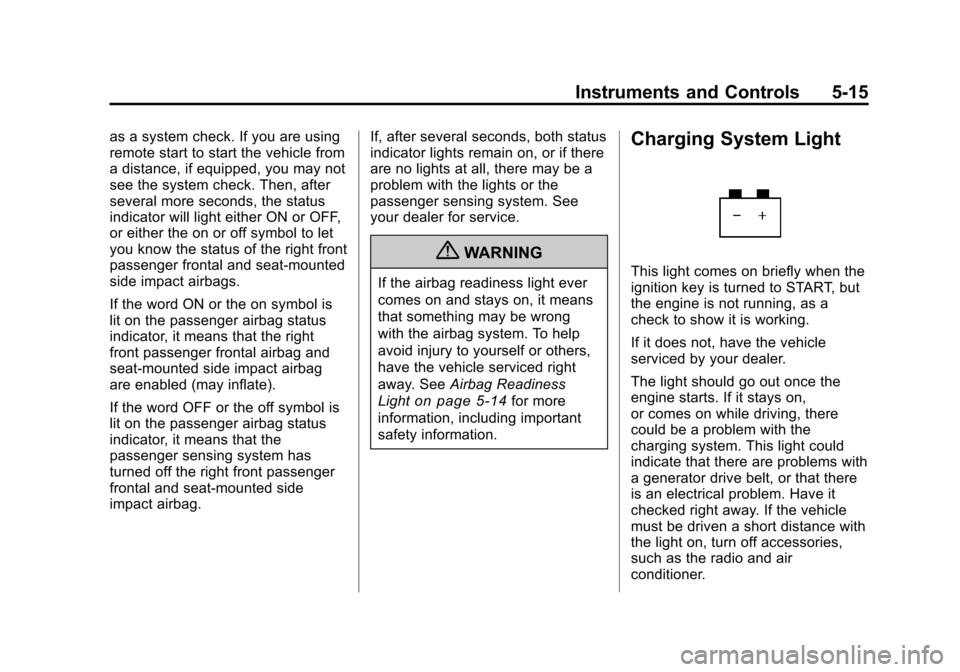
Charging System Light
This light comes on briefly when the
ignition key is turned to START, but
the engine is not running, as a
check to show it is working.
If it does not, have the vehicle
serviced by your dealer.
The light should go out once the
engine starts. If it stays on,
or comes on while driving, there
could be a problem with the
charging system. This light could
indicate that there are problems with
a generator drive belt, or that there
is an electrical problem. Have it
checked right away. If the vehicle
must be driven a short distance with
the light on, turn off accessories,
such as the radio and air
conditioner.
Page 128 of 382
Black plate (18,1)Chevrolet Malibu Owner Manual - 2011
5-18 Instruments and Controls
Emissions Inspection and
Maintenance Programs
Some state/provincial and local
governments may have programs
to inspect the on-vehicle emission
control equipment. For the
inspection, the emission system
test equipment is connected to the
vehicle’s Data Link
Connector (DLC).
The DLC is under the instrument
panel to the left of the steering
wheel. See your dealer if assistance
is needed.The vehicle may not pass
inspection if:
.The malfunction indicator lamp is
on with the engine running, or if
the light does not come on when
the ignition is turned to ON/RUN
while the engine is off.
.The critical emission control
systems have not been
completely diagnosed by the
system. This can happen if the
battery has recently been
replaced or if the battery has run
down. The diagnostic system
evaluates critical emission
control systems during normal
driving. This can take
several days of routine driving.
If this has been done and the
vehicle still does not pass the
inspection, your dealer can
prepare the vehicle for
inspection.
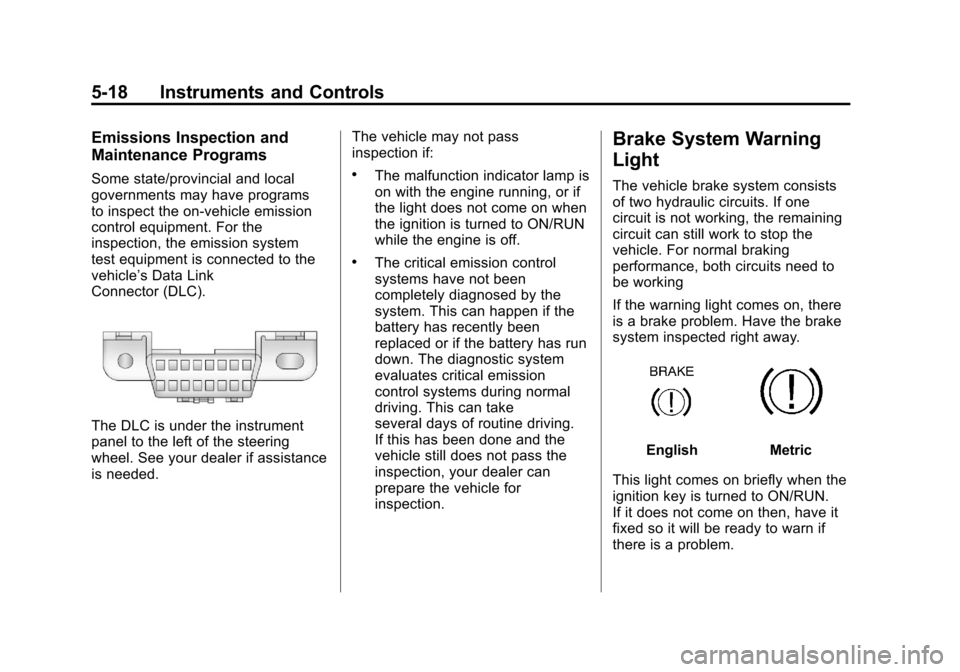
Brake System Warning
Light
The vehicle brake system consists
of two hydraulic circuits. If one
circuit is not working, the remaining
circuit can still work to stop the
vehicle. For normal braking
performance, both circuits need to
be working
If the warning light comes on, there
is a brake problem. Have the brake
system inspected right away.
EnglishMetric
This light comes on briefly when the
ignition key is turned to ON/RUN.
If it does not come on then, have it
fixed so it will be ready to warn if
there is a problem.