2011 CHEVROLET MALIBU brake light
[x] Cancel search: brake lightPage 229 of 382
Black plate (35,1)Chevrolet Malibu Owner Manual - 2011
Driving and Operating 9-35
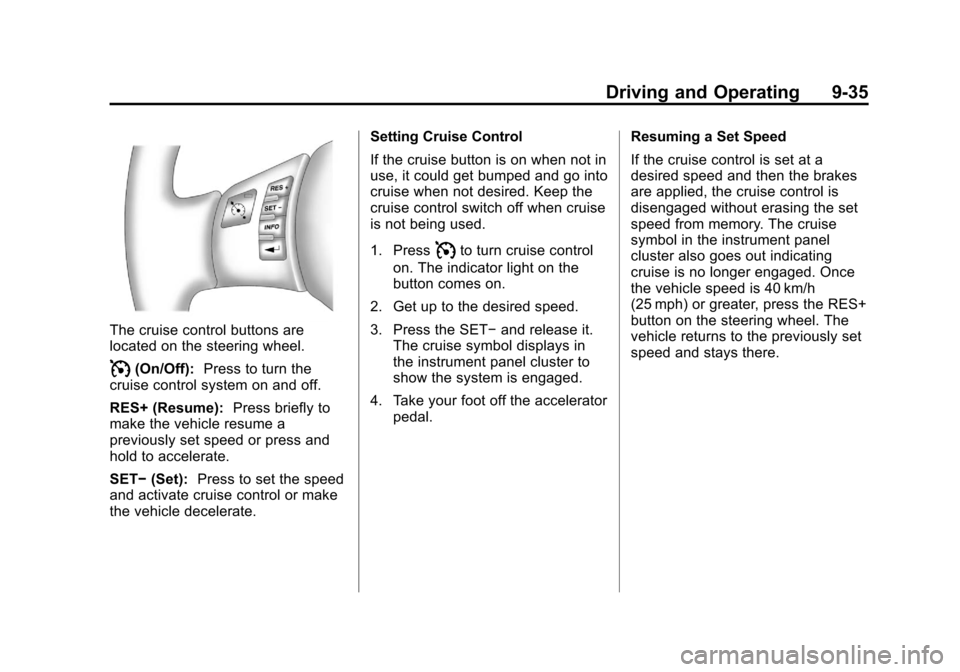
The cruise control buttons are
located on the steering wheel.
I(On/Off):Press to turn the
cruise control system on and off.
RES+ (Resume): Press briefly to
make the vehicle resume a
previously set speed or press and
hold to accelerate.
SET− (Set): Press to set the speed
and activate cruise control or make
the vehicle decelerate. Setting Cruise Control
If the cruise button is on when not in
use, it could get bumped and go into
cruise when not desired. Keep the
cruise control switch off when cruise
is not being used.
1. Press
Ito turn cruise control
on. The indicator light on the
button comes on.
2. Get up to the desired speed.
3. Press the SET− and release it.
The cruise symbol displays in
the instrument panel cluster to
show the system is engaged.
4. Take your foot off the accelerator pedal. Resuming a Set Speed
If the cruise control is set at a
desired speed and then the brakes
are applied, the cruise control is
disengaged without erasing the set
speed from memory. The cruise
symbol in the instrument panel
cluster also goes out indicating
cruise is no longer engaged. Once
the vehicle speed is 40 km/h
(25 mph) or greater, press the RES+
button on the steering wheel. The
vehicle returns to the previously set
speed and stays there.
Page 230 of 382
Black plate (36,1)Chevrolet Malibu Owner Manual - 2011
9-36 Driving and Operating
Increasing Speed While Using
Cruise Control
If the cruise control system is
already activated,
.Press and hold the RES+ button
on the steering wheel until the
desired speed is reached, then
release it.
.To increase the vehicle speed in
small amounts, press the RES+
button briefly. Each time this is
done, the vehicle goes about
1.6 km/h (1 mph) faster.
Reducing Speed While Using
Cruise Control
If the cruise control system is
already activated,
.Press and hold the SET− on the
steering wheel until the lower
speed desired is reached, then
release it.
.To slow down in small amounts,
press the SET− button briefly.
Each time this is done, the
vehicle goes about 1.6 km/h
(1 mph) slower.
Passing Another Vehicle While
Using Cruise Control
Use the accelerator pedal to
increase the vehicle speed. When
you take your foot off the pedal, the
vehicle will slow down to the
previously set cruise control speed.
Using Cruise Control on Hills
How well the cruise control works
on hills depends upon the vehicle
speed, load, and the steepness of
the hills. When going up steep hills,
you might have to step on the
accelerator pedal to maintain the
vehicle speed. When going
downhill, you might have to brake or
shift to a lower gear to keep the
vehicle at a lower speed. When the
brakes are applied this ends the
cruise control. Ending Cruise Control
There are two ways to end cruise
control:
.To disengage the cruise control,
step lightly on the brake pedal.
.To turn off cruise control, press
the
Ibutton.
Erasing Speed Memory
The cruise control set speed is
erased from memory, by pressing
the
Ibutton or if the ignition is
turned off.
Page 265 of 382
Black plate (23,1)Chevrolet Malibu Owner Manual - 2011
Vehicle Care 10-23
{WARNING
The brake wear warning sound
means that soon the brakes will
not work well. That could lead to
a crash. When the brake wear
warning sound is heard, have the
vehicle serviced.
Notice: Continuing to drive with
worn-out brake pads could result
in costly brake repair.
Some driving conditions or climates
can cause a brake squeal when the
brakes are first applied or lightly
applied. This does not mean
something is wrong with the brakes.
Properly torqued wheel nuts are
necessary to help prevent brake
pulsation. When tires are rotated,
inspect brake pads for wear and
evenly tighten wheel nuts in the
proper sequence to torque
specifications in Capacities and
Specifications on page 12‑2. Brake linings should always be
replaced as complete axle sets.Brake Pedal Travel
See your dealer if the brake pedal
does not return to normal height,
or if there is a rapid increase in
pedal travel. This could be a sign
that brake service might be
required.
Brake Adjustment
Every time the brakes are applied,
with or without the vehicle moving,
the brakes adjust for wear.
Replacing Brake System Parts
The braking system on a vehicle is
complex. Its many parts have to be
of top quality and work well together
if the vehicle is to have really good
braking. The vehicle was designed
and tested with top-quality brake
parts. When parts of the braking
system are replaced, be sure to get
new, approved replacement parts.
If this is not done, the brakes might
not work properly. For example,
installing disc brake pads that are
wrong for the vehicle, can change
the balance between the front and
rear brakes
—for the worse. The
braking performance expected can
change in many other ways if the
wrong replacement brake parts are
installed.
Brake Fluid
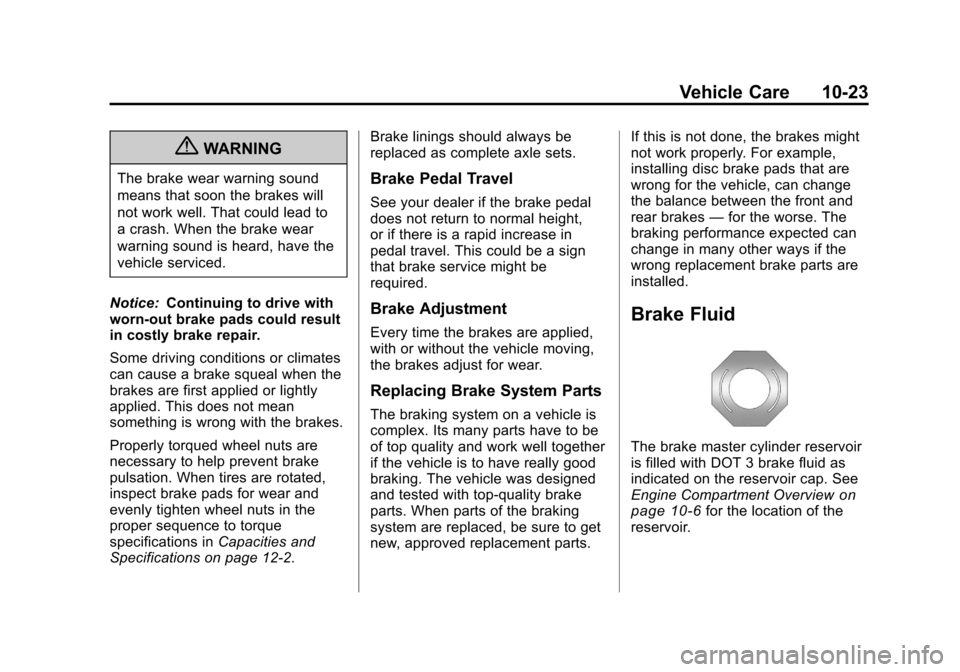
The brake master cylinder reservoir
is filled with DOT 3 brake fluid as
indicated on the reservoir cap. See
Engine Compartment Overview
on
page 10‑6for the location of the
reservoir.
Page 266 of 382
Black plate (24,1)Chevrolet Malibu Owner Manual - 2011
10-24 Vehicle Care
There are only two reasons why the
brake fluid level in the reservoir
might go down:
.The brake fluid level goes down
because of normal brake lining
wear. When new linings are
installed, the fluid level goes
back up.
.A fluid leak in the brake
hydraulic system can also cause
a low fluid level. Have the brake
hydraulic system fixed, since a
leak means that sooner or later
the brakes will not work well.
Do not top off the brake fluid.
Adding fluid does not correct a leak.
If fluid is added when the linings are
worn, there will be too much fluid
when new brake linings are
installed. Add or remove brake fluid,
as necessary, only when work is
done on the brake hydraulic system.
{WARNING
If too much brake fluid is added, it
can spill on the engine and burn,
if the engine is hot enough. You
or others could be burned, and
the vehicle could be damaged.
Add brake fluid only when work is
done on the brake hydraulic
system.
When the brake fluid falls to a low
level, the brake warning light comes
on. See Brake System Warning
Light on page 5‑18.
What to Add
Use only new DOT 3 brake fluid
from a sealed container. See
Recommended Fluids and
Lubricants on page 11‑6. Always clean the brake fluid
reservoir cap and the area around
the cap before removing it. This
helps keep dirt from entering the
reservoir.
{WARNING
With the wrong kind of fluid in the
brake hydraulic system, the
brakes might not work well. This
could cause a crash. Always use
the proper brake fluid.
Notice:
.Using the wrong fluid can
badly damage brake
hydraulic system parts. For
example, just a few drops of
mineral-based oil, such as
engine oil, in the brake
hydraulic system can
damage brake hydraulic
system parts so badly that
they will have to be replaced.
Do not let someone put in
the wrong kind of fluid.
Page 292 of 382
Black plate (50,1)Chevrolet Malibu Owner Manual - 2011
10-50 Vehicle Care
.The TPMS sensor matching
process was started but not
completed or not completed
successfully after rotating the
vehicle's tires. The DIC message
and TPMS malfunction light
should go off once the TPMS
sensor matching process is
performed successfully. See
“TPMS Sensor Matching
Process”later in this section.
.One or more TPMS sensors are
missing or damaged. The DIC
message and the TPMS
malfunction light should go off
when the TPMS sensors are
installed and the sensor
matching process is performed
successfully. See your dealer for
service.
.Replacement tires or wheels do
not match your vehicle's original
equipment tires or wheels. Tires
and wheels other than those
recommended for your vehicle
could prevent the TPMS from
functioning properly. See Buying
New Tires on page 10‑54.
.Operating electronic devices or
being near facilities using radio
wave frequencies similar to the
TPMS could cause the TPMS
sensors to malfunction.
If the TPMS is not functioning it
cannot detect or signal a low tire
condition. See your dealer for
service if the TPMS malfunction
light and DIC message comes on
and stays on.
TPMS Sensor Matching
Process
Each TPMS sensor has a unique
identification code. Any time you
replace one or more of the TPMS
sensors or rotate the vehicle's tires,
the identification codes need to be
matched to the new tire/wheel
location. The sensors are matched,
to the tire/wheel locations, in the
following order: driver side front tire,
passenger side front tire, passenger
side rear tire, and driver side rear
tire using a TPMS diagnostic tool.
See your dealer for service. The TPMS sensors can also be
matched to each tire/wheel position
by increasing or decreasing the
tire's air pressure. When increasing
the tire's pressure, do not exceed
the maximum inflation pressure
indicated on the tire's sidewall. To
decrease the tire's air-pressure use
the pointed end of the valve cap, a
pencil-style air pressure gage,
or a key.
You have two minutes to match
each tire and wheel position. If it
takes longer than two minutes to
match any tire and wheel position,
the matching process stops and you
need to start over.
The TPMS matching process is
outlined below:
1. Set the parking brake.
2. Turn the ignition switch to
ON/RUN with the engine off.
3. Press and hold the Remote Keyless Entry (RKE)
transmitter's LOCK and
UNLOCK buttons, at the same
Page 296 of 382
Black plate (54,1)Chevrolet Malibu Owner Manual - 2011
10-54 Vehicle Care
Inspectionon page 10‑52andTire
Rotationon page 10‑52for
additional information.
The rubber in tires ages over time.
This is also true for the spare tire,
if the vehicle has one, even if it is
not being used. Multiple conditions
affect how fast this aging takes
place, including temperatures,
loading conditions, and inflation
pressure maintenance. Tires will
typically need to be replaced due to
wear before they may need to be
replaced due to age. Consult the tire
manufacturer for more information
on when tires should be replaced.
Vehicle Storage
Tires age when stored normally
mounted on a parked vehicle. Park
a vehicle that will be stored for at
least a month in a cool, dry, clean
area away from direct sunlight to
slow aging. This area should be free
of grease, gasoline, or other
substances that can deteriorate
rubber. Parking for an extended period can
cause flat spots on the tires that
may result in vibrations while
driving. When storing a vehicle for
at least a month, remove the tires or
raise the vehicle to reduce the
weight from the tires.
Buying New Tires
GM has developed and matched
specific tires for your vehicle.
The original equipment tires
installed on your vehicle, when it
was new, were designed to meet
General Motors Tire
Performance Criteria
Specification (TPC Spec)
system rating. If you need
replacement tires, GM strongly
recommends that you get tires
with the same TPC Spec rating.
This way, your vehicle will
continue to have tires that are
designed to give the same
performance and vehicle safety,
during normal use, as the
original tires.
GM's exclusive TPC Spec
system considers over a dozen
critical specifications that impact
the overall performance of your
vehicle, including brake system
performance, ride and handling,
traction control, and tire
pressure monitoring
performance. GM's TPC Spec
number is molded onto the tire's
sidewall near the tire size. If the
tires have an all‐season tread
design, the TPC Spec number
will be followed by an MS for
mud and snow. See
Tire
Sidewall Labeling
on page 10‑40
for additional information.
Page 321 of 382
Black plate (79,1)Chevrolet Malibu Owner Manual - 2011
Vehicle Care 10-79
Notice:Ignoring these steps
could result in costly damage to
the vehicle that would not be
covered by the warranty.
Trying to start the vehicle by
pushing or pulling it will not
work, and it could damage the
vehicle.
1. Check the other vehicle. It must
have a 12-volt battery with a
negative ground system.
Notice: If the other vehicle's
system is not a 12-volt system
with a negative ground, both
vehicles can be damaged. Only
use vehicles with 12-volt systems
with negative grounds to jump
start your vehicle. 2. Get the vehicles close enough
so the jumper cables can reach,
but be sure the vehicles are not
touching each other. If they are,
it could cause a ground
connection you do not want. You
would not be able to start your
vehicle, and the bad grounding
could damage the electrical
systems.
To avoid the possibility of the
vehicles rolling, set the parking
brake firmly on both vehicles
involved in the jump start
procedure. Put an automatic
transmission in P (Park) or a
manual transmission in
N (Neutral) before setting the
parking brake. Notice:
If you leave the radio or
other accessories on during the
jump starting procedure, they
could be damaged. The repairs
would not be covered by the
warranty. Always turn off the
radio and other accessories when
jump starting the vehicle.
3. Turn off the ignition on both
vehicles. Unplug unnecessary
accessories plugged into the
cigarette lighter or the accessory
power outlet. Turn off the radio
and all lamps that are not
needed. This will avoid sparks
and help save both batteries.
And it could save the radio!
Page 371 of 382

Black plate (1,1)Chevrolet Malibu Owner Manual - 2011
INDEX i-1
A
Accessories andModifications . . . . . . . . . . . . . . . . . 10-3
Accessory Power . . . . . . . . . . . . . . 9-19
Add-On Electrical Equipment . . . . . . . . . . . . . . . . . . . 9-48
Adding Equipment to the
Airbag-Equipped Vehicle . . . . . 3-36
Adjustments Lumbar, Front Seats . . . . . . . . . . . 3-4
Air Cleaner/Filter, Engine . . . . . 10-14
Air Vents . . . . . . . . . . . . . . . . . . . . . . . 8-9
Airbag System
Check . . . . . . . . . . . . . . . . . . . . . . . . 3-37
How Does an AirbagRestrain? . . . . . . . . . . . . . . . . . . . 3-29
Passenger Sensing System . . . . . . . . . . . . . . . . . . . . . . 3-31
What Makes an Airbag Inflate? . . . . . . . . . . . . . . . . . . . . . . 3-28
What Will You See After an Airbag Inflates? . . . . . . . . . . 3-29 Airbag System (cont.)
When Should an Airbag
Inflate? . . . . . . . . . . . . . . . . . . . . . . 3-27
Where Are the Airbags? . . . . . . 3-25
Airbags Adding Equipment to theVehicle . . . . . . . . . . . . . . . . . . . . . . 3-36
Passenger Status Indicator . . . 5-14
Readiness Light . . . . . . . . . . . . . . 5-14
Servicing Airbag-Equipped Vehicles . . . . . . . . . . . . . . . . . . . . . 3-35
System Check . . . . . . . . . . . . . . . . 3-23
Alarm System Anti-Theft . . . . . . . . . . . . . . . . . . . . . 2-12
AM-FM Radio . . . . . . . . . . . . . . . . . . . 7-6
Antenna Satellite Radio . . . . . . . . . . . . . . . . 7-13
Anti-Theft
Alarm System . . . . . . . . . . . . . . . . 2-12
Antilock Brake System (ABS) . . . . . . . . . . . . . . . . 9-28
Warning Light . . . . . . . . . . . . . . . . . 5-19 Appearance Care
Exterior . . . . . . . . . . . . . . . . . . . . . 10-85
Interior . . . . . . . . . . . . . . . . . . . . . . 10-89
Assistance Program, Roadside . . . . . . . . . . . . . . . 13-7, 13-9
Audio Players . . . . . . . . . . . . . . . . . 7-14 CD . . . . . . . . . . . . . . . . . . . . . . . . . . . 7-14
Audio System Backglass Antenna . . . . . . . . . . . 7-13
Radio Reception . . . . . . . . . . . . . . 7-12
Theft-Deterrent Feature . . . . . . . . 7-2
Automatic Door Locks . . . . . . . . . . . . . . . . . . . . 2-9
Headlamp System . . . . . . . . . . . . . 6-3
Automatic Climate Control System . . . . . . . . . . . . . . . . . . . . . . . . 8-5
Automatic Transmission . . . . . . . 9-25 Fluid . . . . . . . . . . . . . . . . . . . . . . . . 10-13
Manual Mode . . . . . . . . . . . . . . . . . 9-27
Automatic Transmission Shift Lock Control
Function Check . . . . . . . . . . . . . 10-26
Auxiliary Devices . . . . . . . . . . . . . . 7-18