2011 CHEVROLET IMPALA lock
[x] Cancel search: lockPage 80 of 376
Black plate (32,1)Chevrolet Impala Owner Manual - 2011
3-32 Seats and Restraints
What Will You See After
an Airbag Inflates?
After the frontal airbags and
seat-mounted side impact airbags
inflate, they quickly deflate, so
quickly that some people may not
even realize an airbag inflated.
Roof-rail airbags may still be at least
partially inflated for some time after
they deploy. Some components of
the airbag module may be hot for
several minutes. For location of the
airbag modules, seeWhat Makes
an Airbag Inflate? on page 3‑31.
The parts of the airbag that
come into contact with you may be
warm, but not too hot to touch. There may be some smoke and
dust coming from the vents in the
deflated airbags. Airbag inflation
does not prevent the driver from
seeing out of the windshield or
being able to steer the vehicle, nor
does it prevent people from leaving
the vehicle.
{WARNING
When an airbag inflates, there
may be dust in the air. This dust
could cause breathing problems
for people with a history of
asthma or other breathing trouble.
To avoid this, everyone in the
vehicle should get out as soon as
it is safe to do so. If you have
breathing problems but cannot
get out of the vehicle after an
airbag inflates, then get fresh air
by opening a window or a door.
(Continued)
WARNING (Continued)
If you experience breathing
problems following an airbag
deployment, you should seek
medical attention.
The vehicle has a feature that may
automatically unlock the doors, turn
on the interior lamps and hazard
warning flashers, and shut off the
fuel system after the airbags inflate.
You can lock the doors, turn off the
interior lamps and hazard warning
flashers by using the controls for
those features.
Page 101 of 376
Black plate (53,1)Chevrolet Impala Owner Manual - 2011
Seats and Restraints 3-53
According to accident statistics,
children and infants are safer
when properly restrained in a child
restraint system or infant restraint
system secured in a rear seating
position. SeeWhere to Put the
Restraint on page 3‑48 for
additional information.
Securing a Child Restraint
Designed for the LATCH
System
{WARNING
If a LATCH-type child restraint is
not attached to anchors, the child
restraint will not be able to protect
the child correctly. In a crash, the
child could be seriously injured or
killed. Install a LATCH-type child
restraint properly using the
anchors, or use the vehicle's
safety belts to secure the
restraint, following the instructions
(Continued)
WARNING (Continued)
that came with the child restraint
and the instructions in this
manual.
{WARNING
Do not attach more than one child
restraint to a single anchor.
Attaching more than one child
restraint to a single anchor could
cause the anchor or attachment
to come loose or even break
during a crash. A child or others
could be injured. To reduce the
risk of serious or fatal injuries
during a crash, attach only
one child restraint per anchor.
{WARNING
Children can be seriously injured
or strangled if a shoulder belt is
wrapped around their neck and
the safety belt continues to
tighten. Buckle any unused safety
belts behind the child restraint so
children cannot reach them. Pull
the shoulder belt all the way out
of the retractor to set the lock,
if your vehicle has one, after the
child restraint has been installed.
Notice: Do not let the LATCH
attachments rub against the
vehicle’ s safety belts. This may
damage these parts. If necessary,
move buckled safety belts to
avoid rubbing the LATCH
attachments.
Page 104 of 376
Black plate (56,1)Chevrolet Impala Owner Manual - 2011
3-56 Seats and Restraints
In Canada, the law requires that
forward-facing child restraints have
a top tether, and that the tether be
attached.
If the child restraint does not have
the LATCH system, you will be
using the safety belt to secure the
child restraint in this position.
Be sure to follow the instructions
that came with the child restraint.
Secure the child in the child restraint
when and as the instructions say.
If more than one child restraint
needs to be installed in the rear
seat, be sure to readWhere to Put
the Restraint on page 3‑48.
1. Put the child restraint on the seat.
2. Pick up the latch plate, and run the lap and shoulder portions of
the vehicle's safety belt through
or around the restraint. The child
restraint instructions will show
you how.
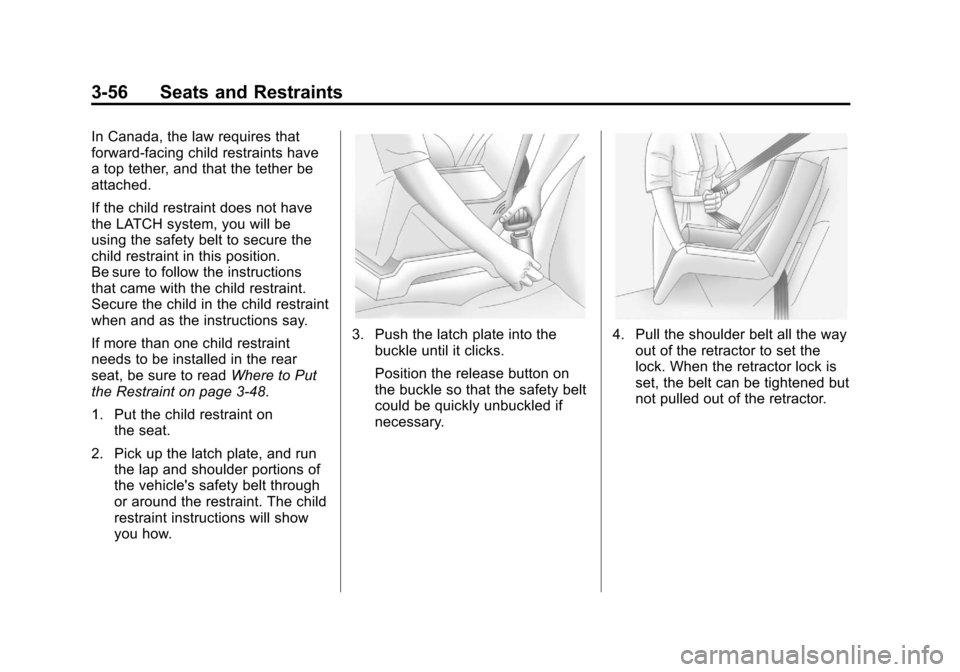
3. Push the latch plate into the
buckle until it clicks.
Position the release button on
the buckle so that the safety belt
could be quickly unbuckled if
necessary.4. Pull the shoulder belt all the wayout of the retractor to set the
lock. When the retractor lock is
set, the belt can be tightened but
not pulled out of the retractor.
Page 105 of 376
Black plate (57,1)Chevrolet Impala Owner Manual - 2011
Seats and Restraints 3-57
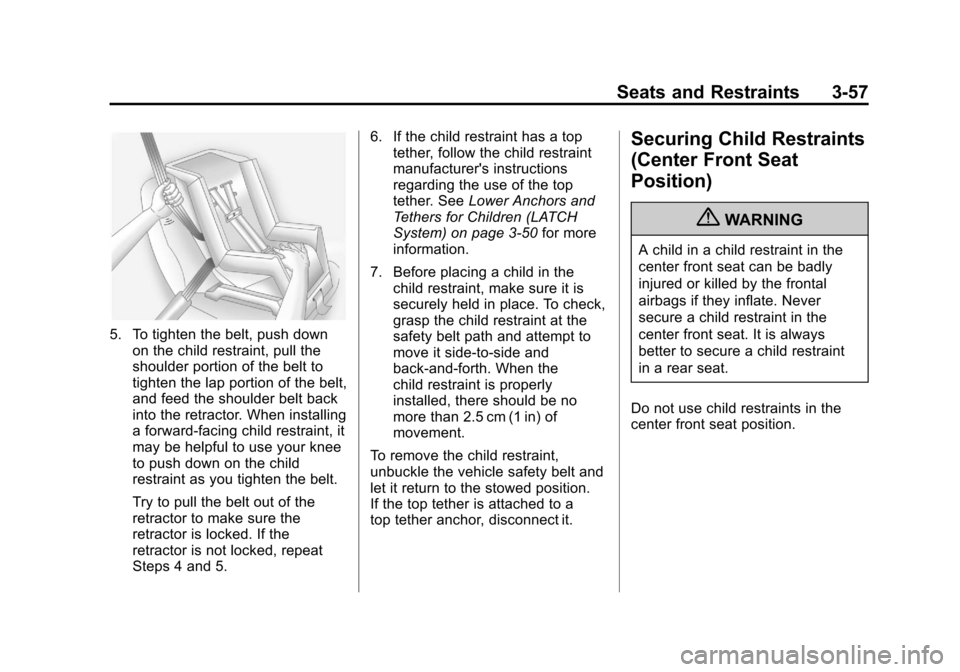
5. To tighten the belt, push downon the child restraint, pull the
shoulder portion of the belt to
tighten the lap portion of the belt,
and feed the shoulder belt back
into the retractor. When installing
a forward-facing child restraint, it
may be helpful to use your knee
to push down on the child
restraint as you tighten the belt.
Try to pull the belt out of the
retractor to make sure the
retractor is locked. If the
retractor is not locked, repeat
Steps 4 and 5. 6. If the child restraint has a top
tether, follow the child restraint
manufacturer's instructions
regarding the use of the top
tether. See Lower Anchors and
Tethers for Children (LATCH
System) on page 3‑50 for more
information.
7. Before placing a child in the child restraint, make sure it is
securely held in place. To check,
grasp the child restraint at the
safety belt path and attempt to
move it side‐to‐side and
back‐and‐forth. When the
child restraint is properly
installed, there should be no
more than 2.5 cm (1 in) of
movement.
To remove the child restraint,
unbuckle the vehicle safety belt and
let it return to the stowed position.
If the top tether is attached to a
top tether anchor, disconnect it.
Securing Child Restraints
(Center Front Seat
Position)
{WARNING
A child in a child restraint in the
center front seat can be badly
injured or killed by the frontal
airbags if they inflate. Never
secure a child restraint in the
center front seat. It is always
better to secure a child restraint
in a rear seat.
Do not use child restraints in the
center front seat position.
Page 107 of 376
Black plate (59,1)Chevrolet Impala Owner Manual - 2011
Seats and Restraints 3-59
Do not secure a child seat in a
position without a top tether anchor
if a national or local law requires
that the top tether be anchored, or if
the instructions that come with the
child restraint say that the top strap
must be anchored.
In Canada, the law requires that
forward-facing child restraints have
a top tether, and that the tether be
attached.
You will be using the lap-shoulder
belt to secure the child restraint in
this position. Follow the instructions
that came with the child restraint.
1. Move the seat as far back as itwill go before securing the
forward-facing child restraint.
When the passenger sensing
system has turned off the right
front passenger frontal airbag,
the off indicator on the
passenger airbag status
indicator should light and stay
lit when the vehicle is started.
See Passenger Airbag Status
Indicator on page 5‑16. 2. Put the child restraint on
the seat.
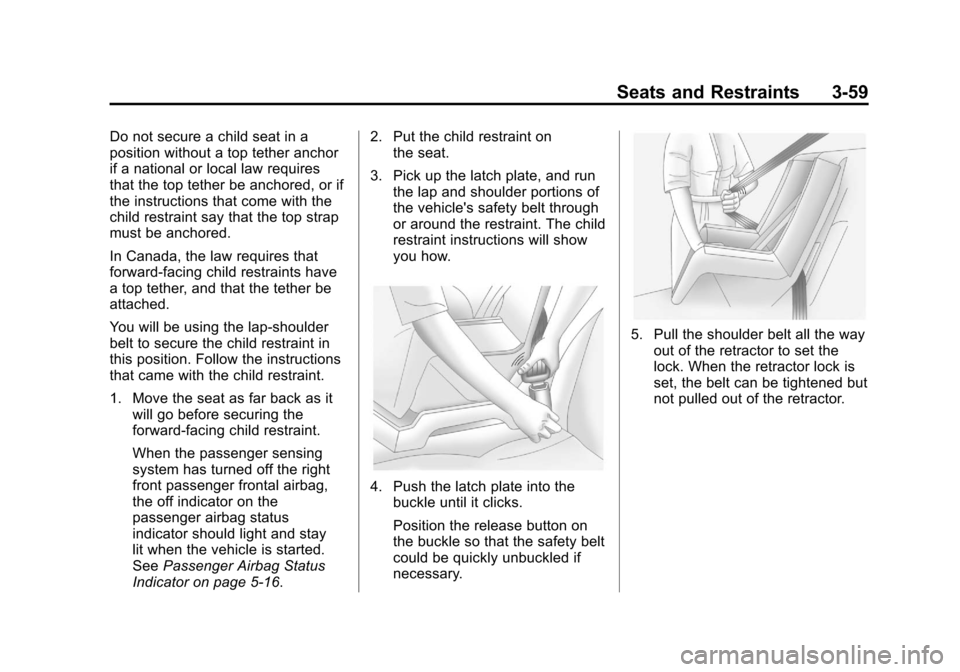
3. Pick up the latch plate, and run the lap and shoulder portions of
the vehicle's safety belt through
or around the restraint. The child
restraint instructions will show
you how.
4. Push the latch plate into thebuckle until it clicks.
Position the release button on
the buckle so that the safety belt
could be quickly unbuckled if
necessary.
5. Pull the shoulder belt all the wayout of the retractor to set the
lock. When the retractor lock is
set, the belt can be tightened but
not pulled out of the retractor.
Page 108 of 376
Black plate (60,1)Chevrolet Impala Owner Manual - 2011
3-60 Seats and Restraints
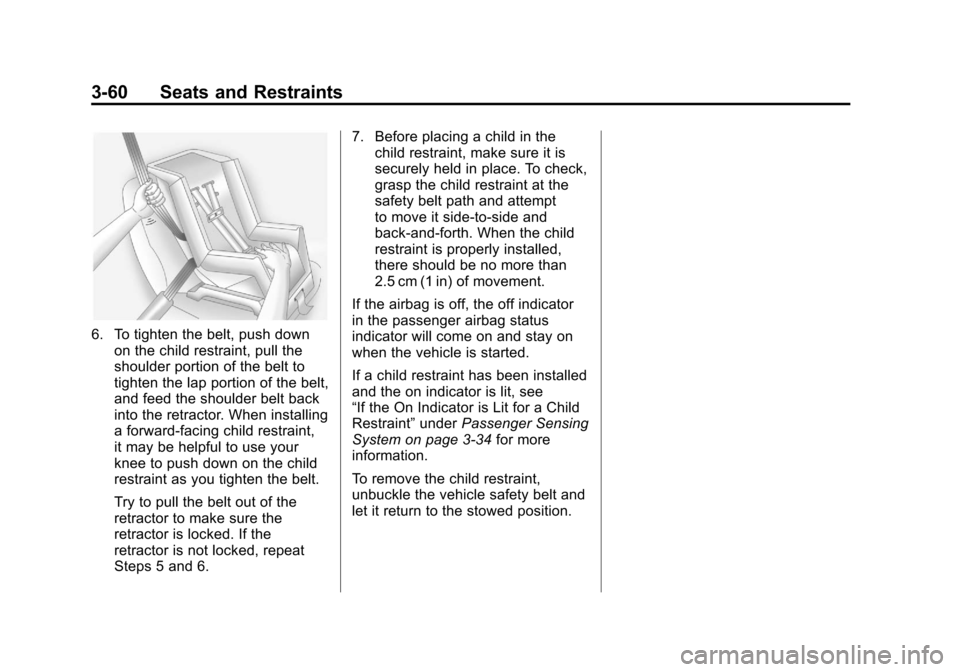
6. To tighten the belt, push downon the child restraint, pull the
shoulder portion of the belt to
tighten the lap portion of the belt,
and feed the shoulder belt back
into the retractor. When installing
a forward-facing child restraint,
it may be helpful to use your
knee to push down on the child
restraint as you tighten the belt.
Try to pull the belt out of the
retractor to make sure the
retractor is locked. If the
retractor is not locked, repeat
Steps 5 and 6. 7. Before placing a child in the
child restraint, make sure it is
securely held in place. To check,
grasp the child restraint at the
safety belt path and attempt
to move it side‐to‐side and
back‐and‐forth. When the child
restraint is properly installed,
there should be no more than
2.5 cm (1 in) of movement.
If the airbag is off, the off indicator
in the passenger airbag status
indicator will come on and stay on
when the vehicle is started.
If a child restraint has been installed
and the on indicator is lit, see
“If the On Indicator is Lit for a Child
Restraint” underPassenger Sensing
System on page 3‑34 for more
information.
To remove the child restraint,
unbuckle the vehicle safety belt and
let it return to the stowed position.
Page 111 of 376

Black plate (1,1)Chevrolet Impala Owner Manual - 2011
Instruments and Controls 5-1
Instruments and
Controls
Controls
Steering Wheel Adjustment . . . 5-2
Steering Wheel Controls . . . . . . 5-3
Horn . . . . . . . . . . . . . . . . . . . . . . . . . . 5-3
Windshield Wiper/Washer . . . . . 5-4
Compass . . . . . . . . . . . . . . . . . . . . . 5-5
Clock . . . . . . . . . . . . . . . . . . . . . . . . . 5-7
Power Outlets . . . . . . . . . . . . . . . . . 5-9
Cigarette Lighter . . . . . . . . . . . . . . 5-9
Ashtrays . . . . . . . . . . . . . . . . . . . . . 5-10
Warning Lights, Gauges, and
Indicators
Warning Lights, Gauges, andIndicators . . . . . . . . . . . . . . . . . . 5-10
Instrument Cluster . . . . . . . . . . . 5-11
Speedometer . . . . . . . . . . . . . . . . 5-12
Odometer . . . . . . . . . . . . . . . . . . . . 5-12
Tachometer . . . . . . . . . . . . . . . . . . 5-12
Fuel Gauge . . . . . . . . . . . . . . . . . . 5-12 Engine Coolant Temperature
Gauge . . . . . . . . . . . . . . . . . . . . . . 5-13
Safety Belt Reminders . . . . . . . 5-14
Airbag Readiness Light . . . . . . 5-15
Passenger Airbag Status Indicator . . . . . . . . . . . . . . . . . . . . 5-16
Charging System Light . . . . . . 5-16
Malfunction Indicator Lamp . . . . . . . . . . . . . 5-17
Brake System Warning Light . . . . . . . . . . . . . . . . . . . . . . . 5-19
Antilock Brake System (ABS) Warning Light . . . . . . . . . . . . . . 5-20
Electronic Stability Control (ESC) Indicator Light . . . . . . . 5-21
Traction Control System (TCS) Warning Light . . . . . . . 5-21
Engine Coolant Temperature Warning Light . . . . . . . . . . . . . . 5-22
Tire Pressure Light . . . . . . . . . . 5-22
Engine Oil Pressure Light . . . . 5-23
Security Light . . . . . . . . . . . . . . . . 5-23
High-Beam on Light . . . . . . . . . 5-24
Front Fog Lamp Light . . . . . . . . 5-24
Cruise Control Light . . . . . . . . . 5-24
Information Displays
Driver Information Center (DIC) . . . . . . . . . . . . . . . 5-24
Vehicle Messages
Vehicle Messages . . . . . . . . . . . 5-28
Battery Voltage and ChargingMessages . . . . . . . . . . . . . . . . . . 5-29
Brake System Messages . . . . 5-29
Door Ajar Messages . . . . . . . . . 5-29
Engine Cooling System Messages . . . . . . . . . . . . . . . . . . 5-30
Engine Oil Messages . . . . . . . . 5-31
Engine Power Messages . . . . 5-31
Fuel System Messages . . . . . . 5-32
Key and Lock Messages . . . . . 5-32
Lamp Messages . . . . . . . . . . . . . 5-32
Ride Control System Messages . . . . . . . . . . . . . . . . . . 5-32
Airbag System Messages . . . . 5-33
Anti-Theft Alarm System Messages . . . . . . . . . . . . . . . . . . 5-34
Service Vehicle Messages . . . 5-34
Tire Messages . . . . . . . . . . . . . . . 5-34
Transmission Messages . . . . . 5-35
Vehicle Reminder Messages . . . . . . . . . . . . . . . . . . 5-36
Washer Fluid Messages . . . . . 5-36
Page 112 of 376
Black plate (2,1)Chevrolet Impala Owner Manual - 2011
5-2 Instruments and Controls
Vehicle Personalization
Vehicle Personalization . . . . . . 5-36
Universal Remote System
Universal Remote System . . . 5-42
Universal Remote SystemProgramming . . . . . . . . . . . . . . . 5-42
Universal Remote System Operation . . . . . . . . . . . . . . . . . . 5-47
Controls
Steering Wheel
Adjustment
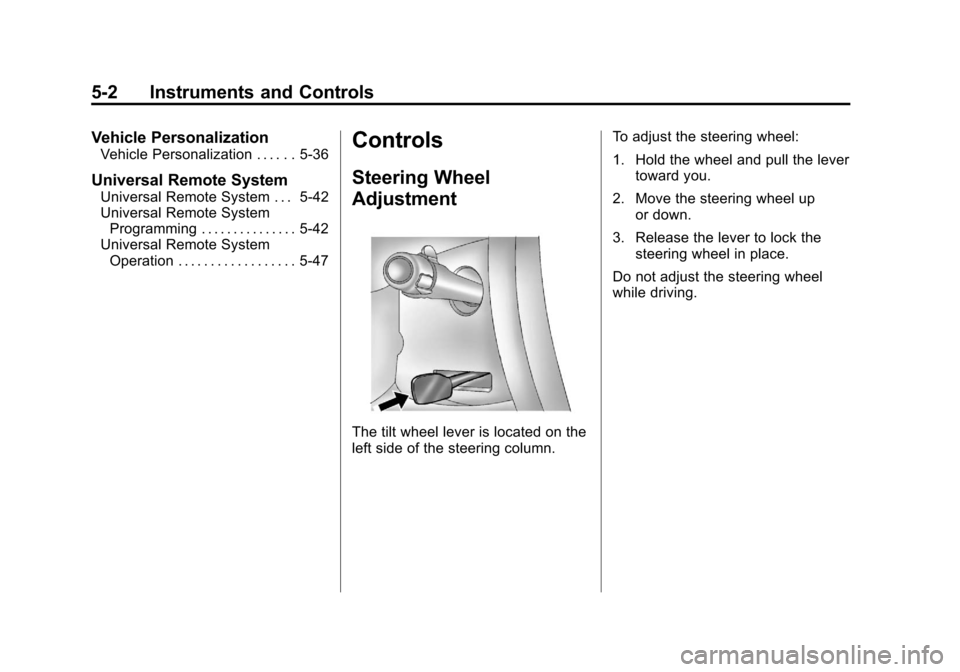
The tilt wheel lever is located on the
left side of the steering column. To adjust the steering wheel:
1. Hold the wheel and pull the lever
toward you.
2. Move the steering wheel up or down.
3. Release the lever to lock the steering wheel in place.
Do not adjust the steering wheel
while driving.