2011 CHEVROLET IMPALA stop start
[x] Cancel search: stop startPage 216 of 376
Black plate (18,1)Chevrolet Impala Owner Manual - 2011
9-18 Driving and Operating
Retained Accessory
Power (RAP)
These vehicle accessories can be
used for up to 10 minutes after the
engine turned off:
.Audio System
.Power Windows
The radio will work when the key is
in ON/RUN or ACC/ACCESSORY.
Once the key is turned from ON/
RUN to LOCK/OFF the radio will
continue to work 10 minutes or until
the driver door is opened. The
power windows will continue to work
for up to 10 minutes or until any
door is opened.
Starting the Engine
Move the shift lever to P (Park) or
N (Neutral). The engine will not start
in any other position. To restart the
engine when the vehicle is already
moving, use N (Neutral) only.
Notice: Do not try to shift to
P (Park) if the vehicle is moving.
If you do, you could damage the
transmission. Shift to P (Park)
only when the vehicle is stopped.
Starting Procedure
1. With your foot off the accelerator pedal, turn the ignition to START.
When the engine starts, let go of
the key. The idle speed will slow
down as the engine warms. Do
not race the engine immediately
after starting it. Operate the
engine and transmission gently
to allow the oil to warm up and
lubricate all moving parts. The vehicle has a
Computer-Controlled Cranking
System. This feature assists in
starting the engine and protects
components. If the ignition key is
turned to the START position,
and then released when the
engine begins cranking, the
engine will continue cranking for
a few seconds or until the
vehicle starts. If the engine does
not start and the key is held in
START, cranking will be stopped
after 15 seconds to prevent
cranking motor damage. To
prevent gear damage, this
system also prevents cranking if
the engine is already running.
Engine cranking can be stopped
by turning the ignition switch to
the ACC/ACCESSORY or
LOCK/OFF position.
Page 217 of 376
Black plate (19,1)Chevrolet Impala Owner Manual - 2011
Driving and Operating 9-19
When the Low Fuel warning
lamp is on and the FUEL LEVEL
LOW message is displayed in
the Driver Information Center
(DIC), the Computer‐Controlled
Cranking System is disabled to
prevent possible vehicle
component damage. When this
happens, hold the ignition switch
in the START position to
continue engine cranking.
Notice: Cranking the engine for
long periods of time, by returning
the key to the START position
immediately after cranking has
ended, can overheat and damage
the cranking motor, and drain the
battery. Wait at least 15 seconds
between each try, to let the
cranking motor cool down. 2. If the engine does not start after
5‐10 seconds, especially in very
cold weather (below −18°C or
0°F), it could be flooded with too
much gasoline. Try pushing the
accelerator pedal all the way to
the floor and holding it there as
you hold the key in START for
up to a maximum of 15 seconds.
Wait at least 15 seconds
between each try, to allow the
cranking motor to cool down.
When the engine starts, let go of
the key and accelerator. If the
vehicle starts briefly but then
stops again, repeat these steps. This clears the extra gasoline
from the engine. Do not race the
engine immediately after starting
it. Operate the engine and
transmission gently until the oil
warms up and lubricates all
moving parts.
Notice: The engine is designed to
work with the electronics in the
vehicle. If you add electrical parts
or accessories, you could change
the way the engine operates.
Before adding electrical
equipment, check with your
dealer. If you do not, the engine
might not perform properly. Any
resulting damage would not be
covered by the vehicle warranty.
Page 224 of 376
Black plate (26,1)Chevrolet Impala Owner Manual - 2011
9-26 Driving and Operating
The vehicle has an automatic
transmission shift lock control
system. You must fully apply the
brakes first, then press the shift
lever button before you can shift
from P (Park) while the ignition is in
ON/RUN. If you cannot shift out of
P (Park), ease pressure on the shift
lever and push the shift lever all the
way into P (Park) as you maintain
brake application. Then press the
shift lever button and move the shift
lever into another gear. SeeShifting
Out of Park on page 9‑22.
R (Reverse): Use this gear to
back up.
Notice: Shifting to R (Reverse)
while the vehicle is moving
forward could damage the
transmission. The repairs would
not be covered by the vehicle
warranty. Shift to R (Reverse) only
after the vehicle is stopped.
To rock the vehicle back and forth to
get out of snow, ice, or sand without
damaging the transmission, see If
the Vehicle is Stuck on page 9‑11. N (Neutral):
In this position,
the engine does not connect with
the wheels. To restart the engine
when the vehicle is already moving,
use N (Neutral) only. Also, use
N (Neutral) when the vehicle is
being towed.
{WARNING
Shifting into a drive gear while the
engine is running at high speed is
dangerous. Unless your foot is
firmly on the brake pedal, the
vehicle could move very rapidly.
You could lose control and hit
people or objects. Do not shift
into a drive gear while the engine
is running at high speed.
Notice: Shifting out of P (Park)
or N (Neutral) with the engine
running at high speed may
damage the transmission. The
repairs would not be covered by
the vehicle warranty. Be sure the
engine is not running at high
speed when shifting the vehicle. D (Drive) :
This position is for
normal driving. It provides the best
fuel economy. If you need more
power for passing, and you are:
.Going less than 55 km/h
(35 mph), push the accelerator
pedal about halfway down.
.Going about 55 km/h (35 mph) or
more, push the accelerator pedal
all the way down.
The transmission will shift down
to the next gear and the vehicle
will have more power.
Downshifting the transmission in
slippery road conditions could result
in skidding, see “Skidding”under
Loss of Control on page 9‑5.
Notice: Driving the vehicle if you
notice that it is moving slowly or
not shifting gears as you increase
speed may damage the
transmission. Have the vehicle
serviced right away. You can
drive in 2 (Second) when you are
Page 225 of 376
Black plate (27,1)Chevrolet Impala Owner Manual - 2011
Driving and Operating 9-27
driving less than 35 mph (55 km/h)
and D (Drive) for higher speeds
until then.
3 (Third):This position is also used
for normal driving. However, it
reduces vehicle speed more than
D (Drive) without using the brakes.
You might choose 3 (Third) instead
of D (Drive) when driving on hilly,
winding roads, when towing a trailer,
so there is less shifting between
gears and when going down a
steep hill.
2 (Second): This position reduces
vehicle speed even more than
3 (Third) without using the brakes.
You can use 2 (Second) on hills.
It can help control vehicle speed as
you go down steep mountain roads.
You would also want to use the
brakes off and on.
Notice: Driving in 2 (Second) for
more than 25 miles (40 km) or at
speeds over 55 mph (90 km/h)
may damage the transmission. Also, shifting into 2 (Second) at
speeds above 65 mph (105 km/h)
can cause damage. Drive in
3 (Third) or D (Drive) instead of
2 (Second).
1 (First):
This position reduces
vehicle speed even more than
2 (Second) without using the brakes.
You can use it on very steep hills,
or in deep snow or mud. If the shift
lever is in 1 (First) while the vehicle
is moving forward, the transmission
will not shift into first gear until the
vehicle is going slowly enough.
Notice: Spinning the tires or
holding the vehicle in one place
on a hill using only the
accelerator pedal may damage
the transmission. The repair will
not be covered by the vehicle
warranty. If you are stuck, do not
spin the tires. When stopping on
a hill, use the brakes to hold the
vehicle in place.Brakes
Antilock Brake
System (ABS)
The vehicle might have the Antilock
Brake System (ABS), an advanced
electronic braking system that helps
prevent a braking skid.
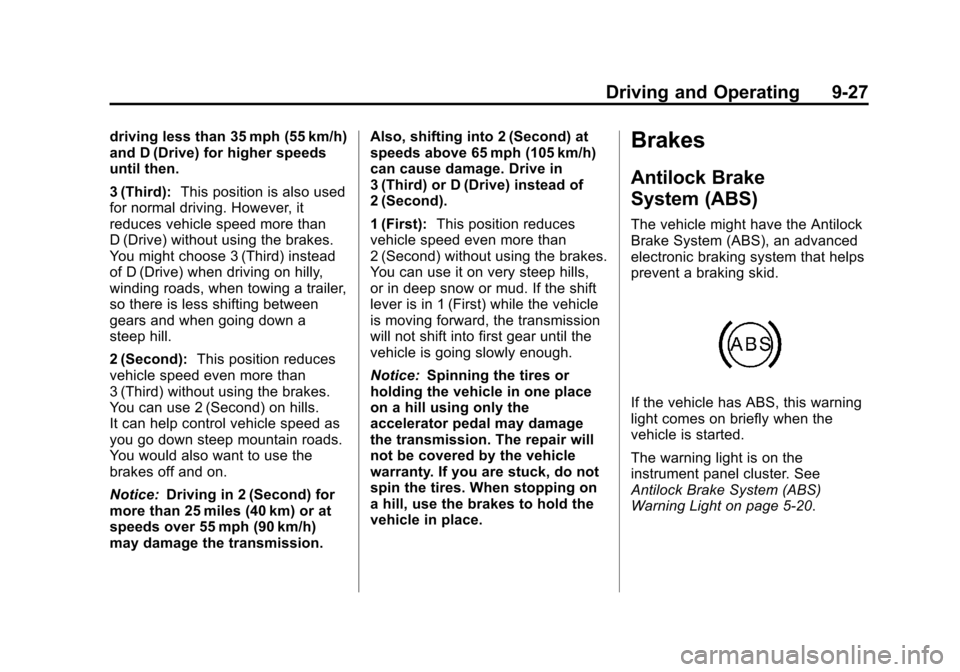
If the vehicle has ABS, this warning
light comes on briefly when the
vehicle is started.
The warning light is on the
instrument panel cluster. See
Antilock Brake System (ABS)
Warning Light on page 5‑20.
Page 240 of 376
Black plate (42,1)Chevrolet Impala Owner Manual - 2011
9-42 Driving and Operating
Driving with a Trailer
Towing a trailer requires a certain
amount of experience. Get to know
the rig before setting out for the
open road. Get acquainted with the
feel of handling and braking with the
added weight of the trailer. And
always keep in mind that the vehicle
you are driving is now longer and
not as responsive as the vehicle is
by itself.
Before starting, check all trailer hitch
parts and attachments, safety
chains, electrical connectors, lamps,
tires and mirror adjustments. If the
trailer has electric brakes, start the
vehicle and trailer moving and then
apply the trailer brake controller by
hand to be sure the brakes are
working. This checks the electrical
connection at the same time.
During the trip, check occasionally
to be sure that the load is secure,
and that the lamps and any trailer
brakes are still working.
Following Distance
Stay at least twice as far behind the
vehicle ahead as you would when
driving the vehicle without a trailer.
This can help to avoid situations
that require heavy braking and
sudden turns.
Passing
More passing distance is needed
when towing a trailer. Because the
rig is longer, it is necessary to go
much farther beyond the passed
vehicle before returning to the lane.
Backing Up
Hold the bottom of the steering
wheel with one hand. Then, to move
the trailer to the left, move that hand
to the left. To move the trailer to the
right, move your hand to the right.
Always back up slowly and,
if possible, have someone
guide you.
Making Turns
Notice:Making very sharp turns
while trailering could cause the
trailer to come in contact with the
vehicle. The vehicle could be
damaged. Avoid making very
sharp turns while trailering.
When turning with a trailer, make
wider turns than normal. Do this so
the trailer will not strike soft
shoulders, curbs, road signs, trees
or other objects. Avoid jerky or
sudden maneuvers. Signal well in
advance.
Turn Signals When Towing a
Trailer
The arrows on the instrument panel
flash whenever signaling a turn or
lane change. Properly hooked up,
the trailer lamps also flash, telling
other drivers the vehicle is turning,
changing lanes or stopping.
When towing a trailer, the arrows
on the instrument panel flash for
turns even if the bulbs on the
trailer are burned out.
Page 241 of 376
Black plate (43,1)Chevrolet Impala Owner Manual - 2011
Driving and Operating 9-43
For this reason you may think other
drivers are seeing the signal when
they are not. It is important to check
occasionally to be sure the trailer
bulbs are still working.
Driving on Grades
Notice:Do not tow on steep
continuous grades exceeding
9.6 km (6 miles). Extended, higher
than normal engine and
transmission temperatures may
result and damage the vehicle.
Frequent stops are very important
to allow the engine and
transmission to cool.
Reduce speed and shift to a
lower gear beforestarting down a
long or steep downgrade. If the
transmission is not shifted down, the
brakes might have to be used so
much that they would get hot and
no longer work well.
On a long uphill grade, shift down
and reduce the vehicle's speed to
around 70 km/h (45 mph) to reduce
the possibility of the engine and the transmission overheating. If the
engine does overheat, see
Engine
Overheating on page 10‑19.
Parking on Hills
{WARNING
Parking the vehicle on a hill with
the trailer attached can be
dangerous. If something goes
wrong, the rig could start to move.
People can be injured, and both
the vehicle and the trailer can be
damaged. When possible, always
park the rig on a flat surface.
If parking the rig on a hill:
1. Press the brake pedal, but do not shift into P (Park) yet.
Turn the wheels into the curb if
facing downhill or into traffic if
facing uphill.
2. Have someone place chocks under the trailer wheels. 3. When the wheel chocks are in
place, release the brake pedal
until the chocks absorb the load.
4. Reapply the brake pedal. Then apply the parking brake and shift
the transmission into P (Park).
5. Release the brake pedal.Leaving After Parking on a Hill
1. Apply and hold the brake pedal while you:
.start the engine,
.shift into a gear, and
.release the parking brake.
2. Let up on the brake pedal.
3. Drive slowly until the trailer is clear of the chocks.
4. Stop and have someone pick up and store the chocks.
Page 247 of 376

Black plate (1,1)Chevrolet Impala Owner Manual - 2011
Vehicle Care 10-1
Vehicle Care
General Information
General Information . . . . . . . . . . 10-2
California Proposition65 Warning . . . . . . . . . . . . . . . . . 10-3
California Perchlorate Materials Requirements . . . . 10-3
Accessories and Modifications . . . . . . . . . . . . . . . 10-3
Vehicle Checks
Doing Your OwnService Work . . . . . . . . . . . . . . . 10-4
Hood . . . . . . . . . . . . . . . . . . . . . . . . 10-5
Engine Compartment Overview . . . . . . . . . . . . . . . . . . . 10-6
Engine Oil . . . . . . . . . . . . . . . . . . . 10-8
Engine Oil Life System . . . . . 10-10
Automatic Transmission Fluid . . . . . . . . . . . . . . . . . . . . . . 10-11
Engine Air Cleaner/Filter . . . . 10-13
Cooling System . . . . . . . . . . . . 10-15
Engine Coolant . . . . . . . . . . . . . 10-16 Engine Overheating . . . . . . . . 10-19
Overheated Engine
Protection
Operating Mode . . . . . . . . . . . 10-21
Power Steering Fluid . . . . . . . 10-21
Washer Fluid . . . . . . . . . . . . . . . 10-22
Brakes . . . . . . . . . . . . . . . . . . . . . 10-23
Brake Fluid . . . . . . . . . . . . . . . . . 10-24
Battery . . . . . . . . . . . . . . . . . . . . . 10-25
Starter Switch Check . . . . . . . 10-26
Automatic Transmission Shift
Lock Control Function
Check . . . . . . . . . . . . . . . . . . . . . 10-26
Ignition Transmission Lock Check . . . . . . . . . . . . . . . . . . . . . 10-27
Park Brake and P (Park) Mechanism Check . . . . . . . . 10-27
Wiper Blade Replacement . . . . . . . . . . . . . . 10-27
Headlamp Aiming
Headlamp Aiming . . . . . . . . . . 10-29
Bulb Replacement
Bulb Replacement . . . . . . . . . . 10-29
Halogen Bulbs . . . . . . . . . . . . . . 10-29
Headlamps, Front TurnSignal, Sidemarker, and
Parking Lamps . . . . . . . . . . . . 10-30 Taillamps, Turn Signal,
Sidemarker, Stoplamps,
and Back-Up Lamps . . . . . . 10-32
License Plate Lamp . . . . . . . . 10-33
Replacement Bulbs . . . . . . . . . 10-33
Electrical System
Electrical System Overload . . . . . . . . . . . . . . . . . . 10-33
Fuses and Circuit Breakers . . . . . . . . . . . . . . . . . . 10-34
Engine Compartment Fuse Block . . . . . . . . . . . . . . . . . . . . . 10-34
Instrument Panel Fuse Block . . . . . . . . . . . . . . . . . . . . . 10-37
Wheels and Tires
Tires . . . . . . . . . . . . . . . . . . . . . . . . 10-38
Tire Sidewall Labeling . . . . . . 10-39
Tire Designations . . . . . . . . . . . 10-41
Tire Terminology andDefinitions . . . . . . . . . . . . . . . . 10-41
Tire Pressure . . . . . . . . . . . . . . . 10-44
Tire Pressure Monitor System . . . . . . . . . . . . . . . . . . . 10-46
Tire Pressure Monitor Operation . . . . . . . . . . . . . . . . . 10-47
Tire Inspection . . . . . . . . . . . . . . 10-51
Tire Rotation . . . . . . . . . . . . . . . 10-51
Page 264 of 376
Black plate (18,1)Chevrolet Impala Owner Manual - 2011
10-18 Vehicle Care
How to Add Coolant to the
Radiator
{WARNING
An electric engine cooling fan
under the hood can start up even
when the engine is not running
and can cause injury. Keep
hands, clothing, and tools away
from any underhood electric fan.
{WARNING
Steam and scalding liquids from a
hot cooling system can blow out
and burn you badly. They are
under pressure, and if you turn
the surge tank pressure
cap—even a little —they can
come out at high speed. Never
turn the cap when the cooling
system, including the surge tank
pressure cap, is hot.
(Continued)
WARNING (Continued)
Wait for the cooling system and
surge tank pressure cap to cool if
you ever have to turn the
pressure cap.
If coolant is needed, add the proper
mixture directly to the radiator, but
be sure the cooling system is cool
before this is done.
1. Remove the pressure cap when the cooling system, including
the pressure cap and upper
radiator hose is no longer hot.
Turn the pressure cap
slowly counterclockwise.
If a hiss is heard, wait for that to
stop. A hiss means that there is
still some pressure left. 2. Keep turning the pressure cap
and remove it.
3. Fill the cooling system with the proper DEX-COOL coolant
mixture, up to the base of the
filler neck. See “What to use”for
more information about the
proper coolant mixture. Rinse or
wipe any spilled coolant from the
engine and the compartment.
4. Then fill the coolant recovery tank to the COLD FILL line.