2011 CHEVROLET IMPALA parking brake
[x] Cancel search: parking brakePage 227 of 376
Black plate (29,1)Chevrolet Impala Owner Manual - 2011
Driving and Operating 9-29
Parking Brake
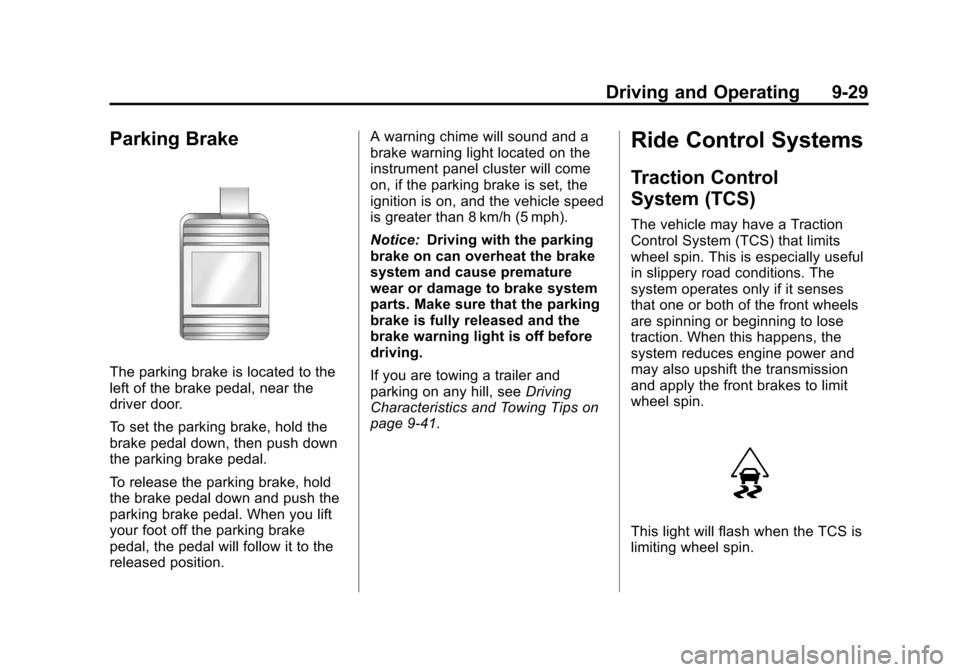
The parking brake is located to the
left of the brake pedal, near the
driver door.
To set the parking brake, hold the
brake pedal down, then push down
the parking brake pedal.
To release the parking brake, hold
the brake pedal down and push the
parking brake pedal. When you lift
your foot off the parking brake
pedal, the pedal will follow it to the
released position.A warning chime will sound and a
brake warning light located on the
instrument panel cluster will come
on, if the parking brake is set, the
ignition is on, and the vehicle speed
is greater than 8 km/h (5 mph).
Notice:
Driving with the parking
brake on can overheat the brake
system and cause premature
wear or damage to brake system
parts. Make sure that the parking
brake is fully released and the
brake warning light is off before
driving.
If you are towing a trailer and
parking on any hill, see Driving
Characteristics and Towing Tips on
page 9‑41.
Ride Control Systems
Traction Control
System (TCS)
The vehicle may have a Traction
Control System (TCS) that limits
wheel spin. This is especially useful
in slippery road conditions. The
system operates only if it senses
that one or both of the front wheels
are spinning or beginning to lose
traction. When this happens, the
system reduces engine power and
may also upshift the transmission
and apply the front brakes to limit
wheel spin.
This light will flash when the TCS is
limiting wheel spin.
Page 241 of 376
Black plate (43,1)Chevrolet Impala Owner Manual - 2011
Driving and Operating 9-43
For this reason you may think other
drivers are seeing the signal when
they are not. It is important to check
occasionally to be sure the trailer
bulbs are still working.
Driving on Grades
Notice:Do not tow on steep
continuous grades exceeding
9.6 km (6 miles). Extended, higher
than normal engine and
transmission temperatures may
result and damage the vehicle.
Frequent stops are very important
to allow the engine and
transmission to cool.
Reduce speed and shift to a
lower gear beforestarting down a
long or steep downgrade. If the
transmission is not shifted down, the
brakes might have to be used so
much that they would get hot and
no longer work well.
On a long uphill grade, shift down
and reduce the vehicle's speed to
around 70 km/h (45 mph) to reduce
the possibility of the engine and the transmission overheating. If the
engine does overheat, see
Engine
Overheating on page 10‑19.
Parking on Hills
{WARNING
Parking the vehicle on a hill with
the trailer attached can be
dangerous. If something goes
wrong, the rig could start to move.
People can be injured, and both
the vehicle and the trailer can be
damaged. When possible, always
park the rig on a flat surface.
If parking the rig on a hill:
1. Press the brake pedal, but do not shift into P (Park) yet.
Turn the wheels into the curb if
facing downhill or into traffic if
facing uphill.
2. Have someone place chocks under the trailer wheels. 3. When the wheel chocks are in
place, release the brake pedal
until the chocks absorb the load.
4. Reapply the brake pedal. Then apply the parking brake and shift
the transmission into P (Park).
5. Release the brake pedal.Leaving After Parking on a Hill
1. Apply and hold the brake pedal while you:
.start the engine,
.shift into a gear, and
.release the parking brake.
2. Let up on the brake pedal.
3. Drive slowly until the trailer is clear of the chocks.
4. Stop and have someone pick up and store the chocks.
Page 247 of 376

Black plate (1,1)Chevrolet Impala Owner Manual - 2011
Vehicle Care 10-1
Vehicle Care
General Information
General Information . . . . . . . . . . 10-2
California Proposition65 Warning . . . . . . . . . . . . . . . . . 10-3
California Perchlorate Materials Requirements . . . . 10-3
Accessories and Modifications . . . . . . . . . . . . . . . 10-3
Vehicle Checks
Doing Your OwnService Work . . . . . . . . . . . . . . . 10-4
Hood . . . . . . . . . . . . . . . . . . . . . . . . 10-5
Engine Compartment Overview . . . . . . . . . . . . . . . . . . . 10-6
Engine Oil . . . . . . . . . . . . . . . . . . . 10-8
Engine Oil Life System . . . . . 10-10
Automatic Transmission Fluid . . . . . . . . . . . . . . . . . . . . . . 10-11
Engine Air Cleaner/Filter . . . . 10-13
Cooling System . . . . . . . . . . . . 10-15
Engine Coolant . . . . . . . . . . . . . 10-16 Engine Overheating . . . . . . . . 10-19
Overheated Engine
Protection
Operating Mode . . . . . . . . . . . 10-21
Power Steering Fluid . . . . . . . 10-21
Washer Fluid . . . . . . . . . . . . . . . 10-22
Brakes . . . . . . . . . . . . . . . . . . . . . 10-23
Brake Fluid . . . . . . . . . . . . . . . . . 10-24
Battery . . . . . . . . . . . . . . . . . . . . . 10-25
Starter Switch Check . . . . . . . 10-26
Automatic Transmission Shift
Lock Control Function
Check . . . . . . . . . . . . . . . . . . . . . 10-26
Ignition Transmission Lock Check . . . . . . . . . . . . . . . . . . . . . 10-27
Park Brake and P (Park) Mechanism Check . . . . . . . . 10-27
Wiper Blade Replacement . . . . . . . . . . . . . . 10-27
Headlamp Aiming
Headlamp Aiming . . . . . . . . . . 10-29
Bulb Replacement
Bulb Replacement . . . . . . . . . . 10-29
Halogen Bulbs . . . . . . . . . . . . . . 10-29
Headlamps, Front TurnSignal, Sidemarker, and
Parking Lamps . . . . . . . . . . . . 10-30 Taillamps, Turn Signal,
Sidemarker, Stoplamps,
and Back-Up Lamps . . . . . . 10-32
License Plate Lamp . . . . . . . . 10-33
Replacement Bulbs . . . . . . . . . 10-33
Electrical System
Electrical System Overload . . . . . . . . . . . . . . . . . . 10-33
Fuses and Circuit Breakers . . . . . . . . . . . . . . . . . . 10-34
Engine Compartment Fuse Block . . . . . . . . . . . . . . . . . . . . . 10-34
Instrument Panel Fuse Block . . . . . . . . . . . . . . . . . . . . . 10-37
Wheels and Tires
Tires . . . . . . . . . . . . . . . . . . . . . . . . 10-38
Tire Sidewall Labeling . . . . . . 10-39
Tire Designations . . . . . . . . . . . 10-41
Tire Terminology andDefinitions . . . . . . . . . . . . . . . . 10-41
Tire Pressure . . . . . . . . . . . . . . . 10-44
Tire Pressure Monitor System . . . . . . . . . . . . . . . . . . . 10-46
Tire Pressure Monitor Operation . . . . . . . . . . . . . . . . . 10-47
Tire Inspection . . . . . . . . . . . . . . 10-51
Tire Rotation . . . . . . . . . . . . . . . 10-51
Page 251 of 376
Black plate (5,1)Chevrolet Impala Owner Manual - 2011
Vehicle Care 10-5
This vehicle has an airbag system.
Before attempting to do your own
service work, seeServicing the
Airbag-Equipped Vehicle on
page 3‑38.
Keep a record with all parts
receipts and list the mileage and the
date of any service work performed.
See Maintenance Records on
page 11‑9.Hood
To open the hood, do the following:
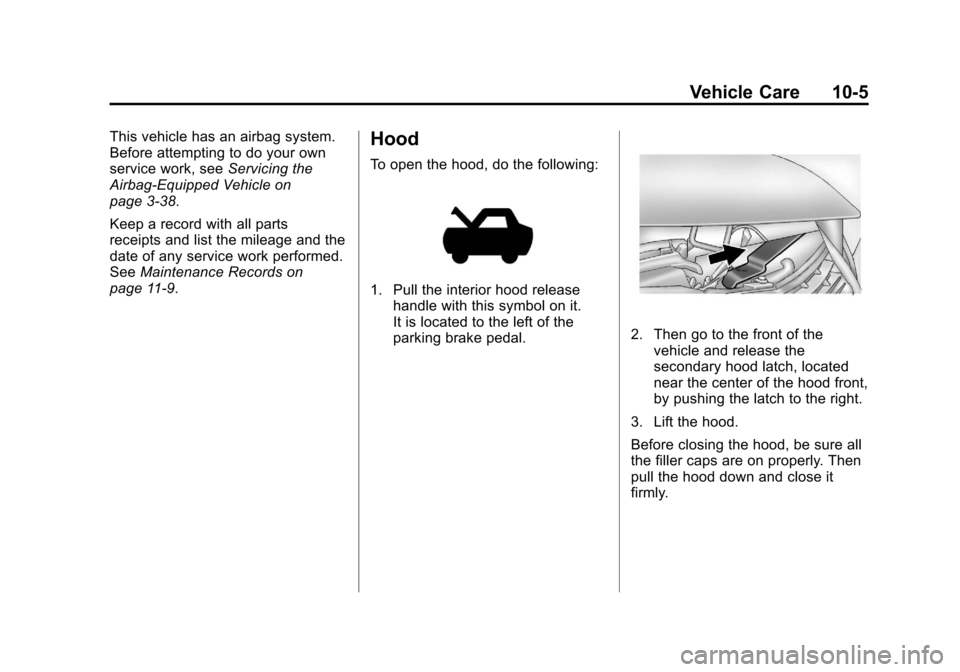
1. Pull the interior hood release handle with this symbol on it.
It is located to the left of the
parking brake pedal.
2. Then go to the front of thevehicle and release the
secondary hood latch, located
near the center of the hood front,
by pushing the latch to the right.
3. Lift the hood.
Before closing the hood, be sure all
the filler caps are on properly. Then
pull the hood down and close it
firmly.
Page 258 of 376
Black plate (12,1)Chevrolet Impala Owner Manual - 2011
10-12 Vehicle Care
Notice:Too much or too
little fluid can damage the
transmission. Too much can
mean that some of the fluid could
come out and fall on hot engine
parts or exhaust system parts,
starting a fire. Too little fluid
could cause the transmission to
overheat. Be sure to get an
accurate reading if checking the
transmission fluid.
Wait at least 30 minutes before
checking the transmission fluid level
if you have been driving:
.When outside temperatures are
above 32°C (90°F).
.At high speed for quite a while.
.In heavy traffic —especially in
hot weather.
.While pulling a trailer.
To get the right reading, the fluid
should be at normal operating
temperature, which is 82°C to
93°C (180°F to 200°F). Get the vehicle warmed up by
driving about 24 km (15 mi) when
outside temperatures are above
10°C (50°F). If it is colder than
10°C (50°F), the vehicle may have
to be driven longer.
Checking the Fluid Level
Prepare your vehicle as follows:
1. Park the vehicle on a level
place. Keep the engine running.
2. With the parking brake applied, place the shift lever in P (Park).
3. With your foot on the brake pedal, move the shift lever
through each gear range,
pausing for about three seconds
in each range. Then, position the
shift lever in P (Park).
4. Let the engine run at idle for three to five minutes. Then, without shutting off the
engine, follow these steps:
1. Pull out the dipstick and wipe it
with a clean rag or paper towel.
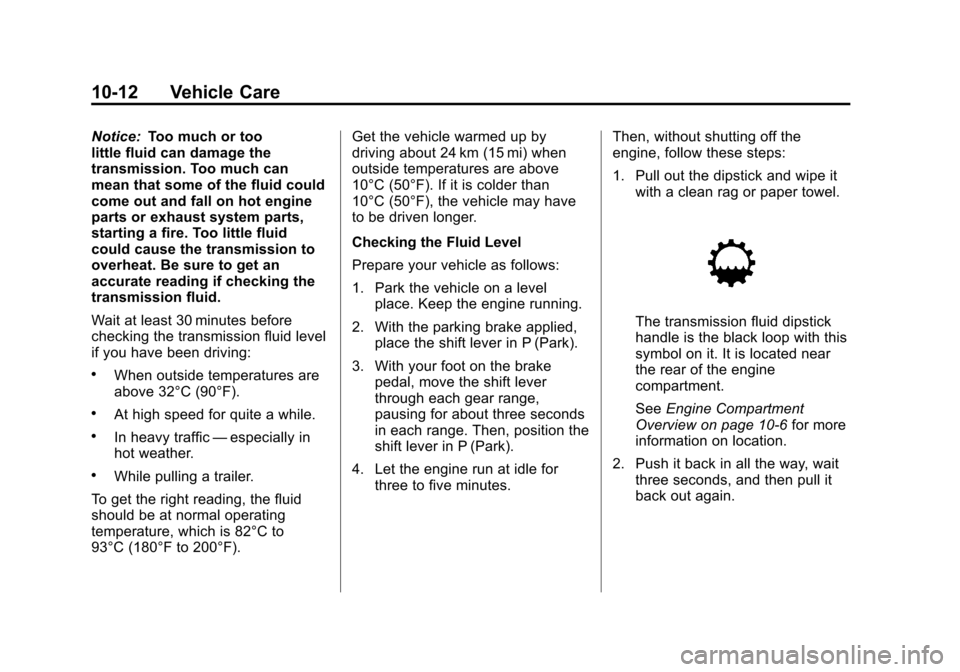
The transmission fluid dipstick
handle is the black loop with this
symbol on it. It is located near
the rear of the engine
compartment.
See Engine Compartment
Overview on page 10‑6 for more
information on location.
2. Push it back in all the way, wait three seconds, and then pull it
back out again.
Page 272 of 376
Black plate (26,1)Chevrolet Impala Owner Manual - 2011
10-26 Vehicle Care
Starter Switch Check
{WARNING
When you are doing this
inspection, the vehicle could
move suddenly. If the vehicle
moves, you or others could
be injured.
1. Before starting this check, be sure there is enough room
around the vehicle.
2. Firmly apply both the parking brake and the regular brake.
See Parking Brake on
page 9‑29.
Do not use the accelerator
pedal, and be ready to turn off
the engine immediately if it
starts. 3. Try to start the engine in each
gear. The vehicle should start
only in P (Park) or N (Neutral).
If the vehicle starts in any other
position, contact your dealer
for service.
Automatic Transmission
Shift Lock Control
Function Check
{WARNING
When you are doing this
inspection, the vehicle could
move suddenly. If the vehicle
moves, you or others could
be injured.
1. Before starting this check, be sure there is enough room
around the vehicle. It should be
parked on a level surface. 2. Firmly apply the parking brake.
See Parking Brake on
page 9‑29.
Be ready to apply the regular
brake immediately if the vehicle
begins to move.
3. With the engine off, turn the ignition to ON/RUN, but do not
start the engine. Without
applying the regular brake,
try to move the shift lever out of
P (Park) with normal effort. If the
shift lever moves out of P (Park),
contact your dealer for service.
Page 273 of 376
Black plate (27,1)Chevrolet Impala Owner Manual - 2011
Vehicle Care 10-27
Ignition Transmission
Lock Check
While parked, and with the parking
brake set, try to turn the ignition to
LOCK/OFF in each shift lever
position.
.The ignition should turn to
LOCK/OFF only when the shift
lever is in P (Park).
.The ignition key should come
out only in LOCK/OFF.
Contact your dealer if service is
required.
Park Brake and P (Park)
Mechanism Check
{WARNING
When you are doing this check,
the vehicle could begin to move.
You or others could be injured
and property could be damaged.
Make sure there is room in front
of the vehicle in case it begins to
roll. Be ready to apply the regular
brake at once should the vehicle
begin to move.
Park on a fairly steep hill, with the
vehicle facing downhill. Keeping
your foot on the regular brake, set
the parking brake.
.To check the parking brake's
holding ability: With the engine
running and the transmission in
N (Neutral), slowly remove foot
pressure from the regular brake
pedal. Do this until the vehicle is
held by the parking brake only.
.To check the P (Park)
mechanism's holding ability:
With the engine running, shift to
P (Park). Then release the
parking brake followed by the
regular brake.
Contact your dealer if service is
required.
Wiper Blade Replacement
Windshield wiper blades should
be inspected for wear or cracking.
See Scheduled Maintenance on
page 11‑2 for more information on
wiper blade inspection.
Replacement blades come in
different types and are removed in
different ways. Here's how to
remove the wiper blade:
1. Pull the windshield wiper arm
connector away from the
windshield.
Page 296 of 376

Black plate (50,1)Chevrolet Impala Owner Manual - 2011
10-50 Vehicle Care
The TPMS sensor matching process
is outlined below:
1. Set the parking brake.
2. Turn the ignition switch to ON/RUN with the engine off.
3. Press the Remote Keyless Entry (RKE) transmitter's lock and
unlock buttons at the same time
for approximately five seconds.
The horn sounds twice to signal
the receiver is in relearn mode
and the TIRE LEARNING
ACTIVE message displays on
the DIC screen.
4. Start with the driver side front tire. 5. Remove the valve cap from the
valve cap stem. Activate the
TPMS sensor by increasing or
decreasing the tire's air pressure
for five seconds, or until a
horn chirp sounds. The horn
chirp, which may take up to
30 seconds to sound, confirms
that the sensor identification
code has been matched to this
tire and wheel position.
6. Proceed to the passenger side front tire, and repeat the
procedure in Step 5.
7. Proceed to the passenger side rear tire, and repeat the
procedure in Step 5. 8. Proceed to the driver side rear
tire, and repeat the procedure
in Step 5. The horn sounds
two times to indicate the sensor
identification code has been
matched to the driver side rear
tire, and the TPMS sensor
matching process is no longer
active. The TIRE LEARNING
ACTIVE message on the
DIC display screen goes off.
9. Turn the ignition switch to LOCK/OFF.
10. Set all four tires to the recommended air pressure
level as indicated on the Tire
and Loading Information label.
11. Put the valve caps back on the valve stems.