2011 CHEVROLET IMPALA buttons
[x] Cancel search: buttonsPage 21 of 376
Black plate (15,1)Chevrolet Impala Owner Manual - 2011
In Brief 1-15
For radios without a FAV button, up
to 18 stations (6 FM1, 6 FM2, and
6 AM), can be programmed on the
6 numbered buttons.
SeeOperation on page 7‑2.
Setting the Clock
To set the time and date for the
Radio with CD (MP3):
1. Turn the radio on.
2. Press
Hand the HR, MIN, MM,
DD, and YYYY (hour, minute,
month, day, and year) display.
3. Press the pushbutton located below any one of the tabs that
you want to change.
4. Increase or decrease the time or date by turning
fclockwise or
counterclockwise.
For detailed instructions on setting
the clock for your specific audio
system, see Clock on page 5‑7.
Satellite Radio
XM is a satellite radio service
that is based in the 48 contiguous
United States and 10 Canadian
provinces. XM satellite radio has a
wide variety of programming and
commercial-free music, coast to
coast, and in digital-quality sound.
A fee is required to receive the
XM service.
For more information, refer to:
.www.xmradio.com or call
1-800-929-2100 (U.S.)
.www.xmradio.ca or call
1-877-438-9677 (Canada)
See “XM Satellite Radio Service”
under Satellite Radio on page 7‑8.
Portable Audio Devices
This vehicle may have an auxiliary
input jack, located on the audio
faceplate. External devices such as iPod
®, MP3 players, etc. can be
connected to the auxiliary input jack
using a 3.5 mm (1/8 in) input jack
cable.
See “Using the Auxiliary Input Jack”
under Auxiliary Devices on
page 7‑19.
Bluetooth®
For vehicles with a Bluetooth
system, it allows users with a
Bluetooth‐enabled cell phone to
make and receive hands-free calls
using the vehicle’ s audio system
and controls.
The Bluetooth‐enabled cell phone
must be paired with the Bluetooth
system before it can be used in the
vehicle. Not all phones will support
all functions. For more information,
visit www.gm.com/bluetooth.
For more information, see Bluetooth
on page 7‑20.
Page 22 of 376
Black plate (16,1)Chevrolet Impala Owner Manual - 2011
1-16 In Brief
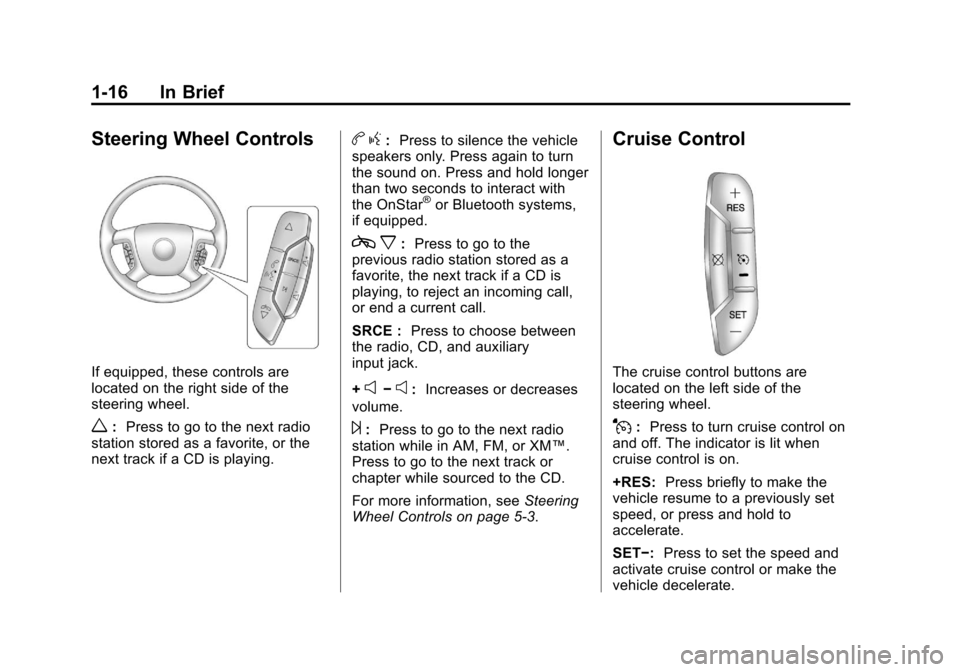
Steering Wheel Controls
If equipped, these controls are
located on the right side of the
steering wheel.
w:Press to go to the next radio
station stored as a favorite, or the
next track if a CD is playing.
b g: Press to silence the vehicle
speakers only. Press again to turn
the sound on. Press and hold longer
than two seconds to interact with
the OnStar
®or Bluetooth systems,
if equipped.
c x:Press to go to the
previous radio station stored as a
favorite, the next track if a CD is
playing, to reject an incoming call,
or end a current call.
SRCE : Press to choose between
the radio, CD, and auxiliary
input jack.
+
e−e: Increases or decreases
volume.
¨: Press to go to the next radio
station while in AM, FM, or XM™.
Press to go to the next track or
chapter while sourced to the CD.
For more information, see Steering
Wheel Controls on page 5‑3.
Cruise Control
The cruise control buttons are
located on the left side of the
steering wheel.
J: Press to turn cruise control on
and off. The indicator is lit when
cruise control is on.
+RES: Press briefly to make the
vehicle resume to a previously set
speed, or press and hold to
accelerate.
SET−: Press to set the speed and
activate cruise control or make the
vehicle decelerate.
Page 28 of 376
Black plate (22,1)Chevrolet Impala Owner Manual - 2011
1-22 In Brief
OnStar Steering Wheel
Controls
This vehicle may have a Talk/Mute
button that can be used to interact
with OnStar hands-free calling.
SeeSteering Wheel Controls on
page 5‑3 for more information.
On some vehicles, the mute button
can be used to dial numbers into
voice mail systems, or to dial phone
extensions. See the OnStar Owner's
Guide for more information.
Your Responsibility
Increase the volume of the radio if
the OnStar advisor cannot be heard.
If the light next to the OnStar
buttons is red, the system may
not be functioning properly.
Press
Qand request a vehicle
diagnostic. If the light appears clear
(no light is appearing), your OnStar
subscription has expired and all
services have been deactivated.
Press
Qto confirm that the OnStar
equipment is active.
Page 43 of 376

Black plate (15,1)Chevrolet Impala Owner Manual - 2011
Keys, Doors and Windows 2-15
Power Mirrors
Controls for the outside power
mirrors are located on the driver
door armrest.
1. Press the left or right side of theselector switch located above
the control pad, to select the
driver or passenger mirror.
2. Press one of the four buttons located on the control pad to
move the mirror to the desired
direction. 3. Adjust each outside mirror so
that a little of the vehicle and the
area behind it can be seen.
Keep the selector switch in the
center position when not adjusting
either outside mirror.
Heated Mirrors
For vehicles with heated mirrors:
=(Rear Window Defogger):
Press to heat the outside rearview
mirrors. See “Rear Window
Defogger” underClimate Control
Systems on page 8‑1 for more
information.
Interior Mirrors
Manual Rearview Mirror
Adjust the inside rearview mirror
for a clear view of the area behind
your vehicle. To avoid glare of the
headlamps from behind, push the
tab forward for daytime and pull it
for nighttime use.
Vehicles with OnStar
®have three
additional control buttons located at
the bottom of the mirror. See your
dealer for more information about
OnStar and how to subscribe to it.
See the OnStar Owner's Guide for
more information about the services
OnStar provides.
Page 44 of 376

Black plate (16,1)Chevrolet Impala Owner Manual - 2011
2-16 Keys, Doors and Windows
Automatic Dimming
Rearview Mirror
The vehicle may have an automatic
dimming inside rearview mirror.
Automatic dimming reduces the
glare from the headlamps of the
vehicle behind you. The dimming
feature comes on and the indicator
light illuminates each time the
ignition is turned to start.
O(On/Off):Press to turn the
dimming feature on or off.
Vehicles with OnStar have three
additional control buttons for the
OnStar system. See your dealer for
more information about OnStar and
how to subscribe to it. See the
OnStar Owner Guide for more
information about the services
OnStar provides.
Cleaning the Mirror
Do not spray glass cleaner directly
on the mirror. Use a soft towel
dampened with water.
Windows
{WARNING
Leaving children, helpless adults,
or pets in a vehicle with the
windows closed is dangerous.
They can be overcome by the
extreme heat and suffer
permanent injuries or even death
from heat stroke. Never leave a
child, a helpless adult, or a pet
alone in a vehicle, especially with
the windows closed in warm or
hot weather.
The vehicle aerodynamics are
designed to improve fuel economy
performance. This may result in a
pulsing sound when either rear
window is down and the front
windows are up. To reduce the
sound, open either a front window
or the sunroof (if equipped).
Page 55 of 376
Black plate (7,1)Chevrolet Impala Owner Manual - 2011
Seats and Restraints 3-7
Heated Front Seats
{WARNING
If you cannot feel temperature
change or pain to the skin, the
seat heater may cause burns
even at low temperatures. To
reduce the risk of burns, people
with such a condition should use
care when using the seat heater,
especially for long periods of
time. Do not place anything on
the seat that insulates against
heat, such as a blanket, cushion,
cover or similar item. This may
cause the seat heater to
overheat. An overheated seat
heater may cause a burn or
may damage the seat.
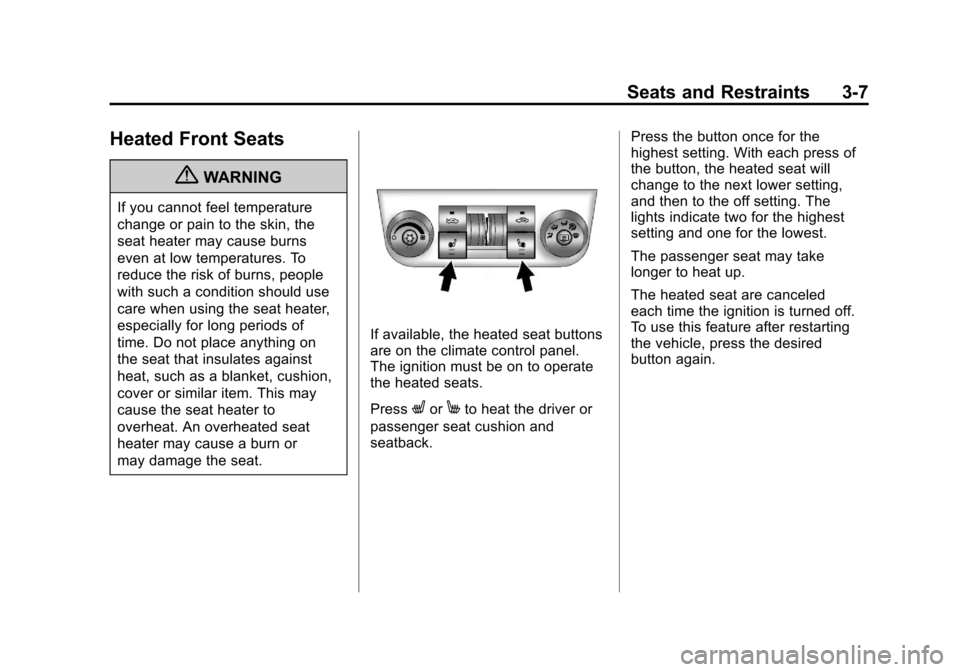
If available, the heated seat buttons
are on the climate control panel.
The ignition must be on to operate
the heated seats.
Press
LorMto heat the driver or
passenger seat cushion and
seatback. Press the button once for the
highest setting. With each press of
the button, the heated seat will
change to the next lower setting,
and then to the off setting. The
lights indicate two for the highest
setting and one for the lowest.
The passenger seat may take
longer to heat up.
The heated seat are canceled
each time the ignition is turned off.
To use this feature after restarting
the vehicle, press the desired
button again.
Page 69 of 376
Black plate (21,1)Chevrolet Impala Owner Manual - 2011
Seats and Restraints 3-21
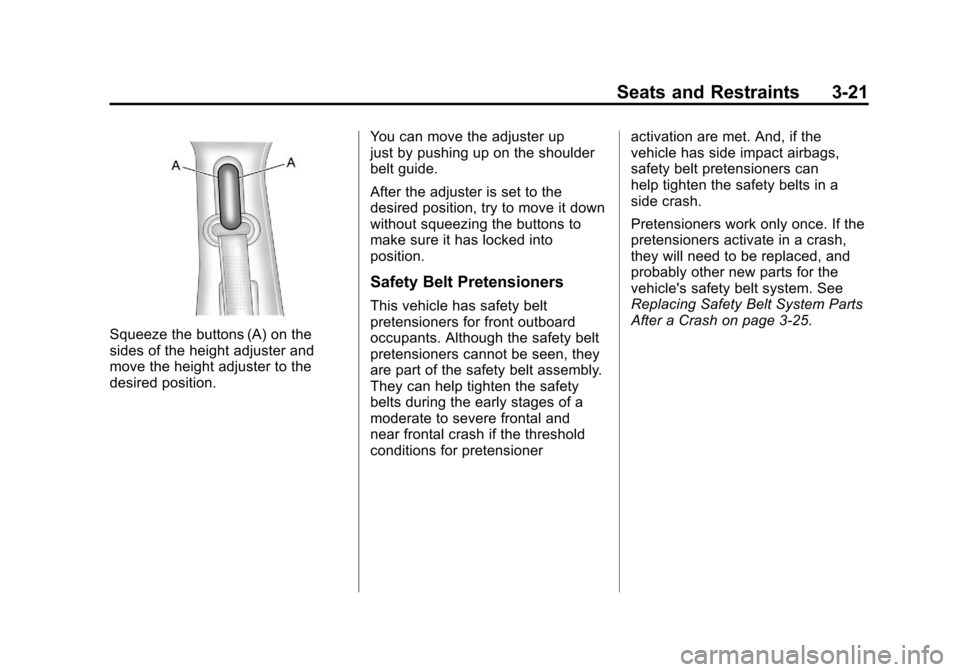
Squeeze the buttons (A) on the
sides of the height adjuster and
move the height adjuster to the
desired position.You can move the adjuster up
just by pushing up on the shoulder
belt guide.
After the adjuster is set to the
desired position, try to move it down
without squeezing the buttons to
make sure it has locked into
position.
Safety Belt Pretensioners
This vehicle has safety belt
pretensioners for front outboard
occupants. Although the safety belt
pretensioners cannot be seen, they
are part of the safety belt assembly.
They can help tighten the safety
belts during the early stages of a
moderate to severe frontal and
near frontal crash if the threshold
conditions for pretensioneractivation are met. And, if the
vehicle has side impact airbags,
safety belt pretensioners can
help tighten the safety belts in a
side crash.
Pretensioners work only once. If the
pretensioners activate in a crash,
they will need to be replaced, and
probably other new parts for the
vehicle's safety belt system. See
Replacing Safety Belt System Parts
After a Crash on page 3‑25.
Page 134 of 376

Black plate (24,1)Chevrolet Impala Owner Manual - 2011
5-24 Instruments and Controls
High-Beam on Light
This light comes on when the
high-beam headlamps are in use.
SeeHeadlamp High/Low-Beam
Changer on page 6‑3 for more
information.
Front Fog Lamp Light
The fog lamp lights come on when
the fog lamps are in use. The lights go out when the fog
lamps are turned off. See
Fog
Lamps on page 6‑5 for more
information.
Cruise Control Light
The cruise control light comes on
whenever the cruise control is set.
The light goes out when the cruise
control is turned off. See Cruise
Control on page 9‑32 for more
information.
Information Displays
Driver Information
Center (DIC)
Your vehicle has a Driver
Information Center (DIC).
All messages will appear in the
DIC display located below the
speedometer in the instrument
panel cluster. The DIC buttons are
located on the instrument panel, to
the right of the instrument panel
cluster.
The DIC comes on when the ignition
is on. After a short delay, the DIC
will display the information that was
last displayed before the engine
was turned off.
The DIC displays trip, fuel, and
vehicle system information, and
warning messages if a system
problem is detected. The bottom line
of the DIC shows the shift lever
position indicator. See Automatic
Transmission on page 9‑25 for
more information.