2011 CHEVROLET EQUINOX Lamps
[x] Cancel search: LampsPage 6 of 446
Black plate (6,1)Chevrolet Equinox Owner Manual - 2011
vi Introduction
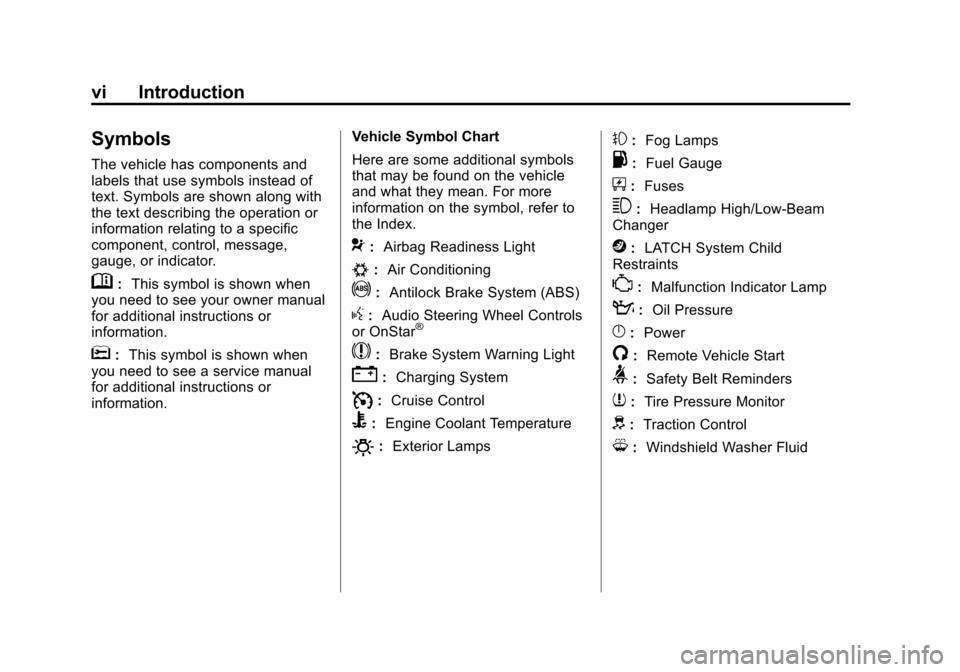
Symbols
The vehicle has components and
labels that use symbols instead of
text. Symbols are shown along with
the text describing the operation or
information relating to a specific
component, control, message,
gauge, or indicator.
M:This symbol is shown when
you need to see your owner manual
for additional instructions or
information.
*: This symbol is shown when
you need to see a service manual
for additional instructions or
information. Vehicle Symbol Chart
Here are some additional symbols
that may be found on the vehicle
and what they mean. For more
information on the symbol, refer to
the Index.
9:
Airbag Readiness Light
#:Air Conditioning
!:Antilock Brake System (ABS)
g:Audio Steering Wheel Controls
or OnStar®
$: Brake System Warning Light
":Charging System
I:Cruise Control
B: Engine Coolant Temperature
O:Exterior Lamps
#:Fog Lamps
.: Fuel Gauge
+:Fuses
3: Headlamp High/Low-Beam
Changer
j: LATCH System Child
Restraints
*: Malfunction Indicator Lamp
::Oil Pressure
}:Power
/:Remote Vehicle Start
>:Safety Belt Reminders
7:Tire Pressure Monitor
d:Traction Control
M:Windshield Washer Fluid
Page 9 of 446

Black plate (3,1)Chevrolet Equinox Owner Manual - 2011
In Brief 1-3
A.Air Vents on page 8‑5.
B. Turn and Lane‐Change Lever. See Turn and Lane-Change
Signals on page 6‑3.
Exterior Lamp Controls on
page 6‑1.
Fog Lamps on page 6‑3
(If Equipped).
C. Instrument Cluster on page 5‑9.
D. Windshield Wiper/Washer on
page 5‑4.
Rear Window Wiper/Washer on
page 5‑5.
E. Power Door Locks on page 2‑7.
F. Instrument Panel Storage on
page 4‑1.
G. Safety Locks on page 2‑8.
H. AM-FM Radio on page 7‑11.
Navigation System
(If Equipped). See Navigation
System Manual. I. Data Link Connector (DLC).
See Malfunction Indicator Lamp
on page 5‑14.
J. Cruise Control on page 9‑44.
K. Instrument Panel Illumination
Control on page 6‑4.
L. Steering Wheel Adjustment on
page 5‑2.
M. Horn on page 5‑3.
N. Steering Wheel Controls on
page 5‑3.
O. Ignition Positions on page 9‑28.
P. Climate Control Systems on
page 8‑1 (If Equipped).
Automatic Climate Control
System on page 8‑3
(If Equipped).
Q. Shift Lever. See Shifting Into
Park on page 9‑32.
R. Fuel Economy Mode on
page 9‑38 (If Equipped). S.
StabiliTrak®System on
page 9‑43.
T. Cupholders on page 4‑1.
U. Power Outlets on page 5‑7.
V. CD Player on page 7‑19.
W. Driver Information Center Buttons (If Equipped). See
Driver Information Center (DIC)
on page 5‑22.
X. Hazard Warning Flashers on
page 6‑3.
Y. Glove Box on page 4‑1.
Page 11 of 446
Black plate (5,1)Chevrolet Equinox Owner Manual - 2011
In Brief 1-5
Remote Vehicle Start
With this feature the engine can be
started from outside of the vehicle.
Starting the Vehicle
1. PressQon the Remote Keyless
Entry transmitter.
2. Press and hold
/for about
two seconds. The turn signal
lamps will briefly flash to confirm
the vehicle has been started.
The parking lamps will turn on
and remain on as long as the
engine is running. The vehicle's
doors will be locked.
3. The key must be inserted and turned to ON/RUN before
driving.
The engine will shut off after
10 minutes unless a time extension
is done or the key is inserted and
turned to ON/RUN.
Canceling a Remote Start
To cancel a remote start, do one of
the following:
.Press/until the parking lamps
turn off.
.Turn on the hazard warning
flashers.
.Insert the key and turn it to
ON/RUN and then back to
LOCK/OFF.
See Remote Vehicle Start on
page 2‑5.
Door Locks
To lock or unlock a door, use the
Remote Keyless Entry (RKE)
transmitter from outside the vehicle.
From inside the vehicle with the
doors locked, pull once on the
door handle to unlock it, and a
second time to open it or use the
power door lock switch.
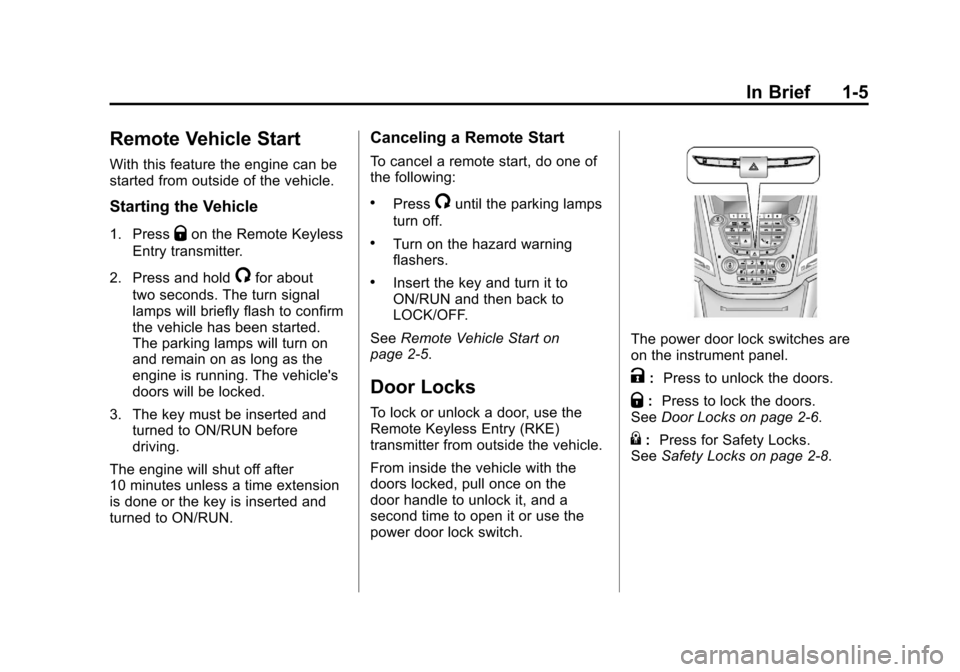
The power door lock switches are
on the instrument panel.
K: Press to unlock the doors.
Q:Press to lock the doors.
See Door Locks on page 2‑6.
{:Press for Safety Locks.
See Safety Locks on page 2‑8.
Page 12 of 446
Black plate (6,1)Chevrolet Equinox Owner Manual - 2011
1-6 In Brief
Liftgate
Manual Liftgate Operation
Unlock the vehicle before opening
the liftgate.
Press the touchpad located in the
handle of the liftgate, above the
license plate, and lift up to open.
Do not press the touchpad while
closing the liftgate. This will cause
the liftgate to be unlatched.
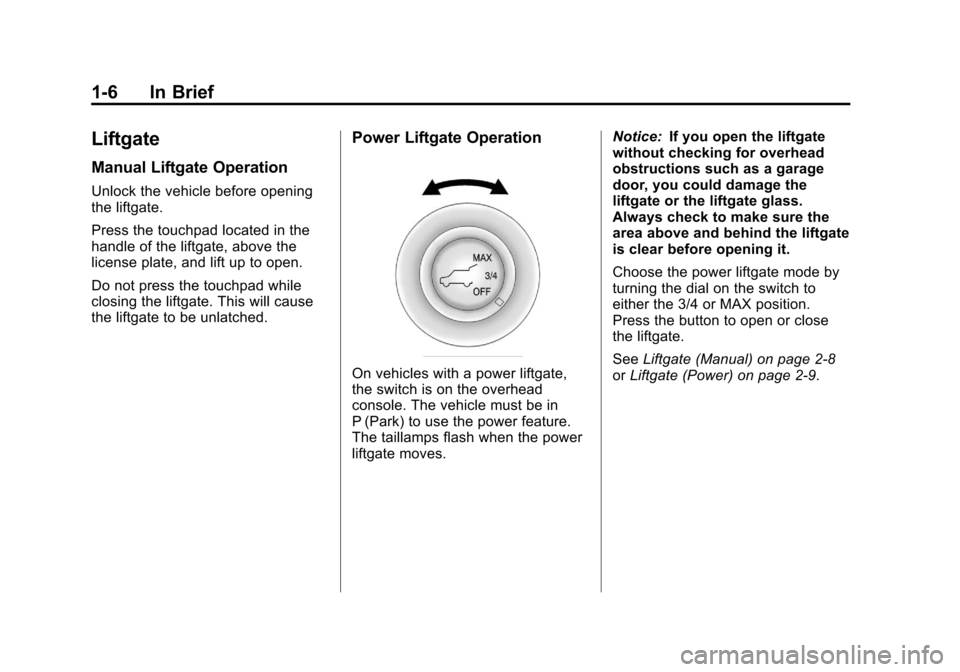
Power Liftgate Operation
On vehicles with a power liftgate,
the switch is on the overhead
console. The vehicle must be in
P (Park) to use the power feature.
The taillamps flash when the power
liftgate moves.Notice:
If you open the liftgate
without checking for overhead
obstructions such as a garage
door, you could damage the
liftgate or the liftgate glass.
Always check to make sure the
area above and behind the liftgate
is clear before opening it.
Choose the power liftgate mode by
turning the dial on the switch to
either the 3/4 or MAX position.
Press the button to open or close
the liftgate.
See Liftgate (Manual) on page 2‑8
or Liftgate (Power) on page 2‑9.
Page 18 of 446
Black plate (12,1)Chevrolet Equinox Owner Manual - 2011
1-12 In Brief
Sensing System for
Passenger Airbag
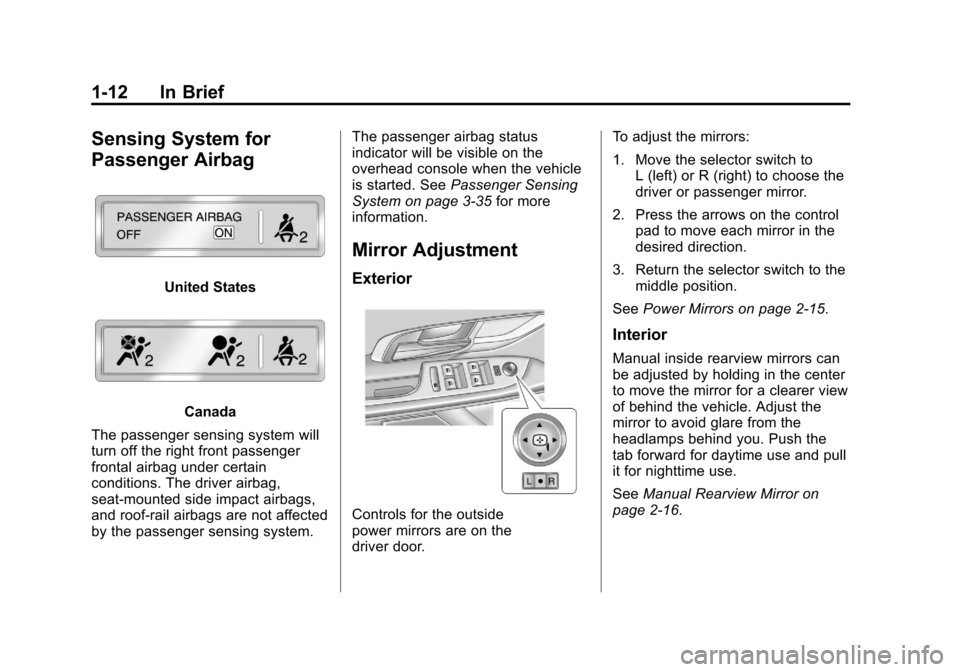
United States
Canada
The passenger sensing system will
turn off the right front passenger
frontal airbag under certain
conditions. The driver airbag,
seat‐mounted side impact airbags,
and roof‐rail airbags are not affected
by the passenger sensing system. The passenger airbag status
indicator will be visible on the
overhead console when the vehicle
is started. See
Passenger Sensing
System on page 3‑35 for more
information.
Mirror Adjustment
Exterior
Controls for the outside
power mirrors are on the
driver door. To adjust the mirrors:
1. Move the selector switch to
L (left) or R (right) to choose the
driver or passenger mirror.
2. Press the arrows on the control pad to move each mirror in the
desired direction.
3. Return the selector switch to the middle position.
See Power Mirrors on page 2‑15.
Interior
Manual inside rearview mirrors can
be adjusted by holding in the center
to move the mirror for a clearer view
of behind the vehicle. Adjust the
mirror to avoid glare from the
headlamps behind you. Push the
tab forward for daytime use and pull
it for nighttime use.
SeeManual Rearview Mirror on
page 2‑16.
Page 19 of 446
Black plate (13,1)Chevrolet Equinox Owner Manual - 2011
In Brief 1-13
Vehicles with an automatic dimming
inside rearview mirror can
automatically reduce the glare from
the headlamps of the vehicle behind
you. The dimming feature comes on
and the indicator light comes on
each time the vehicle is started.
SeeAutomatic Dimming Rearview
Mirror on page 2‑16.Steering Wheel
Adjustment
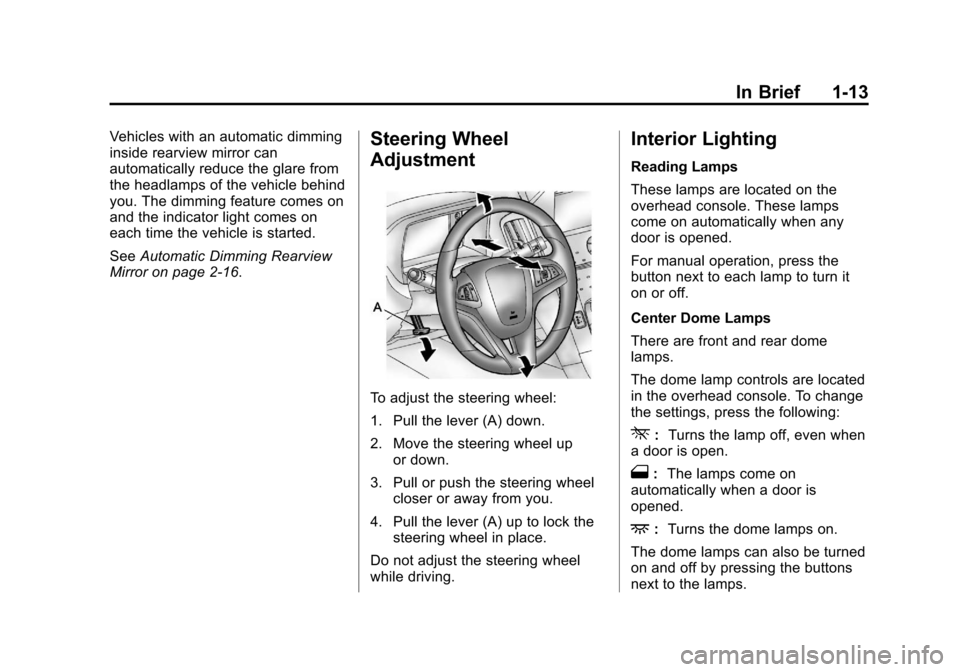
To adjust the steering wheel:
1. Pull the lever (A) down.
2. Move the steering wheel up
or down.
3. Pull or push the steering wheel closer or away from you.
4. Pull the lever (A) up to lock the steering wheel in place.
Do not adjust the steering wheel
while driving.
Interior Lighting
Reading Lamps
These lamps are located on the
overhead console. These lamps
come on automatically when any
door is opened.
For manual operation, press the
button next to each lamp to turn it
on or off.
Center Dome Lamps
There are front and rear dome
lamps.
The dome lamp controls are located
in the overhead console. To change
the settings, press the following:
*: Turns the lamp off, even when
a door is open.
1: The lamps come on
automatically when a door is
opened.
+: Turns the dome lamps on.
The dome lamps can also be turned
on and off by pressing the buttons
next to the lamps.
Page 20 of 446
Black plate (14,1)Chevrolet Equinox Owner Manual - 2011
1-14 In Brief
For more information on interior
lighting, SeeInstrument Panel
Illumination Control on page 6‑4.
Exterior Lighting
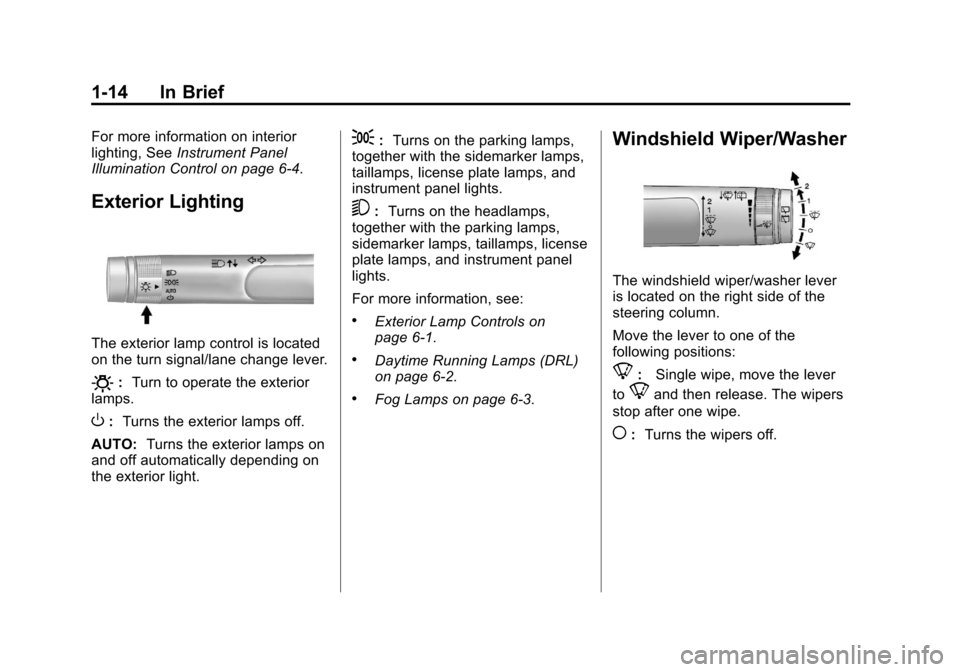
The exterior lamp control is located
on the turn signal/lane change lever.
O: Turn to operate the exterior
lamps.
O: Turns the exterior lamps off.
AUTO: Turns the exterior lamps on
and off automatically depending on
the exterior light.
;: Turns on the parking lamps,
together with the sidemarker lamps,
taillamps, license plate lamps, and
instrument panel lights.
5: Turns on the headlamps,
together with the parking lamps,
sidemarker lamps, taillamps, license
plate lamps, and instrument panel
lights.
For more information, see:
.Exterior Lamp Controls on
page 6‑1.
.Daytime Running Lamps (DRL)
on page 6‑2.
.Fog Lamps on page 6‑3.
Windshield Wiper/Washer
The windshield wiper/washer lever
is located on the right side of the
steering column.
Move the lever to one of the
following positions:
8: Single wipe, move the lever
to
8and then release. The wipers
stop after one wipe.
(: Turns the wipers off.
Page 40 of 446
Black plate (4,1)Chevrolet Equinox Owner Manual - 2011
2-4 Keys, Doors and Windows
PressingKmay also disarm
the theft-deterrent system.
See Anti-Theft Alarm System on
page 2‑12.
V(Remote Liftgate Release):
First press
K, then press and hold
Vto unlock the liftgate. For
vehicles with the power liftgate,
press and hold
Vuntil the liftgate
begins to move to open the liftgate.
7(Vehicle Locator/Panic
Alarm): Press and release one
time to locate the vehicle. The
exterior lamps flash and the horn
chirps. Press and hold
7for at least
two seconds to sound the panic
alarm. The horn sounds and the
turn signals flash until
7is pressed
again or the key is placed in the
ignition and turned to ON/RUN.
/(Remote Vehicle Start): For
vehicles with this feature, first press
Qthen press and hold/to start
the engine from outside the vehicle
using the RKE transmitter. See
Remote Vehicle Start on page 2‑5
for additional information.
Programming Transmitters to
the Vehicle
Only RKE transmitters programmed
to this vehicle will work. If a
transmitter is lost or stolen, a
replacement can be purchased and
programmed through your dealer.
When the replacement transmitter is
programmed to this vehicle, all
remaining transmitters must also be
reprogrammed. Any lost or stolen
transmitters will no longer work
once the new transmitter is
programmed.
Battery Replacement
Replace the battery if the REPLACE
BATTERY IN REMOTE KEY
message displays in the DIC. See
“Replace Battery in Remote Key”
under Key and Lock Messages on
page 5‑29.
The battery is not rechargeable.
To replace the battery:
1. Push the button on the transmitter to extend the key.
2. Remove the battery cover by prying with a finger.
3. Remove the battery by pushing on the battery and sliding it
toward the keyblade.
4. Insert the new battery, positive side facing up. Push the battery
down until it is held in place.
Replace with a CR2032 or
equivalent battery.
5. Snap the battery cover back on to the transmitter.