2011 CHEVROLET CRUZE door lock
[x] Cancel search: door lockPage 243 of 394
Black plate (43,1)Chevrolet Cruze Owner Manual - 2011
Driving and Operating 9-43
Filling the Tank
{WARNING
Fuel vapor burns violently and a
fuel fire can cause bad injuries.
To help avoid injuries to you and
others, read and follow all the
instructions on the fuel pump
island. Turn off the engine when
refueling. Do not smoke near fuel
or when refueling the vehicle. Do
not use cellular phones. Keep
sparks, flames, and smoking
materials away from fuel. Do not
leave the fuel pump unattended
when refueling the vehicle. This is
against the law in some places.
Do not re-enter the vehicle while
pumping fuel. Keep children away
from the fuel pump; never let
children pump fuel.
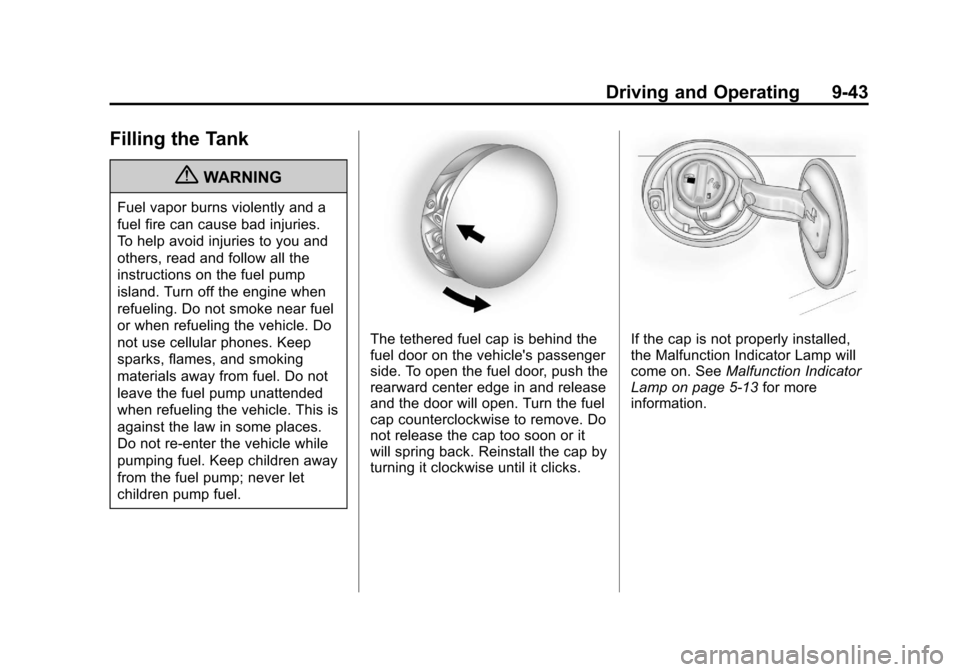
The tethered fuel cap is behind the
fuel door on the vehicle's passenger
side. To open the fuel door, push the
rearward center edge in and release
and the door will open. Turn the fuel
cap counterclockwise to remove. Do
not release the cap too soon or it
will spring back. Reinstall the cap by
turning it clockwise until it clicks.If the cap is not properly installed,
the Malfunction Indicator Lamp will
come on. SeeMalfunction Indicator
Lamp on page 5‑13 for more
information.
Page 322 of 394
Black plate (70,1)Chevrolet Cruze Owner Manual - 2011
10-70 Vehicle Care
If a tire goes flat, avoid further tire
and wheel damage by driving slowly
to a level place. Turn on the hazard
warning flashers. SeeHazard
Warning Flashers on page 6‑3.
See If a Tire Goes Flat on
page 10‑65 for other important
safety warnings.
Do not remove any objects that
have penetrated the tire.
1. Remove the tire sealant and compressor kit from its storage
location. See Storing the Tire
Sealant and Compressor Kit on
page 10‑75.
Make sure the on/off button (D)
is in the off (O) position.
2. Unwrap the sealant/air hose (G) and the power plug (C).
3. Place the kit on the ground.
Make sure the tire valve stem is
positioned close to the ground
so the hose will reach it. 4. Remove the valve stem cap from
the flat tire by turning it
counterclockwise.
5. Attach the sealant/air hose (G) onto the tire valve stem. Turn it
clockwise until it is tight.
6. Plug the power plug (C) into the accessory power outlet in the
vehicle. Unplug all items from
other accessory power outlets.
See Power Outlets on page 5‑5.
If the vehicle has an accessory
power outlet, do not use the
cigarette lighter.
If the vehicle only has a cigarette
lighter, use the cigarette lighter.
Do not pinch the power plug
cord in the door or window.
7. Start the vehicle. The vehicle must be running while using the
air compressor.
8. Press the on/off (D) button to turn the tire sealant and
compressor kit on. The compressor will inject
sealant and air into the tire.
The pressure gauge (E) will
initially show a high pressure
while the compressor pushes the
sealant into the tire. Once the
sealant is completely dispersed
into the tire, the pressure will
quickly drop and start to rise
again as the tire inflates with
air only.
9. Inflate the tire to the recommended inflation pressure
using the pressure gauge (E).
The recommended inflation
pressure can be found on the
Tire and Loading Information
label. See Tire Pressure on
page 10‑50.
The pressure gauge (E) may
read higher than the actual tire
pressure while the compressor is
on. Turn the compressor off to
get an accurate pressure
reading. The compressor may
be turned on/off until the correct
pressure is reached.
Page 336 of 394
Black plate (84,1)Chevrolet Cruze Owner Manual - 2011
10-84 Vehicle Care
Jump Starting
For more information about the
vehicle battery, seeBattery on
page 10‑26.
If the battery has run down, try to
use another vehicle and some
jumper cables to start your vehicle.
Be sure to use the following steps to
do it safely.
{WARNING
Batteries can hurt you. They can
be dangerous because:
.They contain acid that can
burn you.
.They contain gas that can
explode or ignite.
.They contain enough
electricity to burn you.
If you do not follow these steps
exactly, some or all of these
things can hurt you. Notice:
Ignoring these steps
could result in costly damage to
the vehicle that would not be
covered by the warranty.
Trying to start the vehicle by
pushing or pulling it will not
work, and it could damage the
vehicle.
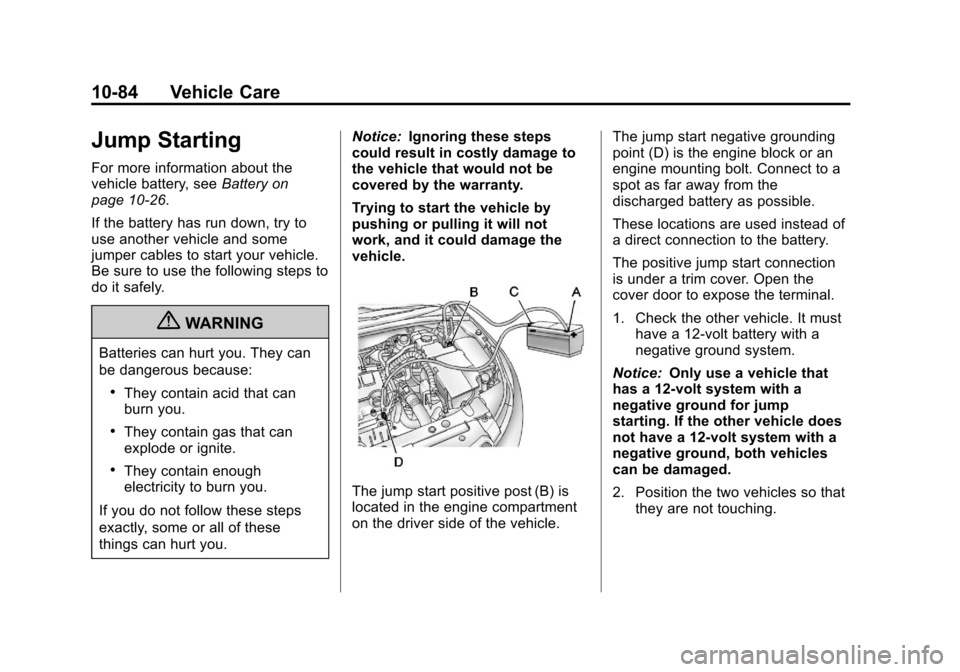
The jump start positive post (B) is
located in the engine compartment
on the driver side of the vehicle. The jump start negative grounding
point (D) is the engine block or an
engine mounting bolt. Connect to a
spot as far away from the
discharged battery as possible.
These locations are used instead of
a direct connection to the battery.
The positive jump start connection
is under a trim cover. Open the
cover door to expose the terminal.
1. Check the other vehicle. It must
have a 12-volt battery with a
negative ground system.
Notice: Only use a vehicle that
has a 12-volt system with a
negative ground for jump
starting. If the other vehicle does
not have a 12-volt system with a
negative ground, both vehicles
can be damaged.
2. Position the two vehicles so that they are not touching.
Page 357 of 394

Black plate (7,1)Chevrolet Cruze Owner Manual - 2011
Service and Maintenance 11-7
UsageFluid/Lubricant
Hydraulic Clutch System DOT 3 Hydraulic Brake Fluid (GM Part No. 12377967, in
Canada 89021320).
Manual Transmission Castrol BOT 0402 Transmission Fluid (GM Part No. 9986259).
Key Lock Cylinders Multi-Purpose Lubricant, Superlube (GM Part No. 12346241, in
Canada 10953474).
Hood Latch Assembly, Secondary Latch, Pivots, Spring Anchor, and Release Pawl Lubriplate Lubricant Aerosol (GM Part No. 12346293, in Canada 992723)
or lubricant meeting requirements of NLGI #2, Category LB or GC-LB.
Hood, Door, and Folding Seat Hinges Multi-Purpose Lubricant, Superlube (GM Part No. 12346241, in
Canada 10953474).
Weatherstrip Conditioning Weatherstrip Lubricant (GM Part No. 3634770, in Canada 10953518) or
Dielectric Silicone Grease (GM Part No. 12345579, in Canada 992887).
Page 382 of 394
Black plate (16,1)Chevrolet Cruze Owner Manual - 2011
13-16 Customer Information
OnStar®
If the vehicle is equipped with an
active OnStar system, that system
may also record data in crash or
near crash‐like situations. The
OnStar Terms and Conditions
provides information on data
collection and use and is available
in the OnStar glove box kit, at
www.onstar.com (U.S.) or
www.onstar.ca (Canada), or by
pressing the
Qbutton and
speaking to an advisor.
Navigation System
If the vehicle has a navigation
system, use of the system may
result in the storage of destinations,
addresses, telephone numbers, and
other trip information. Refer to the
navigation system operating manual
for information on stored data and
for deletion instructions.
Radio Frequency
Identification (RFID)
RFID technology is used in some
vehicles for functions such as tire
pressure monitoring and ignition
system security, as well as in
connection with conveniences such
as key fobs for remote door locking/
unlocking and starting, and
in-vehicle transmitters for garage
door openers. RFID technology in
GM vehicles does not use or record
personal information or link with any
other GM system containing
personal information.
Radio Frequency
Statement
This vehicle has systems that
operate on a radio frequency that
comply with Part 15 of the Federal
Communications Commission (FCC)
rules and with Industry Canada
Standards RSS‐210/220/310.
Operation is subject to the following
two conditions:
1. The device may not cause interference.
2. The device must accept any interference received, including
interference that may cause
undesired operation of the
device.
Changes or modifications to any of
these systems by other than an
authorized service facility could void
authorization to use this equipment.
Page 383 of 394
Black plate (1,1)Chevrolet Cruze Owner Manual - 2011
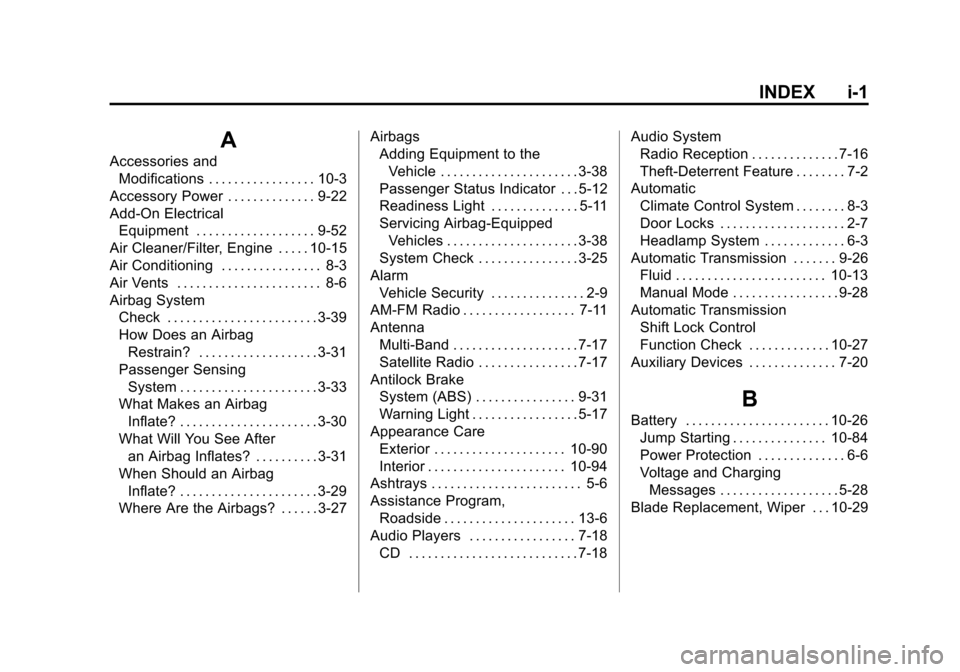
INDEX i-1
A
Accessories andModifications . . . . . . . . . . . . . . . . . 10-3
Accessory Power . . . . . . . . . . . . . . 9-22
Add-On Electrical Equipment . . . . . . . . . . . . . . . . . . . 9-52
Air Cleaner/Filter, Engine . . . . . 10-15
Air Conditioning . . . . . . . . . . . . . . . . 8-3
Air Vents . . . . . . . . . . . . . . . . . . . . . . . 8-6
Airbag System Check . . . . . . . . . . . . . . . . . . . . . . . . 3-39
How Does an Airbag
Restrain? . . . . . . . . . . . . . . . . . . . 3-31
Passenger Sensing System . . . . . . . . . . . . . . . . . . . . . . 3-33
What Makes an Airbag
Inflate? . . . . . . . . . . . . . . . . . . . . . . 3-30
What Will You See After an Airbag Inflates? . . . . . . . . . . 3-31
When Should an Airbag
Inflate? . . . . . . . . . . . . . . . . . . . . . . 3-29
Where Are the Airbags? . . . . . . 3-27 Airbags
Adding Equipment to the
Vehicle . . . . . . . . . . . . . . . . . . . . . . 3-38
Passenger Status Indicator . . . 5-12
Readiness Light . . . . . . . . . . . . . . 5-11
Servicing Airbag-Equipped Vehicles . . . . . . . . . . . . . . . . . . . . . 3-38
System Check . . . . . . . . . . . . . . . . 3-25
Alarm Vehicle Security . . . . . . . . . . . . . . . 2-9
AM-FM Radio . . . . . . . . . . . . . . . . . . 7-11
Antenna
Multi-Band . . . . . . . . . . . . . . . . . . . . 7-17
Satellite Radio . . . . . . . . . . . . . . . . 7-17
Antilock Brake System (ABS) . . . . . . . . . . . . . . . . 9-31
Warning Light . . . . . . . . . . . . . . . . . 5-17
Appearance Care Exterior . . . . . . . . . . . . . . . . . . . . . 10-90
Interior . . . . . . . . . . . . . . . . . . . . . . 10-94
Ashtrays . . . . . . . . . . . . . . . . . . . . . . . . 5-6
Assistance Program,
Roadside . . . . . . . . . . . . . . . . . . . . . 13-6
Audio Players . . . . . . . . . . . . . . . . . 7-18 CD . . . . . . . . . . . . . . . . . . . . . . . . . . . 7-18 Audio System
Radio Reception . . . . . . . . . . . . . . 7-16
Theft-Deterrent Feature . . . . . . . . 7-2
Automatic Climate Control System . . . . . . . . 8-3
Door Locks . . . . . . . . . . . . . . . . . . . . 2-7
Headlamp System . . . . . . . . . . . . . 6-3
Automatic Transmission . . . . . . . 9-26 Fluid . . . . . . . . . . . . . . . . . . . . . . . . 10-13
Manual Mode . . . . . . . . . . . . . . . . . 9-28
Automatic Transmission
Shift Lock Control
Function Check . . . . . . . . . . . . . 10-27
Auxiliary Devices . . . . . . . . . . . . . . 7-20
B
Battery . . . . . . . . . . . . . . . . . . . . . . . 10-26 Jump Starting . . . . . . . . . . . . . . . 10-84
Power Protection . . . . . . . . . . . . . . 6-6
Voltage and Charging
Messages . . . . . . . . . . . . . . . . . . . 5-28
Blade Replacement, Wiper . . . 10-29
Page 385 of 394
Black plate (3,1)Chevrolet Cruze Owner Manual - 2011
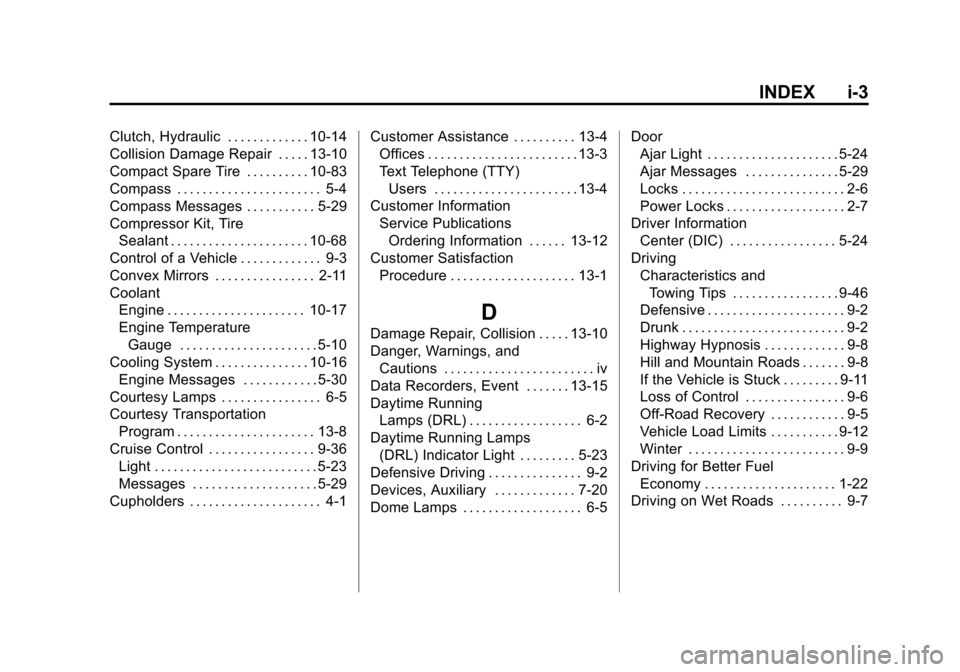
INDEX i-3
Clutch, Hydraulic . . . . . . . . . . . . . 10-14
Collision Damage Repair . . . . . 13-10
Compact Spare Tire . . . . . . . . . . 10-83
Compass . . . . . . . . . . . . . . . . . . . . . . . 5-4
Compass Messages . . . . . . . . . . . 5-29
Compressor Kit, TireSealant . . . . . . . . . . . . . . . . . . . . . . 10-68
Control of a Vehicle . . . . . . . . . . . . . 9-3
Convex Mirrors . . . . . . . . . . . . . . . . 2-11
Coolant Engine . . . . . . . . . . . . . . . . . . . . . . 10-17
Engine Temperature
Gauge . . . . . . . . . . . . . . . . . . . . . . 5-10
Cooling System . . . . . . . . . . . . . . . 10-16 Engine Messages . . . . . . . . . . . . 5-30
Courtesy Lamps . . . . . . . . . . . . . . . . 6-5
Courtesy Transportation
Program . . . . . . . . . . . . . . . . . . . . . . 13-8
Cruise Control . . . . . . . . . . . . . . . . . 9-36 Light . . . . . . . . . . . . . . . . . . . . . . . . . . 5-23
Messages . . . . . . . . . . . . . . . . . . . . 5-29
Cupholders . . . . . . . . . . . . . . . . . . . . . 4-1 Customer Assistance . . . . . . . . . . 13-4
Offices . . . . . . . . . . . . . . . . . . . . . . . . 13-3
Text Telephone (TTY)
Users . . . . . . . . . . . . . . . . . . . . . . . 13-4
Customer Information Service PublicationsOrdering Information . . . . . . 13-12
Customer Satisfaction Procedure . . . . . . . . . . . . . . . . . . . . 13-1
D
Damage Repair, Collision . . . . . 13-10
Danger, Warnings, andCautions . . . . . . . . . . . . . . . . . . . . . . . . iv
Data Recorders, Event . . . . . . . 13-15
Daytime Running Lamps (DRL) . . . . . . . . . . . . . . . . . . 6-2
Daytime Running Lamps
(DRL) Indicator Light . . . . . . . . . 5-23
Defensive Driving . . . . . . . . . . . . . . . 9-2
Devices, Auxiliary . . . . . . . . . . . . . 7-20
Dome Lamps . . . . . . . . . . . . . . . . . . . 6-5 Door
Ajar Light . . . . . . . . . . . . . . . . . . . . . 5-24
Ajar Messages . . . . . . . . . . . . . . . 5-29
Locks . . . . . . . . . . . . . . . . . . . . . . . . . . 2-6
Power Locks . . . . . . . . . . . . . . . . . . . 2-7
Driver Information Center (DIC) . . . . . . . . . . . . . . . . . 5-24
Driving Characteristics andTowing Tips . . . . . . . . . . . . . . . . . 9-46
Defensive . . . . . . . . . . . . . . . . . . . . . . 9-2
Drunk . . . . . . . . . . . . . . . . . . . . . . . . . . 9-2
Highway Hypnosis . . . . . . . . . . . . . 9-8
Hill and Mountain Roads . . . . . . . 9-8
If the Vehicle is Stuck . . . . . . . . . 9-11
Loss of Control . . . . . . . . . . . . . . . . 9-6
Off-Road Recovery . . . . . . . . . . . . 9-5
Vehicle Load Limits . . . . . . . . . . . 9-12
Winter . . . . . . . . . . . . . . . . . . . . . . . . . 9-9
Driving for Better Fuel Economy . . . . . . . . . . . . . . . . . . . . . 1-22
Driving on Wet Roads . . . . . . . . . . 9-7
Page 388 of 394

Black plate (6,1)Chevrolet Cruze Owner Manual - 2011
i-6 INDEX
Instrument Cluster . . . . . . . . . . . . . . 5-8
Instrument PanelStorage Area . . . . . . . . . . . . . . . . . . 4-1
Instrument Panel Overview . . . . . 1-2
Introduction . . . . . . . . . . . . . . . . . . . . . . . iii
J
Jump Starting . . . . . . . . . . . . . . . . . 10-84
K
Key and Lock Messages . . . . . . . 5-31
Keyless Entry Remote (RKE) System . . . . . . . . 2-3
Keys . . . . . . . . . . . . . . . . . . . . . . . . . . . . 2-2
L
Labeling, Tire Sidewall . . . . . . . . 10-44
Lamp Messages . . . . . . . . . . . . . . . 5-31
Lamps Courtesy . . . . . . . . . . . . . . . . . . . . . . . 6-5
Daytime Running (DRL) . . . . . . . 6-2
Dome . . . . . . . . . . . . . . . . . . . . . . . . . . 6-5
Exterior Controls . . . . . . . . . . . . . . . 6-1 Lamps (cont.)
Front Fog . . . . . . . . . . . . . . . . . . . . . . 6-4
License Plate . . . . . . . . . . . . . . . 10-35
Malfunction Indicator . . . . . . . . . 5-13
On Reminder . . . . . . . . . . . . . . . . . 5-23
Reading . . . . . . . . . . . . . . . . . . . . . . . 6-6
Lap-Shoulder Belt . . . . . . . . . . . . . 3-18
LATCH System Replacing Parts After a
Crash . . . . . . . . . . . . . . . . . . . . . . . 3-56
Latch, Lower Anchors and Tethers for Children . . . . . . . . . . 3-49
Light StabiliTrak
®OFF . . . . . . . . . . . . . 5-19
Lighter, Cigarette . . . . . . . . . . . . . . . 5-6
Lighting Entry . . . . . . . . . . . . . . . . . . . . . . . . . . 6-6
Exit . . . . . . . . . . . . . . . . . . . . . . . . . . . . 6-6
Illumination Control . . . . . . . . . . . . 6-5
Lights Airbag Readiness . . . . . . . . . . . . . 5-11
Antilock Brake System(ABS) Warning . . . . . . . . . . . . . . 5-17
Brake System Warning . . . . . . . 5-16 Lights (cont.)
Charging System . . . . . . . . . . . . . 5-13
Cruise Control . . . . . . . . . . . . . . . . 5-23
Daytime Running
Lamps (DRL) . . . . . . . . . . . . . . . . 5-23
Door Ajar . . . . . . . . . . . . . . . . . . . . . 5-24
Engine Oil Pressure . . . . . . . . . . 5-21
Flash-to-Pass . . . . . . . . . . . . . . . . . . 6-2
Front Fog Lamps . . . . . . . . . . . . . 5-23
High-Beam On . . . . . . . . . . . . . . . . 5-22
High/Low Beam Changer . . . . . . 6-2
Low Fuel Warning . . . . . . . . . . . . 5-21
Reduced Engine Power . . . . . . 5-22
Safety Belt Reminders . . . . . . . . 5-10
Security . . . . . . . . . . . . . . . . . . . . . . 5-22
Service Vehicle Soon . . . . . . . . . 5-16
Tire Pressure . . . . . . . . . . . . . . . . . 5-20
Traction Control System (TCS)/StabiliTrak
®. . . . . . . . . . 5-19
Traction Off . . . . . . . . . . . . . . . . . . . 5-19
Ultrasonic Parking Sensor . . . . 5-18
Up-Shift . . . . . . . . . . . . . . . . . . . . . . 5-18
Warning, Power Steering . . . . . 5-18