2011 CHEVROLET CRUZE maintenance
[x] Cancel search: maintenancePage 266 of 394
Black plate (14,1)Chevrolet Cruze Owner Manual - 2011
10-14 Vehicle Care
Change the fluid and filter at the
intervals listed inScheduled
Maintenance on page 11‑2, and be
sure to use the fluid listed in
Recommended Fluids and
Lubricants on page 11‑6.
Manual Transmission
Fluid
How to Check Manual
Transmission Fluid
It is not necessary to check the
manual transmission fluid level.
A transmission fluid leak is the only
reason for fluid loss. If a leak
occurs, take the vehicle to your
dealer service department and have
it repaired as soon as possible. See
Recommended Fluids and
Lubricants on page 11‑6 for the
proper fluid to use.
Hydraulic Clutch
For vehicles with a manual
transmission, it is not necessary to
regularly check brake/clutch fluid
unless there is a leak suspected.
Adding fluid will not correct a leak.
A fluid loss in this system could
indicate a problem. Have the
system inspected and repaired.
When to Check and What
to Use
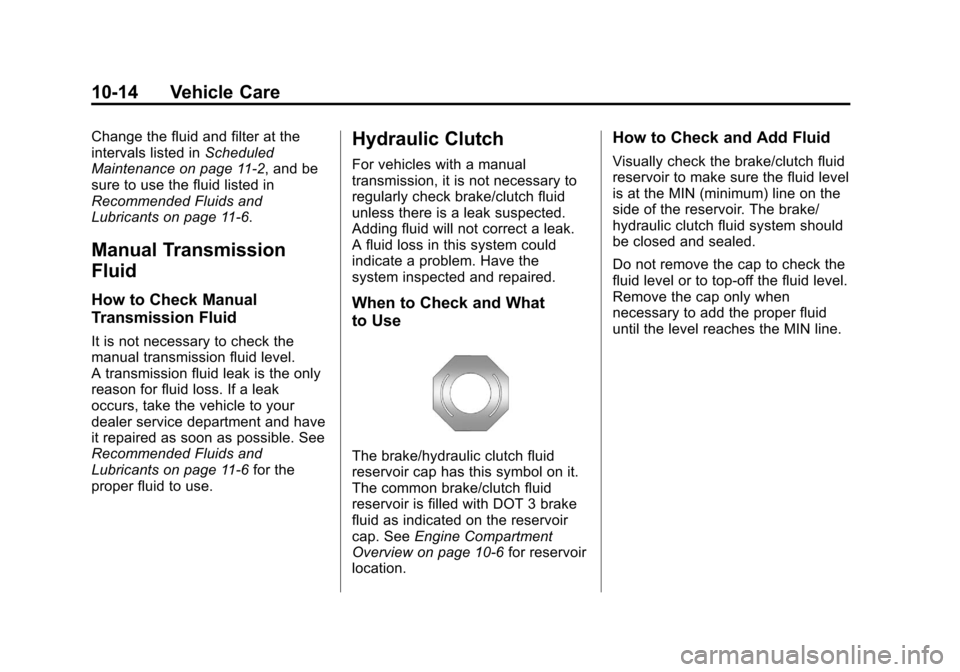
The brake/hydraulic clutch fluid
reservoir cap has this symbol on it.
The common brake/clutch fluid
reservoir is filled with DOT 3 brake
fluid as indicated on the reservoir
cap. See Engine Compartment
Overview on page 10‑6 for reservoir
location.
How to Check and Add Fluid
Visually check the brake/clutch fluid
reservoir to make sure the fluid level
is at the MIN (minimum) line on the
side of the reservoir. The brake/
hydraulic clutch fluid system should
be closed and sealed.
Do not remove the cap to check the
fluid level or to top‐off the fluid level.
Remove the cap only when
necessary to add the proper fluid
until the level reaches the MIN line.
Page 267 of 394
Black plate (15,1)Chevrolet Cruze Owner Manual - 2011
Vehicle Care 10-15
Engine Air Cleaner/Filter
SeeEngine Compartment Overview
on page 10‑6 for the location of the
engine air cleaner/filter.
When to Inspect the Engine Air
Cleaner/Filter
Inspect the air cleaner/filter at the
scheduled maintenance intervals
and replace it at the first oil change
after each 80 000 km (50,000 mi)
interval. See Scheduled
Maintenance on page 11‑2 for more
information. If you are driving in
dusty/dirty conditions, inspect the
filter at each engine oil change.
How to Inspect the Engine Air
Cleaner/Filter
To inspect the air cleaner/filter,
remove the filter from the vehicle
and lightly shake the filter to release
loose dust and dirt. If the filter
remains caked with dirt, a new filter
is required.
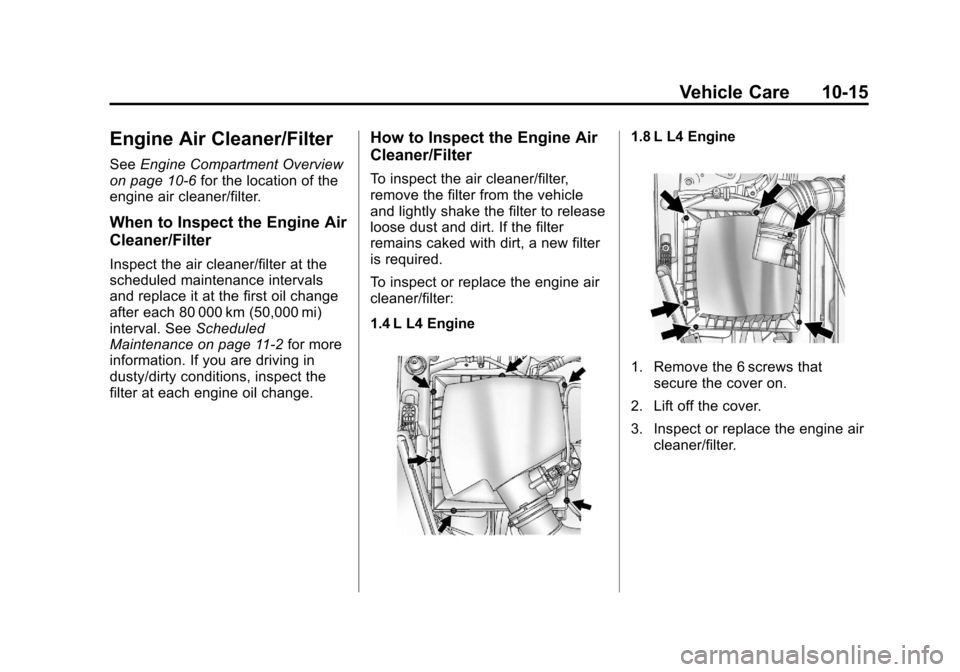
To inspect or replace the engine air
cleaner/filter:
1.4 L L4 Engine
1.8 L L4 Engine
1. Remove the 6 screws that secure the cover on.
2. Lift off the cover.
3. Inspect or replace the engine air cleaner/filter.
Page 274 of 394
Black plate (22,1)Chevrolet Cruze Owner Manual - 2011
10-22 Vehicle Care
Overheated Engine
Protection
Operating Mode
This emergency operating mode
allows the vehicle to be driven to a
safe place in an emergency
situation. If an overheated engine
condition exists, an overheat
protection mode which alternates
firing groups of cylinders helps
prevent engine damage. In this
mode, a significant loss in power
and engine performance will be
noticed. The temperature gauge will
indicate an overheat condition
exists. Driving extended km (mi)
and/or towing a trailer in the
overheat protection mode should be
avoided.Notice:
After driving in the
overheated engine protection
operating mode, to avoid engine
damage, allow the engine to cool
before attempting any repair. The
engine oil will be severely
degraded. Repair the cause of
coolant loss, change the oil and
reset the oil life system. See
Engine Oil on page 10‑9.
Power Steering Fluid
The vehicle is equipped with an
electric power steering system. No
fluid or general maintenance is
required.
Washer Fluid
What to Use
When windshield washer fluid is
needed, be sure to read the
manufacturer's instructions before
use. If operating the vehicle in an
area where the temperature may fall
below freezing, use a fluid that has
sufficient protection against
freezing.
Adding Washer Fluid
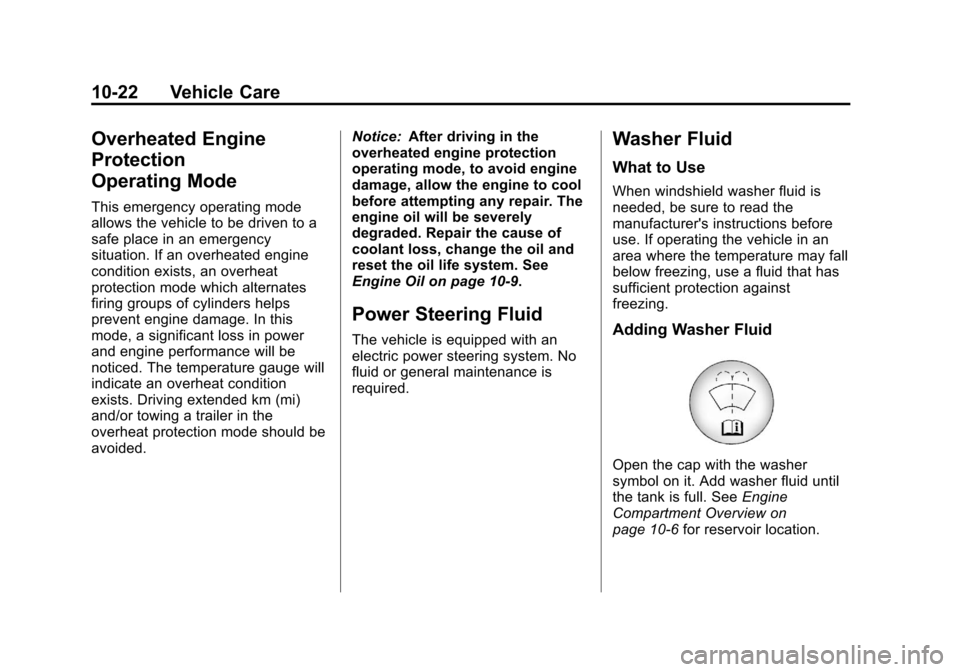
Open the cap with the washer
symbol on it. Add washer fluid until
the tank is full. See Engine
Compartment Overview on
page 10‑6 for reservoir location.
Page 275 of 394
Black plate (23,1)Chevrolet Cruze Owner Manual - 2011
Vehicle Care 10-23
Notice:
.When using concentrated
washer fluid, follow the
manufacturer's instructions
for adding water.
.Do not mix water with
ready-to-use washer fluid.
Water can cause the solution
to freeze and damage the
washer fluid tank and other
parts of the washer system.
Also, water does not clean as
well as washer fluid.
.Fill the washer fluid tank only
three-quarters full when it is
very cold. This allows for
fluid expansion if freezing
occurs, which could damage
the tank if it is
completely full.
.Do not use engine coolant
(antifreeze) in the windshield
washer. It can damage the
windshield washer system
and paint.
Brakes
This vehicle has front disc brakes
and could have rear drum brakes or
rear disc brakes.
Disc brake pads have built-in wear
indicators that make a high-pitched
warning sound when the brake pads
are worn and new pads are needed.
The sound can come and go or be
heard all the time the vehicle is
moving, except when applying the
brake pedal firmly.
{WARNING
The brake wear warning sound
means that soon the brakes will
not work well. That could lead to
a crash. When the brake wear
warning sound is heard, have the
vehicle serviced.
Notice: Continuing to drive with
worn-out brake pads could result
in costly brake repair. Some driving conditions or climates
can cause a brake squeal when the
brakes are first applied or lightly
applied. This does not mean
something is wrong with the brakes.
Properly torqued wheel nuts are
necessary to help prevent brake
pulsation. When tires are rotated,
inspect brake pads for wear and
evenly tighten wheel nuts in the
proper sequence to torque
specifications in
Capacities and
Specifications on page 12‑2.
If the vehicle has rear drum brakes,
they do not have wear indicators,
but if a rear brake rubbing noise is
heard, have the rear brake linings
inspected immediately. Rear brake
drums should be removed and
inspected each time the tires are
removed for rotation or changing.
Drum brakes have an inspection
hole to inspect lining wear during
scheduled maintenance. When the
front brake pads are replaced, have
the rear brakes inspected, too.
Page 281 of 394
Black plate (29,1)Chevrolet Cruze Owner Manual - 2011
Vehicle Care 10-29
Wiper Blade Replacement
Windshield wiper blades should be
inspected for wear or cracking. See
Scheduled Maintenance on
page 11‑2for more information.
Replacement blades come in
different types and are removed in
different ways. For proper
windshield wiper blade length and
type, see Maintenance
Replacement Parts on page 11‑8.
Notice: Allowing the wiper blade
arm to touch the windshield when
no wiper blade is installed could
damage the windshield. Any
damage that occurs would not be
covered by your warranty. Do not
allow the wiper blade arm to
touch the windshield. To replace the windshield wiper
blade:
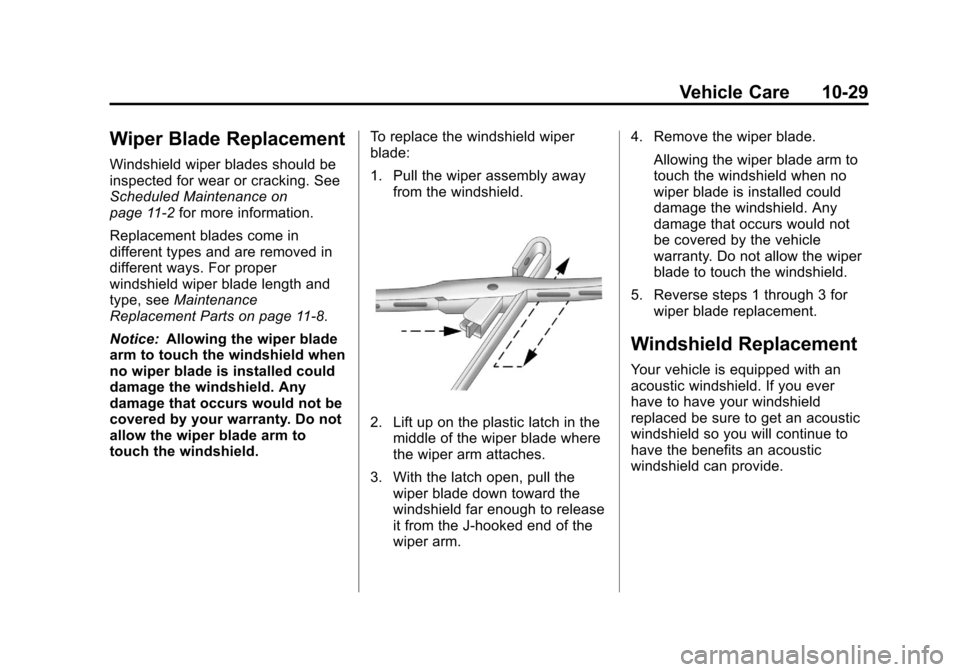
1. Pull the wiper assembly away
from the windshield.
2. Lift up on the plastic latch in themiddle of the wiper blade where
the wiper arm attaches.
3. With the latch open, pull the wiper blade down toward the
windshield far enough to release
it from the J-hooked end of the
wiper arm. 4. Remove the wiper blade.
Allowing the wiper blade arm to
touch the windshield when no
wiper blade is installed could
damage the windshield. Any
damage that occurs would not
be covered by the vehicle
warranty. Do not allow the wiper
blade to touch the windshield.
5. Reverse steps 1 through 3 for wiper blade replacement.
Windshield Replacement
Your vehicle is equipped with an
acoustic windshield. If you ever
have to have your windshield
replaced be sure to get an acoustic
windshield so you will continue to
have the benefits an acoustic
windshield can provide.
Page 304 of 394
Black plate (52,1)Chevrolet Cruze Owner Manual - 2011
10-52 Vehicle Care
Tire Pressure Monitor
System
The Tire Pressure Monitor System
(TPMS) uses radio and sensor
technology to check tire pressure
levels. The TPMS sensors monitor
the air pressure in your tires and
transmit tire pressure readings to a
receiver located in the vehicle.
Each tire, including the spare
(if provided), should be checked
monthly when cold and inflated to
the inflation pressure recommended
by the vehicle manufacturer on the
vehicle placard or tire inflation
pressure label. (If your vehicle has
tires of a different size than the size
indicated on the vehicle placard or
tire inflation pressure label, you
should determine the proper tire
inflation pressure for those tires.)
As an added safety feature, your
vehicle has been equipped with a
tire pressure monitoring system
(TPMS) that illuminates a low tirepressure telltale when one or
more of your tires is significantly
under‐inflated.
Accordingly, when the low tire
pressure telltale illuminates, you
should stop and check your tires as
soon as possible, and inflate them
to the proper pressure. Driving on a
significantly under‐inflated tire
causes the tire to overheat and can
lead to tire failure. Under‐inflation
also reduces fuel efficiency and tire
tread life, and may affect the
vehicle's handling and stopping
ability.
Please note that the TPMS is not a
substitute for proper tire
maintenance, and it is the driver's
responsibility to maintain correct tire
pressure, even if under‐inflation has
not reached the level to trigger
illumination of the TPMS low tire
pressure telltale.
Your vehicle has also been
equipped with a TPMS malfunction
indicator to indicate when the
system is not operating properly.The TPMS malfunction indicator is
combined with the low tire pressure
telltale. When the system detects a
malfunction, the telltale will flash for
approximately one minute and then
remain continuously illuminated.
This sequence will continue upon
subsequent vehicle start‐ups as
long as the malfunction exists.
When the malfunction indicator is
illuminated, the system may not be
able to detect or signal low tire
pressure as intended. TPMS
malfunctions may occur for a variety
of reasons, including the installation
of replacement or alternate tires or
wheels on the vehicle that prevent
the TPMS from functioning properly.
Always check the TPMS malfunction
telltale after replacing one or more
tires or wheels on your vehicle to
ensure that the replacement or
alternate tires and wheels allow the
TPMS to continue to function
properly.
See
Tire Pressure Monitor
Operation on page 10‑53 for
additional information.
Page 306 of 394
Black plate (54,1)Chevrolet Cruze Owner Manual - 2011
10-54 Vehicle Care
Your vehicle's TPMS can warn you
about a low tire pressure condition
but it does not replace normal tire
maintenance. SeeTire Inspection
on page 10‑56, Tire Rotation on
page 10‑57 andTires on
page 10‑42.
Notice: Tire sealant materials are
not all the same. A non-approved
tire sealant could damage the Tire
Pressure Monitor System (TPMS)
sensors. TPMS sensor damage
caused by using an incorrect tire
sealant is not covered by the
vehicle warranty. Always use only
the GM approved tire sealant
available through your dealer or
included in the vehicle.
Factory-installed Tire Inflator Kits
use a GM-approved liquid tire
sealant. Using non-approved tire
sealants could damage the TPMS
sensors. See Tire Sealant and
Compressor Kit on page 10‑68 for
information regarding the inflator kit
materials and instructions.TPMS Malfunction Light and
Message
The TPMS will not function properly
if one or more of the TPMS sensors
are missing or inoperable. When the
system detects a malfunction, the
low tire pressure warning light
flashes for about one minute and
then stays on for the remainder of
the ignition cycle. A DIC warning
message is also displayed. The
malfunction light and DIC warning
message come on at each ignition
cycle until the problem is corrected.
Some of the conditions that can
cause the malfunction light and DIC
message to come on are:
.One of the road tires has been
replaced with the spare tire. The
spare tire does not have a
TPMS sensor. The malfunction
light and DIC message should
go off once you re‐install the
road tire containing the TPMS
sensor and the sensor matching
process is performed sucessfully. See
“TPMS Sensor
Matching Process” later in this
section.
.The TPMS sensor matching
process was started but not
completed or not completed
successfully after rotating the
vehicle's tires. The DIC message
and malfunction light should go
off once the TPMS sensor
matching process is performed
successfully. See “TPMS Sensor
Matching Process” later in this
section.
.One or more TPMS sensors are
missing or damaged. The DIC
message and the malfunction
light should go off when the
TPMS sensors are installed and
the sensor matching process is
performed successfully. See
your dealer for service.
.Replacement tires or wheels do
not match your vehicle's original
equipment tires or wheels. Tires
and wheels other than those
recommended for your vehicle
Page 309 of 394
Black plate (57,1)Chevrolet Cruze Owner Manual - 2011
Vehicle Care 10-57
.The tire has a bump, bulge,
or split.
.The tire has a puncture, cut,
or other damage that cannot
be repaired well because of
the size or location of the
damage.
Tire Rotation
Tires should be rotated every
12 000 km (7,500 miles). See
Scheduled Maintenance on
page 11‑2.
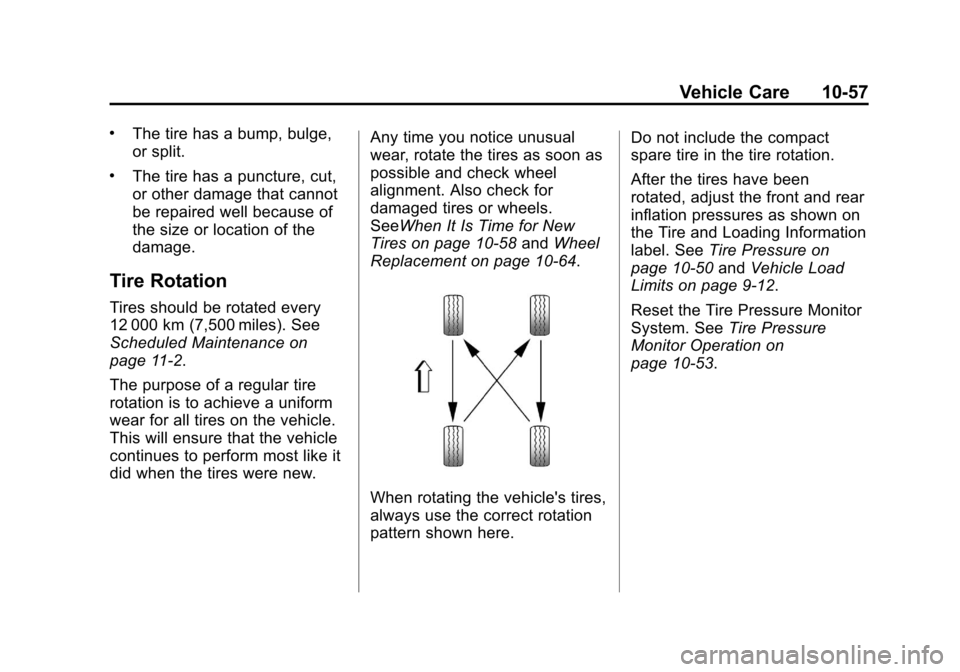
The purpose of a regular tire
rotation is to achieve a uniform
wear for all tires on the vehicle.
This will ensure that the vehicle
continues to perform most like it
did when the tires were new.Any time you notice unusual
wear, rotate the tires as soon as
possible and check wheel
alignment. Also check for
damaged tires or wheels.
SeeWhen It Is Time for New
Tires on page 10‑58
andWheel
Replacement on page 10‑64.
When rotating the vehicle's tires,
always use the correct rotation
pattern shown here. Do not include the compact
spare tire in the tire rotation.
After the tires have been
rotated, adjust the front and rear
inflation pressures as shown on
the Tire and Loading Information
label. See
Tire Pressure on
page 10‑50 andVehicle Load
Limits on page 9‑12.
Reset the Tire Pressure Monitor
System. See Tire Pressure
Monitor Operation on
page 10‑53.