2011 CHEVROLET CORVETTE tow
[x] Cancel search: towPage 286 of 428
Black plate (2,1)Chevrolet Corvette Owner Manual - 2011
10-2 Vehicle Care
Electrical System
Electrical SystemOverload . . . . . . . . . . . . . . . . . . 10-50
Fuses and Circuit Breakers . . . . . . . . . . . . . . . . . . 10-51
Engine Compartment Fuse
Block . . . . . . . . . . . . . . . . . . . . . 10-52
Instrument Panel Fuse Block . . . . . . . . . . . . . . . . . . . . . 10-55
Wheels and Tires
Tires . . . . . . . . . . . . . . . . . . . . . . . . 10-58
Winter Tires . . . . . . . . . . . . . . . . 10-59
Run-Flat Tires . . . . . . . . . . . . . . 10-59
Low-Profile Tires . . . . . . . . . . . 10-60
Tire Sidewall Labeling . . . . . . 10-61
Tire Designations . . . . . . . . . . . 10-62
Tire Terminology andDefinitions . . . . . . . . . . . . . . . . 10-63 Tire Pressure . . . . . . . . . . . . . . . 10-66
Tire Pressure for High-Speed
Operation . . . . . . . . . . . . . . . . . 10-67
Tire Pressure Monitor System . . . . . . . . . . . . . . . . . . . 10-68
Tire Pressure Monitor Operation . . . . . . . . . . . . . . . . . 10-69
Tire Inspection . . . . . . . . . . . . . . 10-72
Tire Rotation . . . . . . . . . . . . . . . 10-72
When It Is Time for New Tires . . . . . . . . . . . . . . . . . . . . . . 10-72
Buying New Tires . . . . . . . . . . . 10-73
Different Size Tires and Wheels . . . . . . . . . . . . . . . . . . . 10-75
Uniform Tire Quality Grading . . . . . . . . . . . . . . . . . . . 10-76
Wheel Alignment and Tire Balance . . . . . . . . . . . . . . . . . . . 10-77
Wheel Replacement . . . . . . . . 10-78
Tire Chains . . . . . . . . . . . . . . . . . 10-80
If a Tire Goes Flat . . . . . . . . . . 10-80
Jump Starting
Jump Starting . . . . . . . . . . . . . . 10-82
Towing
Towing the Vehicle . . . . . . . . . 10-86
Recreational Vehicle Towing . . . . . . . . . . . . . . . . . . . . 10-86
Appearance Care
Exterior Care . . . . . . . . . . . . . . . 10-86
Interior Care . . . . . . . . . . . . . . . . 10-90
Floor Mats . . . . . . . . . . . . . . . . . . 10-93
Page 300 of 428
Black plate (16,1)Chevrolet Corvette Owner Manual - 2011
10-16 Vehicle Care
Checking Engine Oil (Except
ZO6, ZR1, and Grand Sport)
If the CHECK OIL LEVEL message
displays on the Driver Information
Center (DIC), check the engine
oil level right away. For more
information, seeEngine Oil
Messages on page 5‑40. Check
the engine oil level regularly;
this is an added reminder.
It is a good idea to check the engine
oil level at each fuel fill. In order
to get an accurate reading, the
vehicle must be on level ground.
The engine oil dipstick handle
is a yellow loop. See Engine
Compartment Overview on
page 10‑10 for the location
of the engine oil dipstick. Obtaining an accurate oil level
reading is essential:
1. If the engine has been running
recently, turn off the engine and
allow several minutes for the oil
to drain back into the oil pan.
Checking your oil level too soon
after engine shut off will not
provide an accurate oil level
reading.
2. Pull the dipstick and clean it with a paper towel or cloth, then push
it back in all the way. Remove it
again, keeping the tip down, and
check the level.
When to Add Engine Oil
(Except ZO6, ZR1, and Grand
Sport)
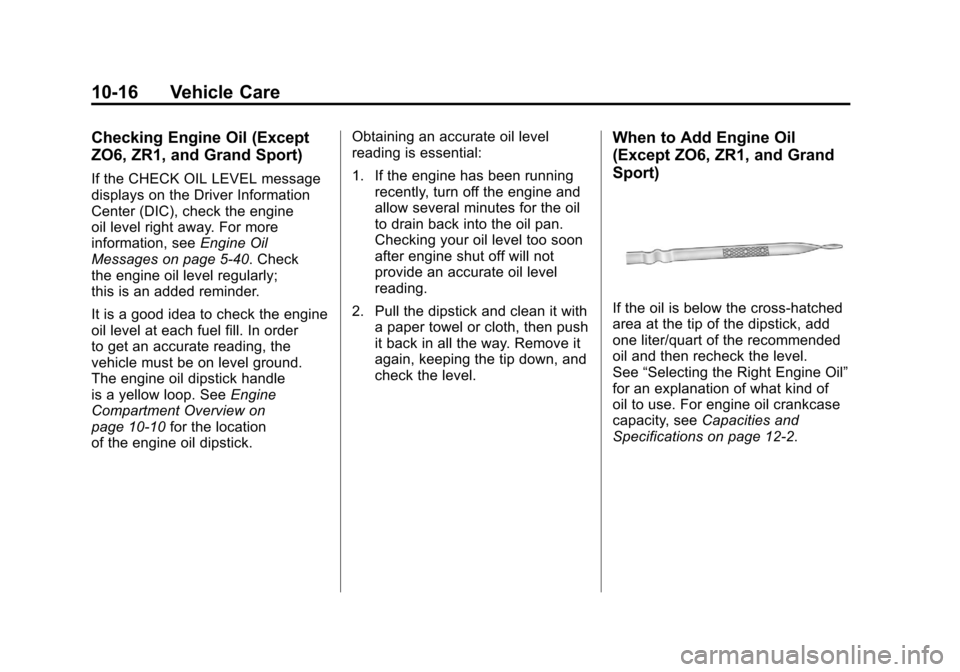
If the oil is below the cross-hatched
area at the tip of the dipstick, add
one liter/quart of the recommended
oil and then recheck the level.
See “Selecting the Right Engine Oil”
for an explanation of what kind of
oil to use. For engine oil crankcase
capacity, see Capacities and
Specifications on page 12‑2.
Page 302 of 428
Black plate (18,1)Chevrolet Corvette Owner Manual - 2011
10-18 Vehicle Care
This is normal since the dipstick is
designed to read engine oil level
only after the engine has run long
enough to reach normal operating
temperature. Do not add engine
oil based on cold engine dipstick
readings. The engine oil level on the
dipstick will also be inaccurate if
checked while the engine is running.
1. To obtain an accurate engineoil level reading, warm up the
engine to at least 80°C (175°F).
Cold oil will not give a correct oil
level reading.
2. Once the engine is warm, turn off the engine. Checking the oil
while the engine is running will
result in an incorrect oil level
reading.
3. Wait at least five minutes (but not more than 20 minutes)
to allow oil to drain and settle in
the engine. 4. Remove the dipstick from the
external engine oil tank and
clean it with a lint‐free paper
towel or a cloth. Re‐insert the
dipstick into the external oil tank,
pushing it all the way in until it
stops.
5. Remove the dipstick from the oil tank and read the level on the
cross‐hatched area. Oil levels
that fall in the cross‐hatched
area are normal.
When to Add Engine Oil
(ZO6, ZR1, and Grand Sport)
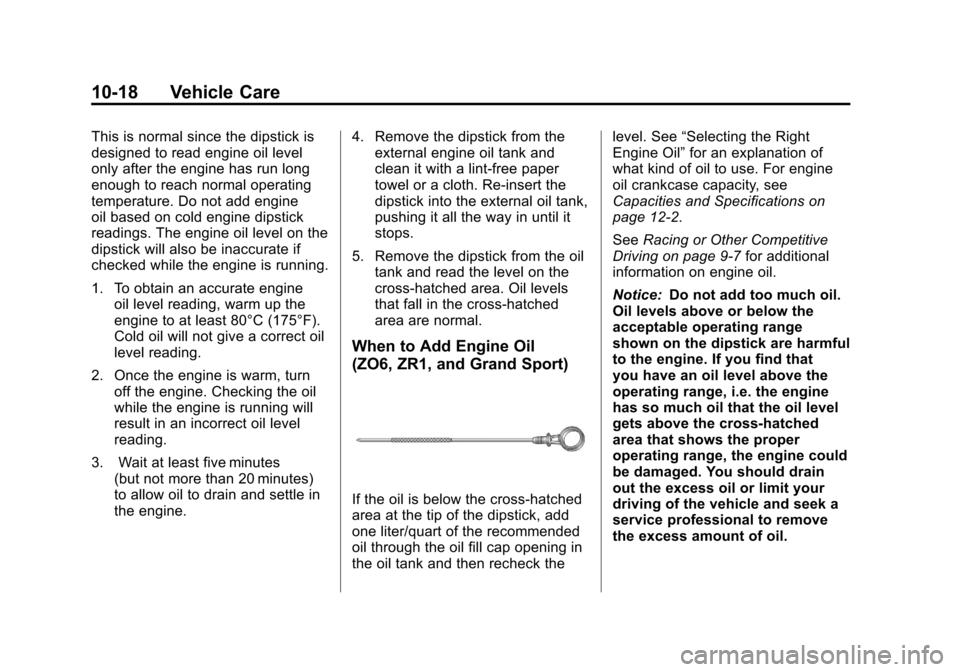
If the oil is below the cross-hatched
area at the tip of the dipstick, add
one liter/quart of the recommended
oil through the oil fill cap opening in
the oil tank and then recheck the level. See
“Selecting the Right
Engine Oil” for an explanation of
what kind of oil to use. For engine
oil crankcase capacity, see
Capacities and Specifications on
page 12‑2.
See Racing or Other Competitive
Driving on page 9‑7 for additional
information on engine oil.
Notice: Do not add too much oil.
Oil levels above or below the
acceptable operating range
shown on the dipstick are harmful
to the engine. If you find that
you have an oil level above the
operating range, i.e. the engine
has so much oil that the oil level
gets above the cross-hatched
area that shows the proper
operating range, the engine could
be damaged. You should drain
out the excess oil or limit your
driving of the vehicle and seek a
service professional to remove
the excess amount of oil.
Page 315 of 428
Black plate (31,1)Chevrolet Corvette Owner Manual - 2011
Vehicle Care 10-31
Checking Coolant
The vehicle must be on a level
surface when checking the coolant
level.
Check to see if coolant is visible in
the coolant surge tank. If the coolant
inside the coolant surge tank is
boiling, do not do anything else until
it cools down. If coolant is visible
but the coolant level is not at or
above the FULL COLD mark, add
a 50/50 mixture of clean, drinkable
water and DEX-COOL coolant at the
coolant recovery tank, but be sure
the cooling system is cool before
this is done. SeeEngine Coolant on
page 10‑29 for more information.
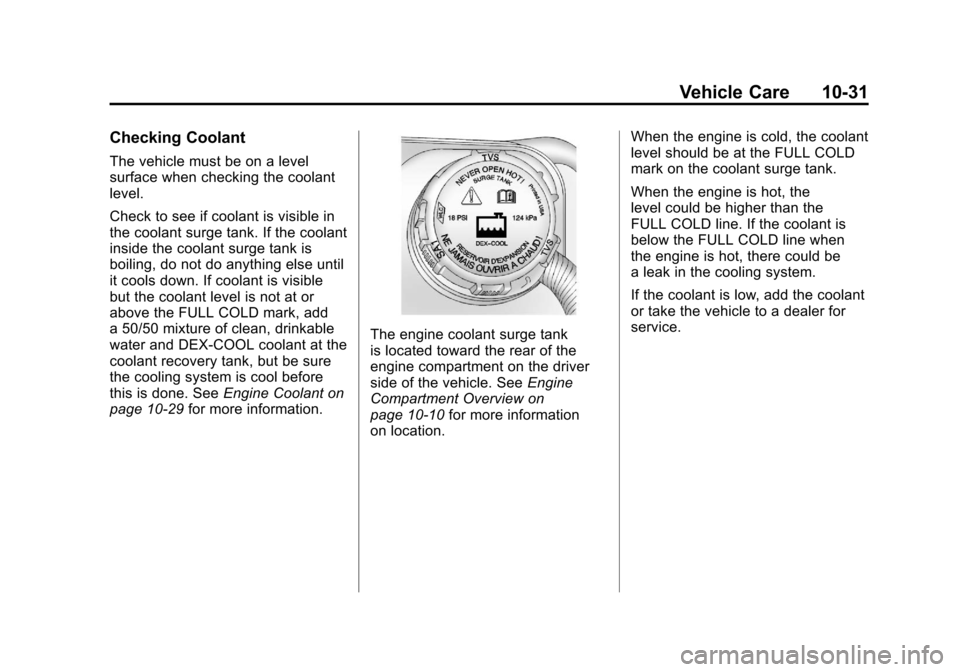
The engine coolant surge tank
is located toward the rear of the
engine compartment on the driver
side of the vehicle. See Engine
Compartment Overview on
page 10‑10 for more information
on location. When the engine is cold, the coolant
level should be at the FULL COLD
mark on the coolant surge tank.
When the engine is hot, the
level could be higher than the
FULL COLD line. If the coolant is
below the FULL COLD line when
the engine is hot, there could be
a leak in the cooling system.
If the coolant is low, add the coolant
or take the vehicle to a dealer for
service.
Page 334 of 428
Black plate (50,1)Chevrolet Corvette Owner Manual - 2011
10-50 Vehicle Care
Taillamps, Turn Signal,
and Stoplamps
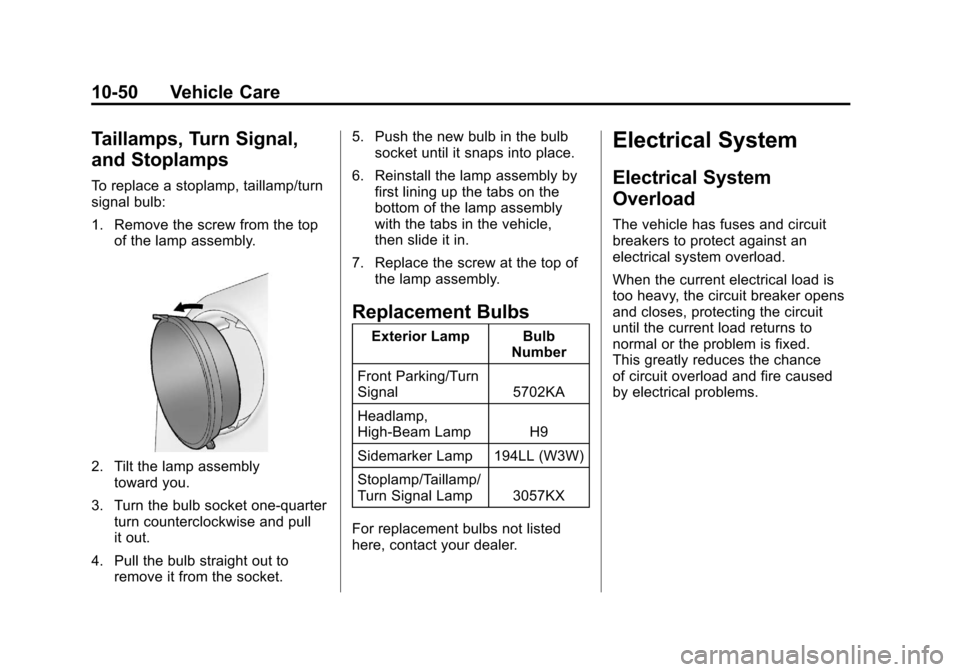
To replace a stoplamp, taillamp/turn
signal bulb:
1. Remove the screw from the topof the lamp assembly.
2. Tilt the lamp assemblytoward you.
3. Turn the bulb socket one-quarter turn counterclockwise and pull
it out.
4. Pull the bulb straight out to remove it from the socket. 5. Push the new bulb in the bulb
socket until it snaps into place.
6. Reinstall the lamp assembly by first lining up the tabs on the
bottom of the lamp assembly
with the tabs in the vehicle,
then slide it in.
7. Replace the screw at the top of the lamp assembly.
Replacement Bulbs
Exterior Lamp Bulb Number
Front Parking/Turn
Signal 5702KA
Headlamp,
High‐Beam Lamp H9
Sidemarker Lamp 194LL (W3W)
Stoplamp/Taillamp/
Turn Signal Lamp 3057KX
For replacement bulbs not listed
here, contact your dealer.
Electrical System
Electrical System
Overload
The vehicle has fuses and circuit
breakers to protect against an
electrical system overload.
When the current electrical load is
too heavy, the circuit breaker opens
and closes, protecting the circuit
until the current load returns to
normal or the problem is fixed.
This greatly reduces the chance
of circuit overload and fire caused
by electrical problems.
Page 363 of 428
Black plate (79,1)Chevrolet Corvette Owner Manual - 2011
Vehicle Care 10-79
{WARNING
Rust or dirt on a wheel, or on the parts to which it is
fastened, can make wheel
nuts become loose after a
time. The wheel could come
off and cause a crash. When
you change a wheel, remove
any rust or dirt from places
where the wheel attaches to
the vehicle. In an emergency,
you can use a cloth or a paper
towel to do this; but be sure to
use a scraper or wire brush
later, if you need to, to get all
the rust or dirt off.Tightening Wheel Lug Nuts
{WARNING
Never use oil or grease on studs
or the threads of the wheel nuts.
If you do, the wheel nuts might
come loose and the wheel could
fall off, causing a crash.
{WARNING
Incorrect wheel nuts or improperly
tightened wheel nuts can cause
the wheel to become loose and
even come off. This could lead
to a crash. Be sure to use the
correct wheel nuts. If you have
to replace them, be sure to get
new GM original equipment
wheel nuts. Notice:
Improperly tightened
wheel nuts can lead to brake
pulsation and rotor damage.
To avoid expensive brake repairs,
evenly tighten the wheel nuts in
the proper sequence and to the
proper torque specification.
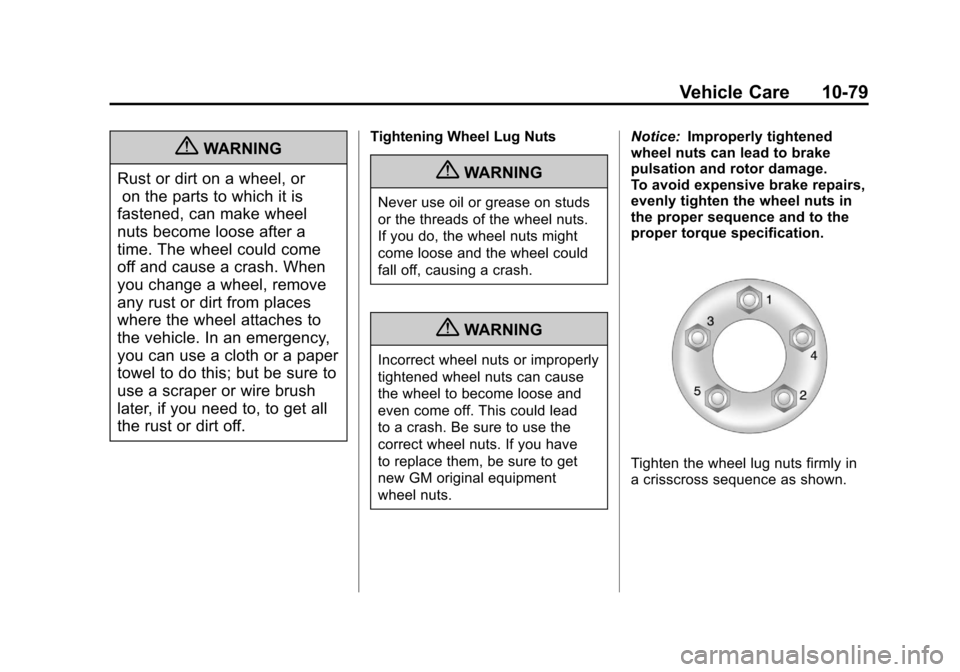
Tighten the wheel lug nuts firmly in
a crisscross sequence as shown.
Page 364 of 428
Black plate (80,1)Chevrolet Corvette Owner Manual - 2011
10-80 Vehicle Care
Tire Chains
{WARNING
Do not use tire chains. There is
not enough clearance. Tire chains
used on a vehicle without the
proper amount of clearance can
cause damage to the brakes,
suspension, or other vehicle
parts. The area damaged by
the tire chains could cause
you to lose control of the vehicle
and you or others may be injured
in a crash. Use another type
of traction device only if its(Continued)
WARNING (Continued)
manufacturer recommends it for
use on the vehicle and tire size
combination and road conditions.
Follow that manufacturer's
instructions. To help avoid
damage to the vehicle, drive
slowly, re‐adjust or remove the
device if it is contacting the
vehicle, and do not spin the
wheels. If you do find traction
devices that will fit, install them
on the rear tires.
If a Tire Goes Flat
It is unusual for a tire to blow out
while you are driving, especially if
you maintain the tires properly. If air
goes out of a tire, it is much more
likely to leak out slowly. See Tires
on page 10‑58 for additional
information. But if you should ever
have a blowout, here are a few tips
about what to expect and what
to do:
If a front tire fails, the flat tire
creates a drag that pulls the vehicle
toward that side. Take your foot
off the accelerator pedal and grip
the steering wheel firmly. Steer to
maintain lane position, and then
gently brake to a stop, well off the
road, if possible.
Page 370 of 428
Black plate (86,1)Chevrolet Corvette Owner Manual - 2011
10-86 Vehicle Care
Towing
Towing the Vehicle
Notice:To avoid damage,
the disabled vehicle should
be towed with all four wheels
off the ground. Care must be
taken with vehicles that have
low ground clearance and/or
special equipment.
Consult your dealer or a
professional towing service if the
disabled vehicle must be towed.
See Roadside Assistance Program
(United States and Canada) on
page 13‑8 orRoadside Assistance
Program (Mexico) on page 13‑10.
Recreational Vehicle
Towing
Notice: Dolly towing or dinghy
towing the vehicle may cause
damage because of reduced
ground clearance. Always put
the vehicle on a flatbed truck or
trailer.
The vehicle was neither designed
nor intended to be towed with any
of its wheels on the ground. If the
vehicle must be towed, see Towing
the Vehicle on page 10‑86.
Appearance Care
Exterior Care
Silicone grease on weatherstrips will
make them last longer, seal better,
and not stick or squeak. Apply
silicone grease with a clean cloth.
During very cold, damp weather
frequent application may be
required. See Recommended Fluids
and Lubricants on page 11‑6.
Washing the Vehicle
The best way to preserve the
vehicle's finish is to keep it clean
by washing it often.
Notice: Certain cleaners contain
chemicals that can damage the
emblems or nameplates on the
vehicle. Check the cleaning
product label. If it states that it
should not be used on plastic
parts, do not use it on the vehicle
or damage may occur and it
would not be covered by the
warranty.