2011 CHEVROLET AVEO horn
[x] Cancel search: hornPage 9 of 328
Black plate (3,1)Chevrolet Aveo Owner Manual - 2011
In Brief 1-3
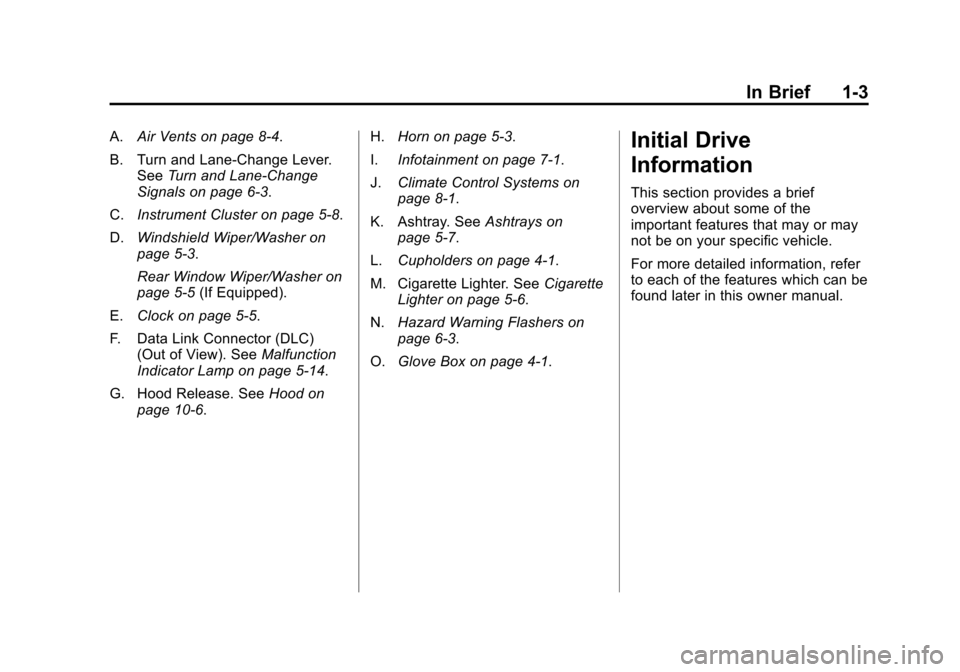
A.Air Vents on page 8‑4.
B. Turn and Lane‐Change Lever. See Turn and Lane-Change
Signals on page 6‑3.
C. Instrument Cluster on page 5‑8.
D. Windshield Wiper/Washer on
page 5‑3.
Rear Window Wiper/Washer on
page 5‑5 (If Equipped).
E. Clock on page 5‑5.
F. Data Link Connector (DLC) (Out of View). See Malfunction
Indicator Lamp on page 5‑14.
G. Hood Release. See Hood on
page 10‑6. H.
Horn on page 5‑3.
I. Infotainment on page 7‑1.
J. Climate Control Systems on
page 8‑1.
K. Ashtray. See Ashtrays on
page 5‑7.
L. Cupholders on page 4‑1.
M. Cigarette Lighter. See Cigarette
Lighter on page 5‑6.
N. Hazard Warning Flashers on
page 6‑3.
O. Glove Box on page 4‑1.Initial Drive
Information
This section provides a brief
overview about some of the
important features that may or may
not be on your specific vehicle.
For more detailed information, refer
to each of the features which can be
found later in this owner manual.
Page 35 of 328
Black plate (3,1)Chevrolet Aveo Owner Manual - 2011
Keys, Doors and Windows 2-3
Remote Keyless Entry
(RKE) System
SeeRadio Frequency Statement on
page 13‑16 for information
regarding Part 15 of the Federal
Communications Commission (FCC)
rules and Industry Canada
Standards RSS-210/220/310.
If there is a decrease in the RKE
operating range:
.Check the distance. The
transmitter may be too far
from the vehicle.
.Check the location. Other
vehicles or objects may be
blocking the signal.
.Check the transmitter's battery.
See “Battery Replacement” later
in this section.
.If the transmitter is still not
working correctly, see your
dealer or a qualified technician
for service.
Remote Keyless Entry
(RKE) System Operation
The Remote Keyless Entry (RKE)
transmitter functions work up to
20 m (65 ft) away from the vehicle.
There are other conditions which
can affect the performance of the
transmitter. See Remote Keyless
Entry (RKE) System on page 2‑3.
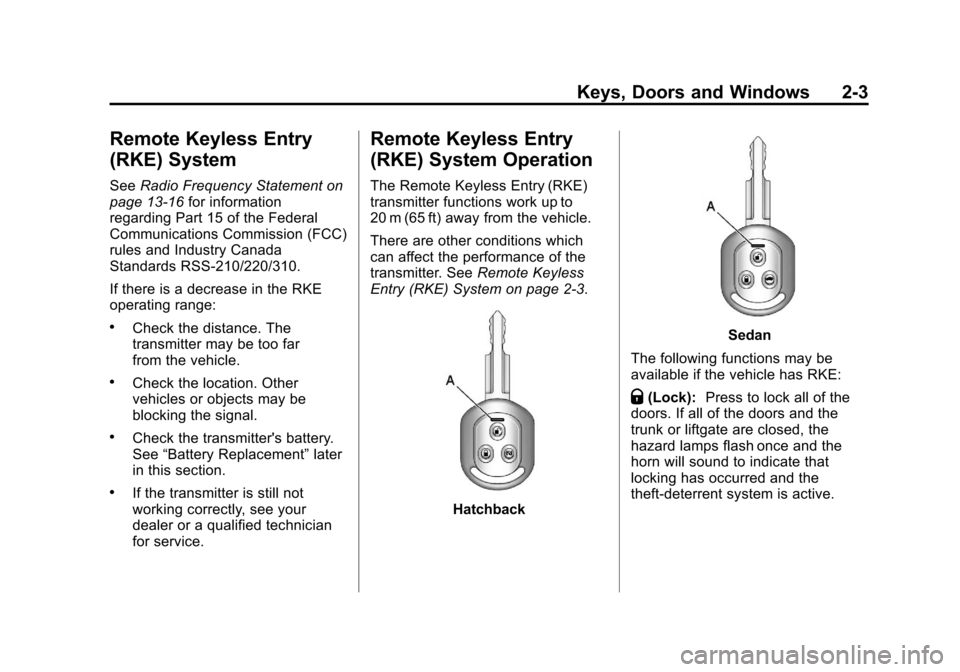
Hatchback
Sedan
The following functions may be
available if the vehicle has RKE:
Q(Lock): Press to lock all of the
doors. If all of the doors and the
trunk or liftgate are closed, the
hazard lamps flash once and the
horn will sound to indicate that
locking has occurred and the
theft-deterrent system is active.
Page 42 of 328
Black plate (10,1)Chevrolet Aveo Owner Manual - 2011
2-10 Keys, Doors and Windows
When closing the liftgate, close from
the center to ensure that it fully
latches.
To lock the liftgate, insert the key
into the lock cylinder and turn it
clockwise or use the RKE
transmitter, if equipped.
The liftgate can also be locked or
unlocked by the central door
unlocking system or RKE
transmitter, if equipped. See
Central Door Unlocking System on
page 2‑6andRemote Keyless Entry
(RKE) System Operation on
page 2‑3.Vehicle Security
This vehicle has theft-deterrent
features; however, they do not make
it impossible to steal.
Anti-Theft Alarm System
Your vehicle may have a content
theft-deterrent system.
The theft-deterrent system will not
arm when you lock the doors using
the key or the manual door lock.
It arms only when you use the
Remote Keyless Entry (RKE)
transmitter.
Arming the System
To arm the system, do the following:
1. Close the doors, the windows, the hood, and the trunk or
liftgate.
Make sure that the windows are
closed, as the system can be
armed even if the windows
are open. 2. Turn the key to LOCK/OFF and
remove the key from the ignition.
If the key is inserted in the
ignition, the transmitter will not
arm the theft-deterrent system.
3. Lock the doors by pressing the lock button on the RKE
transmitter.
.The LED light on the
transmitter will flash once.
.All of the doors will lock.
.The hazard warning lamps
will flash once and the horn
will sound.
.The security light will flash
continuously to indicate that
the theft-deterrent system is
armed. The security light is
located on the center of the
instrument panel near the
clock.
Page 43 of 328
Black plate (11,1)Chevrolet Aveo Owner Manual - 2011
Keys, Doors and Windows 2-11
To avoid activating the alarm by
accident, do one of the following:
.Unlock the driver or passenger
front door using the key.
.Press the unlock button on the
RKE transmitter.
Unlocking a door any other way will
activate the alarm when a door or
the trunk or liftgate is opened.
If you do not want to arm the
theft-deterrent system, lock the
vehicle using the key or the manual
door locks.
Disarming the System
To disarm the system, do one of the
following:
.Unlock the driver or passenger
front door using the key.
.Press the unlock button on the
RKE transmitter.
‐ The LED light on the
transmitter will flash once.
‐ All of the doors will unlock.
‐ The hazard warning lamps will
flash twice.
If the door is not opened or if the
engine is not started within
30 seconds after disarming the
system using the transmitter, all of
the doors will automatically lock and
the theft-deterrent mode will re-arm.
How the System Alarm is
Activated
If a door or the trunk or liftgate is
opened without using the key or the
RKE transmitter, the horn will sound
and the lamps will flash for up to
30 seconds.
How to Turn Off the System
Alarm
If the system alarm is active, it can
be deactivated using one of the
following methods:
.Press one of the buttons on the
RKE transmitter.
.Unlock the driver or passenger
front door using the key.
Otherwise, the alarm will
automatically stop after 30 seconds.
The system will then lock the doors
and re-arm the theft-deterrent
system.
Page 113 of 328

Black plate (1,1)Chevrolet Aveo Owner Manual - 2011
Instruments and Controls 5-1
Instruments and
Controls
Controls
Steering Wheel Adjustment . . . 5-1
Steering Wheel Controls . . . . . . 5-2
Horn . . . . . . . . . . . . . . . . . . . . . . . . . . 5-3
Windshield Wiper/Washer . . . . . 5-3
Rear Window Wiper/Washer . . . . . . . . . . . . . . . . . . . . . . 5-5
Clock . . . . . . . . . . . . . . . . . . . . . . . . . 5-5
Power Outlets . . . . . . . . . . . . . . . . . 5-5
Cigarette Lighter . . . . . . . . . . . . . . 5-6
Ashtrays . . . . . . . . . . . . . . . . . . . . . . 5-7
Warning Lights, Gauges, and
Indicators
Warning Lights, Gauges, and Indicators . . . . . . . . . . . . . . . . . . . . 5-7
Instrument Cluster . . . . . . . . . . . . 5-8
Speedometer . . . . . . . . . . . . . . . . . 5-9
Odometer . . . . . . . . . . . . . . . . . . . . . 5-9
Trip Odometer . . . . . . . . . . . . . . . . . 5-9
Tachometer . . . . . . . . . . . . . . . . . . . 5-9
Fuel Gauge . . . . . . . . . . . . . . . . . . 5-10 Engine Coolant Temperature
Gauge . . . . . . . . . . . . . . . . . . . . . . 5-11
Safety Belt Reminders . . . . . . . 5-11
Airbag Readiness Light . . . . . . 5-12
Passenger Airbag Status Indicator . . . . . . . . . . . . . . . . . . . . 5-12
Charging System Light . . . . . . 5-13
Malfunction Indicator Lamp . . . . . . . . . . . . . 5-14
Brake System Warning Light . . . . . . . . . . . . . . . . . . . . . . . 5-16
Antilock Brake System (ABS) Warning Light . . . . . . . . . . . . . . 5-17
Up-Shift Light . . . . . . . . . . . . . . . . 5-17
Hold Mode Light . . . . . . . . . . . . . 5-18
Tire Pressure Light . . . . . . . . . . 5-18
Engine Oil Pressure Light . . . . 5-18
Change Engine Oil Light . . . . . 5-19
Low Fuel Warning Light . . . . . . 5-20
High-Beam On Light . . . . . . . . . 5-20
Daytime Running Lamps (DRL) Indicator Light . . . . . . . 5-20
Front Fog Lamp Light . . . . . . . . 5-20
Cruise Control Light . . . . . . . . . 5-21
Door Ajar Light . . . . . . . . . . . . . . 5-21
Trip Computer
Trip Computer (US Only) . . . . 5-21
Controls
Steering Wheel
Adjustment
The lever is located under the
steering column, slightly to the left.
Page 115 of 328
Black plate (3,1)Chevrolet Aveo Owner Manual - 2011
Instruments and Controls 5-3
+ VOLUME−:Press the toggle
bar located below the + VOLUME −
button to adjust the volume. Press
the left side of the toggle bar, below
the + (plus) sign to increase the
volume. Press the right side of the
toggle bar, below the −(minus) sign
to decrease the volume.
MODE: Press and release this
button multiple times to cycle
through the audio playback options
that are available on the vehicle.
Options may include FM, AM, XM,
CD, and AUX.
SEEK: Press and release to go to
the next preset station.
Press and hold for a long time to go
to the next AM, FM, or XM station.
The radio seeks stations only with
a strong signal that are in the
selected band.
When playing a CD, press and
release to go to the next track.
Press and hold to fast forward
through the tracks.Horn
Press near or on the horn symbols
on the steering wheel pad to sound
the horn.
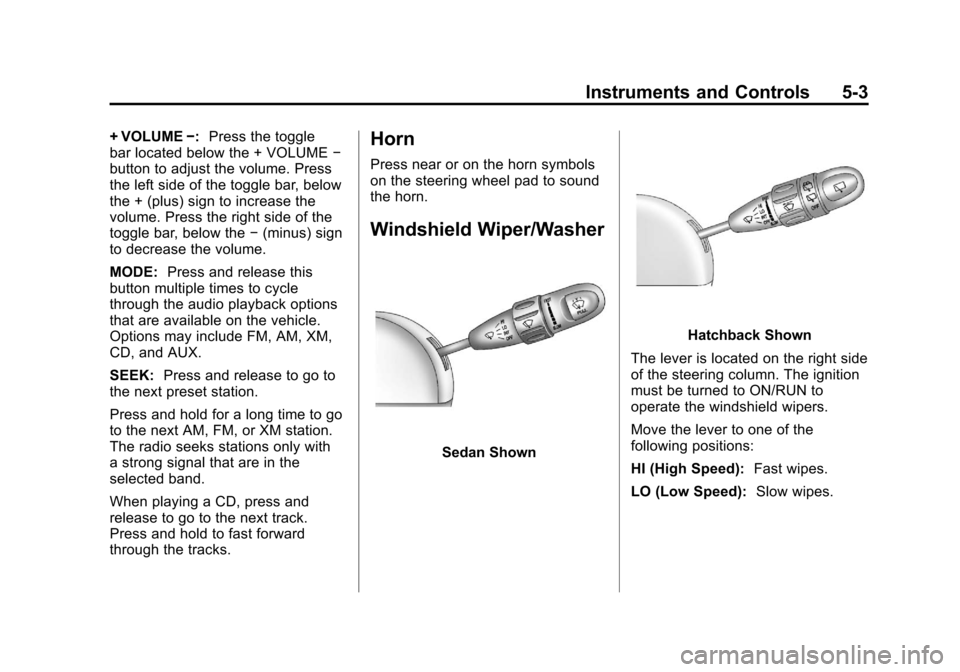
Windshield Wiper/Washer
Sedan Shown
Hatchback Shown
The lever is located on the right side
of the steering column. The ignition
must be turned to ON/RUN to
operate the windshield wipers.
Move the lever to one of the
following positions:
HI (High Speed): Fast wipes.
LO (Low Speed): Slow wipes.
Page 243 of 328
Black plate (41,1)Chevrolet Aveo Owner Manual - 2011
Vehicle Care 10-41
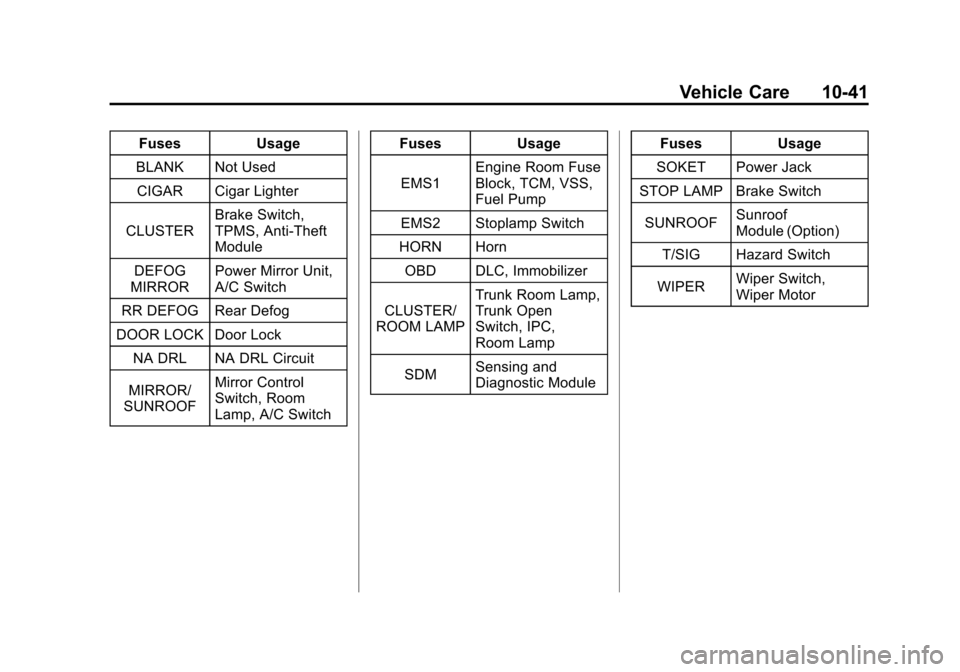
FusesUsage
BLANK Not Used CIGAR Cigar Lighter
CLUSTER Brake Switch,
TPMS, Anti‐Theft
Module
DEFOG
MIRROR Power Mirror Unit,
A/C Switch
RR DEFOG Rear Defog
DOOR LOCK Door Lock
NA DRL NA DRL Circuit
MIRROR/
SUNROOF Mirror Control
Switch, Room
Lamp, A/C Switch Fuses
Usage
EMS1 Engine Room Fuse
Block, TCM, VSS,
Fuel Pump
EMS2 Stoplamp Switch
HORN Horn
OBD DLC, Immobilizer
CLUSTER/
ROOM LAMP Trunk Room Lamp,
Trunk Open
Switch, IPC,
Room Lamp
SDM Sensing and
Diagnostic Module Fuses
Usage
SOKET Power Jack
STOP LAMP Brake Switch
SUNROOF Sunroof
Module (Option)
T/SIG Hazard Switch
WIPER Wiper Switch,
Wiper Motor
Page 323 of 328

Black plate (5,1)Chevrolet Aveo Owner Manual - 2011
INDEX i-5
General InformationService and Maintenance . . . . . 11-1
Towing . . . . . . . . . . . . . . . . . . . . . . . . 9-39
Vehicle Care . . . . . . . . . . . . . . . . . . 10-3
Glove Box . . . . . . . . . . . . . . . . . . . . . . 4-1
GM Mobility Reimbursement Program . . . . . . . . . . . . . . . . . . . . . . 13-5
H
Halogen Bulbs . . . . . . . . . . . . . . . . 10-31
Hazard Warning Flashers . . . . . . . 6-3
Head Restraints . . . . . . . . . . . . . . . . 3-2
Headlamps . . . . . . . . . . . . . . . . . . . 10-31
Aiming . . . . . . . . . . . . . . . . . . . . . . 10-30
Bulb Replacement . . . . . . . . . . 10-31
Daytime RunningLamps (DRL) . . . . . . . . . . . . . . . . . 6-2
Daytime Running Lamps
(DRL) Indicator Light . . . . . . . . 5-20
Flash-to-Pass . . . . . . . . . . . . . . . . . . 6-2
High-Beam On Light . . . . . . . . . . 5-20
High/Low Beam Changer . . . . . . 6-2
Heated Mirrors . . . . . . . . . . . . . . . . . 2-14
Heater
Engine . . . . . . . . . . . . . . . . . . . . . . . . 9-20 Heating and Air Conditioning . . . 8-1
High-Beam On Light . . . . . . . . . . . 5-20
Highway Hypnosis . . . . . . . . . . . . . . 9-8
Hill and Mountain Roads . . . . . . . . 9-8
Hold Mode Light . . . . . . . . . . . . . . . 5-18
Hood . . . . . . . . . . . . . . . . . . . . . . . . . . 10-6
Horn . . . . . . . . . . . . . . . . . . . . . . . . . . . . 5-3
How to Wear Safety Belts
Properly . . . . . . . . . . . . . . . . . . . . . . 3-14
Hydraulic Clutch . . . . . . . . . . . . . . 10-15
I
Ignition Positions . . . . . . . . . . . . . . 9-17
Ignition Transmission Lock Check . . . . . . . . . . . . . . . . . . . . . . . 10-29
Immobilizer . . . . . . . . . . . . . . . . . . . . 2-12
Inadvertent Power Battery Saver . . . . . . . . . . . . . . . . . . . . . . . . . 6-5
Infants and Young Children, Restraints . . . . . . . . . . . . . . . . . . . . 3-41
Infotainment . . . . . . . . . . . . . . . . . . . . 7-1
Instrument Cluster . . . . . . . . . . . . . . 5-8
Introduction . . . . . . . . . . . . . . . . . . . . . . . iii
J
Jump Starting . . . . . . . . . . . . . . . . . 10-70
K
Keyless Entry Remote (RKE) System . . . . . . . . 2-3
Keys . . . . . . . . . . . . . . . . . . . . . . . . . . . . 2-2
L
Labeling, Tire Sidewall . . . . . . . . 10-42
Lamps Daytime Running (DRL) . . . . . . . 6-2
Dome . . . . . . . . . . . . . . . . . . . . . . . . . . 6-5
Exterior Controls . . . . . . . . . . . . . . . 6-1
License Plate . . . . . . . . . . . . . . . 10-35
Malfunction Indicator . . . . . . . . . 5-14
Lap-Shoulder Belt . . . . . . . . . . . . . 3-20
LATCH System Replacing Parts After aCrash . . . . . . . . . . . . . . . . . . . . . . . 3-55
Latch, Lower Anchors and Tethers for Children . . . . . . . . . . 3-48
Liftgate Carbon Monoxide . . . . . . . . . . . . . . 2-9