2011 CHEVROLET AVEO four wheel drive
[x] Cancel search: four wheel drivePage 16 of 328
Black plate (10,1)Chevrolet Aveo Owner Manual - 2011
1-10 In Brief
Mirror Adjustment
Exterior Mirrors
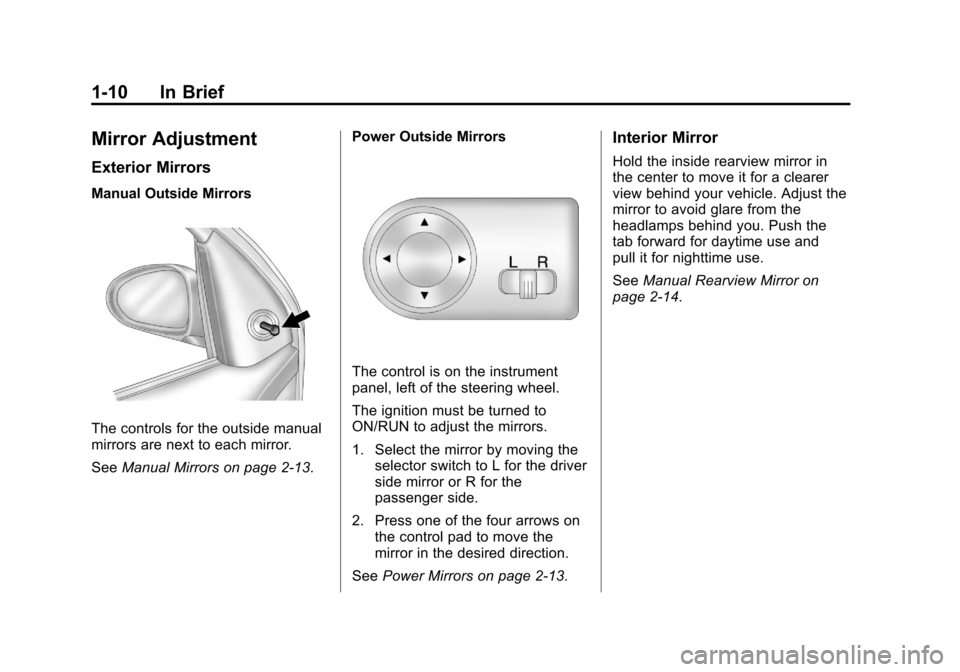
Manual Outside Mirrors
The controls for the outside manual
mirrors are next to each mirror.
SeeManual Mirrors on page 2‑13. Power Outside Mirrors
The control is on the instrument
panel, left of the steering wheel.
The ignition must be turned to
ON/RUN to adjust the mirrors.
1. Select the mirror by moving the
selector switch to L for the driver
side mirror or R for the
passenger side.
2. Press one of the four arrows on the control pad to move the
mirror in the desired direction.
See Power Mirrors on page 2‑13.
Interior Mirror
Hold the inside rearview mirror in
the center to move it for a clearer
view behind your vehicle. Adjust the
mirror to avoid glare from the
headlamps behind you. Push the
tab forward for daytime use and
pull it for nighttime use.
SeeManual Rearview Mirror on
page 2‑14.
Page 145 of 328
Black plate (5,1)Chevrolet Aveo Owner Manual - 2011
Infotainment System 7-5
Press and hold SCAN/AST to use
Automatic Store. The radio only
scans stations with a strong signal
in the selected band.
AST (Automatic Store):Twelve
preset stations with the strongest
reception in the area can be
automatically stored. The radio will
only scan stations with a strong
signal that are in the selected AM or
FM band. If the Automatic Store
function is started in the FM band,
only FM stations are stored in
preset pages A1 and A2. If the
Automatic Store function is started
in the AM band, only AM stations
are stored in A1 and A2.
A combination of AM, FM, and XM
(if equipped) stations can be stored
manually into the other four favorite
pages. To use Automatic Store:
1. Press and hold SCAN/AST to
use Automatic Store mode.
2. Press the pushbutton below the ON tab on the radio display.
3. Automatic Store searches for radio stations with a strong
signal and automatically sets
presets A1 and A2 with new
stations.
4. After all stations are set, press the pushbutton below the arrow
tab on the radio display to return
to the main radio screen.
To reset the automatically stored
radio stations, press and hold
SCAN/AST. Then press the
pushbutton below the RESE tab on
the radio display. If no stations are
stored on preset pages A1 and A2,
the RESE option does not appear
in the radio display. When the
Automatic Store function is used,
any stations that were previously set
will be deleted and replaced with
new stations.Storing a Radio Station
Drivers are encouraged to set up
radio station favorites while the
vehicle is in P (Park). Tune to
favorite stations using the
pushbuttons, favorites button, and
steering wheel controls. See
Defensive Driving on page 9‑2.
A maximum of 36 stations can be
programmed as favorites using the
6 pushbuttons positioned below the
radio station frequency labels and
by using the radio favorites page
button (FAV button). Press the FAV
button to go through up to six pages
of favorites, each having six favorite
stations available per page.
If Automatic Store is used, then four
pages of favorites are available.
Each page of favorites can contain
any combination of AM, FM, or XM
(if equipped) stations. To store a
station as a favorite:
1. Tune in the desired station.
2. Press and release the FAV button to display the page where
the station is to be stored.
Page 147 of 328
Black plate (7,1)Chevrolet Aveo Owner Manual - 2011
Infotainment System 7-7
Storing an XM Channel
Drivers are encouraged to set up
XM Channel favorites while the
vehicle is in P (Park). Tune to
favorite stations using the
pushbuttons, favorites button, and
steering wheel controls. See
Defensive Driving on page 9‑2.
A maximum of 36 stations can be
programmed as favorites using the
6 pushbuttons positioned below the
radio station frequency labels and
by using the radio favorites page
button (FAV button). Press the FAV
button to go through up to six pages
of favorites, each having six favorite
stations available per page.
If Automatic Store is used, then four
pages of favorites are available.
Each page of favorites can contain
any combination of AM, FM, or XM
channels. To store an XM channel
as a favorite:
1. Tune in the desired channel.
2. Press and release the FAVbutton to display the page where
the channel is to be stored. 3. Press and hold one of the six
numbered pushbuttons until
a beep sounds. When the
pushbutton is pressed and
released, the channel that was
set will return.
4. Repeat Steps 1 through 3 for each XM channel to be stored
as a favorite.
To set up the number of favorites
pages:
1. Press and hold FAV until the radio setup menu displays.
2. Select the desired number of favorites pages by pressing the
pushbutton located below the
displayed page numbers.
3. Press FAV to return to the original main radio screen
showing the radio frequency
tabs and to begin the process of
programming favorites for the
chosen number of numbered
pages.
XM Radio Messages
UPDATING: The encryption code
in the receiver is being updated, and
no action is required. This process
should take no longer than
30 seconds.
NO SIGNAL: The system is
functioning correctly, but the vehicle
is in a location that is blocking the
XM signal. When the vehicle is
moved into an open area, the signal
should return.
LOADING: The audio system is
acquiring and processing audio and
text data. No action is needed. This
message should disappear shortly.
OFF AIR: This channel is not
currently in service. Tune in to
another channel.
CH UNAVAILABLE: This
previously assigned channel is no
longer assigned. Tune to another
station. If this station was one of the
presets, choose another station for
that preset button.
Page 258 of 328
Black plate (56,1)Chevrolet Aveo Owner Manual - 2011
10-56 Vehicle Care
Parking for an extended period can
cause flat spots on the tires that
may result in vibrations while
driving. When storing a vehicle for
at least a month, remove the tires or
raise the vehicle to reduce the
weight from the tires.
Buying New Tires
GM has developed and matched
specific tires for the vehicle. If
you need replacement tires, GM
strongly recommends that you get
tires that are the same size, brand,
load range, speed rating, and
construction type (radial and
bias‐belted tires) as the vehicle's
original tires. This way, the vehicle
will continue to have tires that
are designed to give the same
performance and vehicle safety,
during normal use, as the original
tires. SeeTire Sidewall Labeling on
page 10‑42 for additional
information. GM recommends replacing tires in
sets of four. This is because uniform
tread depth on all tires will help
keep the vehicle performing most
like it did when the tires were new.
Replacing less than a full set of tires
can affect the braking and handling
performance of the vehicle. See
Tire
Inspection on page 10‑53 andTire
Rotation on page 10‑54.
{WARNING
Tires could explode during
improper service. Attempting to
mount or dismount a tire could
cause injury or death. Only your
dealer or authorized tire service
center should mount or dismount
the tires.
{CAUTION
Mixing tires could cause you
to lose control while driving.
If you mix tires of different
sizes, brands, or types (radial
and bias-belted tires), the
vehicle may not handle
properly, and you could have
a crash. Using tires of different
sizes, brands, or types may
also cause damage to your
vehicle. Be sure to use the
correct size, brand, and type
of tires on all wheels. It is
all right to drive with your
compact spare temporarily, as
it was developed for use on
your vehicle. See Compact
Spare Tire on page 10‑69.
Page 277 of 328
Black plate (75,1)Chevrolet Aveo Owner Manual - 2011
Vehicle Care 10-75
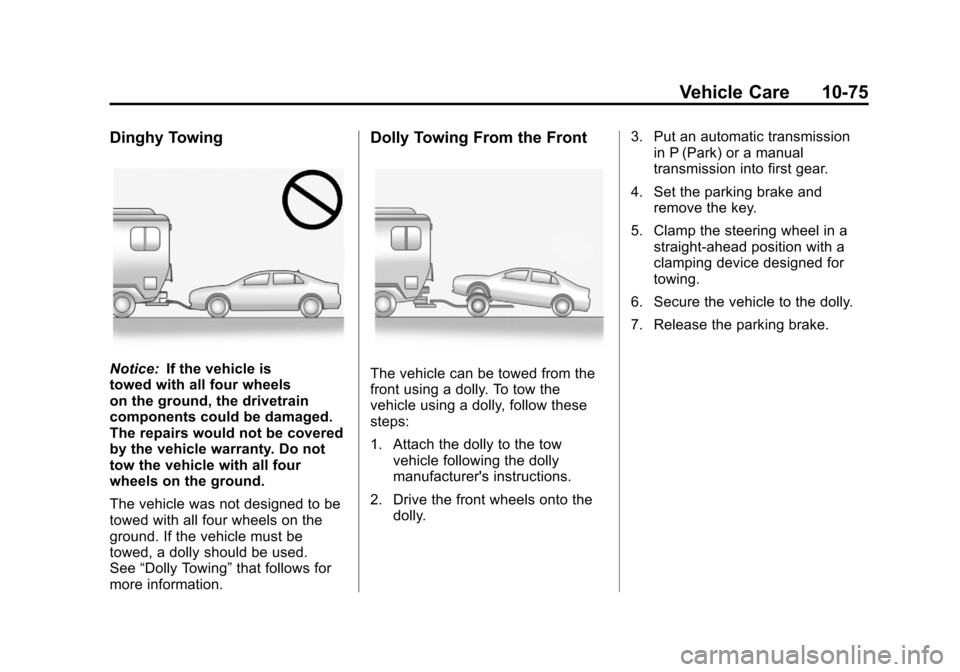
Dinghy Towing
Notice:If the vehicle is
towed with all four wheels
on the ground, the drivetrain
components could be damaged.
The repairs would not be covered
by the vehicle warranty. Do not
tow the vehicle with all four
wheels on the ground.
The vehicle was not designed to be
towed with all four wheels on the
ground. If the vehicle must be
towed, a dolly should be used.
See “Dolly Towing” that follows for
more information.
Dolly Towing From the Front
The vehicle can be towed from the
front using a dolly. To tow the
vehicle using a dolly, follow these
steps:
1. Attach the dolly to the tow vehicle following the dolly
manufacturer's instructions.
2. Drive the front wheels onto the dolly. 3. Put an automatic transmission
in P (Park) or a manual
transmission into first gear.
4. Set the parking brake and remove the key.
5. Clamp the steering wheel in a straight-ahead position with a
clamping device designed for
towing.
6. Secure the vehicle to the dolly.
7. Release the parking brake.