Page 138 of 328

Black plate (4,1)Chevrolet Aveo Owner Manual - 2011
6-4 Lighting
Fog Lamps
For vehicles with fog lamps, they
are controlled by the
#band
located on the middle of the turn
signal/multifunction lever.
To use the fog lamps, the ignition
must be turned to ON/RUN and the
low-beam headlamps or parking
lamps must be on.
Turn the band to
#to turn the fog
lamps on. The band automatically
returns to its starting position when
released. The fog lamp indicator
light comes on in the instrument
panel cluster. See Front Fog Lamp
Light on page 5‑20. To turn the fog lamps off, turn the
band to
#again. The fog lamp
indicator light will go off.
The fog lamps will also turn off
when the high-beam headlamps are
turned on. When the high-beam
headlamps are turned off, the fog
lamps will turn on again.
Some localities have laws that
require the headlamps to be on
along with the fog lamps.Interior Lighting
Instrument Panel
Illumination Control
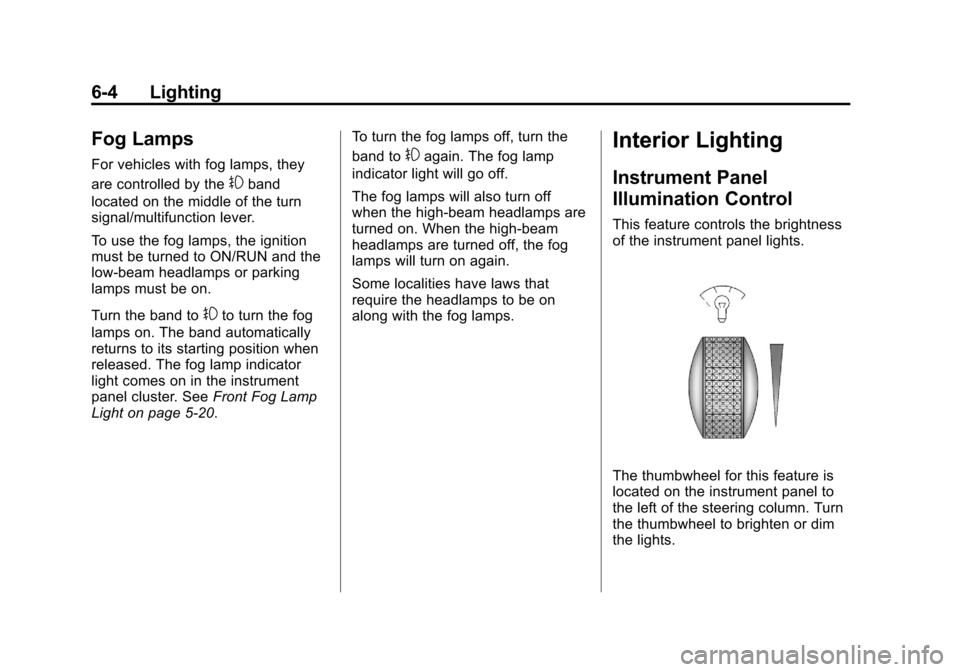
This feature controls the brightness
of the instrument panel lights.
The thumbwheel for this feature is
located on the instrument panel to
the left of the steering column. Turn
the thumbwheel to brighten or dim
the lights.
Page 173 of 328

Black plate (11,1)Chevrolet Aveo Owner Manual - 2011
Driving and Operating 9-11
WARNING (Continued)
Snow can trap exhaust gases
under your vehicle. This can
cause deadly CO (Carbon
Monoxide) gas to get inside. CO
could overcome you and kill you.
You cannot see it or smell it, so
you might not know it is in your
vehicle. Clear away snow from
around the base of your vehicle,
especially any that is blocking the
exhaust.
Run the engine for short periods
only as needed to keep warm, but
be careful. To save fuel, run the engine for only
short periods as needed to warm
the vehicle and then shut the engine
off and close the window most of
the way to save heat. Repeat this
until help arrives but only when you
feel really uncomfortable from the
cold. Moving about to keep warm
also helps.
If it takes some time for help to
arrive, now and then when you run
the engine, push the accelerator
pedal slightly so the engine runs
faster than the idle speed. This
keeps the battery charged to restart
the vehicle and to signal for help
with the headlamps. Do this as little
as possible to save fuel.
If the Vehicle is Stuck
Slowly and cautiously spin the
wheels to free the vehicle when
stuck in sand, mud, ice, or snow.
If stuck too severely for the traction
system to free the vehicle, turn the
traction system off and use the
rocking method.
{WARNING
If the vehicle's tires spin at high
speed, they can explode, and you
or others could be injured. The
vehicle can overheat, causing an
engine compartment fire or other
damage. Spin the wheels as little
as possible and avoid going
above 55 km/h (35 mph).
For information about using tire
chains on the vehicle, see Tire
Chains on page 10‑61.
Page 203 of 328

Black plate (1,1)Chevrolet Aveo Owner Manual - 2011
Vehicle Care 10-1
Vehicle Care
General Information
General Information . . . . . . . . . . 10-3
California Proposition65 Warning . . . . . . . . . . . . . . . . . 10-3
California Perchlorate Materials Requirements . . . . 10-3
Accessories and Modifications . . . . . . . . . . . . . . . 10-4
Vehicle Checks
Doing Your OwnService Work . . . . . . . . . . . . . . . 10-5
Hood . . . . . . . . . . . . . . . . . . . . . . . . 10-6
Engine Compartment Overview . . . . . . . . . . . . . . . . . . . 10-8
Engine Oil . . . . . . . . . . . . . . . . . . . 10-9
Engine Oil Life System . . . . . 10-12
Automatic Transmission Fluid . . . . . . . . . . . . . . . . . . . . . . 10-13
Manual Transmission Fluid . . . . . . . . . . . . . . . . . . . . . . 10-15
Hydraulic Clutch . . . . . . . . . . . . 10-15
Engine Air Cleaner/Filter . . . . 10-16
Cooling System . . . . . . . . . . . . 10-17 Engine Coolant . . . . . . . . . . . . . 10-18
Engine Overheating . . . . . . . . 10-21
Power Steering Fluid . . . . . . . 10-23
Washer Fluid . . . . . . . . . . . . . . . 10-24
Brakes . . . . . . . . . . . . . . . . . . . . . 10-24
Brake Fluid . . . . . . . . . . . . . . . . . 10-26
Battery . . . . . . . . . . . . . . . . . . . . . 10-27
Starter Switch Check . . . . . . . 10-28
Automatic Transmission Shift
Lock Control Function
Check . . . . . . . . . . . . . . . . . . . . . 10-28
Ignition Transmission Lock Check . . . . . . . . . . . . . . . . . . . . . 10-29
Park Brake and P (Park) Mechanism Check . . . . . . . . 10-29
Wiper Blade Replacement . . . . . . . . . . . . . . 10-30
Headlamp Aiming
Headlamp Aiming . . . . . . . . . . 10-30
Bulb Replacement
Bulb Replacement . . . . . . . . . . 10-31
Halogen Bulbs . . . . . . . . . . . . . . 10-31
Headlamps . . . . . . . . . . . . . . . . . 10-31
Front Turn Signal,Sidemarker, and Parking
Lamps . . . . . . . . . . . . . . . . . . . . 10-32 Taillamps, Turn Signal,
Sidemarker, Stoplamps,
and Back-Up Lamps . . . . . . 10-33
Center High-Mounted Stoplamp (CHMSL)
(Hatchback) . . . . . . . . . . . . . . . 10-34
Center High-Mounted Stoplamp (CHMSL)
(Sedan) . . . . . . . . . . . . . . . . . . . 10-34
License Plate Lamp . . . . . . . . 10-35
Replacement Bulbs . . . . . . . . . 10-35
Electrical System
Electrical System Overload . . . . . . . . . . . . . . . . . . 10-36
Fuses and Circuit Breakers . . . . . . . . . . . . . . . . . . 10-36
Engine Compartment Fuse Block . . . . . . . . . . . . . . . . . . . . . 10-37
Instrument Panel Fuse Block . . . . . . . . . . . . . . . . . . . . . 10-40
Wheels and Tires
Tires . . . . . . . . . . . . . . . . . . . . . . . . 10-42
Tire Sidewall Labeling . . . . . . 10-42
Tire Designations . . . . . . . . . . . 10-45
Tire Terminology andDefinitions . . . . . . . . . . . . . . . . 10-45
Tire Pressure . . . . . . . . . . . . . . . 10-48
Page 232 of 328

Black plate (30,1)Chevrolet Aveo Owner Manual - 2011
10-30 Vehicle Care
Wiper Blade Replacement
Windshield wiper blades should be
inspected for wear or cracking. See
“Wiper Blade Check”for more
information.
Replacement blades come in
different types and are removed in
different ways. For the proper type,
see Maintenance Replacement
Parts on page 11‑8. Here is how to remove and replace
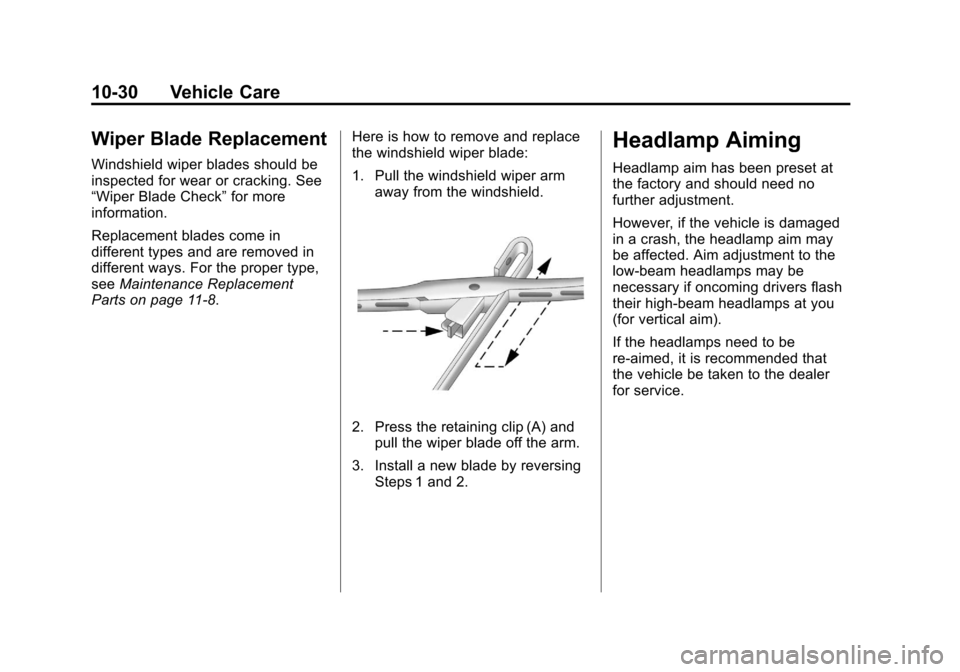
the windshield wiper blade:
1. Pull the windshield wiper arm
away from the windshield.
2. Press the retaining clip (A) andpull the wiper blade off the arm.
3. Install a new blade by reversing Steps 1 and 2.
Headlamp Aiming
Headlamp aim has been preset at
the factory and should need no
further adjustment.
However, if the vehicle is damaged
in a crash, the headlamp aim may
be affected. Aim adjustment to the
low-beam headlamps may be
necessary if oncoming drivers flash
their high-beam headlamps at you
(for vertical aim).
If the headlamps need to be
re-aimed, it is recommended that
the vehicle be taken to the dealer
for service.
Page 233 of 328
Black plate (31,1)Chevrolet Aveo Owner Manual - 2011
Vehicle Care 10-31
Bulb Replacement
For the proper type of replacement
bulbs, seeReplacement Bulbs on
page 10‑35.
For any bulb‐changing procedure
not listed in this section, contact
your dealer.
Halogen Bulbs
{WARNING
Halogen bulbs have pressurized
gas inside and can burst if you
drop or scratch the bulb. You or
others could be injured. Be sure
to read and follow the instructions
on the bulb package.
Headlamps
To replace a headlamp bulb:
1. Open the hood. See Hood on
page 10‑6.
2. Remove the three bolts to remove the headlamp assembly.
3. Disconnect the wiring harness connector from the rear of
the bulb.
4. Remove the headlamp cap.
5. Release the spring that retainsthe bulb by loosening the screw.
6. Remove the old bulb and install the new bulb.
7. Install the bulb retaining spring and tighten the screw.
8. Reinstall the headlamp cap.
9. Reconnect the wiring harness at the rear of the bulb.
Page 234 of 328
Black plate (32,1)Chevrolet Aveo Owner Manual - 2011
10-32 Vehicle Care
10. Reinstall the headlampassembly using the three bolts.
Front Turn Signal,
Sidemarker, and Parking
Lamps
To replace a front turn signal or
parking lamp bulb:
1. Open the hood. See Hood on
page 10‑6 for more information.
2. Remove the three bolts to
remove the headlamp assembly.
3. Disconnect the wiring harness connector from the rear of
the bulb.
4. Turn the front turn signal bulbsocket counterclockwise.
5. Pull the front turn signal bulb socket out of the lamp housing.
6. Press the bulb inward and turn it counterclockwise to remove it
from the bulb socket.
7. Install the new bulb into the socket by pressing it in and
turning it clockwise.
Page 235 of 328
Black plate (33,1)Chevrolet Aveo Owner Manual - 2011
Vehicle Care 10-33
8. Install the socket into the lamphousing by turning it clockwise.
9. Reconnect the wiring harness connector at the rear of the bulb.
10. Reinstall the headlamp assembly using the three bolts.
Taillamps, Turn Signal,
Sidemarker, Stoplamps,
and Back-Up Lamps
To replace a taillamp, turn signal
lamp, stoplamp, or back-up bulb:
1. Open the liftgate or trunk. SeeLiftgate (Hatchback) on page 2‑9
orTrunk on page 2‑7.
Hatchback
Sedan
2. Remove the two screws and the lamp assembly.
3. Turn the bulb socket counterclockwise and remove
the socket.
4. Press the bulb in and turn counterclockwise to remove it
from the socket.
Page 237 of 328

Black plate (35,1)Chevrolet Aveo Owner Manual - 2011
Vehicle Care 10-35
4. Remove the bulb by pulling itstraight out of the bulb holder.
5. Install the new bulb.
6. Reverse Steps 1 through 3 to reinstall.
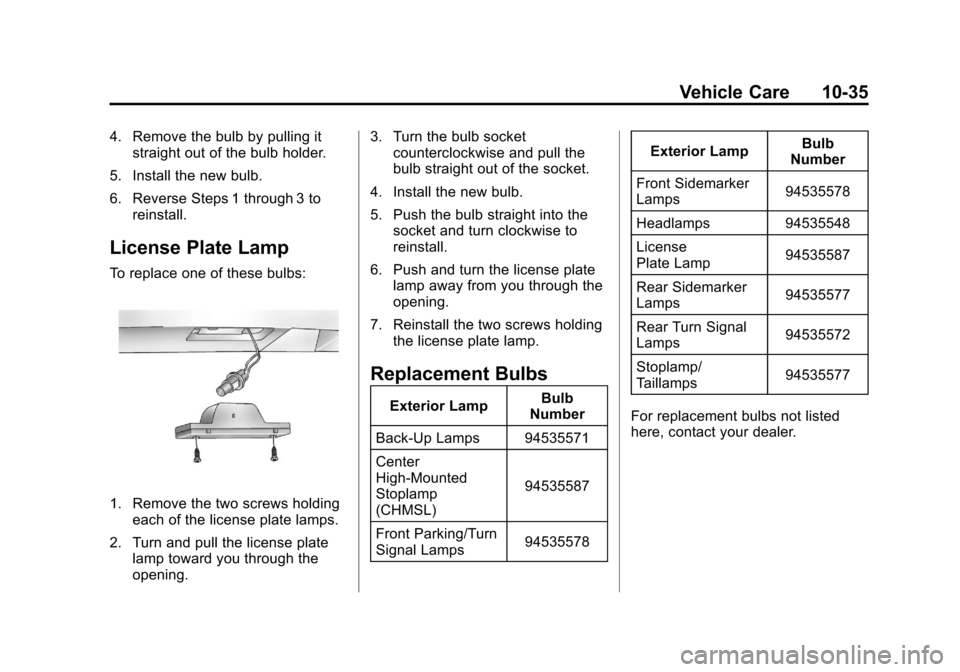
License Plate Lamp
To replace one of these bulbs:
1. Remove the two screws holdingeach of the license plate lamps.
2. Turn and pull the license plate lamp toward you through the
opening. 3. Turn the bulb socket
counterclockwise and pull the
bulb straight out of the socket.
4. Install the new bulb.
5. Push the bulb straight into the socket and turn clockwise to
reinstall.
6. Push and turn the license plate lamp away from you through the
opening.
7. Reinstall the two screws holding the license plate lamp.
Replacement Bulbs
Exterior Lamp Bulb
Number
Back-Up Lamps 94535571
Center
High-Mounted
Stoplamp
(CHMSL) 94535587
Front Parking/Turn
Signal Lamps 94535578Exterior Lamp
Bulb
Number
Front Sidemarker
Lamps 94535578
Headlamps 94535548
License
Plate Lamp 94535587
Rear Sidemarker
Lamps 94535577
Rear Turn Signal
Lamps 94535572
Stoplamp/
Taillamps 94535577
For replacement bulbs not listed
here, contact your dealer.