2011 BMW 535I settings
[x] Cancel search: settingsPage 131 of 304

Press the left or right side of the button:
decrease or increase air volume.
The
selected air volume is shown on the display
of the automatic climate control.
Switching the system on/off
Switching off
At the lowest fan speed, press the left
side of the button on the driver's side.
Switching on
Press any button.
Maximum cooling Press the button.
The system is set to the lowest tem‐
perature, maximum air volume and recirculated-
air mode.
Air flows out of the vents for the upper body re‐
gion. Open them for this purpose.
Air is cooled as quickly as possible:
▷ At an external temperature of approx. 32 ℉/
0 ℃.
▷ When the engine is running.
Parked-car ventilation
The concept
The
parked-car ventilation ventilates the vehicle
interior and lowers its temperature, if necessary.
The system can be switched on and off directly
or by using two preset switch-on times. It re‐
mains switched on for 30 minutes.
They can be operated via iDrive.
Parked-car ventilation
Using the preset switch-on time or when oper‐
ated directly: any external temperature.
Open the vents to allow air to flow out. Switching on/off directly
1.
"Settings"
2. "Climate"
3. "Activate parked-car vent." The symbol on the automatic climate control
flashes if the system is switched on.
The
system continues to run for some time after
being switched off.
Preselecting the switch-on time
1. "Settings"
2. "Climate"
3. "Timer 1:" or "Timer 2:"
4. Set the desired time.
Activating the switch-on time
1. "Settings"
2. "Climate"
3. "Activate Timer 1" or "Activate Timer 2" The symbol on the automatic climate control
lights up when the switch-on time is activated. The symbol on the automatic climate control
flashes
when the system has been switched on.
The system will only be switched on within the
next 24 hours. After that, it needs to reactivated.
Seite 131
131Online Edition for Part no. 01 40 2 606 469 - 03 11 490
Reference Mobility Communication Entertainment Navigation Driving tips
Controls At a glance
Page 138 of 304

Storage compartments
Storage compartments
The following storage compartments are avail‐
able in the vehicle interior:
▷
Glove compartment on the driver's and front
passenger side, refer to page 138.
▷ Storage compartment on the center con‐
sole: manual transmission.
▷ Storage compartment*, refer to page 141,
in the center console for remote control: au‐
tomatic transmission*.
▷ Storage compartment in the center armrest,
refer to page 139, in the front and rear.
▷ Compartments in the doors.
▷ Pockets*
on the backrests of the front seats.
▷ Net* in the front passenger footwell.
Glove compartment
Front passenger side
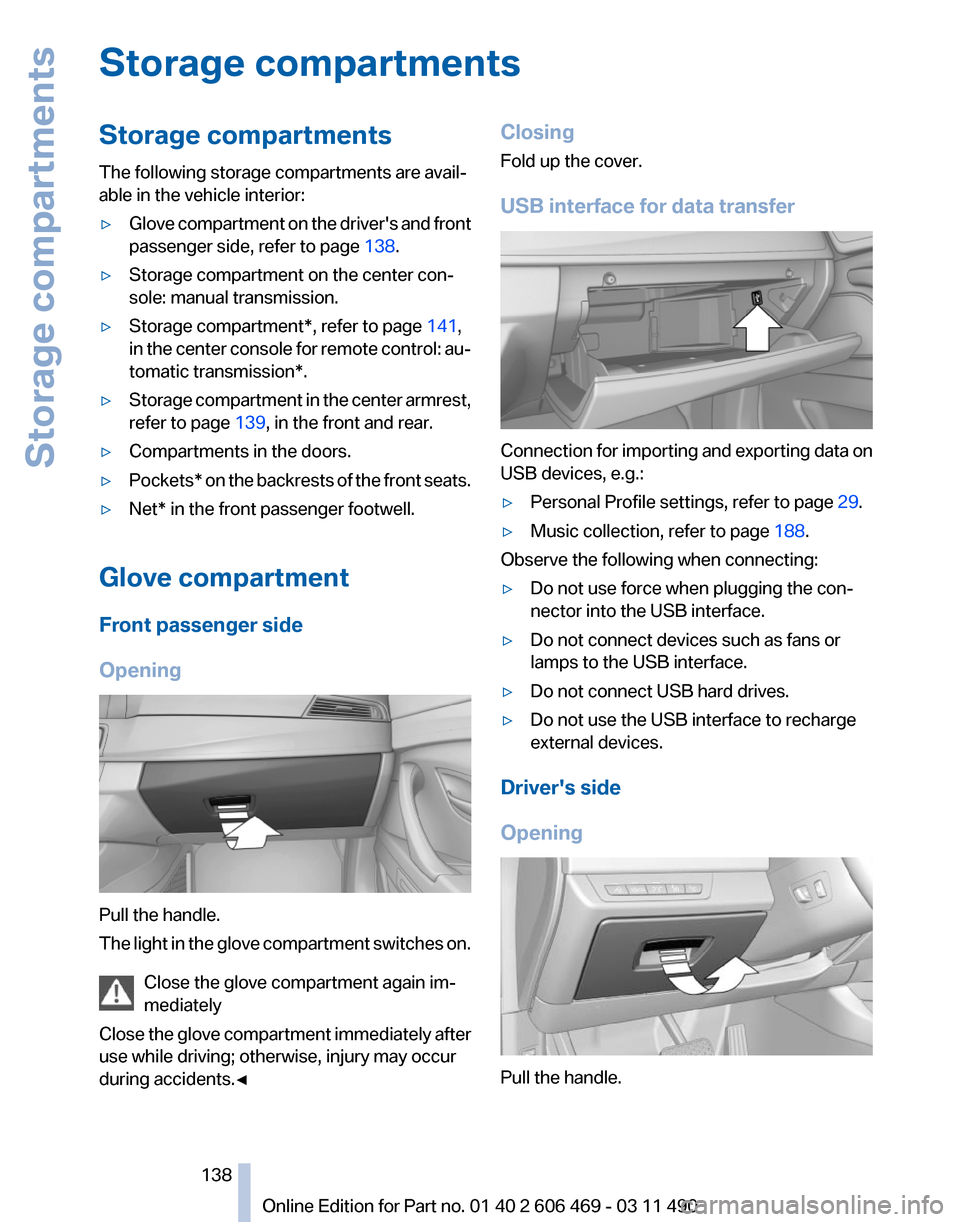
Opening Pull the handle.
The
light in the glove compartment switches on.
Close the glove compartment again im‐
mediately
Close the glove compartment immediately after
use while driving; otherwise, injury may occur
during accidents.◀ Closing
Fold up the cover.
USB interface for data transfer
Connection for importing and exporting data on
USB devices, e.g.:
▷
Personal Profile settings, refer to page 29.
▷ Music collection, refer to page 188.
Observe the following when connecting:
▷ Do not use force when plugging the con‐
nector into the USB interface.
▷ Do not connect devices such as fans or
lamps to the USB interface.
▷ Do not connect USB hard drives.
▷ Do not use the USB interface to recharge
external devices.
Driver's side
Opening Pull the handle.
Seite 138
138 Online Edition for Part no. 01 40 2 606 469 - 03 11 490
Storage compartments
Page 159 of 304

Specifying the street
If
the system does not recognize a street, one of
the following is displayed:
▷ The name of a street in the vicinity.
▷ The county.
▷ The coordinates of the destination.
Additional functions
Additional functions are available on the inter‐
active map after the controller is pressed. ▷ Select the symbol.
"Start guidance" or "Add as another
destination"
Add a destination as a further destination,
refer to page 160.
▷ "Exit interactive map": return to the map
view.
▷ "View in northern direction" or "View in
driving direction"
▷ "Display destination": the map section
around the destination is displayed.
▷ "Display current location": the map section
around your current location is displayed.
▷ "Find
points of interest": the search for spe‐
cial destinations is started.
Destination entry by voice*
General information
▷ Instructions for voice activation system, re‐
fer to page 22.
▷ When making a destination entry by voice,
you can change between voice operation
and iDrive. ▷
To have the available spoken instructions
read out loud: ›Voice commands
‹
Saying the entries
▷ the town/city, street, and house number can
be entered as a single
command*.
▷ Countries, towns and cities, streets, and in‐
tersections can be said as whole words* or
spelled in the language of the system, refer
to page 79.
Example: to enter a town/city in a US state
as
a whole word, the language of the system
must be English.
▷ Spell the entry if the spoken language and
the language of the system differ.
▷ Say the letters smoothly, and avoid exag‐
gerating the pronunciation and inserting
lengthy pauses between the letters.
▷ The options available for entering data de‐
pend
on the navigation data and the country
and language settings.
entering an address using a command*
1. Press the button on the steering
wheel.
2. ›Enter address‹
3. Wait for a request from the system.
4. Say the address in the suggested order.
5. Continue making the entry as prompted by
the system.
If necessary, individually name the separate
components of the address, e.g., the town/city.
Entering a town/city separately
The name of the town/city can be said as a
word* or spelled out.
With the destination entry menu displayed:
1. Press the button on the steering
wheel.
2. ›City‹ or ›Spell city‹.
3. Wait for the system to prompt you for the
town/city.
Seite 159
159Online Edition for Part no. 01 40 2 606 469 - 03 11 490
Reference Mobility Communication Entertainment
Navigation Driving tips Controls At a glance
Page 162 of 304

▷
Road types are part of the navigation data
and
are taken into consideration when plan‐
ning a route, e.g., avoid highways.
▷ The recommended route may differ from the
route
you would take based on personal ex‐
perience.
▷ The settings are stored for the remote con‐
trol currently in use.
▷ Destination guidance with traffic bulletins,
refer to page 167.
Changing the route criteria
1. "Navigation"
2. "Map"
3. "Route preference"
4. Select the criterion:
▷ "Fast route": time-optimized route,
being
a combination of the shortest pos‐
sible route and the fastest roads.
▷ "Efficient route": optimized combi‐
nation of the fastest and shortest route.
▷ "Short route": short distance, irre‐
spective
of how fast or slow progress will
be.
▷ "Alternative routes": if available, alter‐
native routes are suggested during ac‐
tive route guidance. The individual sug‐
gestions are highlighted in color. 5.
Specify additional criteria for the route, if
necessary:
▷"Avoid highways": highways are
avoided wherever possible.
▷ "Avoid
toll roads": toll roads are avoided
wherever possible. ▷
"Avoid ferries": ferries are avoided
where possible.
Route
Different views of the route are available during
destination guidance:
▷ Arrow view in the instrument cluster and on
the Control Display.
▷ List of route sections.
▷ Map view, refer to page 163.
▷ Arrow view in the Head-up Display*, refer to
page 124.
Arrow view
The following information is displayed during
destination guidance:
▷ Large arrow: current direction of travel.
▷ Small arrow: indicates the next change in di‐
rection.
▷ Intersection view.
▷ Lane information.
▷ Traffic bulletins.
▷ Distance to the next change in direction.
▷ Street name at the next change in direction.
Lane information
On multi-lane roads, the recommended lanes
are marked in the arrow view by a triangle.
▷ Solid triangle: best lane.
▷ Empty triangle: possible lane. However, an‐
other lane change may be needed shortly.
Displaying list of route sections
When the destination guidance is started, a list
of route sections can be displayed. The driving
distances and traffic bulletins are displayed for
each route section.
1. "Navigation"
2. "Route information"
3. Mark route section.
The route section is displayed on the split
screen.
Seite 162
162 Online Edition for Part no. 01 40 2 606 469 - 03 11 490
Navigation
Page 165 of 304

Settings for the map view
The settings are stored for the remote control
currently in use.
1.
"Navigation"
2. "Map"
3. Open "Options".
4. "Settings"
Set the map view.
▷ "Day/night mode"
Select and create the necessary settings
depending on the light conditions.
"Traffic conditions/gray map" active: the
setting is disregarded.
▷ With the Professional navigation system:
"Satellite images"
Depending on availability and resolution,
satellite images* are displayed in a scale of
approx. 1 mile to 600 miles/2 km to
1,000 km.
▷ "Perspective view in 3D"
Prominent areas that are contained in the
navigation data are displayed on the map in
3D.
▷ "Traffic conditions/gray map"
The map is optimized for displaying traffic
bulletins,
refer to page 165. Symbols for the
special destinations are no longer displayed.
Map view for split screen
The map view can be selected for the split
screen independently from the main screen.
1. Open "Options".
2. "Split screen"
3. Move the controller to the right repeatedly
until the split screen is selected.
4. Select "Split screen content" or the scale.
5. Select the map view.
▷"Arrow display"
▷ "Map facing north"
▷ "Map direction of travel"
▷ "Map view with perspective" ▷
"Position"
▷ "Exit ramp view": selected blind drive‐
ways
are displayed three dimensionally.
Setting in some cases will affect the dis‐
play in the Head-Up Display*.
▷ "Traffic conditions/gray map"
6. To change the scale: select the split screen
and turn the controller.
Traffic bulletins*
At a glance
▷ Display the traffic bulletins from radio sta‐
tions that broadcast the TI Traffic Informa‐
tion
of a traffic information service. Informa‐
tion on traffic obstructions and hazards is
updated continuously.
Certain BMW models equipped with navi‐
gation have the capability to display real-
time traffic information. If your system has
this capability the following additional terms
and conditions apply:
An End-User shall no longer have the right
to use the Traffic Data in the event that the
End-User is in material breach of the terms
and conditions contained herein.
A. Total Traffic Network, a division of Clear
Channel Broadcasting, Inc. (“Total Traffic
Network”) holds the rights to the traffic in‐
cident data and RDS-TMC network through
which it is delivered. You may not modify,
copy, scan or use any other method to re‐
produce, duplicate, republish, transmit or
distribute in any way any portion of traffic in‐
cident data. You agree to indemnify, defend
and hold harmless BMW of North America,
LLC. (“BMW NA”) and Total Traffic Net‐
work, Inrix, Inc (and their affiliates) against
any and all claims, damages, costs or other
expenses that arise directly or indirectly out
of (a) your unauthorized use of the traffic in‐
cident data or the RDS-TMC network, (b)
your violation of this directive and/or (c) any
unauthorized or unlawful activities by you in
connection herewith.
Seite 165
165Online Edition for Part no. 01 40 2 606 469 - 03 11 490
Reference Mobility Communication Entertainment
Navigation Driving tips Controls At a glance
Page 166 of 304

B. Total Traffic Network traffic data is infor‐
mational only. User assumes all risk of use.
Total Traffic Network, BMW NA, and their
suppliers make no representations about
content, traffic and road conditions, route
usability, or speed.
C. The licensed material is provided to li‐
censee
“as is,” and “where is”. Total Traffic
Network, including, but not limited to, any
and all third party providers of any of the li‐
censed material, expressly disclaims, to the
fullest extent permitted by law, all warranties
or representations with respect to the li‐
censed material (including, without limita‐
tion, that the licensed material will be error-
free, will operate without interruption or that
the traffic data will be accurate), express, im‐
plied or statutory, including, without limita‐
tion, the implied warranties of merchanta‐
bility, non-infringement fitness for a
particular purpose, or those arising from a
course of dealing or usage of trade.
D. Neither Total Traffic Network, Inrix, Inc. or
BMW NA will be liable to you for any indirect,
special, consequential, exemplary, or inci‐
dental damages (including, without limita‐
tion, lost revenues, anticipated revenues, or
profits relating to the same) arising from any
claim relating directly or indirectly to use of
the traffic data, and even if Total Traffic Net‐
work, Inrix, Inc., or BMW NA are aware of the
possibility of such damages. These limita‐
tions apply to all claims, including, without
limitation, claims in contract and tort (such
as negligence, product liability and strict li‐
ability). Some states do not allow the exclu‐
sion or limitation of incidental or consequen‐
tial damages, so those particular limitations
may not apply to you.
▷ The traffic bulletins are indicated on the map
by symbols.
▷ The traffic bulletins for the surrounding area
are stored in a list. The symbol in the function bar of the map
view turns red if there are traffic bulletins
that affect the calculated route. Switching the reception on/off
1.
"Navigation"
2. Open "Options".
3. "Receive Traffic Info"
Open the traffic bulletins
1. "Navigation"
2. "Map"
3. "Traffic Info"
First the traffic bulletins for the calculated
route are displayed.
The traffic bulletins are sorted by their dis‐
tance from the current position of the vehi‐
cle.
4. Select a traffic bulletin. "More information": display additional
information.
5. Scroll to the next or previous traffic bulletin
if required.
Traffic bulletins on the map
"Traffic conditions/gray map"
Active: indication
on the control display is switched to shades of
gray. This enables a better view of the traffic
bulletins. The day/night mode is disregarded in
this setting. Symbols and special destinations
are not displayed.
1. "Navigation"
2. "Map"
3. Open "Options".
4. "Settings"
5. "Traffic conditions/gray map"
Symbols in the map view
Depending on the scale of the map and the lo‐
cation of the traffic obstruction along the route,
the symbols for the traffic obstructions are dis‐
played.
Additional information in the map view
Depending on the map scale, a traffic obstruc‐
tion's
length, direction, and impact are displayed
Seite 166
166 Online Edition for Part no. 01 40 2 606 469 - 03 11 490
Navigation
Page 172 of 304

Tone
General information
The sound settings are stored for the remote
control currently in use.
Treble, bass, balance, and
fader
▷
"Treble": treble adjustment.
▷ "Bass": depth adjustment.
▷ "Balance": left/right volume distribution.
▷ "Fader": front/rear volume distribution.
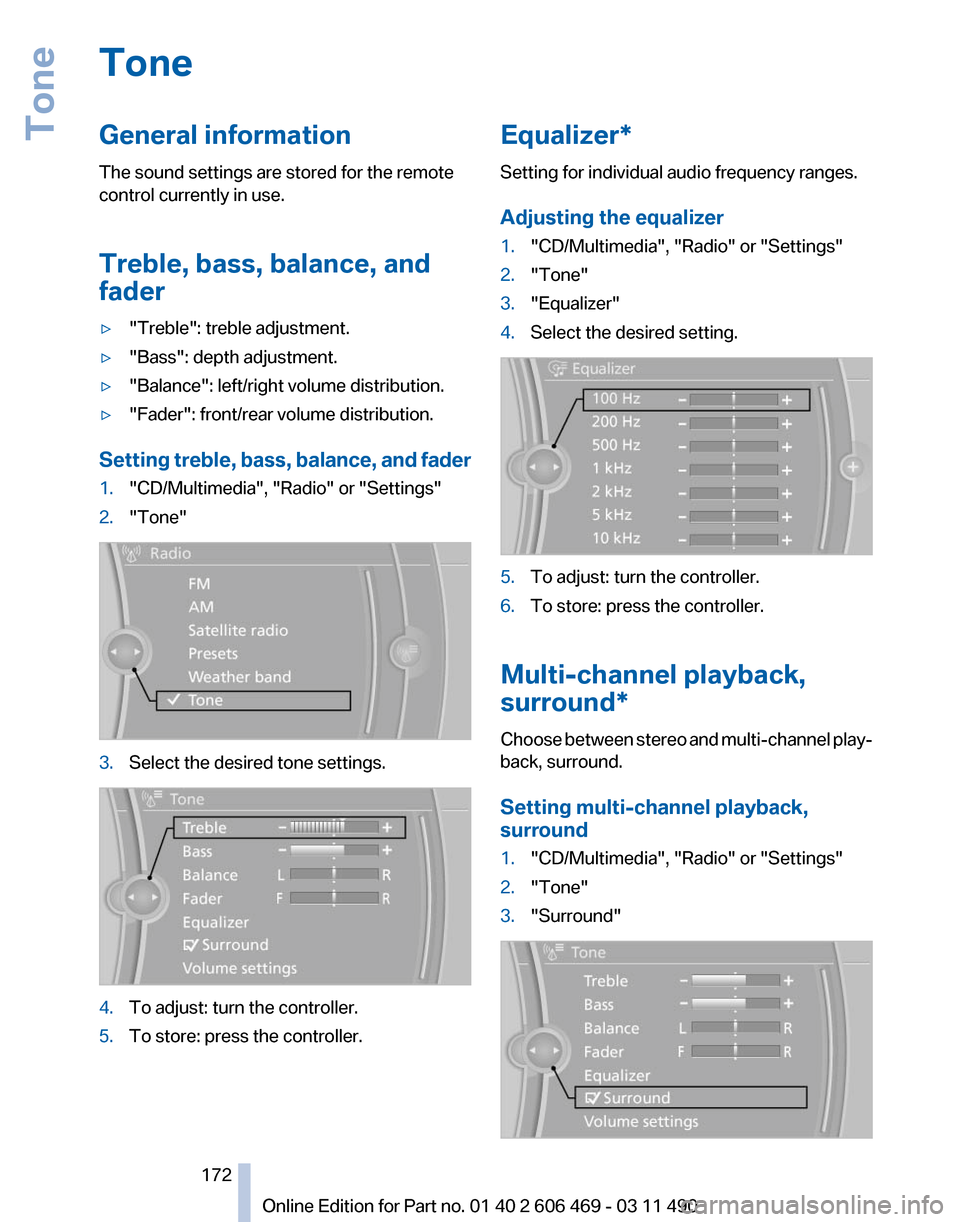
Setting treble, bass, balance, and fader
1. "CD/Multimedia", "Radio" or "Settings"
2. "Tone" 3.
Select the desired tone settings. 4.
To adjust: turn the controller.
5. To store: press the controller. Equalizer*
Setting for individual audio frequency ranges.
Adjusting the equalizer
1.
"CD/Multimedia", "Radio" or "Settings"
2. "Tone"
3. "Equalizer"
4. Select the desired setting. 5.
To adjust: turn the controller.
6. To store: press the controller.
Multi-channel playback,
surround*
Choose between stereo and multi-channel play‐
back, surround.
Setting multi-channel playback,
surround
1. "CD/Multimedia", "Radio" or "Settings"
2. "Tone"
3. "Surround" Seite 172
172 Online Edition for Part no. 01 40 2 606 469 - 03 11 490
Tone
Page 173 of 304

When surround is activated, multi-channel play‐
back is simulated when a stereo audio track is
played.
Volume
▷
"Speed volume": speed-dependent volume
control.
▷ "PDC": volume of the PDC signal* com‐
pared to the entertainment sound output.
▷ "Gong": volume of the signal, such as the
safety belt reminder, compared to the en‐
tertainment sound output.
▷ "Microphone": volume of the microphone*
during a phone call.
▷ "Loudspeak.":
volume of the loudspeakers*
during a phone call.
The following volumes are only stored for the
respective paired telephone:
"Microphone",
"Loudspeak.".
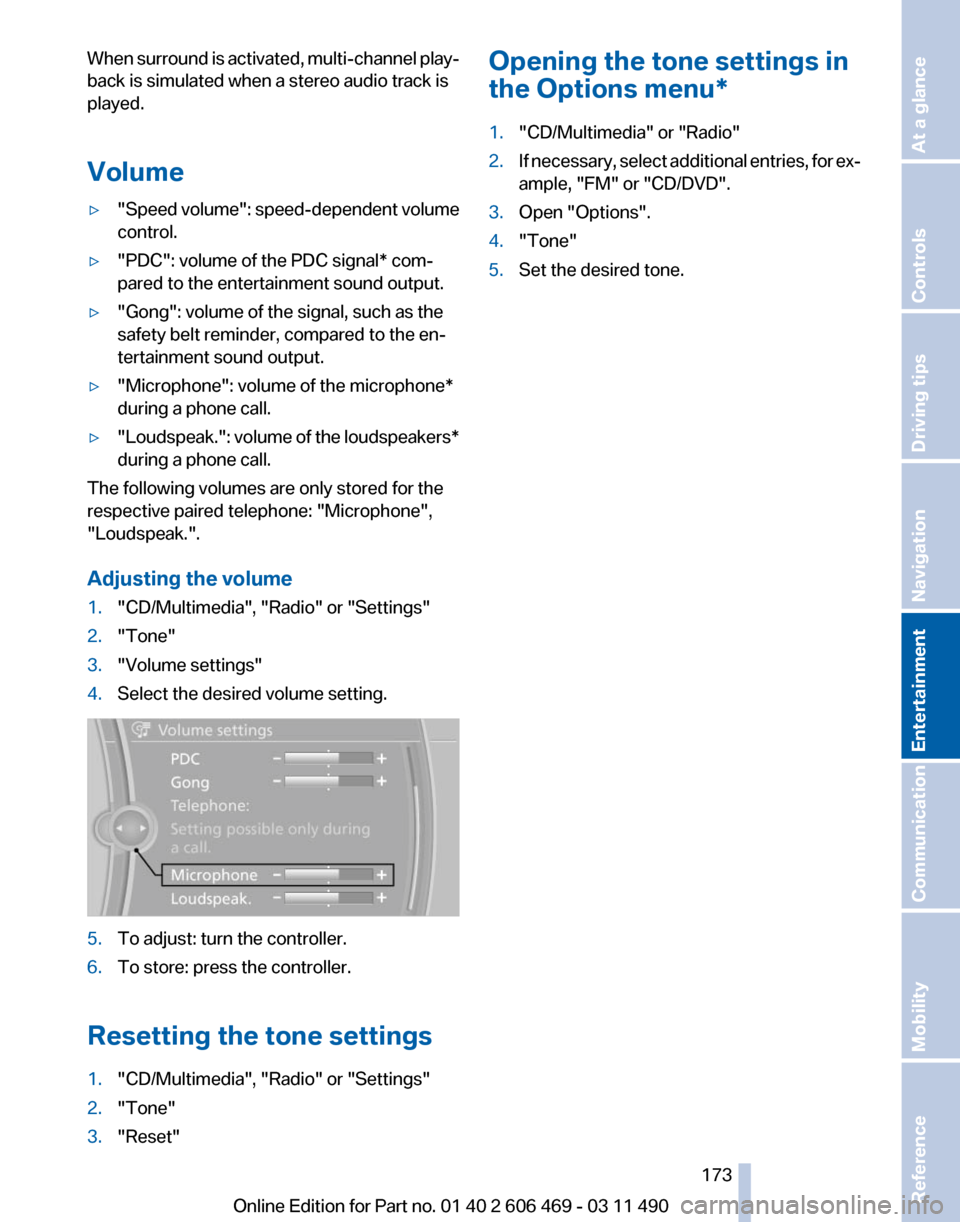
Adjusting the volume
1. "CD/Multimedia", "Radio" or "Settings"
2. "Tone"
3. "Volume settings"
4. Select the desired volume setting. 5.
To adjust: turn the controller.
6. To store: press the controller.
Resetting the tone settings
1. "CD/Multimedia", "Radio" or "Settings"
2. "Tone"
3. "Reset" Opening the tone settings in
the Options menu
*
1. "CD/Multimedia" or "Radio"
2. If necessary, select additional entries, for ex‐
ample, "FM" or
"CD/DVD".
3. Open "Options".
4. "Tone"
5. Set the desired tone.
Seite 173
173Online Edition for Part no. 01 40 2 606 469 - 03 11 490
Reference Mobility Communication
Entertainment Navigation Driving tips Controls At a glance