2011 BMW 535I GRAN TURISMO heating
[x] Cancel search: heatingPage 13 of 297
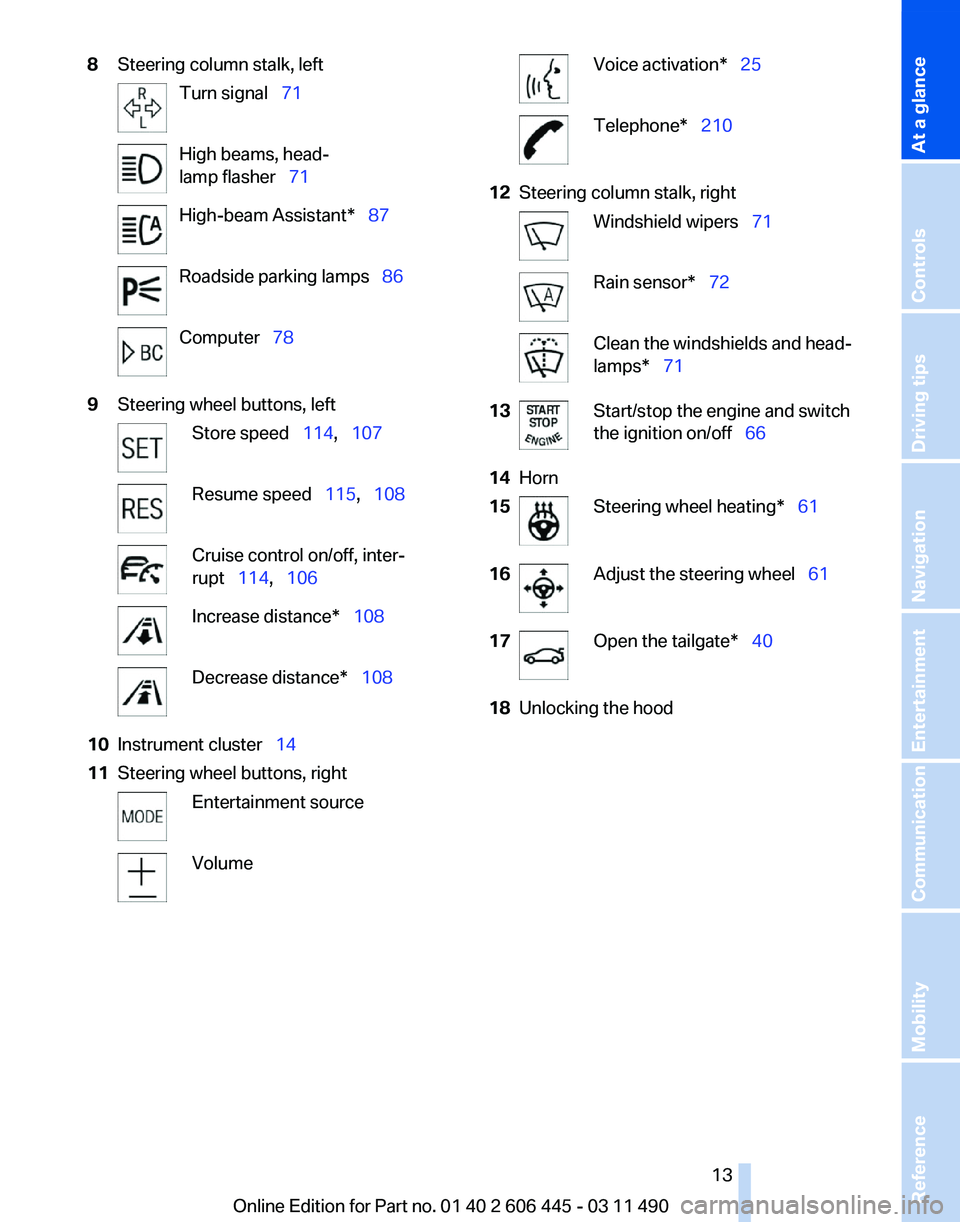
8
Steering column stalk, left Turn signal 71
High beams, head‐
lamp flasher 71
High-beam Assistant* 87
Roadside parking lamps 86
Computer 78
9 Steering wheel buttons, left Store speed 114, 107
Resume speed 115, 108
Cruise control on/off, inter‐
rupt 114, 106
Increase distance* 108
Decrease distance* 108
10 Instrument cluster 14
11 Steering wheel buttons, right Entertainment source
Volume Voice activation* 25
Telephone* 210
12 Steering column stalk, right Windshield wipers 71
Rain sensor*
72 Clean the windshields and head‐
lamps* 71
13 Start/stop the engine and switch
the ignition on/off 66
14 Horn
15 Steering wheel heating* 61
16 Adjust the steering wheel
61
17 Open the tailgate* 40
18 Unlocking the hood
Seite 13
13Online Edition for Part no. 01 40 2 606 445 - 03 11 490
Reference Mobility Communication Entertainment Navigation Driving tips Controls
At a glance
Page 37 of 297
With automatic trunk lid operation*:
Press the button on the remote control
for approx. 1 second and release.
The large tailgate opens automatically.
Note the opening height of the large tail‐
gate
The tailgate pivots back and up when it opens.
Ensure that there is sufficient clearance when
the large tailgate opens; otherwise, damage may
result.◀
The tailgate opens, regardless of whether it was
previously locked or unlocked.
In some vehicle equipment variants, the tailgate
can only be opened using the remote control if
the vehicle was unlocked first.
To avoid locking yourself out of the vehicle, do
not place the remote control into the cargo area.
The tailgate is locked again as soon as it is
pushed closed.
Provide edge protection
Sharp or angular objects can hit the rear
window while driving and damage the heating
wires of the rear window. Provide edge protec‐
tion.◀
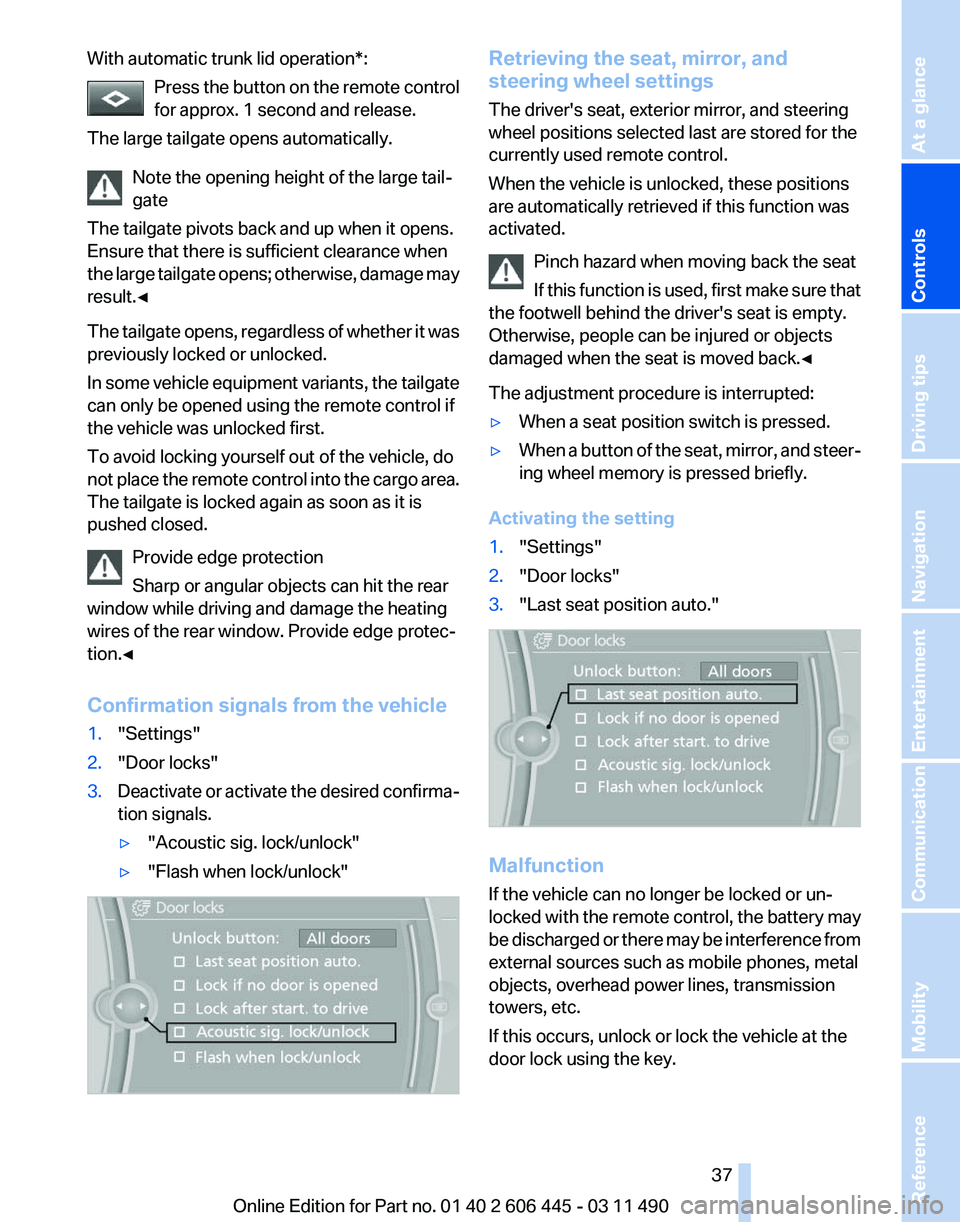
Confirmation signals from the vehicle
1. "Settings"
2. "Door locks"
3. Deactivate or activate the desired confirma‐
tion signals.
▷"Acoustic sig. lock/unlock"
▷ "Flash when lock/unlock" Retrieving the seat, mirror, and
steering wheel settings
The driver's seat, exterior mirror, and steering
wheel positions selected last are stored for the
currently used remote control.
When the vehicle is unlocked, these positions
are automatically retrieved if this function was
activated.
Pinch hazard when moving back the seat
If
this function is used, first make sure that
the footwell behind the driver's seat is empty.
Otherwise, people can be injured or objects
damaged when the seat is moved back.◀
The adjustment procedure is interrupted:
▷ When a seat position switch is pressed.
▷ When a button of the seat, mirror, and steer‐
ing wheel memory is pressed briefly.
Activating the setting
1. "Settings"
2. "Door locks"
3. "Last seat position auto." Malfunction
If the vehicle can no longer be locked or un‐
locked
with the remote control, the battery may
be discharged or there may be interference from
external sources such as mobile phones, metal
objects, overhead power lines, transmission
towers, etc.
If this occurs, unlock or lock the vehicle at the
door lock using the key. Seite 37
37Online Edition for Part no. 01 40 2 606 445 - 03 11 490
Reference Mobility Communication Entertainment Navigation Driving tips
Controls At a glance
Page 39 of 297
Unlocking and opening*
▷
Either unlock the doors together using the
button for the central locking system and
then
pull the door handle above the armrest
or
▷ Pull the door opener twice individually on
each door: the first time unlocks the door,
the second time opens it.
Locking and unlocking Press the button in the vehicle.
The
doors and the tailgate are locked or
unlocked when the front doors are closed, but
they are not secured against theft.
The fuel filler flap remains unlocked.
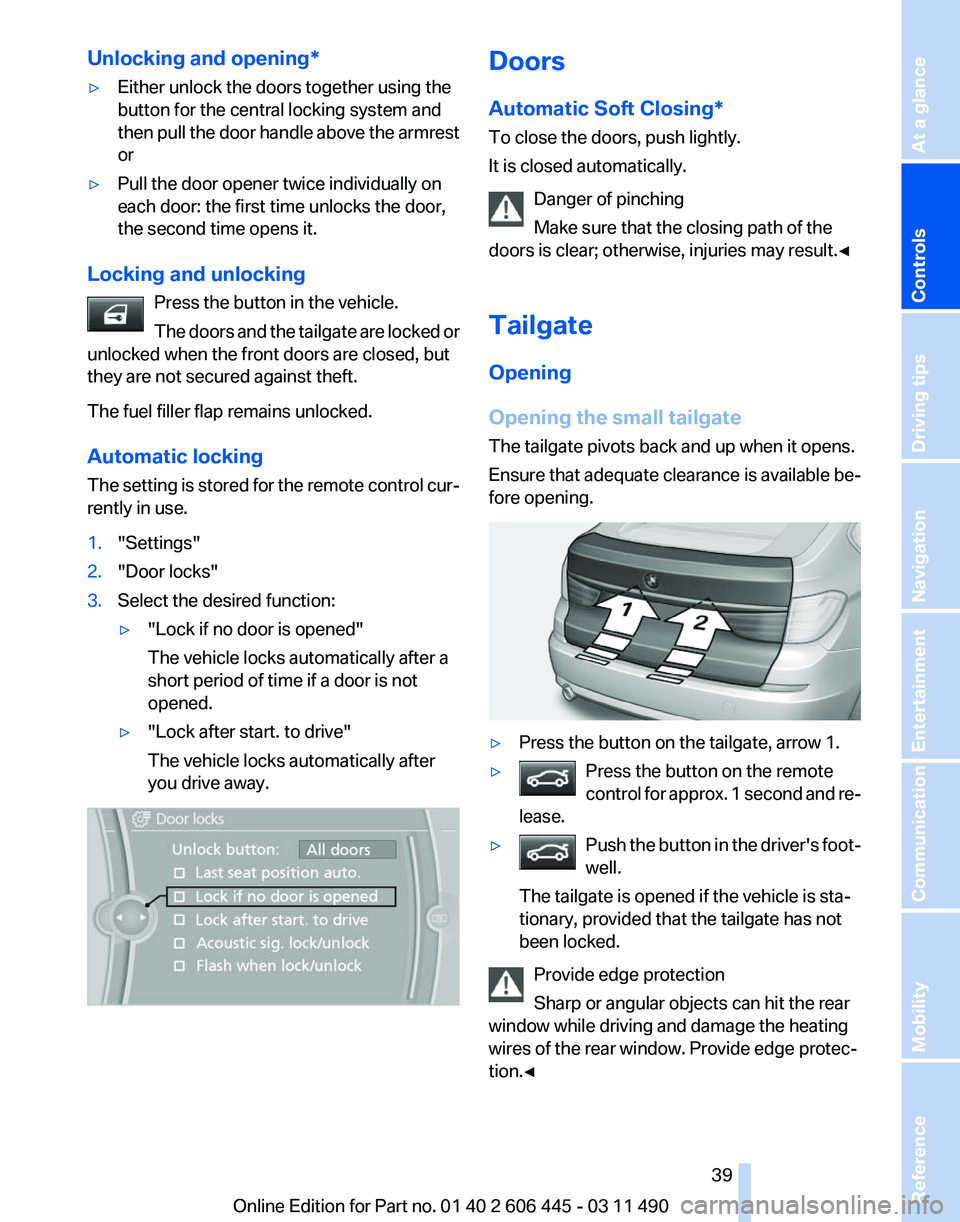
Automatic locking
The setting is stored for the remote control cur‐
rently in use.
1. "Settings"
2. "Door locks"
3. Select the desired function:
▷"Lock if no door is opened"
The vehicle locks automatically after a
short period of time if a door is not
opened.
▷ "Lock after start. to drive"
The vehicle locks automatically after
you drive away. Doors
Automatic Soft Closing*
To close the doors, push lightly.
It is closed automatically.
Danger of pinching
Make sure that the closing path of the
doors is clear; otherwise, injuries may result.◀
Tailgate
Opening
Opening the small tailgate
The tailgate pivots back and up when it opens.
Ensure that adequate clearance is available be‐
fore opening. ▷
Press the button on the tailgate, arrow 1.
▷ Press the button on the remote
control
for approx. 1 second and re‐
lease. ▷
Push the button in the driver's foot‐
well.
The tailgate is opened if the vehicle is sta‐
tionary, provided that the tailgate has not
been locked. Provide edge protection
Sharp or angular objects can hit the rear
window while driving and damage the heating
wires of the rear window. Provide edge protec‐
tion.◀ Seite 39
39Online Edition for Part no. 01 40 2 606 445 - 03 11 490
Reference Mobility Communication Entertainment Navigation Driving tips
Controls At a glance
Page 40 of 297
Opening the large tailgate
Note the opening height of the large tail‐
gate
The tailgate pivots back and up when it opens.
Ensure that there is sufficient clearance when
the
large tailgate opens; otherwise, damage may
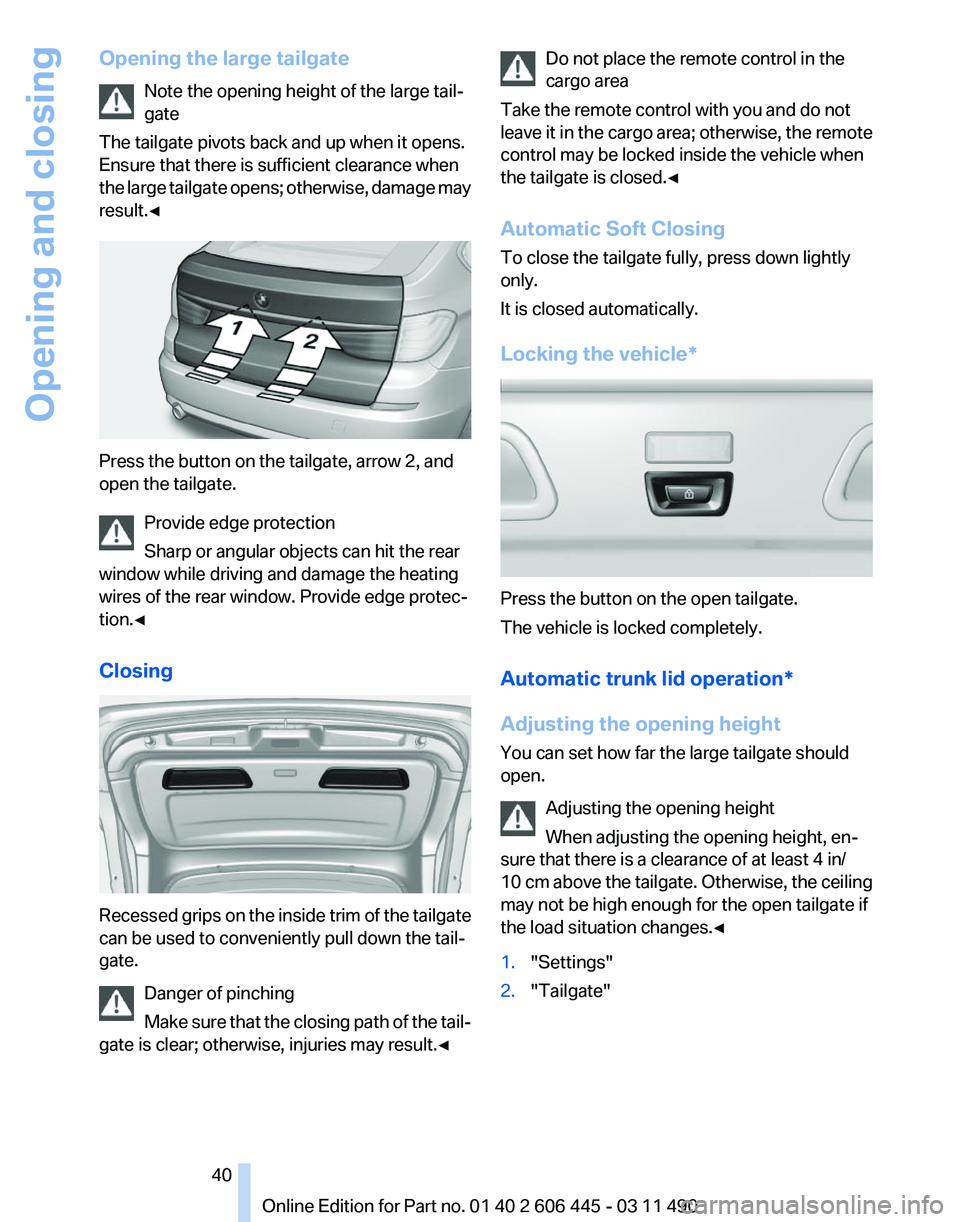
result.◀ Press the button on the tailgate, arrow 2, and
open the tailgate.
Provide edge protection
Sharp or angular objects can hit the rear
window while driving and damage the heating
wires of the rear window. Provide edge protec‐
tion.◀
Closing Recessed grips on the inside trim of the tailgate
can be used to conveniently pull down the tail‐
gate.
Danger of pinching
Make
sure that the closing path of the tail‐
gate is clear; otherwise, injuries may result.◀ Do not place the remote control in the
cargo area
Take the remote control with you and do not
leave
it in the cargo area; otherwise, the remote
control may be locked inside the vehicle when
the tailgate is closed.◀
Automatic Soft Closing
To close the tailgate fully, press down lightly
only.
It is closed automatically.
Locking the vehicle* Press the button on the open tailgate.
The vehicle is locked completely.
Automatic trunk lid operation*
Adjusting the opening height
You can set how far the large tailgate should
open.
Adjusting the opening height
When adjusting the opening height, en‐
sure that there is a clearance of at least 4 in/
10
cm above the tailgate. Otherwise, the ceiling
may not be high enough for the open tailgate if
the load situation changes.◀
1. "Settings"
2. "Tailgate" Seite 40
40 Online Edition for Part no. 01 40 2 606 445 - 03 11 490
Opening and closing
Page 46 of 297
Danger of pinching even with pinch pro‐
tection
Even with the pinch protection system, check
that the window's closing path is clear; other‐
wise, the closing action may not stop in certain
situations, e.g., if thin objects are present.
◀
Window accessories
Do not install any accessories in the range
of movement of the windows; otherwise, the
pinch protection system will be impaired.◀
Closing without the pinch protection
system
Danger of pinching
Monitor the closing process and make
sure that the closing path of the window is clear;
otherwise, injuries may result.◀
For example, if there is an external danger or if
ice on the windows prevents a window from
closing normally, proceed as follows:
1. Pull the switch past the resistance point and
hold it there.
Pinch protection is limited and the window
reopens
slightly if the closing force exceeds
a certain value.
2. Pull the switch past the resistance point
again within approx. 4 seconds and hold it
there.
The window closes without pinch protec‐
tion.
Safety switch
The following functions can be locked simulta‐
neously, using the switch:
▷ Opening and closing of the rear windows
using the switches in the rear.
▷ Operation of the roller sunblinds* using the
switches in the rear.
▷ Adjustment of the power rear seats*.
▷ Adjustment of the power head restraints* in
the rear. Switching on and off
Press the button.
The
LED lights up if the safety function
is switched on.
Safety switch for rear operation
Press the safety switch when transporting
children in the rear; otherwise, injury may result
if the windows are closed without supervision.◀
Roller sunblinds*
General information
The safety switch in the driver's door can be
used to prevent children, for example, from op‐
erating the roller blinds using the switches in the
rear.
Press the safety switch in the driver's door. The
LED lights up if the safety function is switched
on.
If you are no longer able to move the roller blinds
after having activated them consecutively a
number of times, the system is blocked for a
limited time to prevent overheating. Let the sys‐
tem cool.
The roller sunblinds cannot be moved at low in‐
terior temperatures.
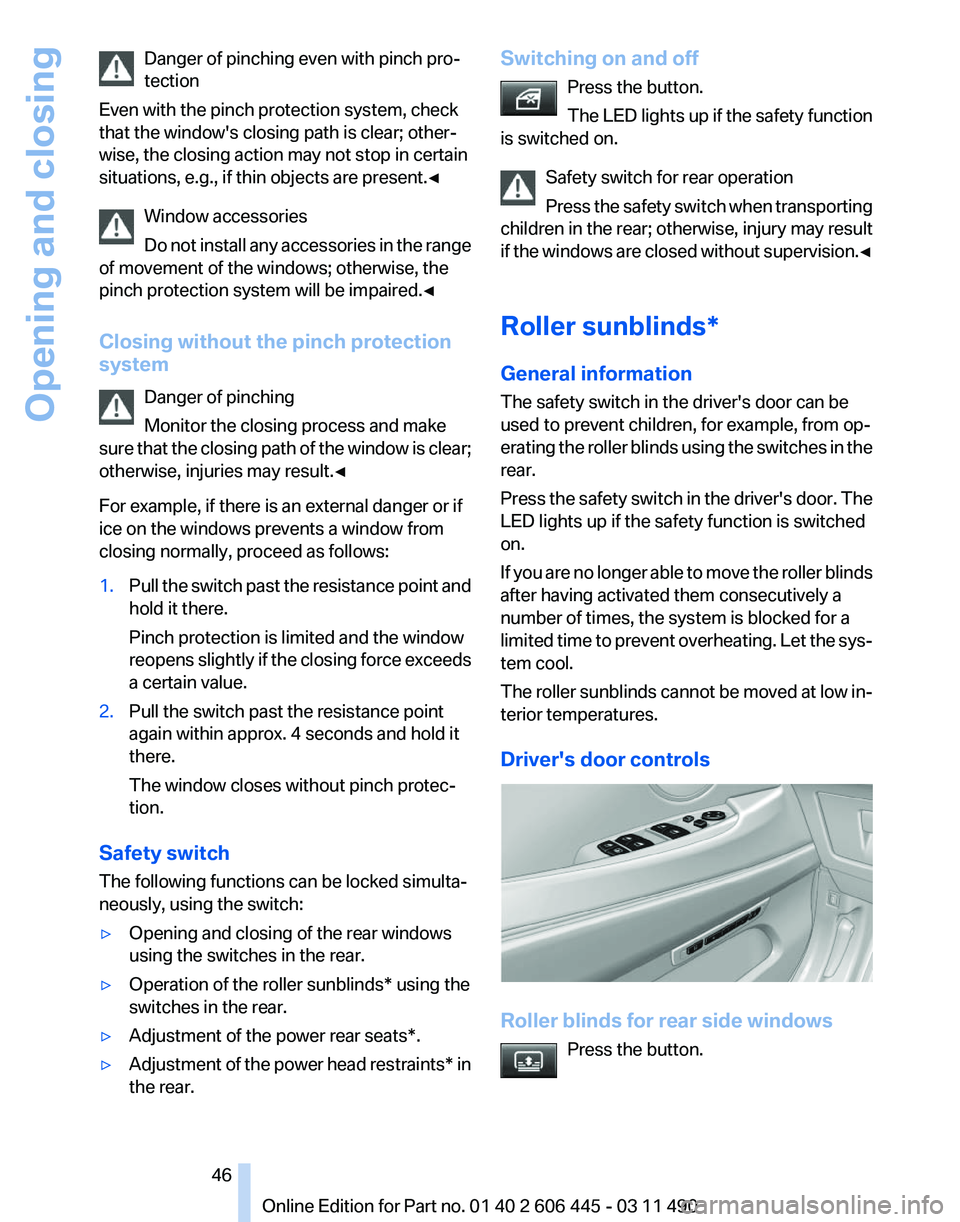
Driver's door controls Roller blinds for rear side windows
Press the button. Seite 46
46 Online Edition for Part no. 01 40 2 606 445 - 03 11 490
Opening and closing
Page 52 of 297
Active seat*
Active adjustment of the seat cushion's con‐
tours reduces muscular tension and fatigue to
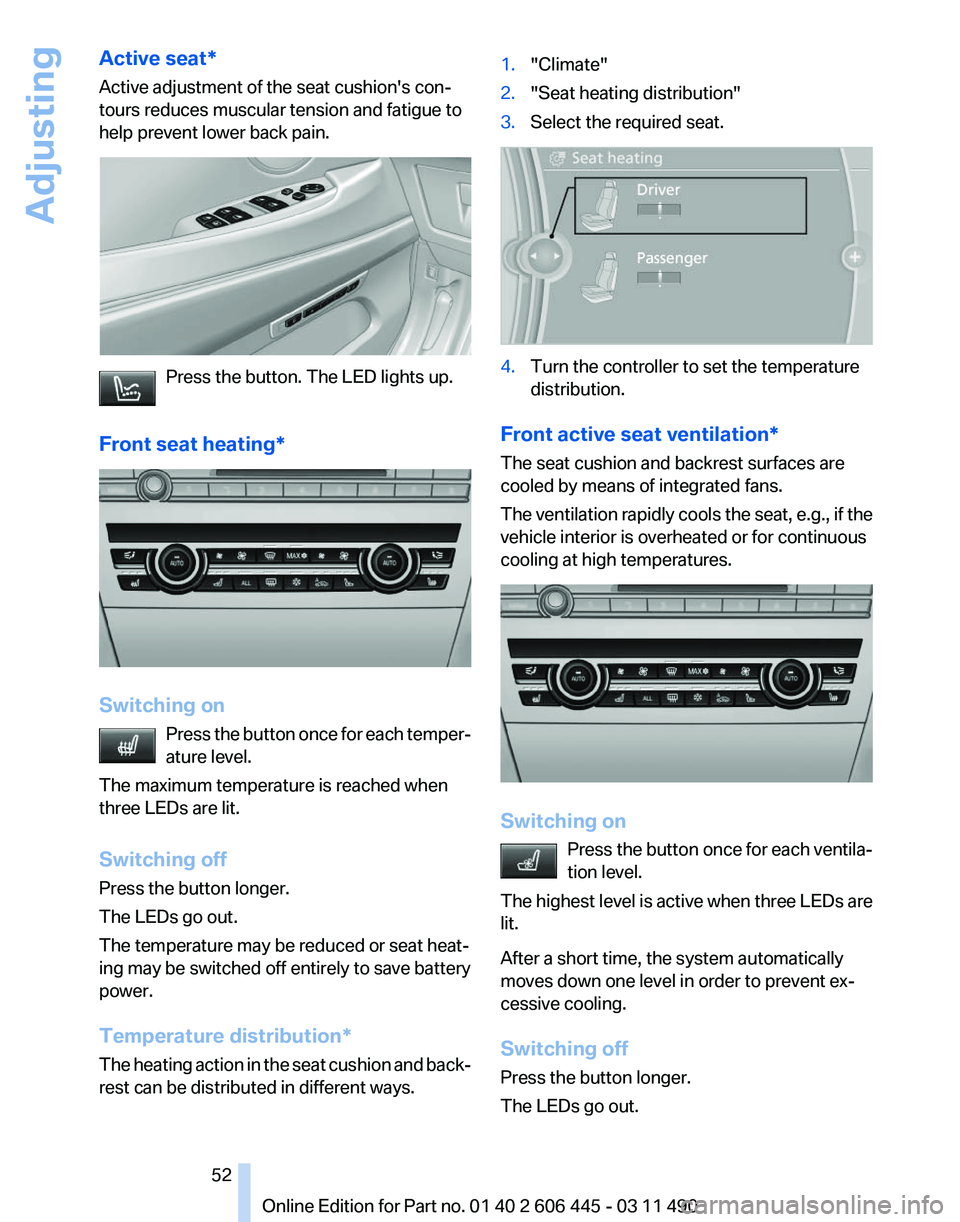
help prevent lower back pain.
Press the button. The LED lights up.
Front seat heating *Switching on
Press
the button once for each temper‐
ature level.
The maximum temperature is reached when
three LEDs are lit.
Switching off
Press the button longer.
The LEDs go out.
The temperature may be reduced or seat heat‐
ing may be switched off entirely to save battery
power.
Temperature distribution*
The heating action in the seat cushion and back‐
rest can be distributed in different ways. 1.
"Climate"
2. "Seat heating distribution"
3. Select the required seat. 4.
Turn the controller to set the temperature
distribution.
Front active seat ventilation*
The seat cushion and backrest surfaces are
cooled by means of integrated fans.
The
ventilation rapidly cools the seat, e.g., if the
vehicle interior is overheated or for continuous
cooling at high temperatures. Switching on
Press
the button once for each ventila‐
tion level.
The highest level is active when three LEDs are
lit.
After a short time, the system automatically
moves down one level in order to prevent ex‐
cessive cooling.
Switching off
Press the button longer.
The LEDs go out. Seite 52
52 Online Edition for Part no. 01 40 2 606 445 - 03 11 490
Adjusting
Page 54 of 297
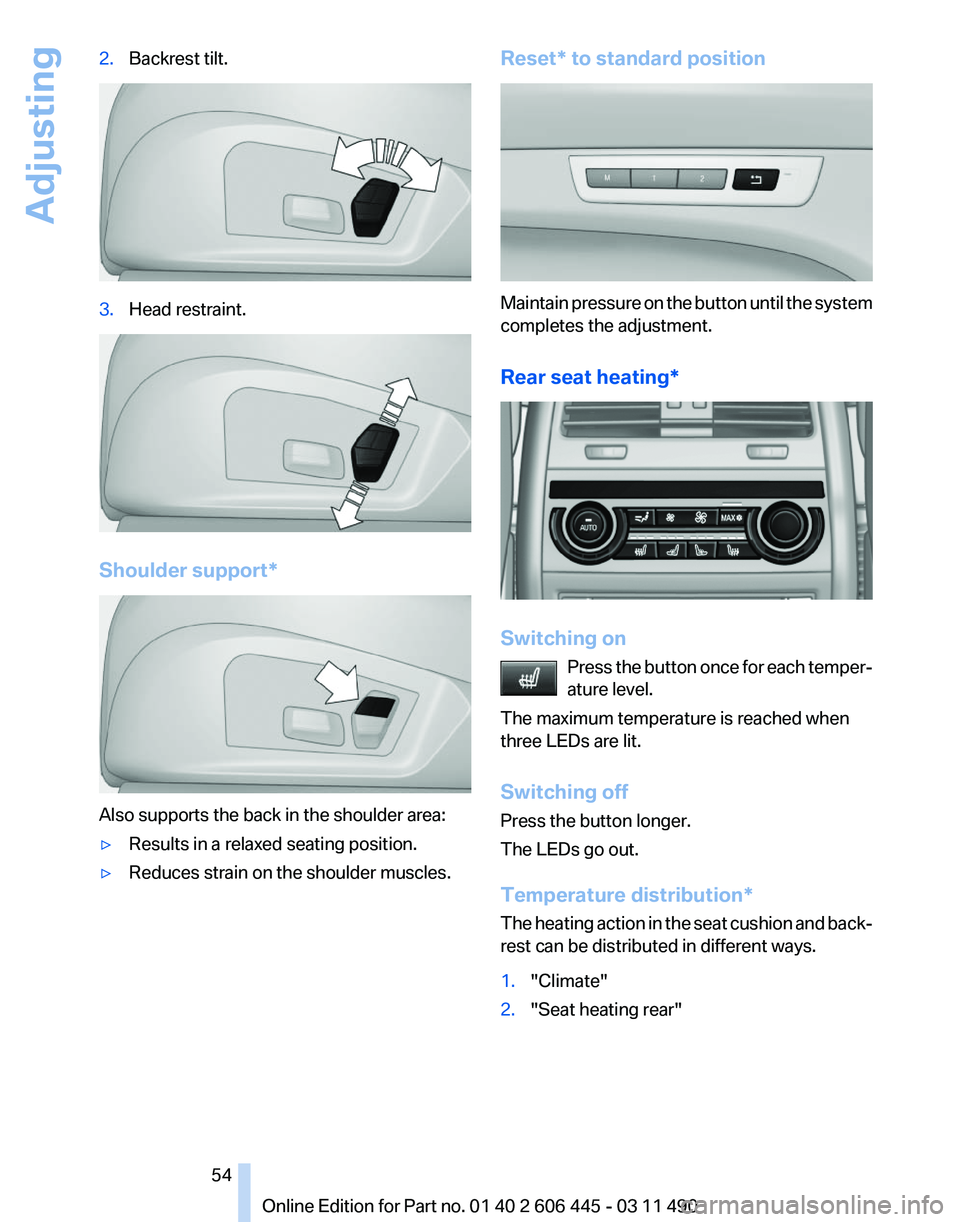
2.
Backrest tilt. 3.
Head restraint. Shoulder support*
Also supports the back in the shoulder area:
▷
Results in a relaxed seating position.
▷ Reduces strain on the shoulder muscles. Reset* to standard position Maintain pressure on the button until the system
completes the adjustment.
Rear seat heating
* Switching on
Press
the button once for each temper‐
ature level.
The maximum temperature is reached when
three LEDs are lit.
Switching off
Press the button longer.
The LEDs go out.
Temperature distribution*
The heating action in the seat cushion and back‐
rest can be distributed in different ways.
1. "Climate"
2. "Seat heating rear" Seite 54
54 Online Edition for Part no. 01 40 2 606 445 - 03 11 490
Adjusting
Page 60 of 297
tomatically retrieved if the setting for this
function is active.
Selecting a mirror
To change over to the other mirror:
Slide the mirror changeover switch.
Adjusting electrically The
setting corresponds to the direction
in which the button is pressed.
Storing positions*
Seat, mirror, and steering wheel memory, refer
to page 58.
Adjusting manually
If an electrical malfunction occurs, for example,
press the edges of the mirror glass.
Automatic Curb Monitor*
When the reverse gear is engaged, the mirror
glass tilts downward slightly on the front pas‐
senger side. This improves your view of the curb
and other low-lying obstacles when parking, for
example.
Activating
1. Slide the mirror changeover switch
to the driver's side mirror position.
2. Engage transmission position R.
Deactivating
Slide the mirror changeover switch to the pas‐
senger's side mirror position.
Fold in and out* Press the button.
Possible up to approx. 15 mph/20 km/h.
For example, this is advantageous
▷ In car washes.
▷ In narrow streets. ▷
For folding back mirrors that were folded
away manually.
Mirrors that were folded in are folded out auto‐
matically
at a speed of approx. 25 mph/40 km/h.
Fold in the mirror in a car wash
Before entering an automatic car wash,
fold in the exterior mirrors by hand or with the
button; otherwise, they could be damaged, de‐
pending on the width of the vehicle.◀
Automatic heating
Both exterior mirrors are automatically heated
whenever the engine is running.
Automatic dimming feature
Both exterior mirrors are automatically dimmed.
Photocells are used for control in the Interior rear
view mirror, refer to page 61.
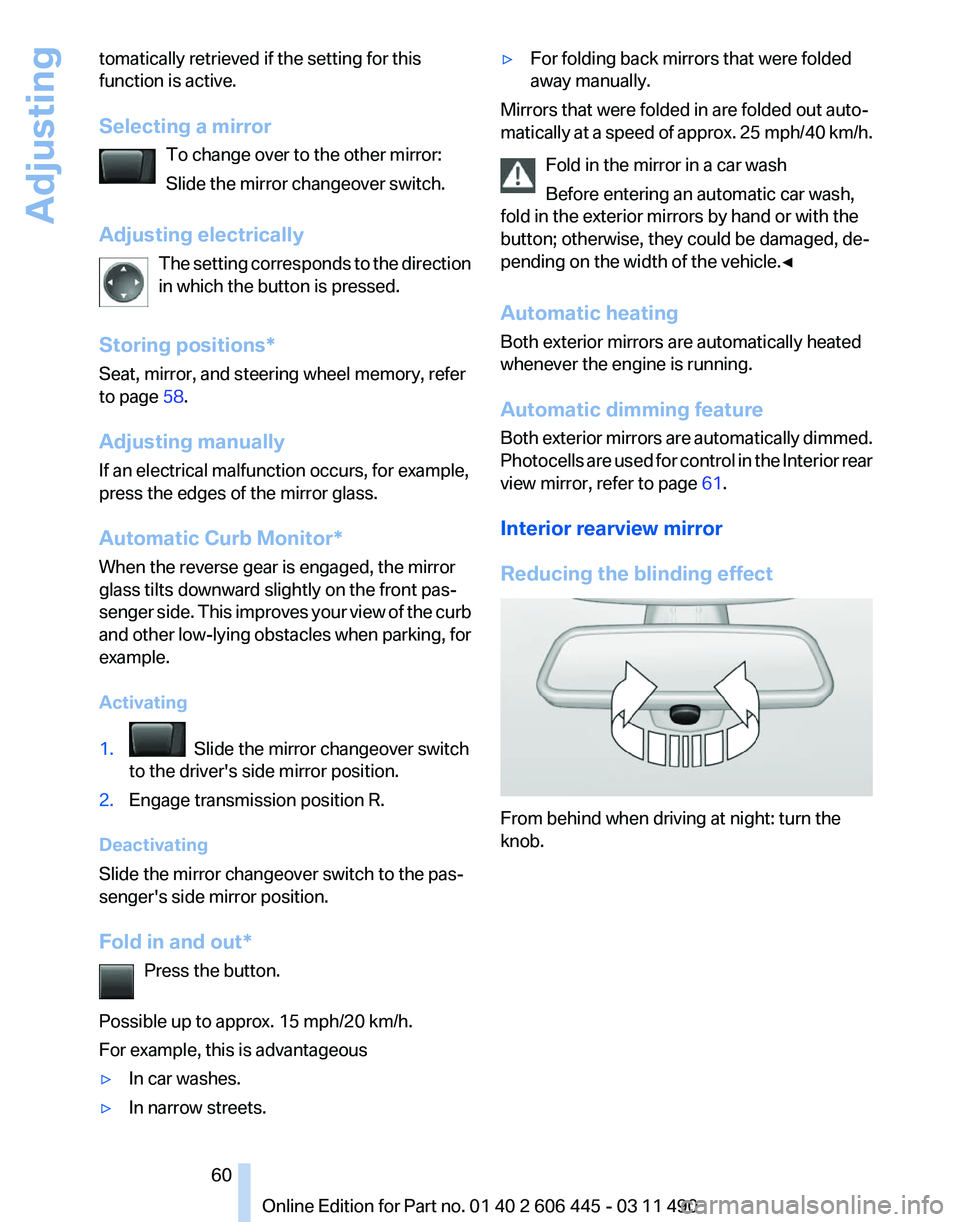
Interior rearview mirror
Reducing the blinding effect From behind when driving at night: turn the
knob. Seite 60
60 Online Edition for Part no. 01 40 2 606 445 - 03 11 490
Adjusting