2011 BMW 135I CONVERTIBLE lock
[x] Cancel search: lockPage 65 of 256

Controls
63Reference
At a glance
Driving tips
Communications
Navigation
Entertainment
Mobility
Manually unlocking parking lock
In the event of a power supply interrup-
tion such as a discharged or discon-
nected battery or an electrical malfunction, the
parking lock must be manually unlocked; other-
wise, the rear wheels are immobilized and the
vehicle cannot be towed.<
Only unlock the parking lock manually for tow-
ing and make sure to set the parking brake
forcefully beforehand so that the vehicle cannot
roll. Lock the parking lock again after the vehicle
is parked.
Releasing
1.Unclip the sleeve of the selector lever.
2.Pull the sleeve up over the selector lever
until the sleeve is inside out.
3.Using the allen wrench from the toolkit,
refer to page213, rotate the cover until it
reaches the stop, arrow 1, and remove,
arrow2.
4.Insert allen wrench into the opening,
arrow1.5.Rotate allen wrench until it reaches the
stop, arrow2. The parking lock is unlocked.
Do not turn allen wrench in the oppo-
site direction; otherwise, you may
damage the mechanism.<
6.Remove allen wrench from the opening.
After parking the vehicle, lock the parking
lock again. Otherwise, there is a danger
that the vehicle will roll.<
Locking
1.Press the button, see arrow.
The parking lock is locked again.
2.Replace cover again.
3.Clip the selector lever sleeve back into
place.
4.Forcefully apply the parking brake.
Jump-starting and towing, starting on
page220.
Page 70 of 256

Controls overview
68
Controls overview
Odometer, outside
temperature display, clock
1Knob in the instrument cluster
2Outside temperature and clock
3Odometer and trip odometer
Knob in the instrument cluster
>To reset the trip odometer while the ignition
is switched on
>To display the time, outside temperature
and odometer briefly while the ignition is
switched off
Units of measure
To select the respective units of measure, miles
or km for the odometer as well as 7 or 6 for
the outside temperature, refer to Units of mea-
sure on page72.
The setting is stored for the remote control cur-
rently in use.
Time, outside temperature display
Setting the time, refer to page74.
Outside temperature warning
When the displayed temperature falls to approx.
+377/+36, a signal sounds and a warning
lamp lights up. There is an increased risk of
black ice.
Black ice can also form at temperatures
above +377/+36. You should there-
fore drive carefully on bridges and shaded roads, for example; otherwise, there is an
increased risk of an accident.<
Odometer and trip odometer
Resetting the trip odometer:
With the ignition switched on, press button1 in
the instrument cluster.
When the vehicle is parked
If you still want to view the time, outside tem-
perature and odometer reading briefly after the
remote control has been taken out of the igni-
tion lock:
Press button1 in the instrument cluster.
Tachometer
Never force the engine speed up into the red
warning field, see arrow. In this range, the fuel
supply is interrupted to protect the engine.
Page 76 of 256

Controls overview
74
Entering deadlines for legally required
inspections*
Make sure the date on the Control Display is
always set correctly, refer to page75; other-
wise, the effectiveness of Condition Based Ser-
vice CBS is not ensured.
1."Vehicle Info"
2."Vehicle status"
3."Service required"
4."§ Vehicle inspection"
5.Open the menu for entering the deadline.
6."Date:"
7.Create the settings.
8.Press the controller to apply the setting.
The year is highlighted.
9.Turn the controller to make the adjustment.
10.Press the controller to apply the setting.
The date entry is stored.
To exit from the menu:
Move the controller to the left.
More information on the BMW Maintenance
System can be found on page207.
Automatic Service Request*
Data regarding the maintenance status or
legally mandated inspections of the vehicle are
automatically transmitted to your BMW center
prior to a service due date.
You can check when your BMW center was
notified.
1."Vehicle Info"
2."Vehicle status"
3."Options"
4."Last Service Request"
Clock
The settings are stored for the remote control
currently in use, refer also to Personal Profile on
page26.
Setting the time
In the instrument cluster
To set the 12h/24h format, refer to Setting the
time format on page75.
Page 83 of 256

Controls
81Reference
At a glance
Driving tips
Communications
Navigation
Entertainment
Mobility
Driving stability control
systems
Your BMW has a number of systems that help
to maintain the vehicle's stability even in
adverse driving conditions.
Antilock Brake System ABS
ABS prevents locking of the wheels during
braking. Safe steering response is maintained
even during full braking. Active safety is thus
increased.
The ABS is operational every time you start the
engine. Braking safely, refer to page114.
Electronic brake-force distribution
EBV
The system controls the brake pressure in the
rear wheels to ensure stable braking behavior.
Dynamic Brake Control DBC
When you apply the brakes rapidly, this system
automatically produces the maximum braking
force boost and thus helps to achieve the short-
est possible braking distance during full brak-
ing. This system exploits all of the benefits pro-
vided by ABS.
Do not reduce the pressure on the brake for the
duration of the full braking application.
Dynamic Stability Control DSC
DSC prevents the driving wheels from losing
traction when you pull away from rest or accel-
erate. The system also recognizes unstable
driving conditions, for example if the rear of the
car is about to swerve or if momentum is acting
at an angle past the front wheels. In these
cases, DSC helps the vehicle maintain a safe
course within physical limits by reducing engine
output and through braking actions at the indi-
vidual wheels.
The laws of physics cannot be repealed,
even with DSC. An appropriate driving
style always remains the responsibility of the
driver. Therefore, do not reduce the additional
safety margin again by taking risks, as this could
result in an accident.<
Deactivating DSC
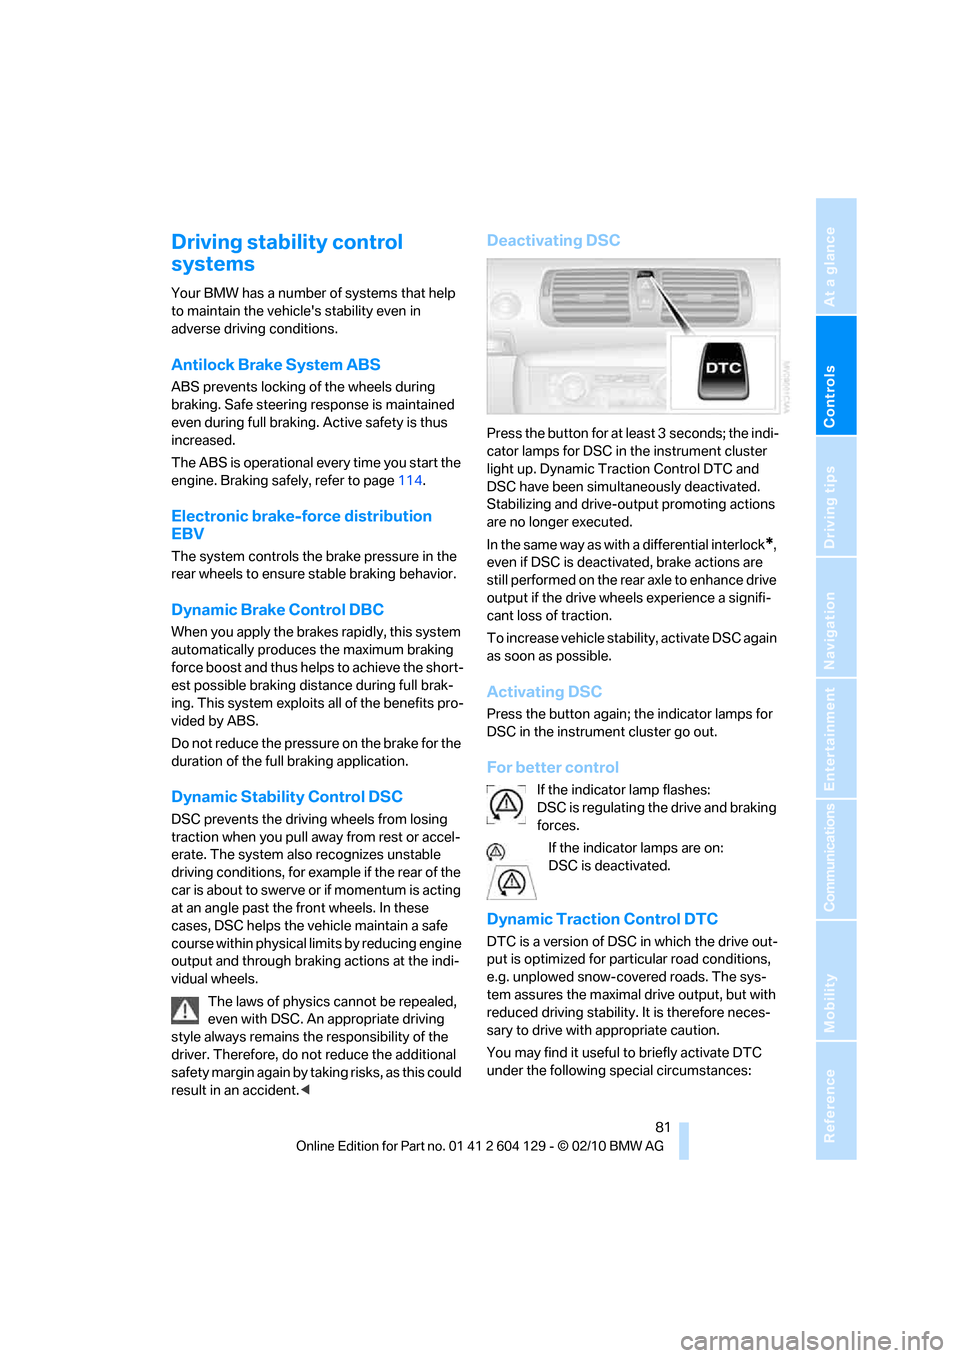
Press the button for at least 3 seconds; the indi-
cator lamps for DSC in the instrument cluster
light up. Dynamic Traction Control DTC and
DSC have been simultaneously deactivated.
Stabilizing and drive-output promoting actions
are no longer executed.
In the same way as with a differential interlock
*,
even if DSC is deactivated, brake actions are
still performed on the rear axle to enhance drive
output if the drive wheels experience a signifi-
cant loss of traction.
To increase vehicle stability, activate DSC again
as soon as possible.
Activating DSC
Press the button again; the indicator lamps for
DSC in the instrument cluster go out.
For better control
If the indicator lamp flashes:
DSC is regulating the drive and braking
forces.
If the indicator lamps are on:
DSC is deactivated.
Dynamic Traction Control DTC
DTC is a version of DSC in which the drive out-
put is optimized for particular road conditions,
e.g. unplowed snow-covered roads. The sys-
tem assures the maximal drive output, but with
reduced driving stability. It is therefore neces-
sary to drive with appropriate caution.
You may find it useful to briefly activate DTC
under the following special circumstances:
Page 92 of 256

Technology for driving comfort and safety
90
Convertible: rollover
protection system
The rollover protection system is activated
automatically in the event of an accident, a crit-
ical driving situation, an extreme tilt in the car's
longitudinal axis or upon loss of ground contact.
The protection bars behind the rear head
restraints deploy within fractions of a second.
As a supplementary system to the reinforced
windshield frame, the rollover protection sys-
tem ensures that the necessary headroom is
maintained for all vehicle occupants.
Always keep the area of movement of the
rollover protection system clear.
In minor accidents, you are protected by the
fastened safety belt and, depending on acci-
dent severity, by the safety belt tensioner and
multi-phase airbag retention system.<
Resetting
If the rollover protection system was not
impacted after being automatically activated, it
can be reset by lowering the protection bars to
their original positions. This does not require
tools.
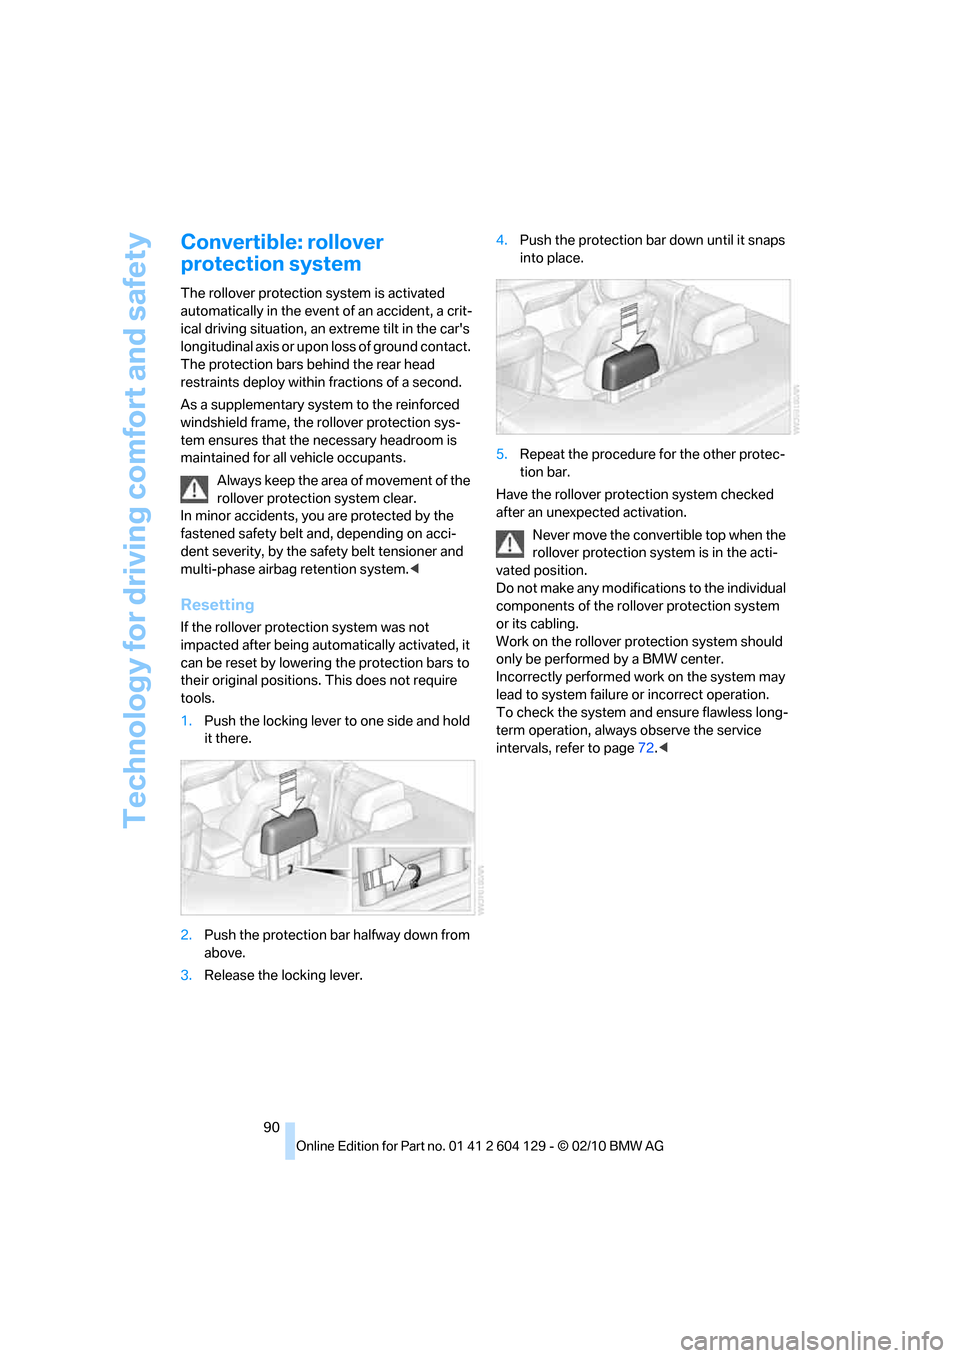
1.Push the locking lever to one side and hold
it there.
2.Push the protection bar halfway down from
above.
3.Release the locking lever.4.Push the protection bar down until it snaps
into place.
5.Repeat the procedure for the other protec-
tion bar.
Have the rollover protection system checked
after an unexpected activation.
Never move the convertible top when the
rollover protection system is in the acti-
vated position.
Do not make any modifications to the individual
components of the rollover protection system
or its cabling.
Work on the rollover protection system should
only be performed by a BMW center.
Incorrectly performed work on the system may
lead to system failure or incorrect operation.
To check the system and ensure flawless long-
term operation, always observe the service
intervals, refer to page72.<
Page 93 of 256

Controls
91Reference
At a glance
Driving tips
Communications
Navigation
Entertainment
Mobility
Lamps
Parking lamps/low beams
0Lamps off,
daytime running lights
1Parking lamps and daytime running lights
2Low beams,
welcome lamps
*
3Automatic headlamp control*, daytime run-
ning lights, welcome lamps
*, high-beam
assistant
*, adaptive light control*
When you open the driver's door with the igni-
tion switched off, the exterior lighting is auto-
matically switched off if the light switch is in
position 0, 2 or 3.
Switch on the parking lamps if necessary,
switch position 1.
Parking lamps
In switch position1, the front, rear and side
vehicle lighting is switched on. You can use the
parking lamps for parking.
The parking lamps will discharge the bat-
tery. Therefore, do not leave them on for
unduly long periods of time; otherwise, the bat-
tery might not have enough power to start the
engine. It is preferable to switch on the left-
hand or right-hand roadside parking lamps,
refer to page93.<
Low-beam headlamps
The low beams light up when the light switch is
in position 2 and the ignition is on.
Automatic headlamp control*
When the switch is in position3, the low beams
are switched on and off automatically depend-
ing on ambient light conditions, e.g. in a tunnel,
in twilight, or if there is precipitation. The adap-
tive light control
* is active. The LED next to the
symbol is illuminated when the low beams are
on. You can also activate the daytime running
lights, refer to page92. In the situations
described above, the lamps then automatically
switch from daytime running lights to low
beams.
The headlamps may also come on when the
sun is sitting low on a blue sky.
The low beams remain switched on inde-
pendent of the ambient lighting condi-
tions when you switch on the fog lamps
*.<
The automatic headlamp control cannot
serve as a substitute for your personal
judgment in determining when the lamps
should be switched on in response to ambient
lighting conditions. For example, the system
cannot detect fog or hazy weather. To avoid
safety risks, you should always switch on the
low-beam headlamps manually under these
conditions.<
Welcome lamps
If you leave the light switch in position 2 or 3
when you park the car, the parking lamps and
the interior lamps light up briefly when you
unlock the vehicle.
Activating/deactivating welcome
lamps
1."Settings"
2."Lighting"
Page 101 of 256

Controls
99Reference
At a glance
Driving tips
Communications
Navigation
Entertainment
Mobility
Switching the system on/off
Switching off
With the blower at its lowest set-
ting, press the left side of the but-
ton to switch off the automatic cli-
mate control.
All displays are cleared except for the rear win-
dow defroster if it is switched on.
The outside air supply is blocked when
the automatic climate control is switched
off. If the air quality deteriorates or the window
fogs over, switch the system back on and
increase the air volume.<
Switching on
Press any button except the ALL or the rear
window defroster button to reactivate the auto-
matic climate control.
Ventilation
1Use the thumbwheels to smoothly open
and close the air vents
2Use the lever to change the direction of the
airflow
Ventilation for cooling
Adjust the vent outlets to direct the flow of cool
air in your direction, for instance if it has become
too hot in the car.
Draft-free ventilation
Set the vent outlets so that the air flows past
you and not straight at you.
Microfilter/activated-charcoal filter
The microfilter traps dust and pollen in the
incoming air. The activated-charcoal filter pro-
vides additional protection by filtering gaseous
pollutants from the outside air. Your BMW cen-
ter replaces this combined filter during routine
maintenance.
Parked car ventilation*
The concept
The parked car ventilation provides ventilation
to the passenger compartment and lowers its
temperature, if necessary.
The parked car ventilation system is operated
via iDrive, refer to page16. Two different
switch-on times can be preselected.
The parked car ventilation remains switched on
for approx. 30 minutes. The system can also be
switched on and off directly. Due to its high
power consumption, it should not be switched
on twice in a row without driving in between to
allow the battery to recharge.
The parked car ventilation system comes on if
the outside temperature is above 597/156
when the switch-on time was preselected, but
is ready for use at any temperature when the
system is switched on directly.
The air emerges from the air vents for the upper
body area in the instrument panel. The air vents
must therefore be open.
Switching on and off directly
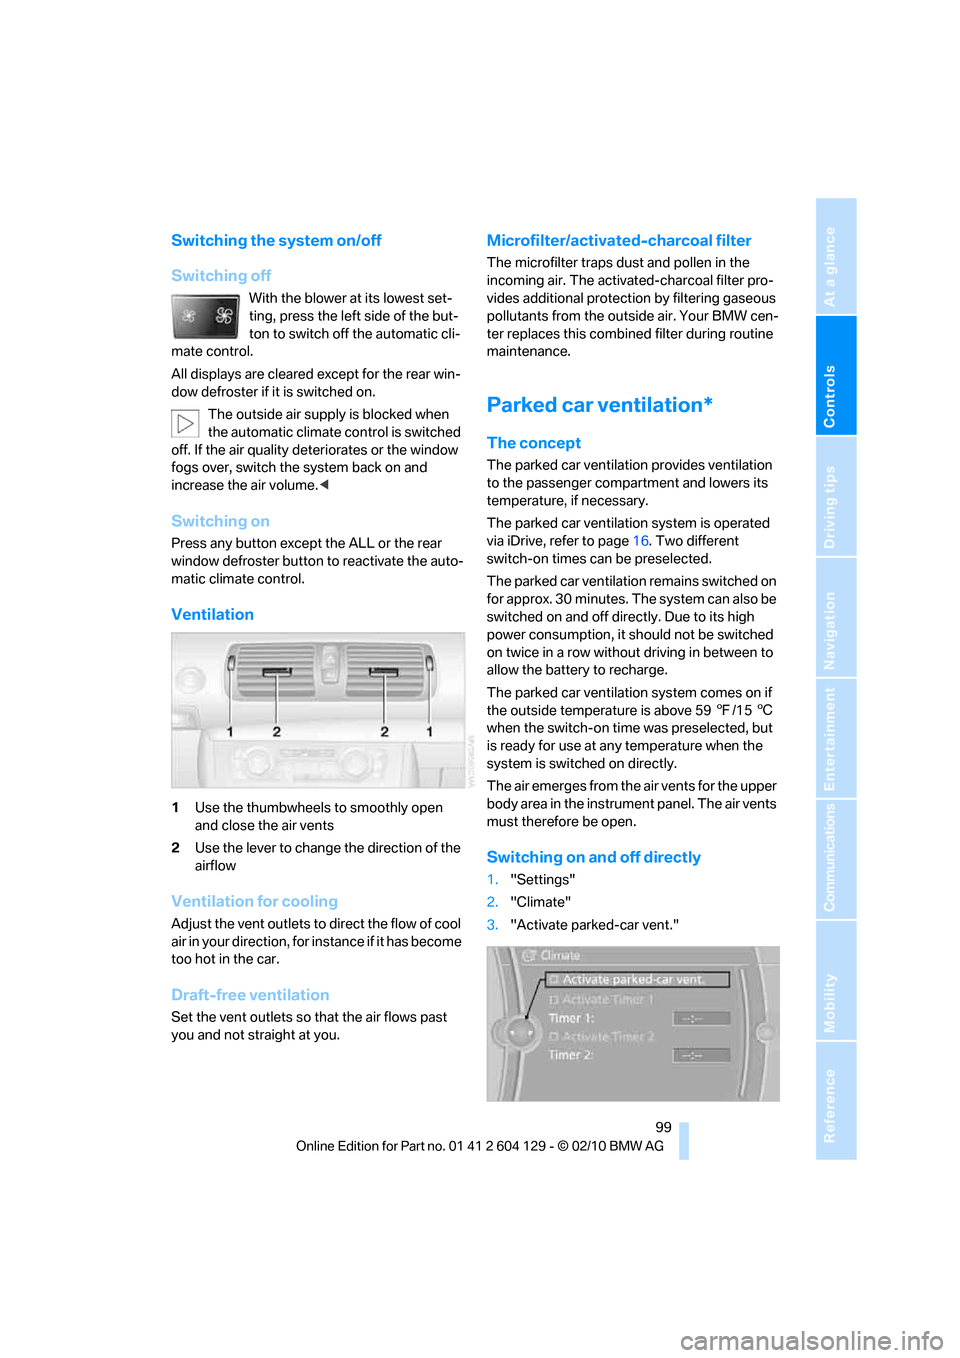
1."Settings"
2."Climate"
3."Activate parked-car vent."
Page 106 of 256

Practical interior accessories
104
Calibrating the digital compass
The digital compass must be calibrated in the
following situations:
>An incorrect compass direction is shown.
>The compass direction shown does not
change although the direction of travel
does.
>Not all compass directions are shown.
Procedure
1.Make sure that no large metal objects or
overhead power lines are in the vicinity of
your vehicle and that you have enough
space to drive in a circle.
2.Set the currently valid compass zone.
3.Convertible: ensure that the convertible top
is fully closed.
4.Press the adjustment button for approx.
6-7 seconds to call up C. Then drive in at
least one full circle at a speed of no more
than 4 mph/7 km/h.
If calibration is successful, the display
changes from C to a compass direction.
5.Convertible: open the convertible top fully
and repeat step 4.
Setting right-hand/left-hand steering
Your digital compass is factory-set to right-
hand or left-hand steering, in accordance with
your vehicle.
Set the language
You can set the language of the display:
Press the adjustment button for approx.
12-13 seconds. Briefly press the adjustment
button again to switch between English, "E",
and German, "O".
The setting is automatically saved after approx.
10 seconds.
Glove compartment
Opening
Pull the handle.
The light in the glove compartment comes on.
To prevent injury in the event of an acci-
dent while the vehicle is being driven,
close the glove compartment immediately after
use.<
Closing
Fold the cover up.
Locking
To lock the glove compartment, use the inte-
grated key of the remote control, refer to
page26.
USB interface for data transmission
Port for importing and exporting data on USB
devices, e.g. music collections, refer to
page162.
Observe the following when connecting:
>Do not forcibly connect the plug to the USB
interface.
>Do not connect devices such as fans or
lamps to the USB interface.