Page 110 of 142

8-30
8
�Use only the recommended quality brake fluid,
otherwise the rubber seals may deteriorate,
causing leakage and poor braking performance.�Refill with the same type of brake fluid. Mixing
fluids may result in a harmful chemical reaction
and lead to poor braking performance.�Be careful that water does not enter the brake
fluid reservoir when refilling. Water will signifi-
cantly lower the boiling point of the fluid and may
result in vapor lock.�Brake fluid may deteriorate painted surfaces or
plastic parts. Always clean up spilled fluid imme-
diately.�As the brake pads wear, it is normal for the brake
fluid level to gradually go down. However, if the
brake fluid level goes down suddenly, have a
Yamaha dealer check the cause.EBU24281Changing the brake fluid Have a Yamaha dealer change the brake fluid at
the intervals specified in the TIP after the periodic
maintenance and lubrication chart. In addition,have the oil seals of the brake master cylinder and
calipers as well as the brake hoses replaced at the
intervals listed below or whenever they are dam-
aged or leaking.
�Oil seals: Replace every two years.�Brake hoses: Replace every four years.EBU24394Checking the front brake lever free play The brake lever free play must be checked at the
intervals specified in the periodic maintenance and
lubrication chart. The brake lever should have no
free play as shown. If there is free play, have a
Yamaha dealer check the brake system. Recommended brake fluid:
DOT 41. No free play
U1AB60E0.book Page 30 Wednesday, April 29, 2009 10:19 AM
Page 111 of 142
8-31
8
EBU24514Adjusting the brake pedal and rear
brake lever free play and checking the
brake pedal position The brake pedal and brake lever free play must be
checked and, if necessary, adjusted at the inter-
vals specified in the periodic maintenance and lu-
brication chart.TIP�Always perform this maintenance completely in
the following order whenever adjusting the rear
brake.�Before adjusting the brake lever and brake pedal
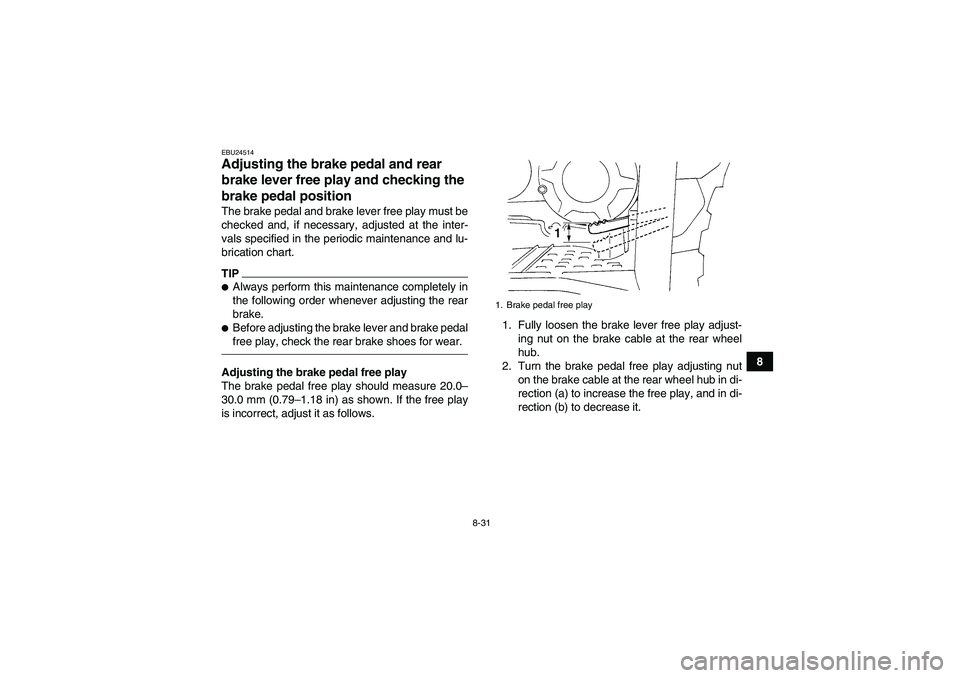
free play, check the rear brake shoes for wear.Adjusting the brake pedal free play
The brake pedal free play should measure 20.0–
30.0 mm (0.79–1.18 in) as shown. If the free play
is incorrect, adjust it as follows.1. Fully loosen the brake lever free play adjust-
ing nut on the brake cable at the rear wheel
hub.
2. Turn the brake pedal free play adjusting nut
on the brake cable at the rear wheel hub in di-
rection (a) to increase the free play, and in di-
rection (b) to decrease it.
1. Brake pedal free play
U1AB60E0.book Page 31 Wednesday, April 29, 2009 10:19 AM
Page 114 of 142
8-34
8
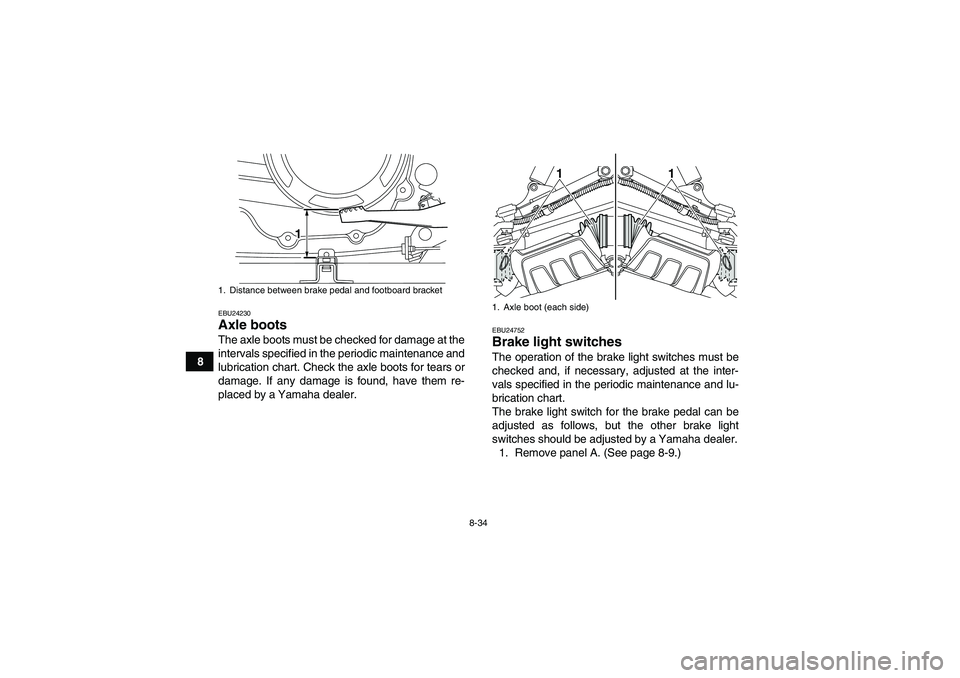
EBU24230Axle boots The axle boots must be checked for damage at the
intervals specified in the periodic maintenance and
lubrication chart. Check the axle boots for tears or
damage. If any damage is found, have them re-
placed by a Yamaha dealer.
EBU24752Brake light switches The operation of the brake light switches must be
checked and, if necessary, adjusted at the inter-
vals specified in the periodic maintenance and lu-
brication chart.
The brake light switch for the brake pedal can be
adjusted as follows, but the other brake light
switches should be adjusted by a Yamaha dealer.
1. Remove panel A. (See page 8-9.)
1. Distance between brake pedal and footboard bracket
1 1
1. Axle boot (each side)
11
U1AB60E0.book Page 34 Wednesday, April 29, 2009 10:19 AM
Page 117 of 142
8-37
8
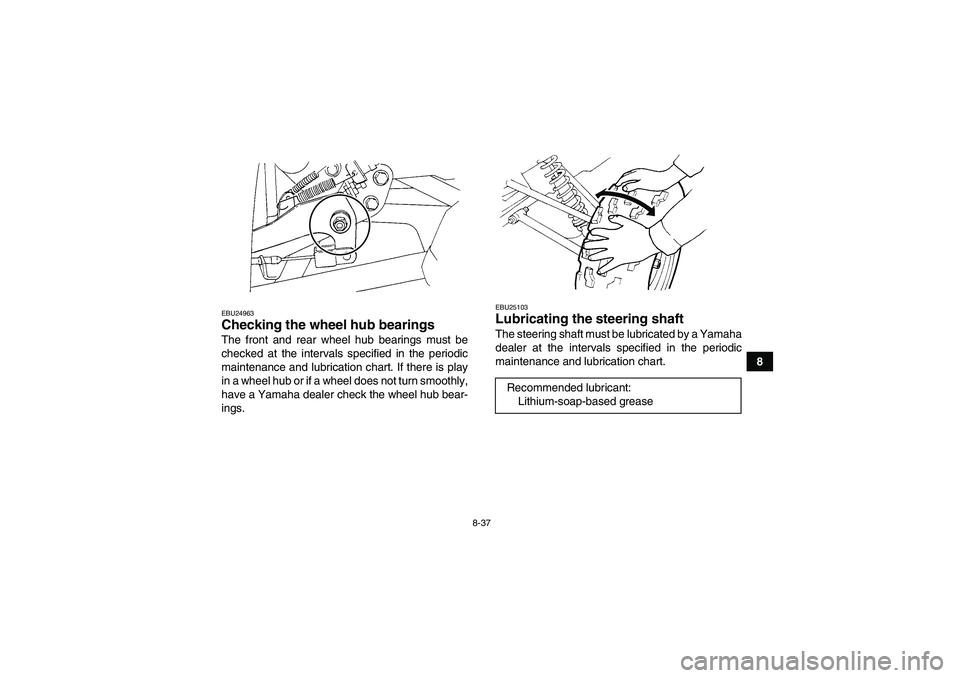
EBU24963Checking the wheel hub bearings The front and rear wheel hub bearings must be
checked at the intervals specified in the periodic
maintenance and lubrication chart. If there is play
in a wheel hub or if a wheel does not turn smoothly,
have a Yamaha dealer check the wheel hub bear-
ings.
EBU25103Lubricating the steering shaft The steering shaft must be lubricated by a Yamaha
dealer at the intervals specified in the periodic
maintenance and lubrication chart.Recommended lubricant:
Lithium-soap-based grease
U1AB60E0.book Page 37 Wednesday, April 29, 2009 10:19 AM
Page 140 of 142

KKey identification number ............................................. 11-1LLabel locations ............................................................... 1-1
Light switch .................................................................... 4-4MMain switch .................................................................... 4-1
Maintenance and lubrication chart ................................. 8-5
Maintenance chart, emission control system ................. 8-3
Model label ................................................................... 11-2NNeutral indicator light ..................................................... 4-2OOil temperature warning light ......................................... 4-2
On-Command four-wheel-drive switch ........................... 4-5
Owner’s manual and tool kit ........................................... 8-1PPanel, removing and installing ....................................... 8-9
Parking ........................................................................... 6-5
Parking brake ................................................................. 4-8
Parking on a slope ......................................................... 6-5
Part locations ................................................................. 3-1RRecoil starter .................................................................. 4-9
Reverse indicator light .................................................... 4-2
Riding your ATV ............................................................. 7-1SSafety information .......................................................... 2-1
Seat .............................................................................. 4-14
Shock absorber assemblies, adjusting the front .......... 4-16
Shock absorber assembly, adjusting the rear .............. 4-17Spark arrester, cleaning ............................................... 8-23
Spark plug, checking ...................................................... 8-9
Specifications ............................................................... 10-1
Speed limiter .................................................................. 4-6
Speedometer .................................................................. 4-3
Starter (choke) ............................................................. 4-13
Start switch ..................................................................... 4-4
Steering shaft, lubricating ............................................. 8-37
Storage ........................................................................... 9-2
Storage compartment ................................................... 4-15
TTail/brake light bulb, replacing ..................................... 8-44
Throttle cable free play, adjusting ................................ 8-27
Throttle lever ........................................................... 4-5, 5-4
Tires ............................................................................... 5-4
Troubleshooting ........................................................... 8-46
Troubleshooting chart .................................................. 8-47VValve clearance ............................................................ 8-27
V-belt case drain plug .................................................. 8-25
V-belt cooling duct check hose .................................... 8-24
Vehicle identification number ....................................... 11-1WWheel hub bearings, checking ..................................... 8-37
Wheel, installing ........................................................... 8-44
Wheel, removing .......................................................... 8-44
U1AB60E0.book Page 2 Wednesday, April 29, 2009 10:19 AM