2010 VOLKSWAGEN GOLF deactivate
[x] Cancel search: deactivatePage 31 of 516
Touch the
function button changes to
!Manual).
func tion button in the pop-up window to activ ate the The pop-up window is closed and
Tune is dis played in the center of the bottom row
o n the scree n.
Th e frequency of th e selected stati
on is displayed.
ly: Tum the tuning knob =>fig. 1
Afte r releasing the the next receivable radio station is matica lly set.
function button to
end manual frequency selection.
function button
and ch oose a differe nt method selectio n
in the pop-up windo w or !Presets)).
Afte r about seconds of idle time manual quency selection stops automa tica lly.
Manual frequency selection is also stopped if a
s tation is selec ted via a station preset button or the
display is changed to the FM station
For stations , the statio n name can
be displaye d un derne ath the fr e qu ency.
main menu 11. These function buttons are
try and device specific.
the mai n menu press the function
button !Extras!
Activate or deactivate the checkbox in th e functio n button in order to display or hid e
the station preset butto ns.
the checkbox in the is activa ted ,
s ix sta tion prese t buttons are disp layed in the
11.
function button in the
Press the Presets to display th e s tation pre se t
bu ttons.
The station preset buttons are disp layed when a
diffe ren t option for select
ing stations is chosen.
funct ion button and choose a
different method of selec ting station in the pop -u p
or !Tune]).
Changing the displayed station preset
buttons
The station pres et button s are disp layed in groups of six function buttons
Turn the tuning knob 1 ®in order to tag
the statio n preset butto ns one afte r the othe r. turn the
tuning knob in either
Page 44 of 516
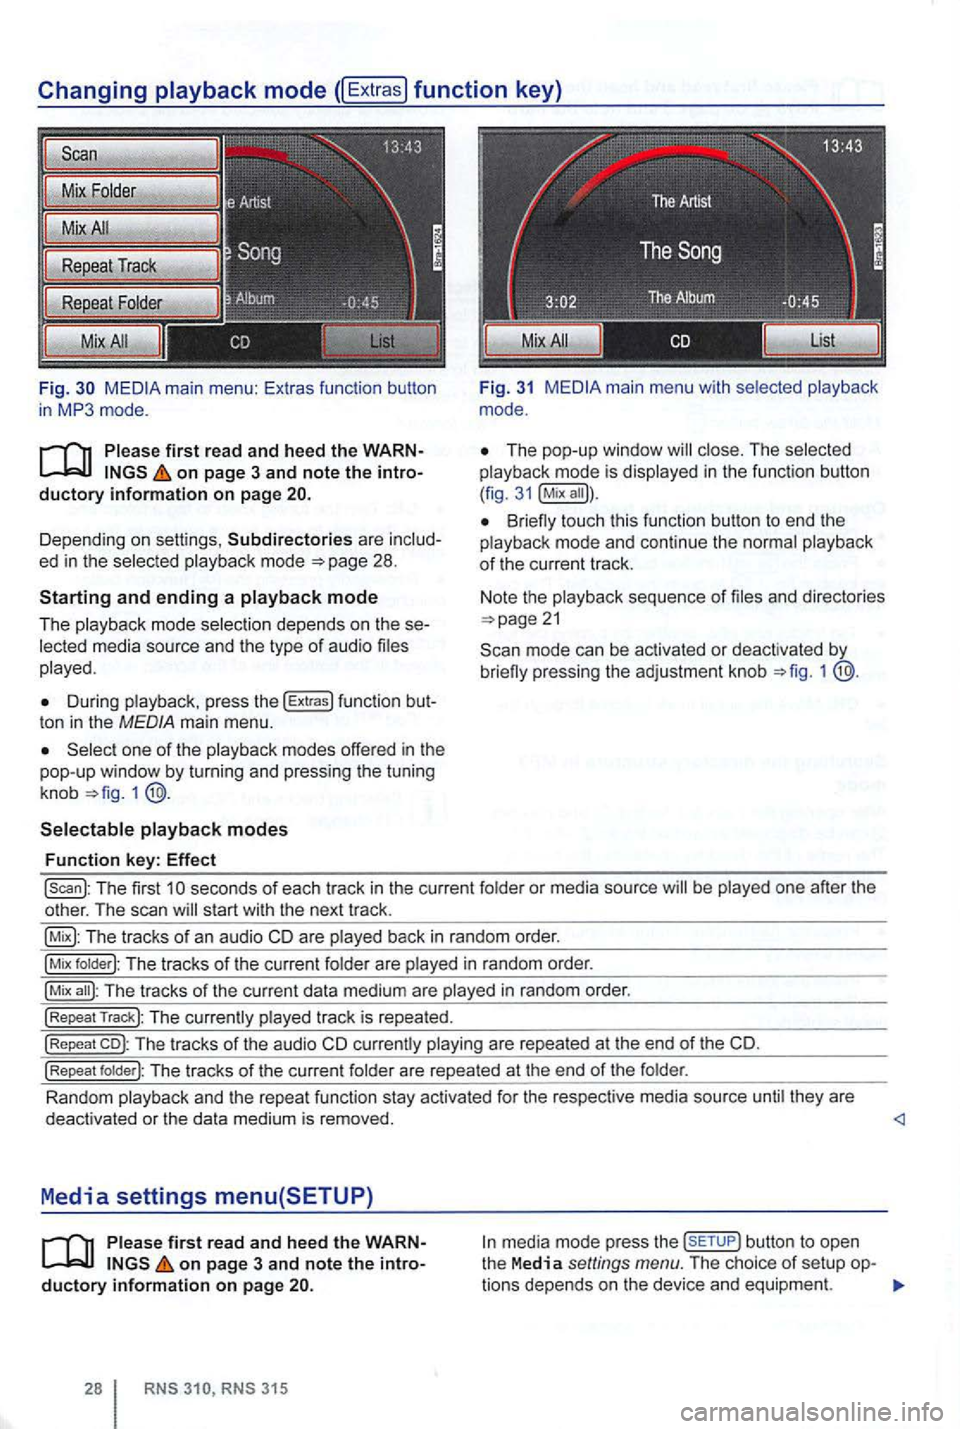
Fig. main m enu : Ex tras function butto n
i n mode.
on page 3 and note the
Depending on sett ings , Subdirectories are mode
During press the !Extras) func tion t on in the MED IA ma in menu.
one of the
1
main menu wit h
Th e pop-up windo w in the funct ion button
( fig .
Bri eny touch this function button to end the mode and continue the
sequence of
mode can be activated or deactivated by brieny pressing the adjustment knob 1
!scan): Th e first seconds of each tr ack in the curre nt or media source be one after the
o ther . The scan start with the next track .
The tracks of an aud io CD are back in random order.
!Mix T he tracks of the cur rent are in random order.
!Mix The tracks of the curr ent data medium are in random order.
!Repeat Track): The track is repea ted.
!Repeat co): The tracks of the audio CD are repea te d at t he end of the CD.
!Repeat The tracks of the curren t
Random they are
deact ivated or the data medium is removed. <1
Media settings menu(SETUP)
on page 3 and note the button to open
the Media settings menu. The choice of setup tions dep ends on the device and equipme nt.
Page 69 of 516
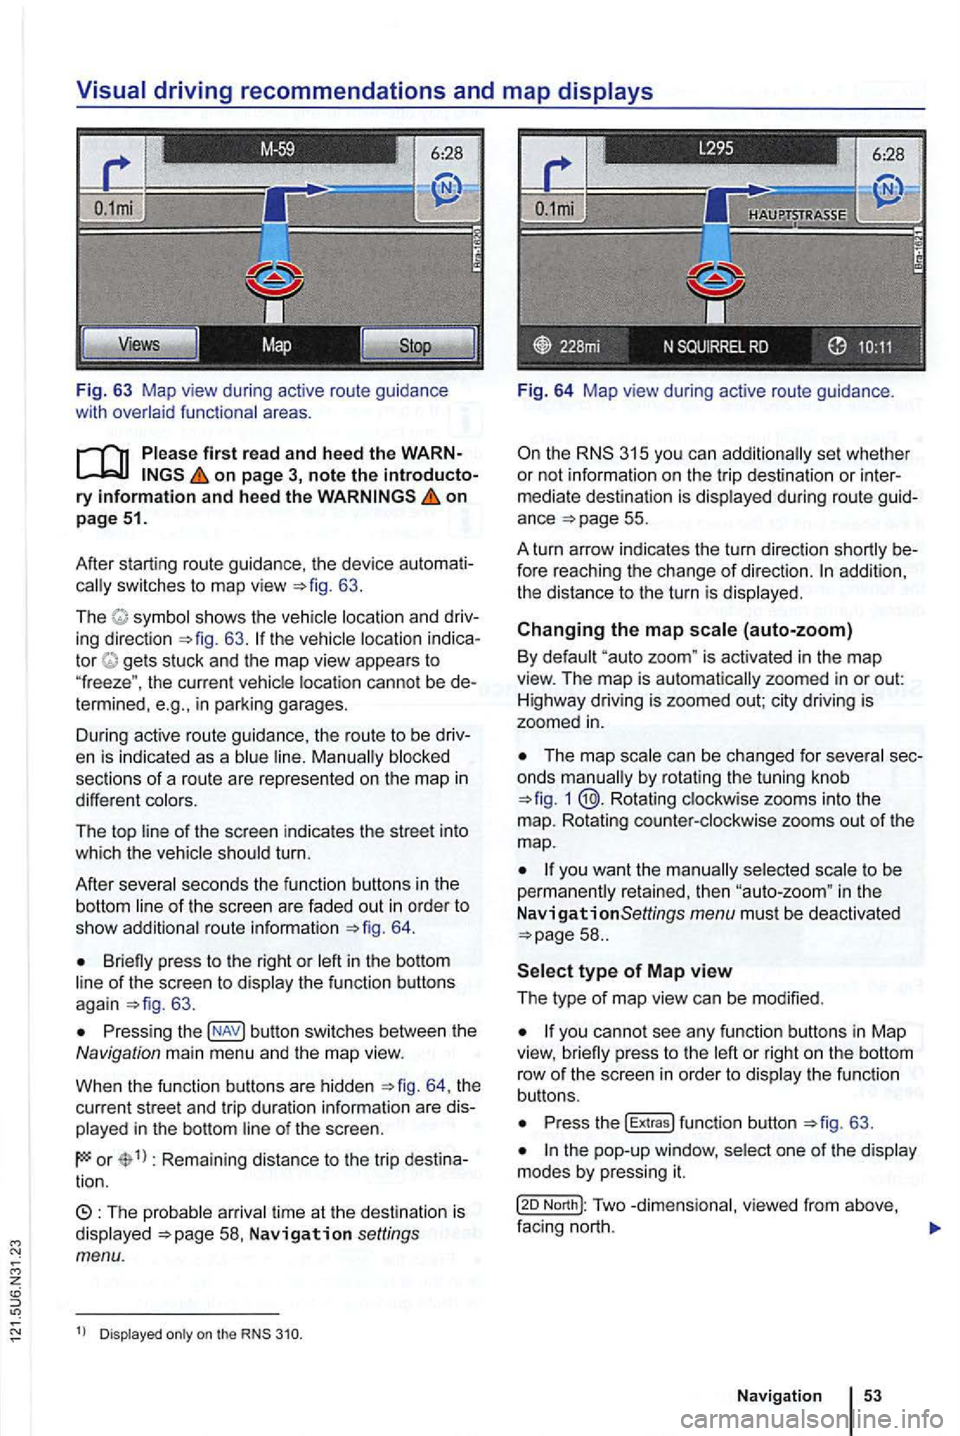
Fig. 63 Map view during active route guidance
with
on page 3, note the introductory information and heed the on page 51.
After starting route guidance. the device
switches to map view 63.
The sh ows the ing direction 63. tor gets stuck and the map view appears to
" freeze ". the current cannot be in parking garages.
During active route guidance , the route to
be
sections of a ro ute are represented on the map in
different
of the screen indicates the street into
which the turn.
After
seco nds the function buttons in th e
bottom
route informa tion 64.
Briefly press to the right or of the screen to 63 .
Press ing button switches between the Navigation main men u and the map view.
When the func tion buttons are hidden
th e
current street and trip duratio n info rmation are
in the bottom
or Rema ining distance to the trip tion.
time at th e destinat ion is Navigation settings menu.
Dis played on the
Fig. 64 Map view during active route guidance .
the RNS 315 you can additio nally set whethe r
or not inform ation on the trip dest ina tion or
ance =>page 55.
A turn arrow indicates the turn direction
fore reaching the change of direction. addition,
th e distance to the turn is
Changing the map (auto-zoom)
By "auto zoom " is activated in the map
view. The map is automatically zoomed in or out:
H ighwa y driving is zoomed out; city driving is
zoomed
in.
The map by rotat ing the tuning knob 1 @.Rotating zooms into the
m ap. Rotating
to be
perma nen tly retained, then in the
N avigationSettings menu must be deactivated
or right on the bottom
row of th e sc ree n in orde r to th e fu n ct io n
buttons.
Press the !Extras ! function button =>fig. 63 .
North!: Two facing nort h.
N avi gation
Page 73 of 516
on page 3, note the ry and heed the on pag e 51.
An upcoming section of road can be blocked
while route guidance is in process.
Pre ss the nus (exce pt for
Press the (Route) function button in the Info dow .
Press the ahead ) function button in the
pop-up window.
the length of the section which is to be
blocked by turning the tuning knob 1 @.
The length of the section being blocked is played at the bottom of the screen . (Max) pears at the bottom , thi s signifies the max imum distance.
Route guidance in Demo mode
on page 3, note the introductory on page 51.
Demo mode is activated in the Navigation tings menu ,
Touch ing the (D emo ) function button starts route guidance " to the entered trip destinatio n.
ance are compa rable to route guidance .
route guidance is repeated after reaching
the fictional trip destinat ion, and always restarts
from
in t he Navigation settings menu, the n
virtual route guidance starts from this position.
A
entered starting point is overwr itten by
the current vehicle location when the is
moved and the current location of the vehicle can
be determined via
Press the tun ing knob or press the function
button to confirm the block.
Blocked sections are displayed on the map in gray.
The route is recalculated
as as the navigation
system can determi ne a reasonable route to avoid
the blocked section.
R e
moving a
Pre ss the button in any of the navigation
Pre ss the (Rout e) function button in the Info dow .
Press the Rem ove Ex.) function button in the pop-up window .
regarding manually blocking ditional upcoming route sections 56.
afte r virtua l route guidance in Demo mode, rea l
route guidance is started , then the device must be
re -orien ted . Depending on the number of being received at the time, this may take a wh ile. movement can reduce the re-o rientation
t ime
Ending D emo mode
The demo mode should be deactivated after being
used , as you are
tween a virtua l or a normal route guidance at the
beg inning of any naviga tion .
Demo mode is
automatically ended when
the route guidance is fini shed or a new final
also Demo mode.
You end Demo mode in the
N av ig a tion settings menu.
Press the button in any of the naviga
tion menus.
Deactivate the checkbox in Demo mode) functio n button .
Navigation
Page 115 of 516
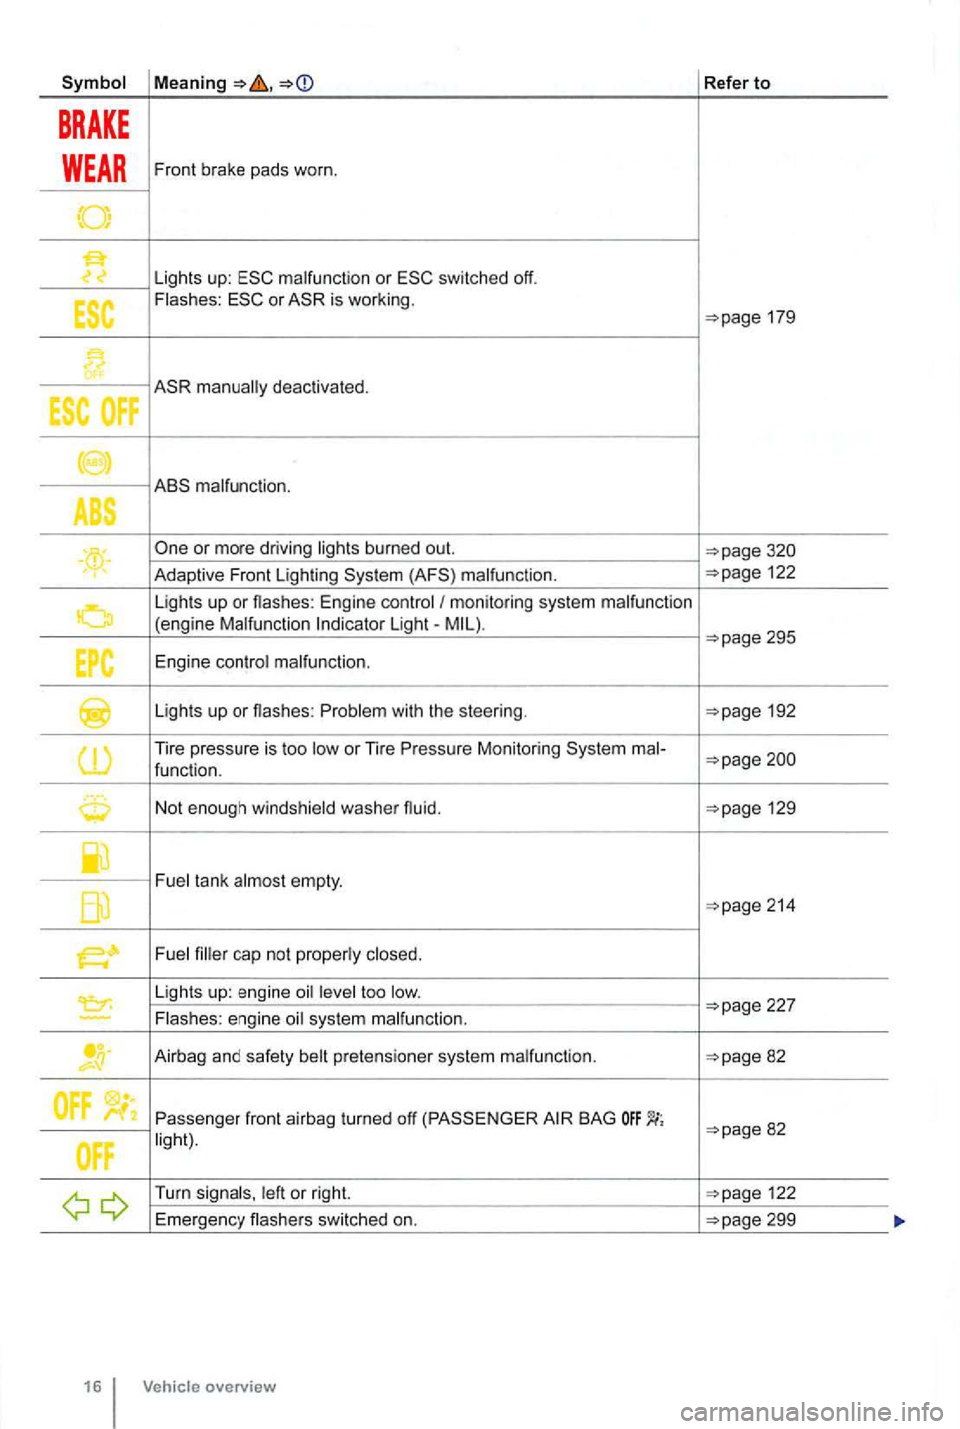
Refer to
BRAKE
WEAR Front brake pads worn.
Lights up: switched off. or is working.
deactivated.
. 122
Lights up or flashes : Engine monitoring system Light-
Lights up or flashes: with the steering . 192
Tire pressure is too or Tire Pressure Monitoring function.
Not enough 129
tank
cap not
Lights up: engine too 227 -system malfunction .
Airbag and safety
Passenger front airbag turned off BAG
Turn
299
overview
Page 119 of 516
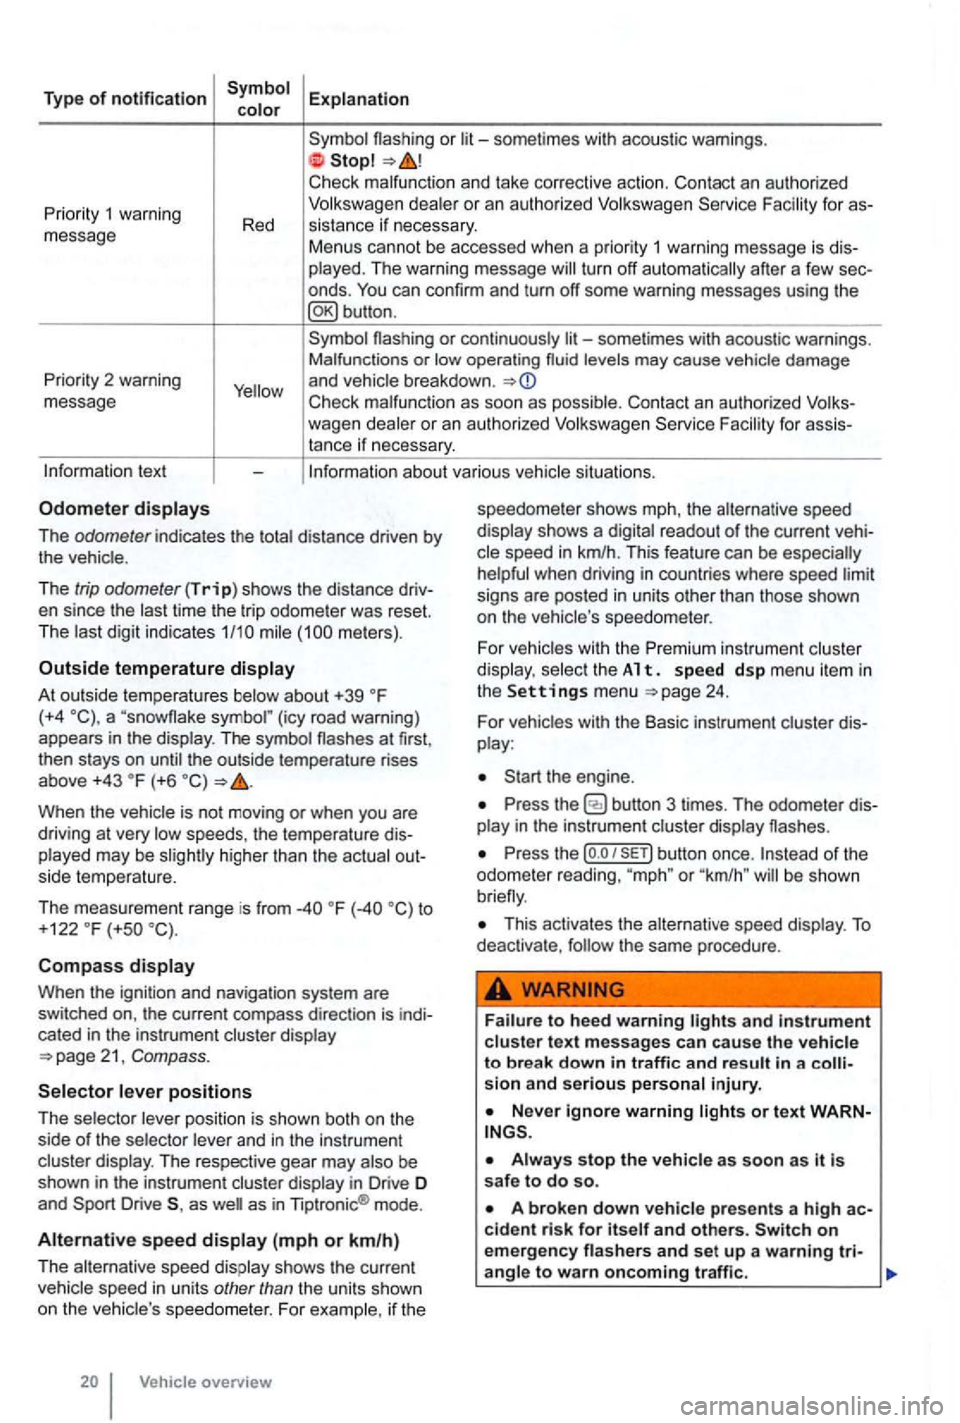
Type of notification
or
deale r o r an autho rized
turn off automatically after a few sec
onds .
Priority 2 warning
message
or continuously levels may cause vehicle damage
and vehicle breakdown .
Check malfunc tion as soon as possib le. Con tact an authorized for assistance if necessary.
tex t
The odometer indicates the distance driven by the vehic le .
The
trip odometer (Trip) shows the distance driv
en since the time the trip odometer was reset.
The meters) .
Outside temperature
At out side temperatures (+4 (icy road warning)
appears in the display . The symbol the outside temperature rises
above +43 (+6
higher than the actual out
side temperature.
The measurement range is from
to
+122 (+so
Compass
Whe n the ignit ion and navigation system are
switched on, the current compass direction is indi
cated
in the instrument cluster display
position is shown both on the
side of the selector and in the instrument
cluster display. The respective gear may
as as in Tiptronic ® mode .
Alternative speed (mph or km/h)
The alternative speed display shows the current
Vehicle overview speedometer
shows mph, the alternative speed
display shows a
readout of the current veh i
signs are posted in units other than those shown
on the vehicle 's speedo meter .
For
vehicles with the Premi um instrument cluster
di splay. select th e A 1 t. s pe ed d sp me nu it em in the Settings menu 24.
For vehicles with the Basic instrument cluster dis
play :
Press the
Press the (o .o button once. or "km /h " be shown
This activates the alternative speed display . To deactivate , the same procedure .
and in strument cluste r text messages can cause the vehicle to break down in traffic and result in a sion and serious personal injury.
on emergency
Page 126 of 516
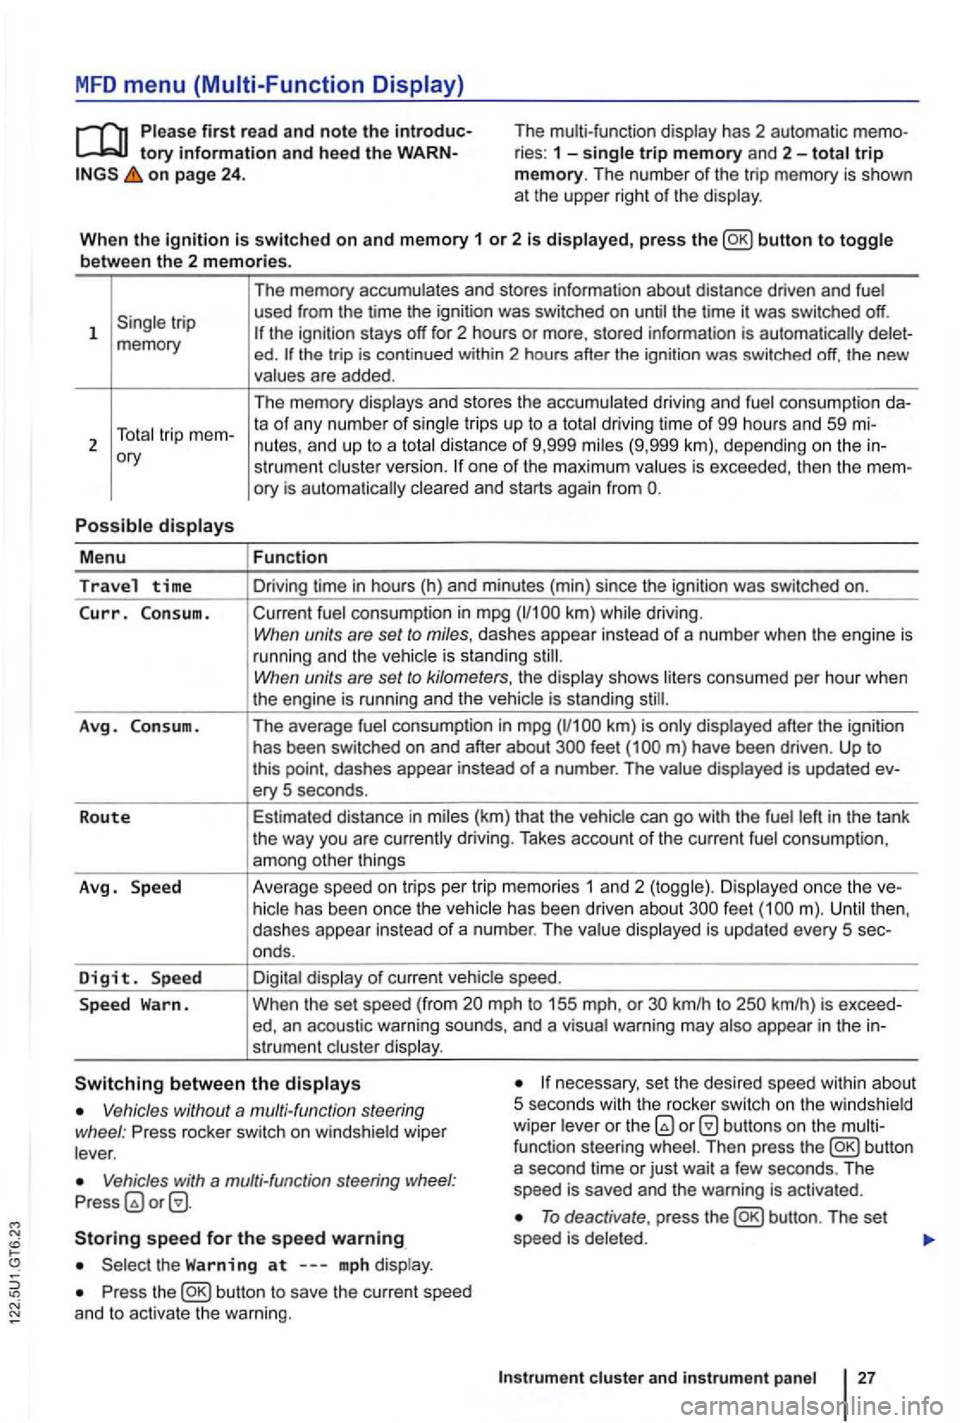
MFD menu (Multi-Function Display)
tory information and hee d the on page 24 . The multi-function
display has 2 automatic ries : 1 -single trip memory and 2-total trip memory. The number of the trip memory is shown
at the upper right of the display .
Wh en th e
ignition is switched on and memory 1 or 2 is displayed, press button to toggle
b etwee n the 2 m em ories.
1
ory
P o
ssible displays
M enu
Travel time
Curr. C on sum.
A vg . Consu m .
R o
ute
Avg . Speed
D
igit. Sp ee d
S p ee d
Warn. The
memory accumulates and stores information about distance driven and fuel
used from the time the ignition was switched on until the time it was switched off.
ed . the trip is cont inued within 2 hours after the ignition was switched off, the new
values are added .
The memory displays and stores the accumulated driving and fuel consumption
strumen t cluste r version. one of the maximum values is exceeded, then the
Fun ction
Driving time in hours (h) and minu tes (min) since the ignition was switched on.
Current fuel consumption in mpg
have been driven . Up to this point , dashes appear instead of a number . The value displayed is updated ery 5 seconds .
Estimated distance in miles (km) that the vehic le can
go with the fuel left in the tank
the way you are currently driving. Takes account of the current fuel consumpt ion ,
among other things
Ave rage speed on tri
ps per tr ip memor ies 1 an d 2 (toggle) . Di splayed once the feet
mph to 155 mph, or km/h to
necessary, set the desired speed within about
5 seco nds with th e rocker switch on the w indshield
wiper leve r or the Vehicles without a multi-function steering
wheel : Press rocker switch on windshie ld wiper
lever .
Vehicles with a multi-fun ction steering Press
Storing speed for the speed warning
Press the
To deactivate , press
Instrum ent cluste r and in str um en t panel
Page 144 of 516
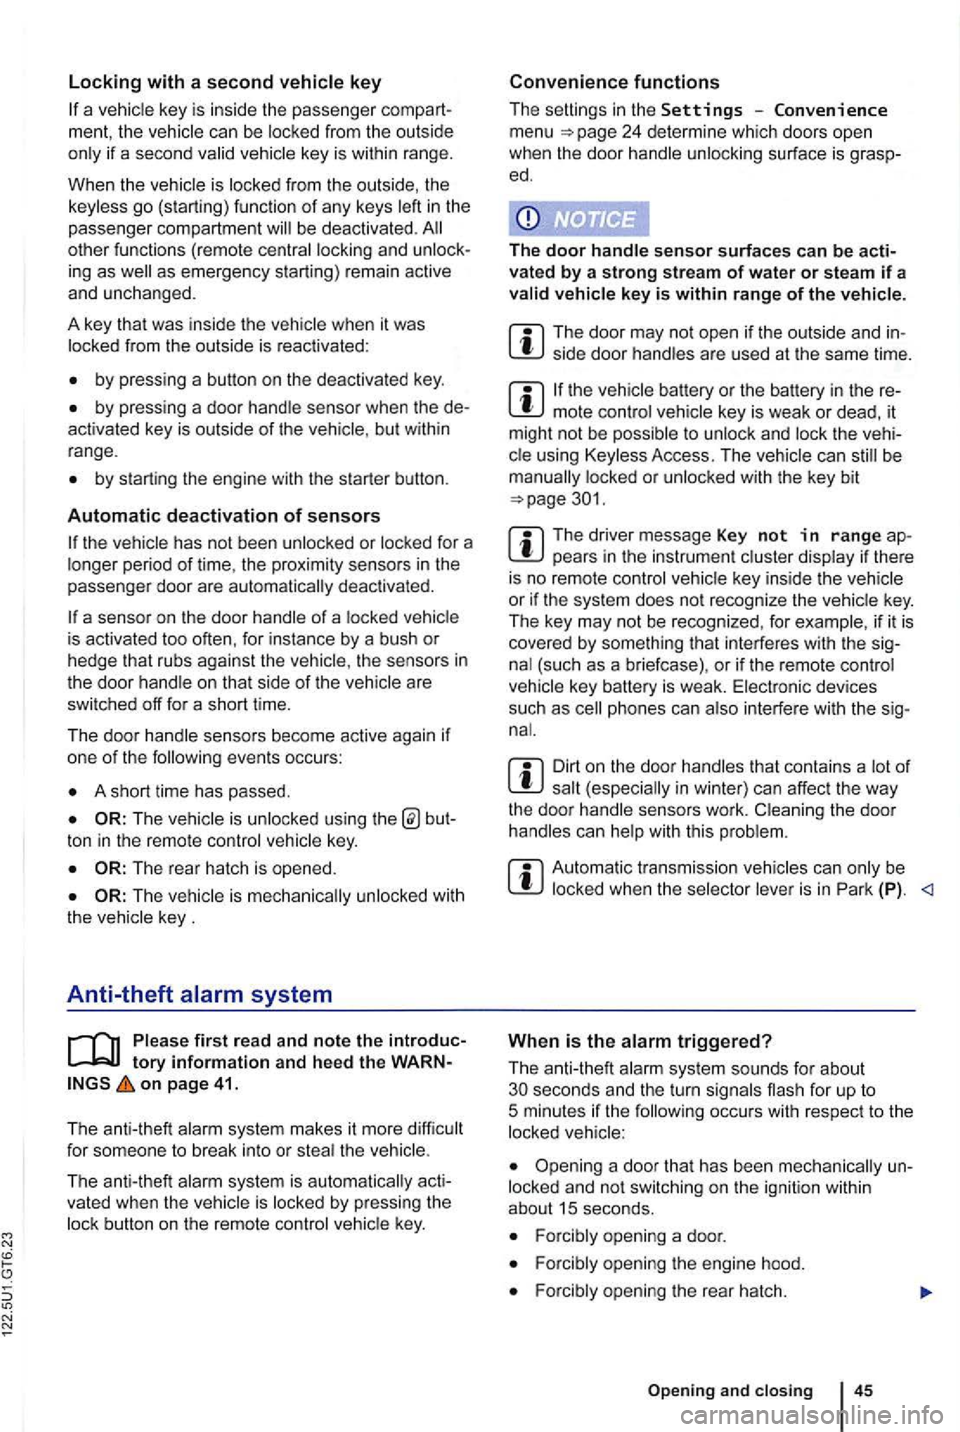
N
if a seco nd valid
by press ing a button on the deactivated key.
by pressing a door handle sensor when the de
activated key is outside of the vehicle , but with in
range .
by starting the engine with the starter butto n.
Automatic deactivation of sensors
deactivated .
is activated too often, for instance by a bush or hedge that rubs against the the sensors in the door handle on that side of the vehicle are
switched off for a short time.
T he door handle sensors become active again if
one of the even ts occurs:
A short time has passed.
The rear hatch is opened .
The key .
Anti-theft
tory information and hee d the WARN on page 41.
T he anti-theft alarm system makes it more difficult
for someon e to break into or steal the veh icle .
The anti-theft alarm system is
key i s within range of the vehicle.
T he door may not open if the outside and in side door handles are used at the same time.
the vehicle battery or the battery in the remote control vehicle key is weak or dead , it
might not be possible to unlock and using Keyless Access. The vehicle can locked or unlocked with the key bit
The driver message Key not in ra nge ap pears in the instrument cluster display if there
is no remote control vehicle key inside the vehicle
or if the system does not recognize the
key. The key may not be recognized , for example, if it is
covered by something that interferes with the sig
(such as a briefcase) , or if the remote control
vehicle key battery is weak. Electronic devices
such
as phones can interfere with the sig
Dirt on the door handles that conta ins a of in winter) can affect the way
the door handle sensors work.
with this problem .
Automatic transmissio n vehic les can
Opening a door that has been un
locked and not switching on the igni tion with in
about 15 seconds.
Forcibly opening a door.
Forcibly opening the engine hood.
Forcib ly opening the rea r hat ch.
and closi ng 45