2010 VOLKSWAGEN BEETLE park assist
[x] Cancel search: park assistPage 30 of 138

Downloaded from www.Manualslib.com manuals search engine Menu 1submenu
Multi function
display set--
tings
Time and date -settings
Units settings -
Service -
Factory set--tings
Settings options
The following display s ca n be activat
deactivated :
-
Curr ent consu mption
-Average consumpti on
- Top -up volume
- Conveni ence consum ers
- Eco tips
- Driv ing time
- Di stance
travell ed
-Average spee d
- Digital speed
-
Speed warning
-Oil t empe rature .
The
foll ow ing data can be reset:
-
" Sin ce start" driving data
-"Long -term" driving data.
The following functions can be set:
-Time source (manual , GPS)
-Set summer time automatically
-Time
-Time
zone
-Time format (12h, 24h)
-Date
- Date format
The
following functions can be set:
-Distance
-Speed
-Temperature
-Volume
-Consumption
-Pressure.
The follow ing data are displayed :
- Vehicle identification number
- Date
of next inspection
-Date of next oil change service.
The
following settings can be reset:
-All settings
- Driver assist systems
-
Parking and manoeuvring
-Light
-Mirrors and wipers
-
Opening and closing
- Multifunction display Further
In-
formation ~ ~
d
or
...,page 26
-
-
=>page 20
-
-
"'
L
34 Overview of the vehicle
-~~------------~J
Page 81 of 138

Downloaded from www.Manualslib.com manuals search engine • o;;--"cc A WAR'I'G (Contmued)
tf the brake warning lamp 0 does not go
'Jt or if it lights up when driving, the brake Ol , . • fluid level in the reservoir IS too low or there
is a fault in the brake system. Stop the vehi
c le immediately and seek expert assistance
=>page 188 , Brake fluid.
, tf the brake warning lamp ID lights up to
gether with the ABS indicator lamp 8, the
control function of the ABS may have failed.
This can cause the rear wheels to lock quick
ly when you brake. Locked rear wheels can
lead to a loss of control of the vehicle. If pos
s ible, reduce your speed and drive carefully
at low speed to the nearest qualified work
shop in order to have the brake system tes
ted . Avoid sudden braking and driving ma
noeuvres on the way.
• The ABS is not functioning correctly if the
ABS indicator lamp Et does not go out or
com es on while the vehicle is in motion. The
Electronic parking brake
BSIV)•~9
Fig . 140 In lower part of centre console : bu tton
for the electron ic parkin g brake
rf'n First read and observe the i~troductory
~ information and safety warnmgs A on
page 179.
The electronic parking brake replaces the hand
brake.
Switching on the electronic parking brake
The elec tron ic park ing brake can be swit ched on at
a n y time when the vehic le
is stationary . Even when
the ignition is sw itched off, always switch on the
e lectroni c parking brake when leaving
or parking
the vehicle .
_,
A WARN IN.G (Continued) .,~ ,1
vehicle can be stopped using the normal
brakes only {without ABS). The protection
provided by ABS is no longer available. Pro
ceed to a qualified workshop as soon a s pos
s ible.
• If the warning lamp 0 lights up either indi
vidually or together with a text message in
the d isplay of the instrument cluster, proceed
to a qualified workshop immediately to have
the brake pads checked or any worn brake
pads replaced.
Fa i
lure to observe illuminated indicator lamps
and text messages can lead to your vehicle be-
ing damaged.
• T he electron ic park ing brake is switched on
when the indicato r lamp in the button ::;;. Fig. 140
(a rro w) and the red indicator lamp ID in the instru
ment cluster displ ay are lit up ::;;. page 180.
• Release the button .
Switching off the electronic parking brake
• Swit ch on the ignition .
• Press the@) ::;;. Fig . 140 button . At the same
time depress the brake pedal with some force or
depress the accele rator pedal slightly when the en
gine is run ning .
• The indicator lamp in the button =:;.Fig . 140 (a r
row ) and the red indicator lamp ® in the instru
ment cluster will go out.
Automatic switch-off for the electronic
parking brake when driving off
The elec tronic parking brake switches off automati
cally when the vehi cle pulls away, prov ided that the
driver door is closed and the drive r sea t belt has
been fastened . If the vehicle has a manual gear
box, you must also depress the clutch fully before
pulling off so that the system detects that you want
to switch off the parking brake.
You can prevent the electronic parking brake f 0 . h. ff r m sw1tc 1ng o automat ically by pulling and hold.
the@) button::;;. Fig. 140 while pulling away. lng
Starting the engine, changing gear and parking 181
2
Page 84 of 138

Downloaded from www.Manualslib.com manuals search engine ~S~ta~~~st~o~p~s~y~s~te~m~--------------------------------------
BSG-0005
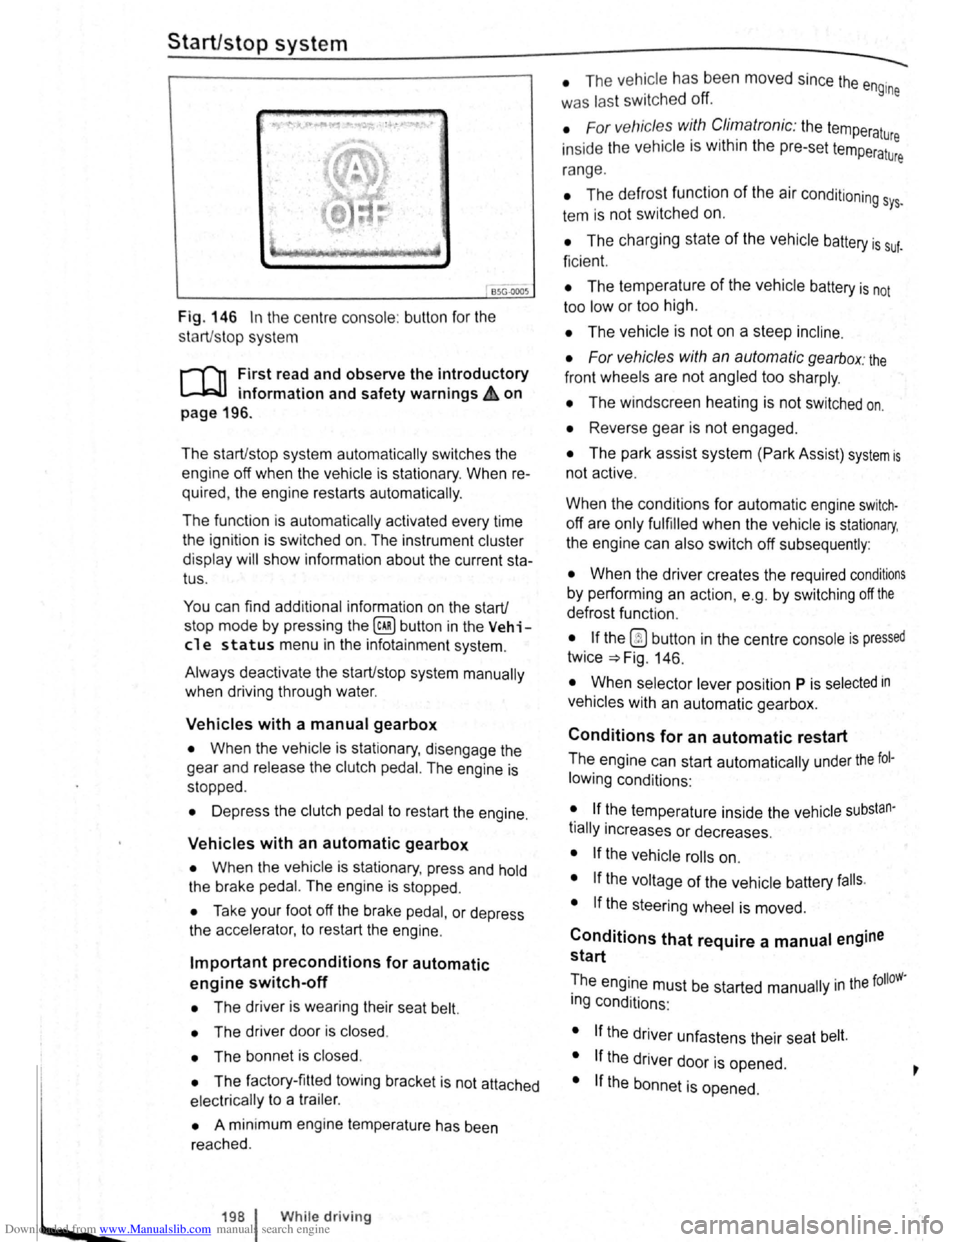
Fig. 146 In the centre consol e: butt on for the
s tart/s top syst em
r-T'n First read and observe the introductory
L-lcJJ information and safety warnings .&. on
page
196.
The start/stop system automatically switches the
engine off when the vehicle is stationary . When re
quired , the engine restarts automatically .
The function is automatically activated every time
the ignit ion is switched on. The instrument cluster
display will show information about the current sta
tus .
You can find additional information on the start/
stop mode by pressing
the~ button in the Vehi
cl e status menu in the infota inment system .
Always deactivate the start/stop system manually
when driving through water.
Vehicles with a manual gearbox
• When the vehicle is stat ionary , d isengage the
g e
ar and release the clutch pedal. The engine is
stopped .
• Depress the clutch pedal to restart the engine .
Vehicles with an automatic gearbox
• When the vehicle is stationary , press and hold
the brake pedal. The engine
is stopped.
• Ta ke your foot off the brake pedal, or depress
the acce lerator, to restart the engine .
Important preconditions for automatic
engine switch-off
• The driv er is wearing their seat belt.
• The driver door is closed .
• The bonnet is closed .
• The factory-fitted towing bracket is not attached
ele ctrically to a trailer .
• A minimum engine temperature has been
rea ched .
198 I While driving
• The ve hicle has been moved since the engine
was las t switc he d off.
• F or v ehicle s with Climatronic: the temperatu
inside the ve hicle is within the pre-set temperat~~e
ra nge .
• The de frost function of the air conditioning sys.
tem is not switched on.
• The charging state of the vehicle battery is suf.
ficient.
• The temperature of the vehicle battery is not
too
low or too high .
• The vehicle is not on a steep incline.
• For vehicles with an automatic gearbox: the
front wheels are not angled too sharply .
• The windscreen heating is not switched on.
• Reverse gear is not engaged .
• The park assist system (Park Assist) system is
not active .
When the condit ions
for automatic engine swit ch
off are only fulfilled when the vehicle is stationary,
the engine can also switch off subsequently :
• When the driver creates the required conditions
by performing an action , e .g . by switching off the
defrost function .
• If the @ button in the centre console is pressed
twice ~Fig. 146.
• When selector lever position P is selected in
vehicles with an automatic gearbox.
Conditions for an automatic restart
The engine can start automatically under the fol
lowing conditions :
• If the temperature inside the vehicle substan
tially increases or decreases .
• If the vehicle rolls on.
• If the voltage of the vehicle battery falls.
• If the steering wheel is moved.
Conditions that require a manual engine
start
The engine must be started manually in the folloW·
ing conditions :
• If the driver unfastens their seat belt.
• If the driver door is opened .
• If the bonnet is opened.
Page 86 of 138

Downloaded from www.Manualslib.com manuals search engine -•
parkPilot
COl Introduction
This chapter contains information on the following
subjects:
Operating ParkPilot . . . . . . . . . . . . . . . . . . . . . . 202
parkPilot display
. . . . . . . . . . . . . . . . . . . . . . . . 204
ParkPilot menu . . . . . . . . . . . . . . . . . . . . . . . . . 206
Vehicle path display . . . . . . . . . . . . . . . . . . . . . 207
Towing a trailer . . . . . . . . . . . . . . . . . . . . . . . . . . 208
The ParkPilot assists the driver when manoeuvring
and parking . If the vehicle is approaching an obsta
cle located in the range of the ultrasound sensors ,
an intermittent acoustic warning is sounded , de
pending on the distance . The shorter the distance ,
the shorter the intervals . The acoustic warning will
sound continuously if the obstacle is very close .
The ultrasound sensors in the bumpers transmit
and receive ultrasound waves. The system uses
the time difference between the ultrason ic waves
(i.e. between the transmission and reflection from
obstacles and the point of reception) to continu
ously calculate the distance between the bumper
and the obstacle.
Additional information and warnings:
• Exterior views ~page 6
• lnfotainment system ~page 31
• Braking , stopping and parking ~page 179
• Reverse assist system (Rear Assist)
~page 209
• Park
assist system (Park Assist) ~page 213
• Cleaning and caring for the vehicle exterior
~page 294
• Accessories , modificat ions , repairs and renewal
of parts ~page 320
A WARNING
The ParkPilot cannot replace the full concen
tration of the driver.
• Unintentional vehicle movements can
cause serious injury.
• Always adapt your speed and driving style
to suit visibility, weather, road and traffic con
ditions.
• Ultrasound sensors have blind spots in
Which obstacles and people cannot be detec
ted '--.
A WARNING (Continued) ~-
• Always monitor the area around the vehi
cle as the ultrasound sensors will not always
detect infants, animals and objects.
• Certain surfaces of objects and clothes
cannot reflect the signals from the ultrasound
sensors. The system is unable to detect
these objects or people wearing this type of
clothing, or they may be detected incorrectly.
• External sources of sound can affect the
signals of the ultrasound sensors. In certain
circumstances, the system may not recog
nise people or objects.
A WARNING ~-.
Automatic activation of the ParkPilot only oc
curs at very low speeds. An inappropriate
driving style can cause accidents and serious
injuries.
• Always bear in mind the time delay be
tween the signals.
• The ultrasound sensors may not always be
able to detect objects such as trailer drawbars,
thin rails, fences, posts, trees and open or
opening tailgates. This can result in damage to
your vehicle.
• If the ParkPilot has detected an obstacle
and issued a warning, the obstacle may move
out of the detection range of the sensors as the
vehicle approaches it, particularly if the object
is very high or very low. These objects are no
longer registered.
• The vehicle can sustain considerable dam
age if the warning given by the ParkPilot is ig
nored.
• The ultrasound sensors in the bumper can
be displaced or damaged through impacts, e.g.
when parking.
• The ultrasound sensors in the bumpers
must be kept clean and free of ice and snow
and not be covered up by stickers or other
items, as these may prevent the system from
working properly.
Driver assist systems 2o1
Page 90 of 138

Downloaded from www.Manualslib.com manuals search engine ..
Segment colour if
Area of the vchicl Fig. 149 Oistn nco of tho vehicle an obstacle has
from an obs tacle Acou
stic signal been d etected (col-
our
display only)
®
Ob .. t( c l approx
. 31 -160 cm
R l r sid n o t in th c-1p prox . 31 -60 cm
Fr ont c ntr v
hicl 's approx . 31 -120 cm
Grey
® Fr ont sid p lh. n ppr ox. 31 -60 cm ----
-R
®
A ppr ox. 31 -160 cm
R Clr id Obstfl cle In app rox . 31 -60 cm
-th v hicle 's I n te rmitt ent to ne Y
e llow
®
Fron t ce ntr e p8th. approx . 31 -120 cm
Front sid app rox . 31 -60 cm --
@ ,@ , Ob sta cle o utsid e of th e co lli-
approx .
0 -30 cm
©_ sio n area . Int
ermitt ent to ne Red
®
.®. Obsta cle in the co llision
approx.
0 -30 cm Consta nt to ne
© area . R
ed
ParkPilot
with front and rear a rea
Segment colour if
Distance of the v ehicle an obstacle has
Area of the vehicle Acoustic signal been detected (col-from an obstacle our
display only)
®
Rear
centre app
rox. 31 - 160 cm
Rear side Obs tac le approx . 31 -90 cm
Front centre n
ot in th e
approx. 31 -120 cm Grey
®
-ve hi cle's
Front side
path. app
rox .
90 cm
--
© Side app rox. 31 -90 cm
--
®
Rear centre app
rox. 31 -160 cm
Rear side appro
x. 31 -90 cm Obstacle in 1----
®
Front centre th
e vehic le's approx
. 31 -120 cm Intermitt ent ton e Yellow
Fr on t side path
.
approx . 31 -90 cm
© Sid e app rox . 31 -90 cm
®.®. Obst acle outside of app rox . 0 -30 cm Int ermittent tone
Red
© the collision area. -
®.@ , Obs tac le in the
approx. 0 -30 cm Con sta nt to ne
Red
© collision area .
ParkPilot
in the area around the vehicle
When there is an immin ent risk of co llisio n in the
front area of the ve hi cle, th e aco ustic signa ls are
s o
unded a t the front. Wl1en th ere is a risk of immi
nent collision in the rear area of the ve hicl e, t11e
acoustic signals are sounded at th e rea r.
Things to note about the ParkPilot in the
area around the vehicle 1
)
Acoustic signa ls are only so unded fo r tho se areas
that are displaye d on th e inf otain ment system
s c
reen . The
sca
nne d area along the side of the vehicle is
a utomatically hidd en in the following sit uations : ...,.
1
) T he are a ar ound th e ve hicle 15 not shown 1n
ve hi cle s w1th 4 ultr aso und sensors in eac h bump er.
Driver assist systems 205
Page 92 of 138

Downloaded from www.Manualslib.com manuals search engine ...
h parkPil ot is au tomatica lly muted whe n the
!le~tronic parking brake is switc he d on.
Vehicle path display
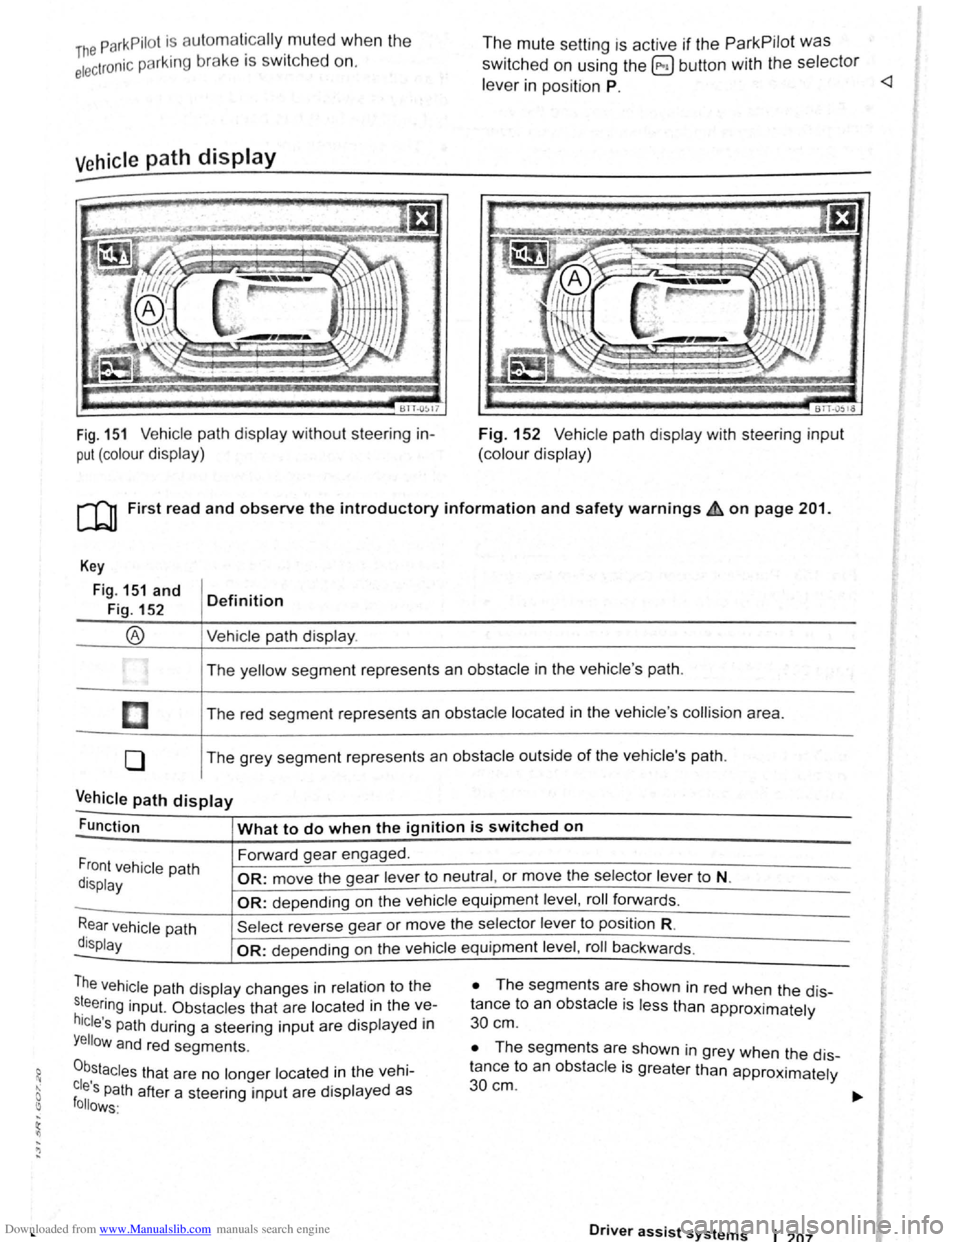
611-0~17
Fig. 151 Vehicle path display w ithout steering in
put (colour display)
The mute setting is active if the ParkPilot was
switched on using the @ button with the selector
le ve r in position P.
BTT -051o
Fig. 152 V ehi cle path display with steering input
(colour display)
[Q) First read and observe the introductory information and safety warnings £ on page 201.
Key
Fig. 151 and
Fig. 152
®
I
[]
0
Definition
Vehi cle path display .
The yellow segment represents an obstacle in the vehicle 's path .
The red seg ment represents an
obstacle located in the vehicle 's collision area .
The grey segment represents an
obstacle outside of the vehicle's path.
Vehicle path display -
Function What to do when the ignition is switched on
Forward gear engaged .
Front vehicle path
display OR: move the gear lever to neutral , or move the selector lever to N.
-OR: depending on the vehicle equipment level , roll forwards .
Rear vehicle path
display
Sel ect reverse gea r or move the selector lever to position R.
-OR: depen ding on the vehi cle equipment level , roll ba ckw ards.
The vehicle path dis play changes in relation to the
s~eering inp ut. Ob stacles that are located in the ve
hicle's path during a steering input are disp layed in
Yellow and red segments.
0b,stacles that are no longer located in the vehi
cles Path after a steering input are displayed as follows·
• The segm ents are shown in red when the dis
tance to an
obstacle is less than approximately
30 cm .
• The segments are shown in grey when the dis
tance to an
obsta cle is greater than approximately
30cm.
Driver assist systems 1 207
Page 94 of 138

Downloaded from www.Manualslib.com manuals search engine ~ ; ) J
Reverse assist system (Rear Assist)
eo Introduction
ThiS c hflp t r co nlc:tln s Informa tio n on th e fo llowing
subjor.ts :
G 11 rat Infor m ation . . . . . . . . . . . . . . . . . . . . . . 210
Parking ....... ········· ....... . ........ 2 12
A cam era in th e ta il g a te he lp s th e driver when re
ve rsing o r m an o e uv ring the ve hi cle . The came ra
picture and th e o rienta tio n lin e s projecte d by the
syste m are di sp la ye d o n the s creen of th e facto ry
littcd ra d io or n avi gatio n sy ste m .
Additional information and warnings:
• Exte rio r v ie ws ~p age 6
• Accessories, modifica tio ns , re pai rs a nd re ne w al
of parts ::>p ag e 32 0
•
=>Bookle t R ad io o r ~Booklet N av iga tio n sy s
te m
A WARNING
Using cameras to estimate the distance from
obstacles (persons, vehicle etc. ) is inaccurate
and can cause accidents and severe injuries.
• The camera lens enlarges and distorts the
field of vision and makes objects on the
screen appear to be different and imprecise.
• Certain objects, for example narrow posts
or grids , may be difficult or impossible to see
on the screen because of its low resolution or
poor light conditions.
• The camera has blind spots within which
obstacles and people cannot be detected.
• Keep the camera lens clean, free of snow
and ice and do not cover it.
A WARNING
~------------~--------~~~------~ The technology of the Rear Assist system
cannot overcome the laws of physics or sys
tem-related vehicle limitations. Careless or
unintentional use of the Rear Assist system
can cause accidents and severe injuries. The
system is not a substitute for the full concen
tration of the driver.
• Adapt your speed and driving style to suit
visibility, weather, road and traffic conditions.
• Keep looking to check the direction in
which you are parking and the relevant area
around the vehicle. The front of the vehicle
swings out more than the rear of the vehicle.
•
Do not allow the images shown on the
screen to distract you from the traffic around
you.
• Always monitor the area around the vehi
cle as the cameras will not always detect in
fants, animals and objects.
• The system may not be able to d isplay all
areas clearly.
• The Rear Assist system should only be
used when the tailgate is fully closed.
• The camera only shows two-dimensional
images on the screen. The lack of depth of field
means that recesses and protruding objects on
the ground may only be detected with difficulty,
or may not be detected at all.
• The camera may not always be able to de
tect objects such as thin rails, fences, posts,
trees etc. This can result in damage to your ve
hicle.
Driver assist systems 209
Page 96 of 138

Downloaded from www.Manualslib.com manuals search engine 1) The Roar A
ss is t s y ste m should not be used in the following situations:
-If the rear of the ve hi cle is heavily loaded.
-If tl'e driv er is no t famili a r with the sy s tem .
-If the pos ition or angl e of the cam era has changed, e.g . following a rear-end collision. The system
sh ould be checked by a qualifi ed workshop.
2) Optica l deception by the camera :
The Rear Ass is t r eve rs ing camera only supplies two-dimen sional image s. Due to the lack of depth of field
on the sc ree n, potho les and dips in the ground , protruding parts on another ve hicle or protruding objects
on the gro und may be difficult or impossible to see on the image .
Objects or other ve hicles m ay appear closer or further away on the screen than they actually are.
-If you d rive from a le ve l surface onto an upward or downward slope.
-If you drive from an upward or downward slope onto a level surface .
-If the rear of th e ve hi cle is hea vily loaded .
-
Whe n app roac hing protruding objects. Su ch obje cts can leave the camera 's field of vision while you are
r e ve rs
ing.
Cleaning the camera lens
Keep the cam era le ns clean and free of ice and
s n o w :
• Switch o n the ignition .
• Switch on the electronic parking brake.
• Selec t re ve rse gea r.
• Moisten the le ns with a commercially available
alcohol- b ase d glass clea ner and clean the le ns
with a dry clot h ~CD.
• Remove snow with a brush .
• Remove ice with a de -ice r spray ~CD.
• Never use an abrasive cleaning product to
clean the lens.
•
Never use warm or hot water to remove
snow and ice from the lens of the camera . The
lens could otherwise be damaged.
m lt is not possible to open the tailgate if the
W V olkswagen badge is folded out.
m Volkswagen reco mmends that you practise
W parking with the rear assist system in a traf
fic-calmed area or car park with good vision and
we ather conditions .
In this way you can become
familiar with the system and the orientation lines in
a safer environment.
m The rear assist system cannot be switched
W on if the tailgate is open . <1
Driver assist systems