Page 148 of 386
135
2-3. Operating the lights and wipers
2
When driving
n
The windshield wiper and washer can be operated when
The engine switch must be in the ON position.
n If no windshield washer fluid sprays
Check that the washer nozzles are not blocked and if there is washer fluid in
the windshield washer fluid reservoir.
NOTICE
nWhen the windshield is dry
Do not use the wipers, as they may damage the windshield.
n When there is no washer fluid spray from the nozzle
Damage to the washer fluid pump may be caused if the lever is pulled
toward you and held continually.
n When a nozzle becomes block
Do not try to clear it with a pin or other object. The nozzle will be damaged.
Washer/wiper dual opera-
tion
Wipers will automatically oper-
ate a couple of times after the
washer squirts.
Page 152 of 386

139
2-4. Using other driving systems
2
When driving
Driving assist systems
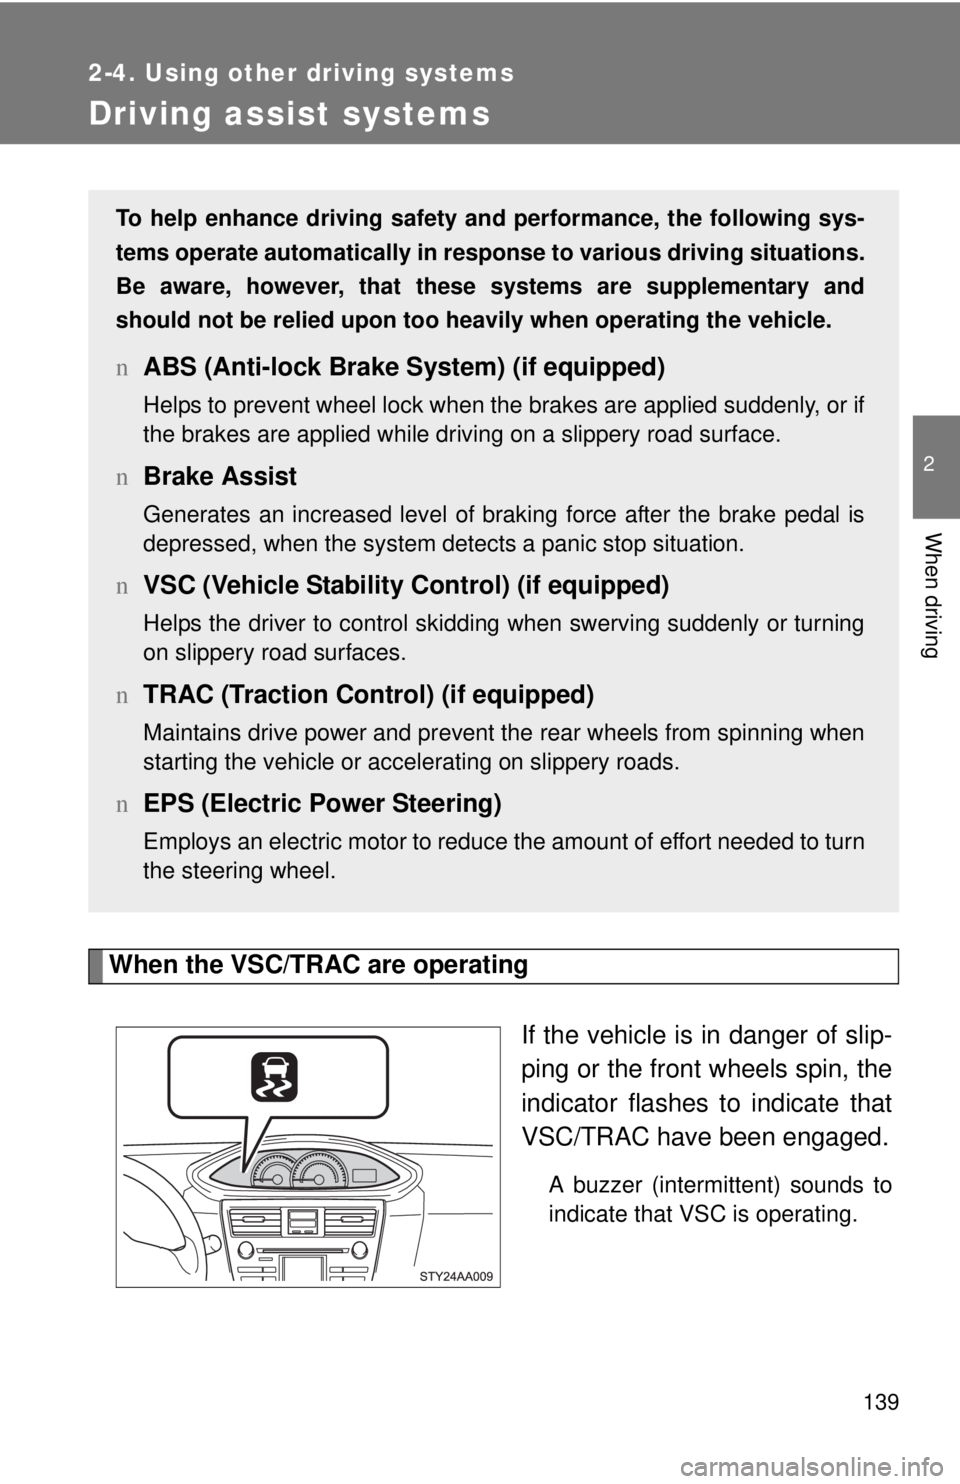
When the VSC/TRAC are operatingIf the vehicle is in danger of slip-
ping or the front wheels spin, the
indicator flashes to indicate that
VSC/TRAC have been engaged.
A buzzer (intermittent) sounds to
indicate that VSC is operating.
To help enhance driving safety and performance, the following sys-
tems operate automatically in res ponse to various driving situations.
Be aware, however, that these systems are supplementary and
should not be relied upon too heavi ly when operating the vehicle.
nABS (Anti-lock Brake System) (if equipped)
Helps to prevent wheel lock when the brakes are applied suddenly, or if
the brakes are applied while driving on a slippery road surface.
nBrake Assist
Generates an increased level of braking force after the brake pedal is
depressed, when the system detects a panic stop situation.
nVSC (Vehicle Stability Control) (if equipped)
Helps the driver to control skidding when swerving suddenly or turning
on slippery road surfaces.
nTRAC (Traction Control) (if equipped)
Maintains drive power and prevent the rear wheels from spinning when
starting the vehicle or accelerating on slippery roads.
nEPS (Electric Power Steering)
Employs an electric motor to reduce the amount of effort needed to turn
the steering wheel.
Page 159 of 386

146 2-5. Driving information
CAUTION
nThings that must not be carried in the trunk
The following things may cause a fire if loaded in the trunk.
lReceptacles containing gasoline
lAerosol cans
nStorage precautions
Observe the following precautions.
Failing to do so may result in death or serious injury.
lDo not place cargo or luggage in or on the following locations as the
item may get under the clutch, brake or accelerator pedal and prevent
the pedals from being depressed properly, block the driver’s vision, or
hit the driver or passengers, causing an accident.
• Driver’s feet
• Front passenger or rear seats (when stacking items)
• Package tray
• Instrument panel
• Dashboard
• Auxiliary box or tray that has no lid
lSecure all items in the occupant compartment, as they may shift and
injure someone during emergency braking, sudden swerving or an
accident.
lNever allow anyone to ride in the enlarged trunk. It is not designed for
passengers. They should ride in their seats with their seat belts prop-
erly fastened. Otherwise, they are much more likely to suffer death or
serious bodily injury, in the event of emergency braking, sudden
swerving or an accident.
nCapacity and distribution
lDo not exceed the maximum axle weight rating or the total vehicle
weight rating.
lEven if the total load of occupant’s weight and the cargo load is less
than the total load capacity, do not apply the load unevenly. Improper
loading may cause deterioration of steering or braking control which
may cause death or serious injury.
Page 162 of 386

149
2-5. Driving information
2
When driving
Regulations on the use of snow chains
l Regulations regarding the use of tire chains vary according to loca-
tion and type of road. Always check local regu lations before install-
ing chains.
l Use SAE Class “S” type radial tire chains, with the exception of
radial cable chains or V-bar type chains.
• Install the chains on the front tires.
• Refer to the explanation that comes with the tire chains for
installation instructions.
l Retighten the chains after drivi ng 1/4 - 1/2 mile (0.5 - 1.0 km).
nSnow chain installation
Observe the following precautions when installing and removing chains.
lInstall and remove tire chains in a safe location.
l Install tire chains on the front tires only. Do not install tire chains on the
rear tires.
l Install the tire chains on front tires as tightly as possible.
l Install tire chains following the instructions provided in the accompanying
instructions.
l If wheel ornaments are used, they will be scratched by the chain band,
so remove the ornaments before putting on the chains. ( →P. 310)
nWhen driving the vehicle
Accelerate the vehicle slowly and drive at a reduced speed suit-
able to road conditions.
n When parking the vehicle
Park the vehicle and move the shift lever to P (automatic trans-
mission) or to 1 or R (manual transmission) without setting the
parking brake. The parking brak e may freeze up, preventing it
from being released. If necessary , block the wheels to prevent
inadvertent sliding or creeping.
Page 171 of 386

158 2-5. Driving information
lIn order to maintain engine braking efficiency, do not use the trans-
mission in D (automatic transmission) or 5 (manual transmission).
l Due to the added load of the trailer, your vehicle’s engine may
overheat on hot days (at temper atures over 85°F [30°C]) when
driving up a long or steep grade. If the engine coolant temperature
gauge indicates overheating, immediately turn off the air condition-
ing (if in use), pull your vehicle off the road and stop in a safe spot.
( → P. 325)
l Always place wheel blocks under both the vehicle and the trailer
wheels when parking. Apply the parking brake firmly, and put the
transmission in P (automatic transmission) or in 1 or R (manual
transmission). Avoid parking on a slope, but if unavoidable, do so
only after performing the following:
Apply the brakes and keep them applied.
Have someone place wheel bloc ks under both the vehicle and
trailer wheels.
When the wheel blocks are in place, release the brakes slowly
until the blocks absorb the load.
Apply the parking brake firmly.
Shift into 1 or R (manual transmission) or P (automatic trans-
mission) and turn off the engine.
l When restarting after parking on a slope:
With the transmission in P (automatic transmission) or the
clutch pedal (manual transmission) depressed, start the
engine. On vehicles with an au tomatic transmission, be sure
to keep the brake pedal pressed.
Shift into a forward gear. If reversing, shift into R.
Release the parking brake (also brake pedal on vehicles with
an automatic transmission), and slowly pull or back away from
the wheel blocks. Stop and apply the brakes.
Have someone retrieve the blocks.
Page 175 of 386
162 2-5. Driving information
NOTICE
nDinghy towing direction
n To prevent the steering from locking
Ensure the engine switch is in the ACC position.
Do not tow the vehicle backwards.
Doing so may cause serious damage.
Page 176 of 386
164
3-1. Using the air conditioning system and defogger
Air conditioning system
Adjusting the settingsn Adjusting the temperature setting
Turn the temperature control dial clockwise (warm) or counter-
clockwise (cool).
If is not pressed, the system will blow ambient temperature air or
heated air.
For quick cooling, turn the temperature control dial to the “
MAX A/C”
position and set the air intake selection dial to (recirculated air)
mode.
Fan speed control dial
Air outlet selection dial
Air conditioning ON/OFF switch
Temperature control dial
Air intake selection dial
Page 177 of 386
165
3-1. Using the air conditioning system
and defogger
3
Interior features
nAdjusting the fan speed
Turn the fan speed control dial clockwise (increase) or counter-
clockwise (decrease).
Set the dial to “0” to turn the fan off.
n Selecting the air outlets
Set the air outlet selection di al to an appropriate position.
The positions between the air outlet selections shown below can also be
selected for more detailed adjustment.
When the dial is set to , air
flows to the upper body.
When the dial is set to , air
flows to the upper body and feet.
: Some models