Page 204 of 406
192 3-1. Using the air conditioning system and defogger
CAUTION
■To prevent the windshield from fogging up
Do not set the air outlet selection dial to during cool air operation in
extremely humid weather. The difference between the temperature of the
outside air and that of the windshield can cause the outer surface of the
windshield to fog up, blocking your vision.
NOTICE
■To prevent battery discharge
Do not leave the air conditioning system on longer than necessary when the
engine is stopped.
Page 205 of 406

193
3-1. Using the air conditioning system and defogger
3
Interior features
Rear window and outside rear view mirror defoggers∗
∗: If equipped
■The rear window and outside rear vi ew mirror defoggers can be oper-
ated when
The engine switch is in the ON position.
■ Outside rear view mirror defoggers (vehicles with outside rear view
mirror defoggers)
Turning the rear window defogger on will turn the outside rear view mirror
defoggers on.
CAUTION
■ When the outside rear view mirror defoggers are on (vehicles with out-
side rear view mirror defoggers)
Do not touch the rear view mirror surfaces, as they can become very hot and
burn you.
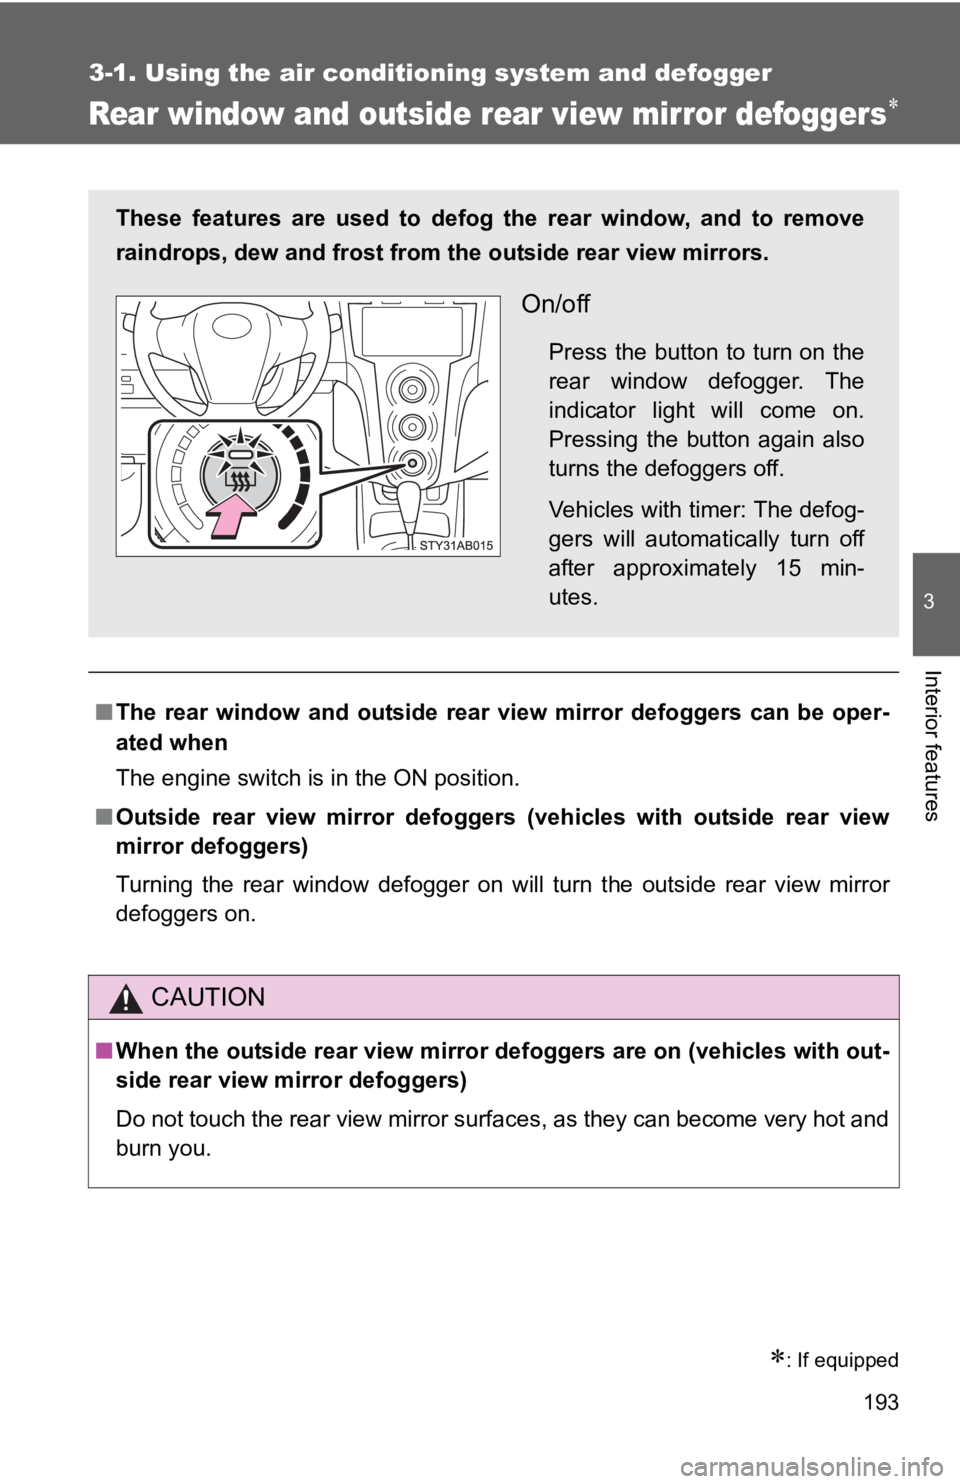
These features are used to defog the rear window, and to remove
raindrops, dew and frost from the outside rear view mirrors.
On/off
Press the button to turn on the
rear window defogger. The
indicator light will come on.
Pressing the button again also
turns the defoggers off.
Vehicles with timer: The defog-
gers will automatically turn off
after approximately 15 min-
utes.
Page 206 of 406
194 3-1. Using the air conditioning system and defogger
NOTICE
■To prevent battery discharge
Do not leave the rear window defogger on longer than necessary when the
engine is stopped.
Page 208 of 406

196 3-2. Using the audio system
CAUTION
■For vehicles sold in U.S.A. and Canada
●Part 15 of the FCC Rules
FCC Warning:
Any unauthorized changes or modifications to this equipment will void the
user’s authority to operate this device.
● Laser products
Do not take this unit apart or attempt to make any changes yourself.
This is an intricate unit that uses a laser pickup to retrieve information from
the surface of compact discs. The laser is carefully shielded so that its
rays remain inside the cabinet. Therefore, never try to disassemble the
player or alter any of its parts since you may be exposed to laser rays and
dangerous voltages.
● CAUTION
This product utilizes a laser.
Use of controls or adjustments or performance of procedures other than
those specified herein may result in hazardous radiation exposure.
NOTICE
■To prevent battery discharge
Do not leave the audio system on longer than necessary with the engine o\
ff.
■ To avoid damaging the audio system
Take care not to spill drinks or other fluids over the audio system.
Page 230 of 406
218
3-3. Using the interior lights
Interior lights list
■Illuminated entry system (if equipped)
When the interior light switch is in the DOOR position, the interior light auto-
matically turns on/off according to whether the doors are locked/unlocked
and whether the doors are open/closed and the engine switch position.
■ To prevent the battery from being discharged
If the interior light remains on when the door is not fully closed and the inte-
rior light switch is in the DOOR position, the light will go off automatically
after 20 minutes.
■ Customization that can be co nfigured at Toyota dealer
Settings (e.g. The time elapsed before lights turn off) can be changed.
(Customizable features →P. 377)
Interior light (→P. 219)
Personal lights ( →P. 219)
Page 242 of 406
230 3-5. Other interior features
■The clock is displayed when
The engine switch is in the ON position.
■ When disconnecting and reco nnecting battery terminals
The time display will automatically be set to 1:00.
■ Adjusting to a full hour (vehicles without tachometer)
If you press the clock reset button, the minute values will be rounded to the
nearest hour. So, minute values from “:00” to “:29” are rounded down, and
values from “:30” to “:59” are rounded up.*
*: e.g.
1:00 to 1:29 → 1:00
1:30 to 1:59 → 2:00
Vehicles without tachometer
Press and hold the clock reset button to enter the adjust-
ment mode for the clock.
Press the clock reset button to adjust the minutes.
After adjusting the minutes, wait 5 seconds to allow the minutes to
be automatically input.
Press the clock reset button to adjust the hours.
After adjusting the hours, wait 5 seconds to allow the hours to be
automatically input and then return to normal mode.
Page 243 of 406
231
3-5. Other interior features
3
Interior features
Power outlet
■The power outlet can be used when
The engine switch is in the ACC or ON position.
NOTICE
■To avoid damaging the power outlet
Close the power outlet lid when the power outlet is not in use.
Foreign objects or liquids that enter the power outlet may cause a short cir-
cuit.
■ To prevent the fuse from being blown
Do not use an accessory that uses more than 12 V 10 A.
■ To prevent the battery from being discharged
Do not use the power outlet longer than necessary when the engine is not\
running.
The power outlet can be used for 12 V accessories that run on less
than 10 A.
Page 244 of 406

232
3-5. Other interior features
Floor mat
CAUTION
Observe the following precautions.
Failure to do so may cause the driver’s floor mat to slip, possibly interfering
with the pedals while driving. An unexpectedly high speed may result or it may
become difficult to stop the vehicle, leading to a serious accident.
■When installing the driver’s floor mat
●Do not use floor mats designed for other models or different model year
vehicles, even if they are Toyota Genuine floor mats.
● Only use floor mats designed for the driver’s seat.
● Always install the floor mat securely using the retaining hooks (clips) pro-
vided.
● Do not use two or more floor mats on top of each other.
● Do not place the floor mat bottom-side up or upside-down.
■ Before driving
Use only floor mats designed specifically for vehicles of the same
model and model year as your vehic le. Fix them securely in place
onto the carpet.
Fix the floor mat in place using
the retaining hooks (clips) pro-
vided.
For details, refer to the floor
mat retention clip installation
instructions supplied with the
clips.
● Check that the floor mat is securely
fixed in the right place with all the pro-
vided retaining hooks (clips). Be espe-
cially careful to perform this check after
cleaning the floor.
● With the engine stopped and the shift
lever in P (automatic transmission) or N
(manual transmission), fully depress
each pedal to the floor to make sure it
does not interfere with the floor mat.