Page 406 of 592
406 3-7. Other interior features
Press and hold down one of the
buttons on the HomeLink and
the button on the transmitter.
When the indicator light on the
HomeLink
changes from a slow
to a rapid flash after 20 seconds,
you can release both buttons.
Test the operation of the
HomeLink
by pressing the
newly programmed button.
If programming a garage door
opener, check to see if the garage
door opens and closes. If the
garage door does not operate,
see if your garage transmitter is
of the Rolling Code type. Press
and hold the programmed
HomeLink
button. The garage
door has the rolling code feature
if the indicator light (on the
HomeLink
) flashes rapidly for 2
seconds and then remains lit. If
your transmitter is the Rolling
Code type, proceed to the head-
ing “Programming a rolling code
system”.
Repeat the steps above to program another device for each of
the remaining HomeLink buttons.
STEP2
STEP3
STEP4
Page 407 of 592

407
3-7. Other interior features
3
Interior features
■
Programming a Rolling Code sys tem (for U.S.A. owners)
If your device is Rolling Code equipped, follow the steps under the
heading “Programming the HomeLink
” before proceeding with
the steps listed below.
Locate the training button on the ceiling mounted garage door
opener motor. The exact location and color of the button may
vary by brand of garage door opener.
Refer to the operation manual supplied with the garage door opener
for the location of the training button.
Press the training button.
Press and release the vehicle’s programmed HomeLink
but-
ton twice. The garage door may open.
If the garage door opens, the programming process is complete. If
the door does not open, press and release the button a third time.
This third press and release will complete the programming process
by opening the garage door.
The ceiling mounted garage door opener motor should now recog-
nize the HomeLink
transceiver and operate the garage door.
Repeat the steps above to prog ram another rolling code sys-
tem for any of the remaining HomeLink buttons.
■ Programming an entry gate (f or U.S.A. owners)/Programming
all devices in the Canadian market
Place your transmitter 1 to 3 in. (25 to 75 mm) away from the
surface of the HomeLink
.
Keep the indicator light on the HomeLink in view while program-
ming.
Press and hold the selected HomeLink button.
Repeatedly press and releas e (cycle) the device’s remote
control button for two seconds each until step 4 is complete.
When the indicator light on the HomeLink
compatible trans-
ceiver starts to flashing ra pidly, release the buttons.
STEP1
STEP2
STEP3
STEP4
STEP1
STEP2
STEP3
STEP4
Page 408 of 592

408 3-7. Other interior features
Test the operation of the HomeLink by pressing the newly
programmed button. Check to se e if the gate/device operates
correctly.
Repeat the steps above to program another device for each of
the remaining HomeLink
buttons.
■ Programming other devices
To program other devices such as home security systems, home
door locks or lighting, contact your authorized Toyota dealer for
assistance.
■ Reprogramming a button
The individual HomeLink
buttons cannot be erased but can be
reprogrammed. To reprogram a button, follow the programming
instructions.
Operating the HomeLink
Press the appropriate HomeLink button. The HomeLink indicator
light on the HomeLink transceiver should turn on.
The HomeLink continues to send a signal for up to 20 seconds as long
as the button is pressed.
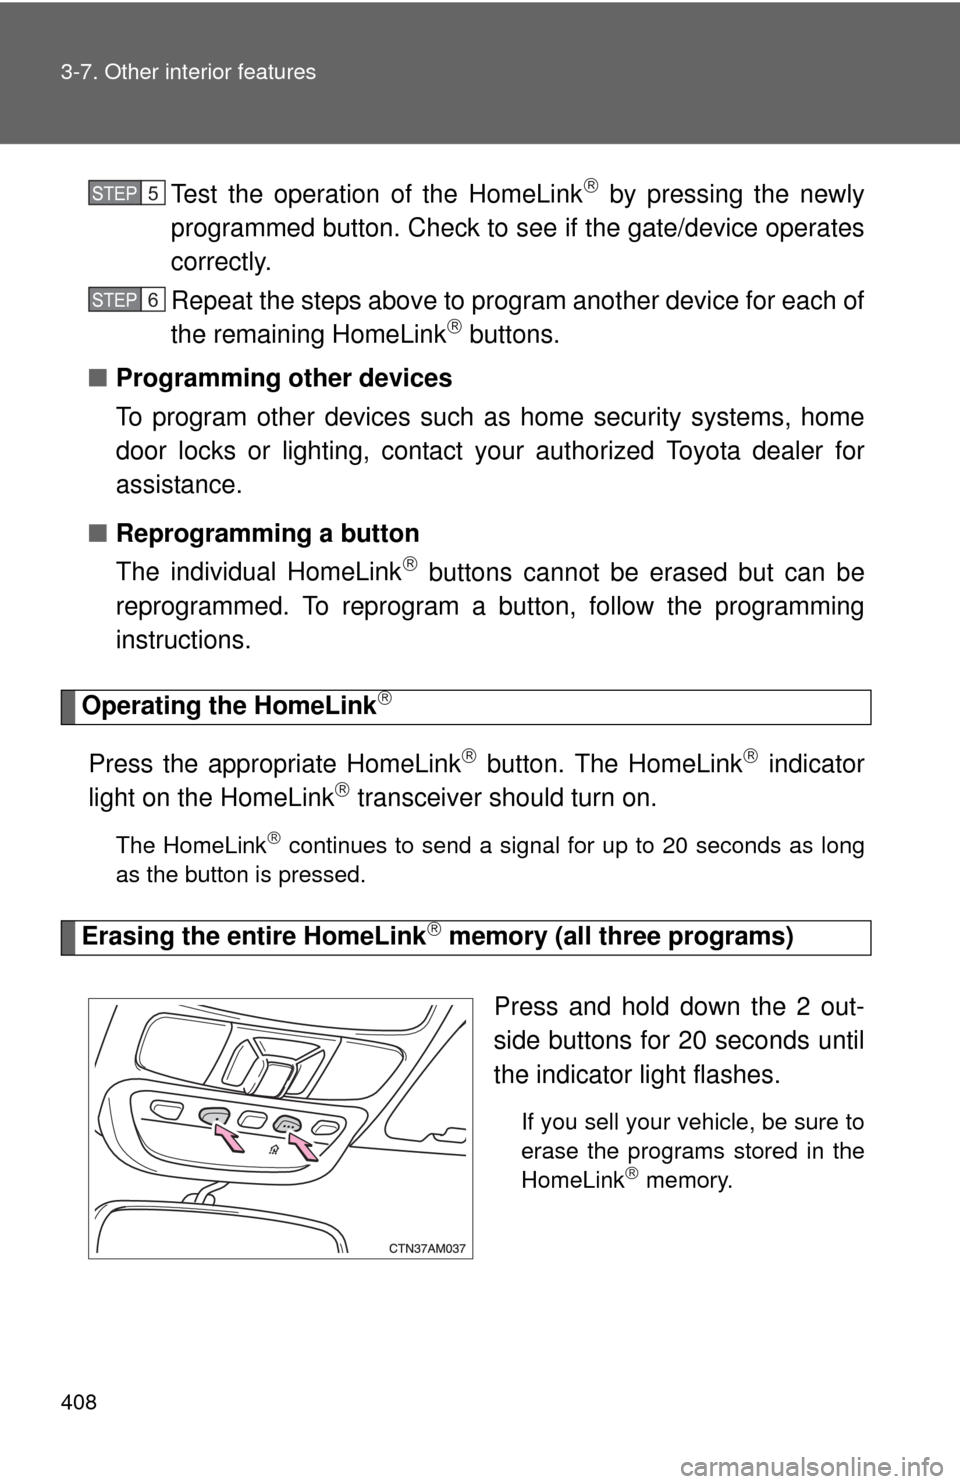
Erasing the entire HomeLink memory (all three programs)
Press and hold down the 2 out-
side buttons for 20 seconds until
the indicator light flashes.
If you sell your vehicle, be sure to
erase the programs stored in the
HomeLink
memory.
STEP5
STEP6
Page 414 of 592
414 3-7. Other interior features
Calibrating the compassThe direction display deviates fr om the true direction determined by
the earth’s magnetic field. The amoun t of deviation varies according
to the geographic position of the vehicle.
If you cross over a map boundary shown in illustration, the compass will
deviate.
To obtain higher precision or perfect calibration, refer to the following.
■Deviation calibration
Stop the vehicle in a level place.
Switch the trip information display to the outside temperature.
( P. 182)
Press and hold both the “MODE”
and “E/M” buttons simulta-
neously for 5 seconds until the
“VAR” indication and a number
(1 to 15) appears on the com-
pass display.
STEP1
STEP2
STEP3
Page 415 of 592
415
3-7. Other interior features
3
Interior features
Press the “E/M” button, and referring to the map above, select
the number of the zone where you are.
If the direction is displayed several seconds after adjustment, the
calibration is complete.
■
Circling calibration
When the direction display may not change after a turn, the com-
pass needs to be calibrated.
Stop the vehicle in a level place where it is safe to drive in a
circle. Press and hold both the “MODE”
and “E/M” buttons simulta-
neously for 10 seconds until the
“CAL” indication appears on the
compass display. (At this time,
the compass display is locked in
“N”.)
Drive the vehicle at 5 mph
(8 km/h) or less in a circle until
“CAL” indicator goes off and the
compass returns to the normal
mode.
If there is not enough space to
drive in a circle, drive around the
block until “CAL” indicator goes
off and the compass returns to
the normal mode.
STEP4
STEP1
STEP2
STEP3