2010 SUZUKI SX4 heater
[x] Cancel search: heaterPage 12 of 297

ILLUSTRATED TABLE OF CONTENTS
80J23-03E
INSTRUMENT PANEL1. Lighting Control Lever (P.2-75)/
Turn Signal Control Lever (P.2-77)
2. Shift Paddles (if equipped) (P.3-14)
3. Front Air Bags (P.2-49)
4. Instrument Cluster (P.2-59)
5. Windshield Wiper and Washer Lever
(P.2-78)/Rear Window Wiper and
Washer Switch (if equipped) (P.2-80)
6. Hazard Warning Switch (P.2-78)
7. Audio (P.5-15)
8. Front Fog Light Switch (if equipped)
(P.2-77)
9. Fuse Box (P.7-36)
10. Engine Hood Release Handle
(P.5-44)
11. Remote Audio Controls (if equipped)
(P.5-37)
12. Ignition Switch (P.3-2)
13. Cruise Control Switch (if equipped)
(P.3-18)
14. Heating and Air Conditioning System
(P.5-1)
15. Accessory Socket (if equipped)
(P.5-47)/Cigarette Lighter
(if equipped) (P.5-47)
16. Heated Rear Window and Heated
Outside Rearview Mirrors Switch
(if equipped) (P.2-81)
17. Glove Box (P.5-49)
18. ESP OFF Switch (if equipped)
(P.3-26)
19. 2WD/i-AWD (intelligent All Wheel
Drive) Switch (if equipped) (P.3-16)
20. Front Seat Heater Switch
(if equipped) (P.2-23)
80J2074
1
9
18
3 2
4
5
6
7
3
12
13
14
15
16
17
10
11
8
19
20
20
EXAMPLE
Page 17 of 297

BEFORE DRIVING
2
80J23-03E
60G404
BEFORE DRIVINGKeys ...................................................................................... 2-1
Door Locks .......................................................................... 2-1
Keyless Start System Remote Controller/
Keyless Entry System Transmitter .................................... 2-6
Theft Deterrent Light ........................................................... 2-17
Windows .............................................................................. 2-17
Mirrors .................................................................................. 2-19
Front Seats .......................................................................... 2-21
Front Seat Heater (if equipped) .......................................... 2-23
Rear Seats ............................................................................ 2-24
Seat Belts and Child Restraint Systems ........................... 2-28
Supplemental Restraint System (air bags) ....................... 2-47
Instrument Cluster .............................................................. 2-59
Warning and Indicator Lights ............................................ 2-60
Speedometer ....................................................................... 2-68
Tachometer .......................................................................... 2-69
Fuel Gauge ........................................................................... 2-69
Temperature Gauge ............................................................ 2-70
Information display ............................................................. 2-70
Lighting Control Lever ........................................................ 2-75
Front Fog Light Switch (if equipped) ................................ 2-77
Turn Signal Control Lever .................................................. 2-77
Hazard Warning Switch ...................................................... 2-78
Windshield Wiper and Washer Lever ................................ 2-78
Tilt Steering Lock Lever (if equipped) ............................... 2-81
Horn ...................................................................................... 2-81
Heated Rear Window and Heated Outside Rearview
Mirrors (if equipped) Switch ............................................... 2-81
Page 40 of 297

2-23BEFORE DRIVING
80J23-03E
80J2012
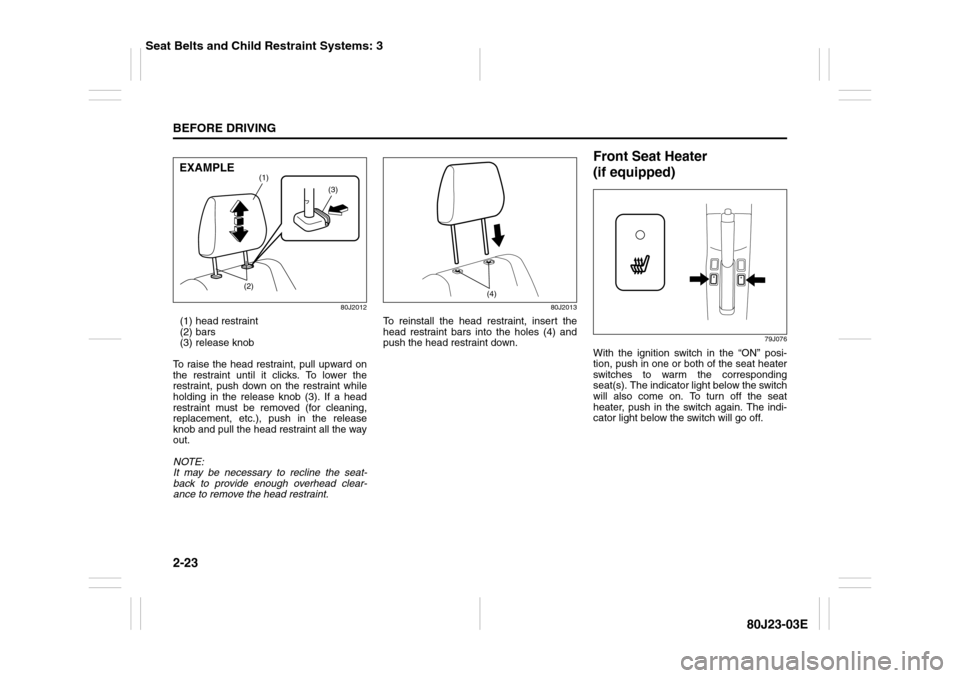
(1) head restraint
(2) bars
(3) release knob
To raise the head restraint, pull upward on
the restraint until it clicks. To lower the
restraint, push down on the restraint while
holding in the release knob (3). If a head
restraint must be removed (for cleaning,
replacement, etc.), push in the release
knob and pull the head restraint all the way
out.
NOTE:
It may be necessary to recline the seat-
back to provide enough overhead clear-
ance to remove the head restraint.
80J2013
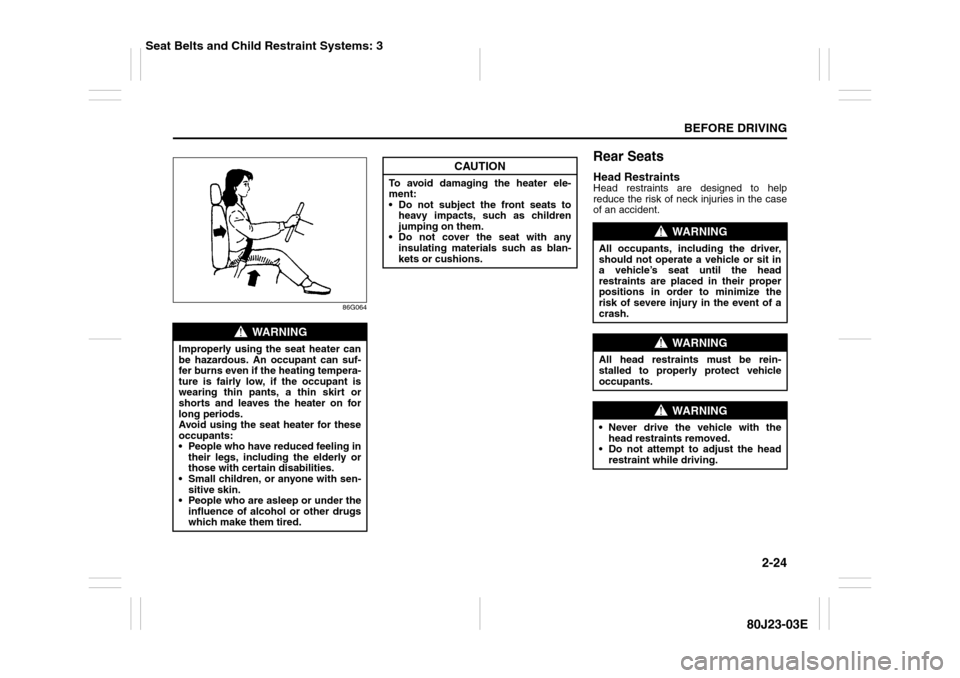
To reinstall the head restraint, insert the
head restraint bars into the holes (4) and
push the head restraint down.
Front Seat Heater
(if equipped)
79J076
With the ignition switch in the “ON” posi-
tion, push in one or both of the seat heater
switches to warm the corresponding
seat(s). The indicator light below the switch
will also come on. To turn off the seat
heater, push in the switch again. The indi-
cator light below the switch will go off.
(3)
(1)
(2)
EXAMPLE
(4)
Seat Belts and Child Restraint Systems: 3
Page 41 of 297

2-24
BEFORE DRIVING
80J23-03E
86G064
Rear SeatsHead RestraintsHead restraints are designed to help
reduce the risk of neck injuries in the case
of an accident.
WARNING
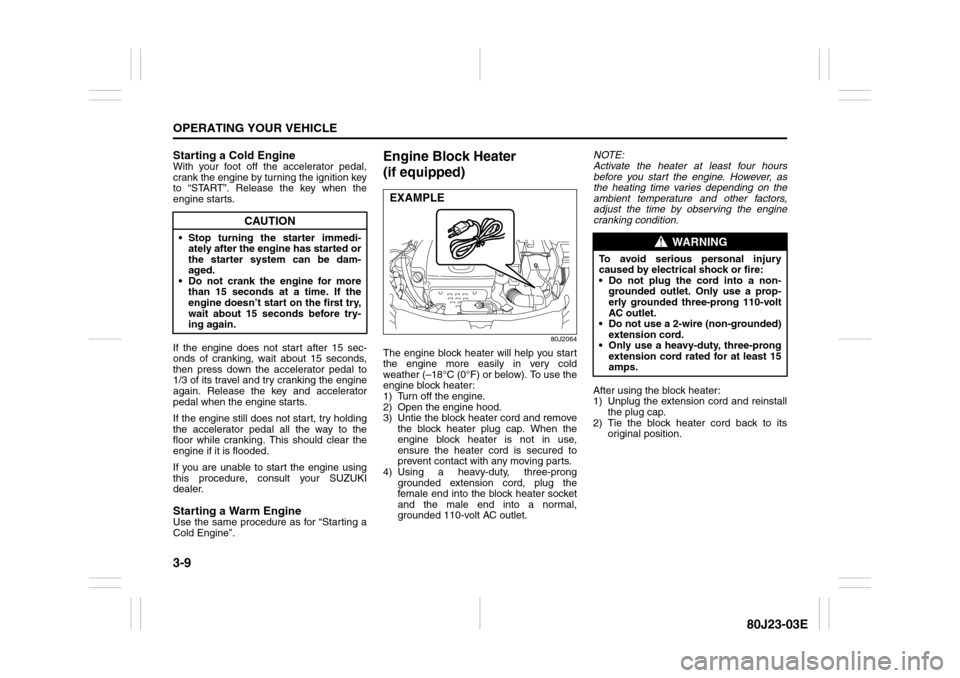
Improperly using the seat heater can
be hazardous. An occupant can suf-
fer burns even if the heating tempera-
ture is fairly low, if the occupant is
wearing thin pants, a thin skirt or
shorts and leaves the heater on for
long periods.
Avoid using the seat heater for these
occupants:
People who have reduced feeling in
their legs, including the elderly or
those with certain disabilities.
Small children, or anyone with sen-
sitive skin.
People who are asleep or under the
influence of alcohol or other drugs
which make them tired.
CAUTION
To avoid damaging the heater ele-
ment:
Do not subject the front seats to
heavy impacts, such as children
jumping on them.
Do not cover the seat with any
insulating materials such as blan-
kets or cushions.
WARNING
All occupants, including the driver,
should not operate a vehicle or sit in
a vehicle’s seat until the head
restraints are placed in their proper
positions in order to minimize the
risk of severe injury in the event of a
crash.
WARNING
All head restraints must be rein-
stalled to properly protect vehicle
occupants.
WARNING
Never drive the vehicle with the
head restraints removed.
Do not attempt to adjust the head
restraint while driving.
Seat Belts and Child Restraint Systems: 3
Page 101 of 297

OPERATING YOUR VEHICLE
3
80J23-03E
60G408
OPERATING YOUR VEHICLEExhaust Gas Warning ......................................................... 3-1
Daily Inspection Checklist .................................................. 3-1
Ignition Switch ..................................................................... 3-2
Parking Brake Lever ........................................................... 3-6
Pedals ................................................................................... 3-7
Starting the Engine ............................................................. 3-8
Engine Block Heater (if equipped) ..................................... 3-9
Using the Transaxle ............................................................ 3-10
Using the 2WD/i-AWD (intelligent All Wheel Drive)
Switch (if equipped) ............................................................ 3-16
Cruise Control (if equipped) ............................................... 3-18
Braking ................................................................................. 3-20
Electronic Stability Program (ESP
®) (if equipped) ........... 3-23
Tire Pressure Monitoring System (TPMS) ........................ 3-26
Page 110 of 297

3-9OPERATING YOUR VEHICLE
80J23-03E
Starting a Cold EngineWith your foot off the accelerator pedal,
crank the engine by turning the ignition key
to “START”. Release the key when the
engine starts.
If the engine does not start after 15 sec-
onds of cranking, wait about 15 seconds,
then press down the accelerator pedal to
1/3 of its travel and try cranking the engine
again. Release the key and accelerator
pedal when the engine starts.
If the engine still does not start, try holding
the accelerator pedal all the way to the
floor while cranking. This should clear the
engine if it is flooded.
If you are unable to start the engine using
this procedure, consult your SUZUKI
dealer.Starting a Warm EngineUse the same procedure as for “Starting a
Cold Engine”.
Engine Block Heater
(if equipped)
80J2064
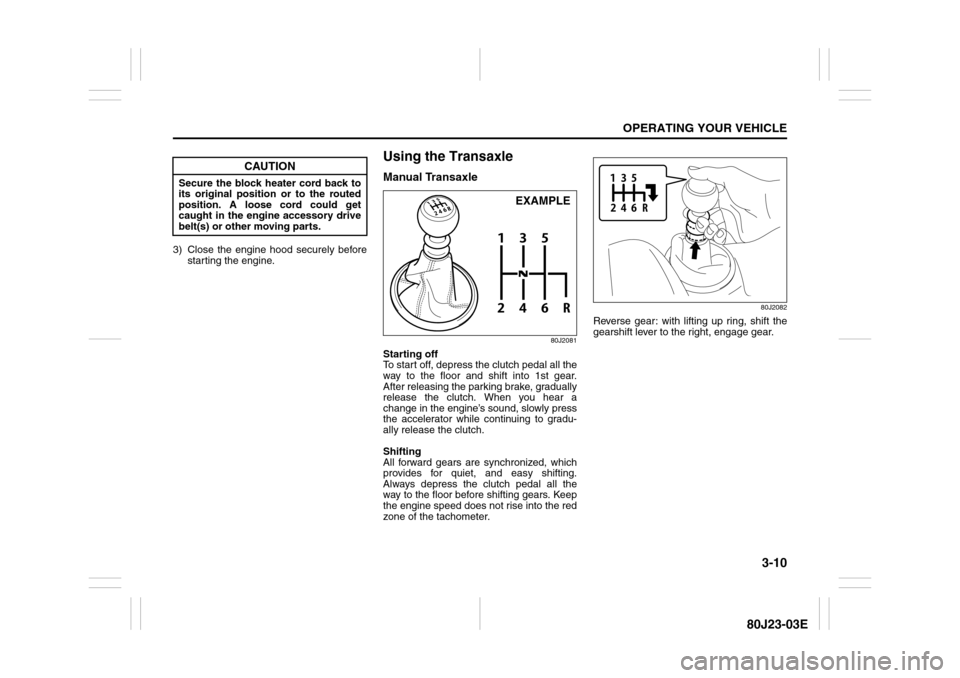
The engine block heater will help you start
the engine more easily in very cold
weather (–18°C (0°F) or below). To use the
engine block heater:
1) Turn off the engine.
2) Open the engine hood.
3) Untie the block heater cord and remove
the block heater plug cap. When the
engine block heater is not in use,
ensure the heater cord is secured to
prevent contact with any moving parts.
4) Using a heavy-duty, three-prong
grounded extension cord, plug the
female end into the block heater socket
and the male end into a normal,
grounded 110-volt AC outlet.NOTE:
Activate the heater at least four hours
before you start the engine. However, as
the heating time varies depending on the
ambient temperature and other factors,
adjust the time by observing the engine
cranking condition.
After using the block heater:
1) Unplug the extension cord and reinstall
the plug cap.
2) Tie the block heater cord back to its
original position.
CAUTION
Stop turning the starter immedi-
ately after the engine has started or
the starter system can be dam-
aged.
Do not crank the engine for more
than 15 seconds at a time. If the
engine doesn’t start on the first try,
wait about 15 seconds before try-
ing again.
EXAMPLE
WARNING
To avoid serious personal injury
caused by electrical shock or fire:
Do not plug the cord into a non-
grounded outlet. Only use a prop-
erly grounded three-prong 110-volt
AC outlet.
Do not use a 2-wire (non-grounded)
extension cord.
Only use a heavy-duty, three-prong
extension cord rated for at least 15
amps.
Page 111 of 297

3-10
OPERATING YOUR VEHICLE
80J23-03E
3) Close the engine hood securely before
starting the engine.
Using the TransaxleManual Transaxle
80J2081
Starting off
To start off, depress the clutch pedal all the
way to the floor and shift into 1st gear.
After releasing the parking brake, gradually
release the clutch. When you hear a
change in the engine’s sound, slowly press
the accelerator while continuing to gradu-
ally release the clutch.
Shifting
All forward gears are synchronized, which
provides for quiet, and easy shifting.
Always depress the clutch pedal all the
way to the floor before shifting gears. Keep
the engine speed does not rise into the red
zone of the tachometer.
80J2082
Reverse gear: with lifting up ring, shift the
gearshift lever to the right, engage gear.
CAUTION
Secure the block heater cord back to
its original position or to the routed
position. A loose cord could get
caught in the engine accessory drive
belt(s) or other moving parts.
EXAMPLE
Page 157 of 297

5-16
OTHER CONTROLS AND EQUIPMENT
80J23-03E
Ty p e 2
80J060
AM/FM/XM 6-CD PLAYER
WITH CD CHANGER CONTROL
Precautions When the inside of the car is very cold
and the player is used soon after switch-
ing on the heater, moisture may form on
the disc or the optical parts of the player
and proper playback may not be possi-
ble. If moisture forms on the disc, wipe it
off with a soft cloth. If moisture forms on
the optical parts of the player, do not use
the player for about one hour. This will
allow the condensation to disappear nor-
mally.
Driving on extremely bumpy roads which
cause severe vibrations may cause
sound to skip.
This unit uses a precision mechanism.
Even in the event that trouble arises,
never open the case, disassemble the
unit, or lubricate the rotating parts.
Please bring the unit to an authorized
SUZUKI dealer or a Clarion service
Department.
Cautions on Handling
52D274
This unit has been designed specifically for
playback of compact discs bearing the
mark (A).
No other discs can be played.
52D275
To remove the compact disc from its stor-
age case, press down on the center of the
case and lift the disc out, holding it care-
fully by the edges.
Always handle the compact disc by the
edges.
Never touch the surface.
(A)
Removing the disc Proper way to hold
the compact disc