2010 SUZUKI SX4 fuel consumption
[x] Cancel search: fuel consumptionPage 87 of 297

2-70
BEFORE DRIVING
80J23-03E
Temperature Gauge
80JM103
When the ignition switch is in the “ON”
position, this gauge indicates the engine
coolant temperature. Under normal driving
conditions, the indicator should stay within
the normal, acceptable temperature range
between “H” and “C”. If the indicator
approaches “H”, overheating is indicated.
Follow the instructions for engine overheat-
ing in the “EMERGENCY SERVICE” sec-
tion.
Information display
80JM104
(1) Trip meter selector knob
(2) Indicator selector knob
(3) Information display
When the ignition switch is in the “ON”
position, the information display shows the
following information.
Display (A)
Instantaneous fuel consumption
Display (B)
Trip meter / Average fuel consumption /
Driving range / Thermometer
Display (C)
Transaxle selector position indicator
(for CVT)
Display (D)
Odometer / Illumination control settingDisplay (E)
Clock (if equipped)
Instantaneous Fuel Consumption
The display (A) shows instantaneous fuel
consumption with a bar graph only when
the vehicle is moving.
80J2026
NOTE:
The display does not show the bar graph
unless the vehicle is moving.
The indicated maximum value of instan-
taneous fuel consumption is 80. No
more than 80 will be indicated on the dis-
play even if the actual instantaneous fuel
consumption is higher.
The indication on the display may be
delayed if fuel consumption is greatly
affected by driving conditions.
The display shows estimated values.
Indications may not be the same as
actual values.
CAUTION
Continuing to drive the vehicle when
engine overheating is indicated can
result in severe engine damage.
(1) (2)(3) (D) (B)(A)
(C)
(E)
EXAMPLE
Page 88 of 297

2-71BEFORE DRIVING
80J23-03E
You can turn off or on the indication of
instantaneous fuel consumption according
to the following instruction.
80J2027
1) Change the display (B) to the driving
range by pushing the indicator selector
knob (2).
80J2028
2) While pushing and holding the trip
meter selector knob (1), turn the indica-
tor selector knob (2) to turn off or on theindication of instantaneous fuel con-
sumption.
NOTE:
When you reconnect the negative (–) ter-
minal to the battery, the indication of the
instantaneous fuel consumption will be
reinitialized. Change the indication again to
your preference.
Trip meter / Average Fuel Consumption /
Driving Range / Thermometer
When the ignition switch is in the “ON”
position, the display (B) shows one of the
following five indications, trip meter A, trip
meter B, average fuel consumption, driving
range or thermometer.
To switch the display indication (B), push
the trip meter selector knob (1) or the indi-
cator selector knob (2) quickly.
80J2029
EXAMPLEEXAMPLE
(Initial
setting)
WARNING
If you attempt to adjust the display
while driving, you could lose control
of the vehicle.
Do not attempt to adjust the display
while driving.
Push the trip meter selector
knob (1).
Push the indicator selector
knob (2).
(a)
(b)
(c)
(d)
(e)EXAMPLE
Page 89 of 297

2-72
BEFORE DRIVING
80J23-03E
(a) Trip meter A
(b) Trip meter B
(c) Average fuel consumption
(d) Driving range
(e) Thermometer
NOTE:
Indications will change when you push
and release a knob.
The display shows estimated values.
Indications may not be the same as
actual values.
Trip meter
The trip meter can be used to measure the
distance traveled on short trips or between
fuel stops.
You can use the trip meter A or trip meter B
independently.
To reset the trip meter to zero, push and
hold the trip meter selector knob (1) for a
while when the display shows the trip
meter.NOTE:
The indicated maximum value of the trip
meter is 9999.9. When you run past the
maximum value, the indicated value will
return to 0.0.
Average fuel consumption
If you selected average fuel consumption
the last time you drove the vehicle, the dis-
play shows the last value of average fuel
consumption from previous driving when
the ignition switch is turned to the “ON”
position. Unless you reset the value of
average fuel consumption, the display indi-
cates the value of average fuel consump-
tion which includes average fuel
consumption during previous driving.
To reset the average fuel consumption to
zero, push and hold the indicator selector
knob (2) for a while when the display
shows the average fuel consumption.
NOTE:
When you reset the indication or reconnect
the negative (–) terminal to the battery, the
value of average fuel consumption will be
shown after driving for a while.Driving range
If you selected driving range the last time
you drove the vehicle, the display indicates
“---” for a few seconds and then indicates
the current driving range when the ignition
switch is turned to the “ON” position.
The driving range shown in the display is
the approximate distance you can drive
until the fuel gauge indicates “E”, based on
current driving conditions.
When the remaining fuel in fuel tank
reaches a low level, the display “---” will
appear.
If the low fuel warning light comes on, fill
the fuel tank immediately regardless of the
value of driving range shown in the display.
As the driving range after refueling is cal-
culated based on the most recent driving
condition, the value is different each time
you refuel.
NOTE:
If you refuel when the ignition switch is in
the “ON” position, the driving range may
not indicate the correct value.
When you reconnect the negative (–) ter-
minal to the battery, the value of driving
range will be shown after driving for a
while.
WARNING
If you attempt to adjust the display
while driving, you could lose control
of the vehicle.
Do not attempt to adjust the display
while driving.
Page 117 of 297

3-16
OPERATING YOUR VEHICLE
80J23-03E
Using the 2WD/i-AWD
(intelligent All Wheel Drive)
Switch (if equipped)
80J009
This i-AWD system enables you to select
the driving mode according to the driving
conditions by operating the 2WD/i-AWD
switch. With this feature, you can select 3
mode positions, “2WD”, “i-AWD AUTO”
and “i-AWD LOCK” by operating the 2WD/
i-AWD switch even when the vehicle is
moving, provided the front wheels are in
the straight ahead position.Description of 3 Mode 4 x 4 System
Positions2WD
In this position, engine power is supplied to
the front axle only. Use this position for
normal driving (on dry, hard surfaces).i-AWD AUTO
In this position, engine power is supplied to
the front and rear axles at normal speed,
providing greater traction than 2-wheel
drive. Use this position for driving on paved
roads or on slippery roads (icy, snow-cov-
ered, muddy, etc.).
In the AUTO mode, the i-AWD controller
judges the driving conditions using signals
from sensors.
When slipping of the front wheels is
detected, the electronically controlled cou-
pling supplies optimum driving force to the
rear wheels. This function improves driving
stability and running through performance
on rough roads and stabilizes driving per-
formance even on a snow covered up-hill
road or the like.
Also, during normal driving on paved
roads, torque distribution to the rear
wheels is reduced to achieve the nearly
front wheel drive condition, thereby fuel
consumption is improved.
i-AWD LOCK
In this position, engine power is supplied to
the front and rear axles at reduced speed.
Use this position when it is hard to start off
in the “i-AWD AUTO” mode such as in
mud, sand or on snow.
NOTE:
Avoid operating your vehicle in the “i-
AWD LOCK” on wet pavement as much
as possible. Operating your vehicle in
the “i-AWD LOCK” on wet pavementmay cause severe damage to the drive
train.
As the vehicle speed increases, the “i-
AWD LOCK” mode is automatically can-
celed and the “i-AWD AUTO” mode is
selected.
When the ignition switch is turned to the
“OFF” position, the “i-AWD LOCK” mode
is canceled.
2WD/i-AWD Switch OperationOperate the 2WD/i-AWD switch according
to the appropriate procedure described
below:
How to turn on 2WD/i-AWD switch
2WD/i-AWD switch will activate when the
ignition switch is turned on.
From 2WD to i-AWD AUTO
Turn the 2WD/i-AWD switch to the neutral
position, and the “i-AWD AUTO” indicator
will come on.
79J040
Page 118 of 297

3-17OPERATING YOUR VEHICLE
80J23-03E
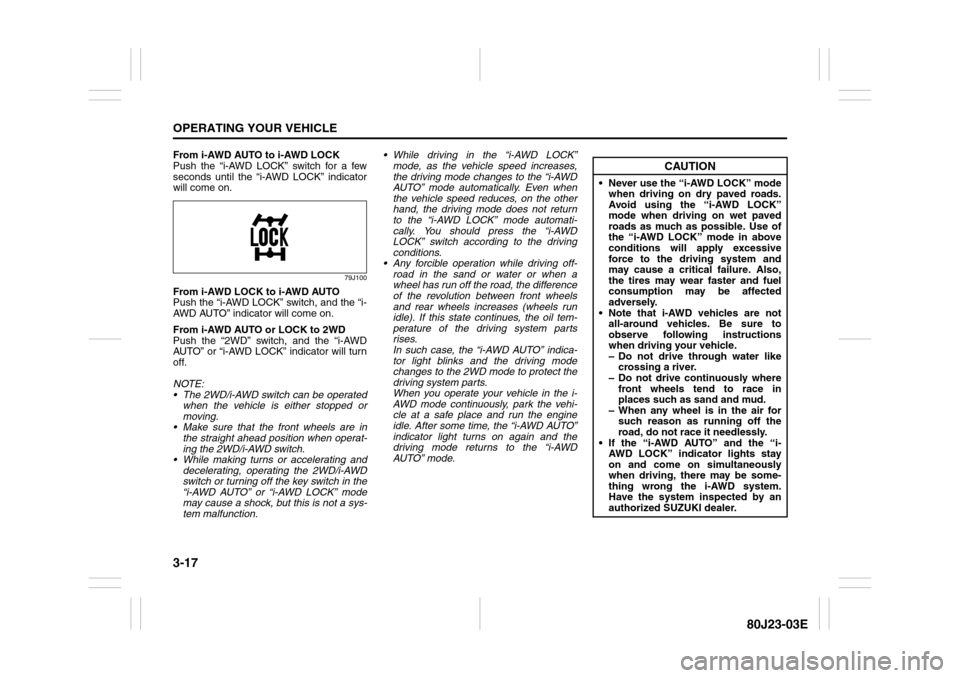
From i-AWD AUTO to i-AWD LOCK
Push the “i-AWD LOCK” switch for a few
seconds until the “i-AWD LOCK” indicator
will come on.
79J100
From i-AWD LOCK to i-AWD AUTO
Push the “i-AWD LOCK” switch, and the “i-
AWD AUTO” indicator will come on.
From i-AWD AUTO or LOCK to 2WD
Push the “2WD” switch, and the “i-AWD
AUTO” or “i-AWD LOCK” indicator will turn
off.
NOTE:
The 2WD/i-AWD switch can be operated
when the vehicle is either stopped or
moving.
Make sure that the front wheels are in
the straight ahead position when operat-
ing the 2WD/i-AWD switch.
While making turns or accelerating and
decelerating, operating the 2WD/i-AWD
switch or turning off the key switch in the
“i-AWD AUTO” or “i-AWD LOCK” mode
may cause a shock, but this is not a sys-
tem malfunction. While driving in the “i-AWD LOCK”
mode, as the vehicle speed increases,
the driving mode changes to the “i-AWD
AUTO” mode automatically. Even when
the vehicle speed reduces, on the other
hand, the driving mode does not return
to the “i-AWD LOCK” mode automati-
cally. You should press the “i-AWD
LOCK” switch according to the driving
conditions.
Any forcible operation while driving off-
road in the sand or water or when a
wheel has run off the road, the difference
of the revolution between front wheels
and rear wheels increases (wheels run
idle). If this state continues, the oil tem-
perature of the driving system parts
rises.
In such case, the “i-AWD AUTO” indica-
tor light blinks and the driving mode
changes to the 2WD mode to protect the
driving system parts.
When you operate your vehicle in the i-
AWD mode continuously, park the vehi-
cle at a safe place and run the engine
idle. After some time, the “i-AWD AUTO”
indicator light turns on again and the
driving mode returns to the “i-AWD
AUTO” mode.
CAUTION
Never use the “i-AWD LOCK” mode
when driving on dry paved roads.
Avoid using the “i-AWD LOCK”
mode when driving on wet paved
roads as much as possible. Use of
the “i-AWD LOCK” mode in above
conditions will apply excessive
force to the driving system and
may cause a critical failure. Also,
the tires may wear faster and fuel
consumption may be affected
adversely.
Note that i-AWD vehicles are not
all-around vehicles. Be sure to
observe following instructions
when driving your vehicle.
– Do not drive through water like
crossing a river.
– Do not drive continuously where
front wheels tend to race in
places such as sand and mud.
– When any wheel is in the air for
such reason as running off the
road, do not race it needlessly.
If the “i-AWD AUTO” and the “i-
AWD LOCK” indicator lights stay
on and come on simultaneously
when driving, there may be some-
thing wrong the i-AWD system.
Have the system inspected by an
authorized SUZUKI dealer.
Page 136 of 297

4-3DRIVING TIPS
80J23-03E
60A183S
Keep the air cleaner clean
If the air cleaner is clogged with dust, there
will be greater intake resistance, resulting
in decreased power output and increased
fuel consumption.
Keep weight to a minimum
The heavier the load, the more fuel the
vehicle consumes. Take out any luggage
or cargo when it is not necessary.
Keep tire pressure correct
Underinflation of the tires can waste fuel
due to increased running resistance of the
tires. Keep your tires inflated to the correct
pressure shown on the label located below
the driver’s side door latch striker.
Highway DrivingWhen driving at highway speeds, pay
attention to the following:
Stopping distance progressively
increases with vehicle speed. Apply the
brakes far enough ahead of the stopping
point to allow for the extra stopping dis-
tance.
On rainy days, “Hydroplaning” can occur.
“Hydroplaning” is the loss of direct con-
tact between the road surface and the
vehicle’s tires due to a water film forming
between them. Steering or braking the
vehicle while “Hydroplaning” can be very
difficult, and loss of control can occur.
Keep speed down when the road surface
is wet.
At high speeds, the vehicle may be
affected by side winds. Therefore,
reduce speed and be prepared for unex-
pected buffeting, which can occur at the
exits of tunnels, when passing by a cut of
a hill, or when being overtaken by large
vehicles, etc.
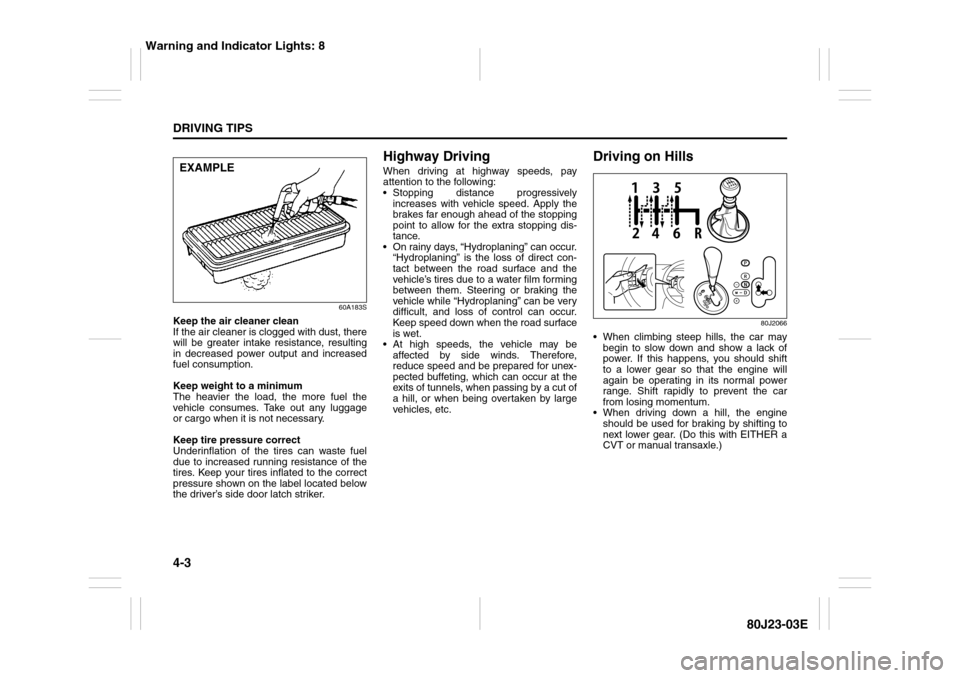
Driving on Hills
80J2066
When climbing steep hills, the car may
begin to slow down and show a lack of
power. If this happens, you should shift
to a lower gear so that the engine will
again be operating in its normal power
range. Shift rapidly to prevent the car
from losing momentum.
When driving down a hill, the engine
should be used for braking by shifting to
next lower gear. (Do this with EITHER a
CVT or manual transaxle.)
EXAMPLE
Warning and Indicator Lights: 8
Page 221 of 297

7-16
INSPECTION AND MAINTENANCE
80J23-03E
Coolant ReplacementSince special procedures are required, we
recommend you take your vehicle to your
SUZUKI dealer for coolant replacement.
Air Cleaner
80J2056
If the air cleaner is clogged with dust, there
will be greater intake resistance, resulting
in decreased power output and increased
fuel consumption.
Unclamp the side clamps, and remove the
element from the air cleaner case. If it
appears to be dirty, replace it with a new
one.
Spark PlugsYou should inspect spark plugs periodically
for carbon deposits. When carbon accu-
mulates on a spark plug, a strong spark
may not be produced. Remove carbon
deposits with a wire or pin and adjust the
spark plug gap.
To access the spark plugs,
80J2069
1) Remove the air cleaner inlet hose (1).
Remove the front part (2), then remove
the rear part (3) of the air cleaner case.
CAUTION
SUZUKI LLC: Standard (Green)
coolant;
The mixture you use should con-
tain 50% concentration of anti-
freeze.
If the lowest ambient temperature
in your area is expected to be
–35°C (–31°F) or below, use higher
concentrations up to 60% following
the instructions on the antifreeze
container.
CAUTION
When putting the cap on the reser-
voir tank, line up the mark on the cap
and the mark on the tank. Failure to
follow this can result in coolant leak-
age.
CAUTION
The air cleaner element should be
replaced every 50000 km (30000
miles). More frequent replacement is
necessary when you drive under
dusty conditions.
CAUTION
When remove the engine cover, make
sure the cover does not interfere the
vehicle to avoid damage to the cover.
(1) (2)(3)
Page 291 of 297

13-1
INDEX
13
80J23-03E
INDEXSymbols“CRUISE” Indicator Light.................................................... 2-66
“ESP OFF” Indicator Light ......................................... 2-63, 3-25
“ESP” (Electronic Stability Program) Warning Light ....... 2-63
“ESP” Warning Light ........................................................... 3-25
“SET” Indicator Light .......................................................... 2-66AAccelerator Pedal .................................................................. 3-8
Accessory Socket ................................................................ 5-47
Adding Coolant .................................................................... 7-15
Adjusting Seat Position ...................................................... 2-21
Adjusting Seatbacks ........................................................... 2-22
AIR BAG Light ...................................................................... 2-65
Air Cleaner............................................................................ 7-16
Air Conditioning System ..................................................... 7-50
All Seat Belts ........................................................................ 2-31
Anti-Lock Brake System (ABS) .......................................... 3-21
Anti-Lock Brake System (ABS) Warning Light ................. 2-62
Anti-Lock Braking System (ABS) ....................................... 3-24
Armrest ................................................................................. 5-51
Assist Grips.......................................................................... 5-48
Audio Systems ..................................................................... 5-15
Automatic Heating and Air Conditioning System
(Climate Control).................................................................... 5-9
Automatic Locking Retractor (ALR)................................... 2-30
Average fuel consumption.................................................. 2-72BBasic Operations ................................................................. 5-18
Battery .................................................................................. 7-35Brake Assist System............................................................ 3-21
Brake Fluid............................................................................ 7-21
Brake Pedal.................................................................... 3-8, 7-22
Brake System Warning Light .............................................. 2-61
Brakes ................................................................................... 7-21
Braking .................................................................................. 3-20
Break-In ................................................................................... 4-1
Bulb Replacement ................................................................ 7-40
CCatalytic Converter ................................................................ 4-1
Changing Engine Oil and Filter........................................... 7-12
Changing Wheels ................................................................... 8-4
Charging Light...................................................................... 2-64
Child Lock System (rear doors) ............................................ 2-3
Child Restraint Systems ...................................................... 2-36
Cigarette Lighter and Ashtray............................................. 5-47
Clock ..................................................................................... 2-75
Clutch Pedal .................................................................. 3-8, 7-19
Compact Spare Tire ............................................................. 7-31
Continuously Variable Transaxle (CVT) ............................. 3-11
Continuously Variable Transaxle (CVT) Fluid ................... 7-20
Coolant Level Check ............................................................ 7-15
Coolant Replacement .......................................................... 7-16
Corrosion Prevention ............................................................ 9-1
Cruise Control ...................................................................... 3-18
Cup Holder and Storage Area ............................................. 5-49DDaily Inspection Checklist..................................................... 3-1
Daytime Running Light (D.R.L.) Indicator Light ................ 2-68
Daytime Running Light (D.R.L.) System ............................ 2-76
Door Locks ............................................................................. 2-1