2010 SUZUKI SX4 light
[x] Cancel search: lightPage 120 of 297
3-19OPERATING YOUR VEHICLE
80J23-03E
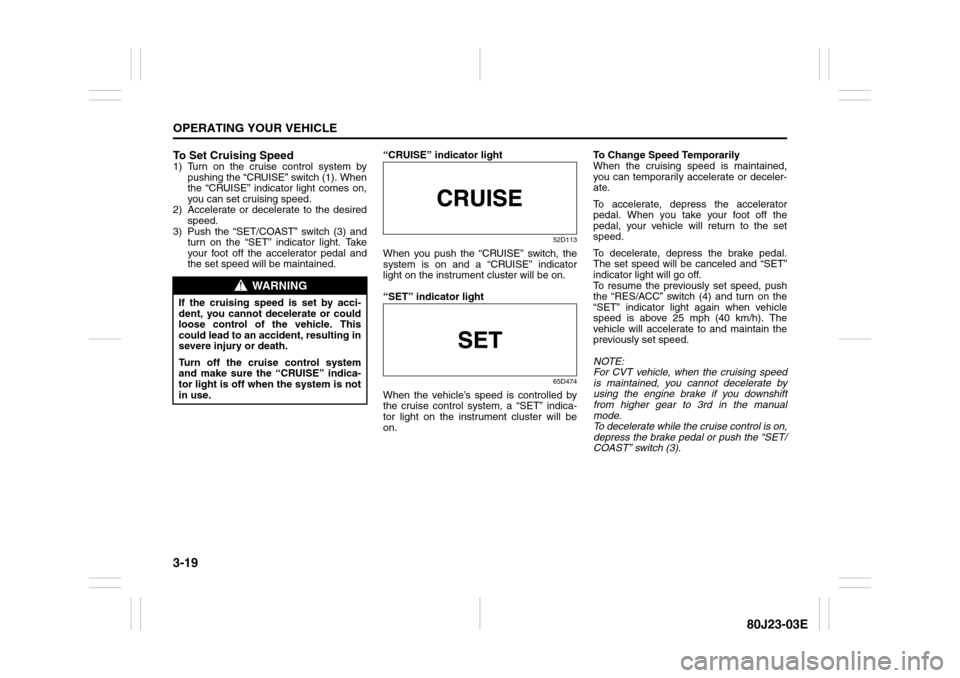
To Set Cruising Speed1) Turn on the cruise control system by
pushing the “CRUISE” switch (1). When
the “CRUISE” indicator light comes on,
you can set cruising speed.
2) Accelerate or decelerate to the desired
speed.
3) Push the “SET/COAST” switch (3) and
turn on the “SET” indicator light. Take
your foot off the accelerator pedal and
the set speed will be maintained.“CRUISE” indicator light
52D113
When you push the “CRUISE” switch, the
system is on and a “CRUISE” indicator
light on the instrument cluster will be on.
“SET” indicator light
65D474
When the vehicle’s speed is controlled by
the cruise control system, a “SET” indica-
tor light on the instrument cluster will be
on.To Change Speed Temporarily
When the cruising speed is maintained,
you can temporarily accelerate or deceler-
ate.
To accelerate, depress the accelerator
pedal. When you take your foot off the
pedal, your vehicle will return to the set
speed.
To decelerate, depress the brake pedal.
The set speed will be canceled and “SET”
indicator light will go off.
To resume the previously set speed, push
the “RES/ACC” switch (4) and turn on the
“SET” indicator light again when vehicle
speed is above 25 mph (40 km/h). The
vehicle will accelerate to and maintain the
previously set speed.
NOTE:
For CVT vehicle, when the cruising speed
is maintained, you cannot decelerate by
using the engine brake if you downshift
from higher gear to 3rd in the manual
mode.
To decelerate while the cruise control is on,
depress the brake pedal or push the “SET/
COAST” switch (3).
WARNING
If the cruising speed is set by acci-
dent, you cannot decelerate or could
loose control of the vehicle. This
could lead to an accident, resulting in
severe injury or death.
Turn off the cruise control system
and make sure the “CRUISE” indica-
tor light is off when the system is not
in use.
Page 121 of 297
3-20
OPERATING YOUR VEHICLE
80J23-03E
To Change Cruising Speed
Using the accelerator pedal
To reset at a faster cruising speed, acceler-
ate to the desired speed using the acceler-
ator pedal and push the “SET/COAST”
switch (3). The new speed will be main-
tained.
Using the brake pedal
To reset at a slower cruising speed, decel-
erate to the desired speed using the brake
pedal and push the “SET/COAST” switch
(3). The new speed will be maintained.
NOTE:
When the brake pedal is depressed, the
“SET” indicator light goes off until reset the
cruising speed.
Using the cruise control switch
To reset at a faster cruising speed, press
repeatedly or hold in the “RES/ACC”
switch (4). Vehicle speed will steadily
increase. When you release the switch, the
new speed will be maintained.
To reset at a slower cruising speed, press
repeatedly or hold in the “SET/COAST”
switch (3) until the vehicle has slowed to
the desired speed, then release the switch.
The new speed will be maintained.
NOTE:
You can adjust the set speed by approxi-
mately 1.0 mph (1.6 km/h) by pushing a
cruise control switch quickly.Cancellation of the Cruise Control
The “SET” indicator light will go off and the
cruise control will be canceled temporarily
with following procedures:
Push the “CANCEL” switch (2).
Depress the brake pedal.
For manual transaxle, depress the clutch
pedal.
For CVT, downshift from 3rd to 2nd in the
manual mode.
The vehicle speed falls more than about
20 percent from the set speed.
Any time the vehicle speed falls below
25 mph (40 km/h).
When the vehicle skids and ESP
® (if
equipped) is activated.
To resume the previously set speed, push
the “RES/ACC” switch (4) and turn on the
“SET” indicator light. Besides, the vehicle
speed has to be above 25 mph (40 km/h)
when the vehicle is not in the above condi-
tions.
To turn off the cruise control system, push
the “CRUISE” switch (1) and make sure
the “CRUISE” indicator light is off.
Also, if the malfunction indicator light in the
instrument cluster comes on or blinks, the
cruise control system will be turned off.
NOTE:
If you turn off the cruise control system, the
previously set speed in the memory is
cleared. Reset your cruising speed again.
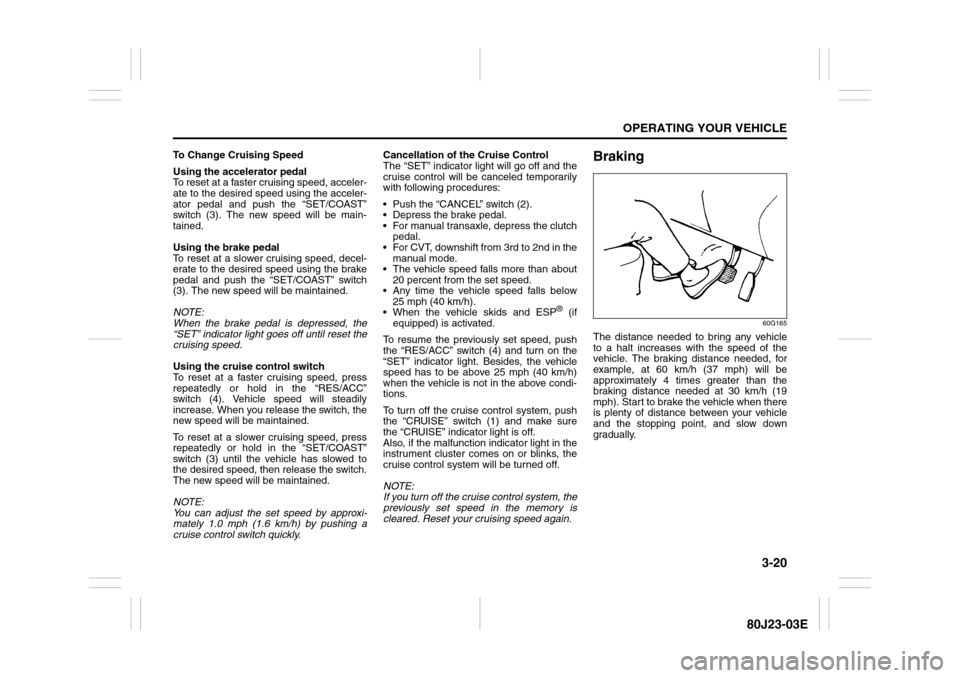
Braking
60G165
The distance needed to bring any vehicle
to a halt increases with the speed of the
vehicle. The braking distance needed, for
example, at 60 km/h (37 mph) will be
approximately 4 times greater than the
braking distance needed at 30 km/h (19
mph). Start to brake the vehicle when there
is plenty of distance between your vehicle
and the stopping point, and slow down
gradually.
Page 123 of 297
3-22
OPERATING YOUR VEHICLE
80J23-03E
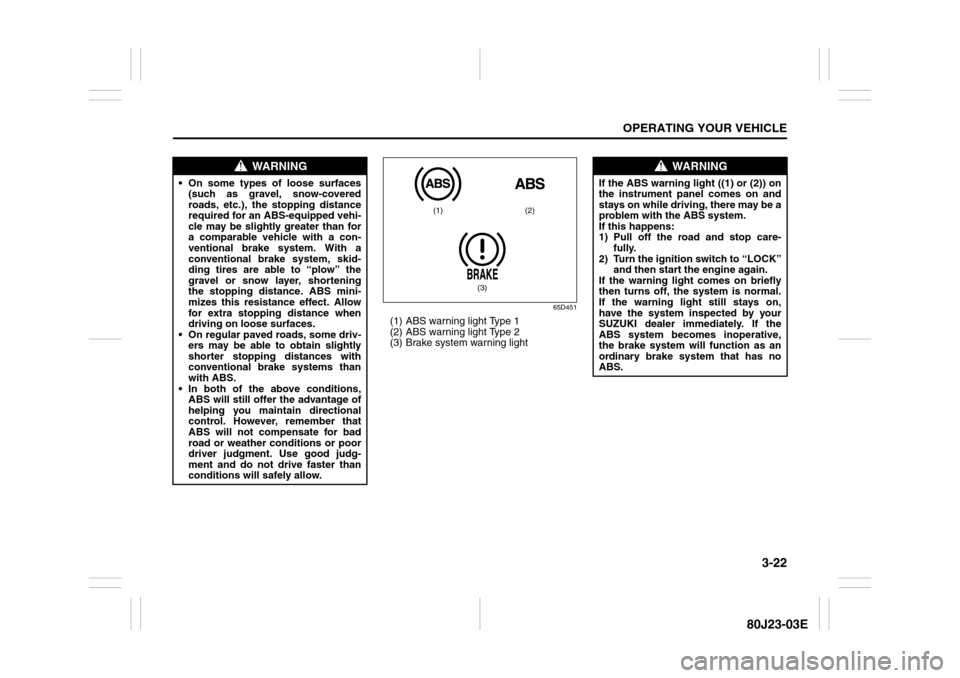
65D451
(1) ABS warning light Type 1
(2) ABS warning light Type 2
(3) Brake system warning light
WARNING
On some types of loose surfaces
(such as gravel, snow-covered
roads, etc.), the stopping distance
required for an ABS-equipped vehi-
cle may be slightly greater than for
a comparable vehicle with a con-
ventional brake system. With a
conventional brake system, skid-
ding tires are able to “plow” the
gravel or snow layer, shortening
the stopping distance. ABS mini-
mizes this resistance effect. Allow
for extra stopping distance when
driving on loose surfaces.
On regular paved roads, some driv-
ers may be able to obtain slightly
shorter stopping distances with
conventional brake systems than
with ABS.
In both of the above conditions,
ABS will still offer the advantage of
helping you maintain directional
control. However, remember that
ABS will not compensate for bad
road or weather conditions or poor
driver judgment. Use good judg-
ment and do not drive faster than
conditions will safely allow.
(1) (2)
(3)
WARNING
If the ABS warning light ((1) or (2)) on
the instrument panel comes on and
stays on while driving, there may be a
problem with the ABS system.
If this happens:
1) Pull off the road and stop care-
fully.
2) Turn the ignition switch to “LOCK”
and then start the engine again.
If the warning light comes on briefly
then turns off, the system is normal.
If the warning light still stays on,
have the system inspected by your
SUZUKI dealer immediately. If the
ABS system becomes inoperative,
the brake system will function as an
ordinary brake system that has no
ABS.
Page 124 of 297
3-23OPERATING YOUR VEHICLE
80J23-03E
How the ABS WorksA computer continuously monitors wheel
speed. The computer compares the
changes in wheel speed when braking. If
the wheels slow suddenly, indicating a
skidding situation, the computer will
change braking pressure several times
each second to prevent the wheels from
locking. When you start your vehicle or
when you accelerate after a hard stop, you
may hear a momentary motor or clicking
noise as the system resets or checks itself.
Electronic Stability Program
(ESP
®) (if equipped)
ESP
® is a registered trademark of Daimler
AG.
The Electronic Stability Program (ESP
®)
helps to control the vehicle during corner-
ing if front wheels or rear wheels skid. It
also assists you in maintaining traction
while accelerating on loose or slippery
road surfaces. It does this by regulating the
engine’s output, and by selectively apply-
ing the brakes. In addition, ESP
® helps to
avoid skidding by controlling braking pres-
sure.
WARNING
If the ABS warning light ((1) or (2))
and the Brake system warning light
(3) on the instrument panel simulta-
neously stay on or come on when
driving, both anti-lock function and
rear brake force control function (pro-
portioning valve function) of the ABS
system may have failed. This could
cause the rear wheels to skid or the
vehicle to spin during braking on a
slippery road or hard braking on a
dry paved road. If both warning lights
come on, drive carefully, avoiding
hard braking as much as possible,
and ask your SUZUKI dealer to
inspect the ABS system immediately.
WARNING
The ABS may not work properly if
tires or wheels other than those
specified in the owner’s manual are
used. This is because the ABS works
by comparing changes in wheel
speed. When replacing tires or
wheels, use only the size and type
specified in this owner’s manual.
WARNING
The ESP
® cannot enhance the vehi-
cle’s driving stability in all situations
and does not control your vehicle’s
entire braking system. The ESP
® can-
not prevent accidents, including
those resulting from excessive speed
in turns, or hydroplaning. Only a safe
and attentive driver can prevent acci-
dents. The capabilities of an ESP
®-
equipped vehicle must never be used
as a substitute for careful driving.
Page 126 of 297
3-25OPERATING YOUR VEHICLE
80J23-03E
The ESP
® indicator lights are described
below:
SLIP Indicator Light
52KM133
When one of the ESP
® systems other than
ABS is activated, the SLIP indicator light in
the instrument cluster blinks 5 times per
second.
NOTE:
When the SLIP indicator light comes on
and stays on while driving, indicating a
malfunction of the ESP® systems (other
than ABS), the brake system will function
as an ordinary ABS with no additional
ESP
® functions.NOTE:
When you disconnect and re-connect the
battery, ESP
® system functions other than
ABS will be deactivated and the slip indica-
tor light will blink 1 time per second. In this
case, use the following procedure to re-
activate the ESP
® systems:
1) Drive your vehicle straight ahead with-
out tire slippage at a speed until the slip
indicator is turned off. (Drive straight for
approximately 35 km/h (22 mph) or
more and 10 seconds or more.)
2) The slip indicator light will go out and
the ESP
® systems (other than ABS) will
be re-activated.
It may take more than few seconds before
the slip indicator light goes out depending
on the road surface condition.
“ESP” Warning Light
66J031
When the ESP
® systems (other than ABS)
have a system malfunction, the “ESP”
warning light in the instrument cluster
comes on.NOTE:
When the “ESP” warning light comes on,
or stays on while driving, indicating a mal-
function of the ESP
® systems (other than
ABS), the brake system will function as an
ordinary ABS that has no additional ESP
®
functions.“ESP OFF” Indicator Light
66J032
You should turn the ESP
® on during your
ordinary driving, so that you have the ben-
efits of all of the ESP
® systems.
It may be required to turn the ESP
® sys-
tems (other than ABS) off if your vehicle is
stuck in sand, mud, or snow, where wheel
spin is necessary.
CAUTION
If the SLIP indicator light comes on
and stays on while driving, there may
be a malfunction of the ESP
® sys-
tems (other than ABS). You should
have the systems inspected by an
authorized SUZUKI dealer.
CAUTION
If the “ESP” warning light comes on,
or stays on while driving, there may
be a malfunction of the ESP
® sys-
tems (other than ABS). You should
have the systems inspected by an
authorized SUZUKI dealer.
Page 127 of 297

3-26
OPERATING YOUR VEHICLE
80J23-03E
“ESP OFF” switch
62J142
When the “ESP OFF” switch located at the
center console is pushed and held to turn
off the ESP
® systems (other than ABS),
the “ESP OFF” indicator light in the instru-
ment cluster comes on.
When you have turned the ESP
® systems
(other than ABS) off, make sure to turn
them back on before resuming ordinary
driving.
When you push the “ESP OFF” switch
again, the “ESP OFF” indicator light will go
out and all of the ESP
® systems will be
activated.
ABS Warning Light / Brake System
Warning LightSee “Braking” in the “OPERATING YOUR
VEHICLE” section.
Tire Pressure Monitoring
System (TPMS)The tire pressure monitoring system is
designed to alert you when one or more of
the tires on your vehicle is significantly
under-inflated. A Tire Pressure Monitoring
System (TPMS) sensor containing a
unique identification code is mounted on
each wheel. The TPMS sensors transmit
tire pressure signals to a central receiver
which relays the information to a tire pres-
sure monitoring system controller. When
the inflation pressure of one or more tires
indicates significant under-inflation, the low
tire pressure warning light shown below
comes on.
Low Tire Pressure Warning Light
52D305
WARNING
Each tire, including the spare (if pro-
vided), should be checked monthly
when cold and inflated to the inflation
pressure recommended by the vehi-
cle manufacturer on the vehicle plac-
ard or tire inflation pressure label. (If
your vehicle has tires of a different
size than the size indicated on the
vehicle placard or tire inflation pres-
sure label, you should determine the
proper tire inflation pressure for
those tires.)
As an added safety feature, your
vehicle has been equipped with a tire
pressure monitoring system (TPMS)
that illuminates a low tire pressure
telltale when one or more of your
tires is significantly under-inflated.
Accordingly, when the low tire pres-
sure telltale illuminates, you should
stop and check your tires as soon as
possible, and inflate them to the
proper pressure.
(Continued)
Page 128 of 297

3-27OPERATING YOUR VEHICLE
80J23-03E
WARNING
(Continued)
Driving on a significantly under-
inflated tire causes the tire to over-
heat and can lead to tire failure.
Under-inflation also reduces fuel effi-
ciency and tire tread life, and may
affect the vehicle’s handling and
stopping ability.
Please note that the TPMS is not a
substitute for proper tire mainte-
nance, and it is the driver’s responsi-
bility to maintain correct tire
pressure, even if under-inflation has
not reached the level to trigger illumi-
nation of the TPMS low tire pressure
telltale.
WARNING
The tire pressure monitoring system
is not a substitute for regular tire
pressure inspections. Check tire
inflation pressures monthly when
cold and set to the recommended
inflation pressure as specified on the
vehicle’s tire information placard and
in the owner’s manual. Refer to
“Tires” in the “INSPECTION AND
MAINTENANCE” section.
WARNING
If the low tire pressure warning light
does not come on when the ignition
is turned to the “ON” position, or
comes on and blinks while driving
there may be a problem with the tire
pressure monitoring system. Have
your vehicle inspected by an autho-
rized SUZUKI dealer. Even if the light
turns off after blinking, indicating
that the monitoring system has
recovered, make sure to have an
authorized SUZUKI dealer check the
system.
WARNING
The load rating of your tires is
reduced at lower inflation pressures.
If your tires become even moderately
under-inflated, the vehicle load may
exceed the load rating of the tires,
which can lead to tire failure. The low
tire pressure warning light will not
alert you of this condition. The warn-
ing light will only come on when one
or more of your tires become signifi-
cantly under-inflated. Check and
adjust your tire inflation pressure at
least once a month. Refer to “Tires”
in the “INSPECTION AND MAINTE-
NANCE” section.
WARNING
If the low tire pressure warning light
comes on and stays on, reduce your
speed and avoid abrupt steering and
braking. Stop in a safe place as soon
as possible and check your tires.
If you have a flat tire, replace it with
the spare tire. Refer to “Jacking
Instructions” in the “EMERGENCY
SERVICE” section. Refer to
“Replacing Tires and/or Wheels”
for instructions on how to restore
normal operation of the tire pres-
sure monitoring system after you
have had a flat tire.
If one or more of your tires is
under-inflated adjust the inflation
pressure in all of your tires to the
recommended inflation pressure as
soon as possible.
Be aware that driving on a signifi-
cantly under-inflated tire can cause
the tire to overheat and can lead to
tire failure, and may affect steering
control and brake effectiveness. This
could lead to an accident, resulting in
severe injury or death.
Page 129 of 297

3-28
OPERATING YOUR VEHICLE
80J23-03E
The low tire pressure warning light can
come on due to normal causes such as
natural air leaks and pressure changes
caused by changes in temperature or
atmospheric pressure. Adjusting the air
pressure in the tires to the pressure shown
on the tire information placard should
cause the low tire pressure warning light to
turn off.
If the light turns on again shortly after
adjusting the pressure in your tires, you
may have a flat tire. If you have a flat tire,
replace it with the spare tire. Refer to
“Jacking Instructions” in the “EMER-
GENCY SERVICE” section. Refer to
“Replacing Tires and/or Wheels” for
instructions on how to restore normal oper-
ation of the tire pressure monitoring sys-
tem after you have had a flat tire.
NOTE:
When the tire inflation pressure is
adjusted in high altitude areas, the low
tire pressure light may not turn off even
after tire inflation pressure adjustment.
In this case, adjust the inflation pressure
to a slightly higher pressure than is
shown on the tire information placard.
The low tire pressure warning light may
turn off temporarily after coming on. This
could be due to surface temperature
increases after long distance driving or
traveling to a high temperature area.
Even if the tire pressure warning lightturns off after coming on, make sure to
check the inflation pressure of all tires.
To reduce the chance that the low tire
pressure warning light will come on due
to normal changes in temperature and
atmospheric pressure, it is important to
check and adjust the tire pressures
when the tires are cold. Tires that
appear to be at the specified pressure
when checked after driving, when the
tires are warm, could have pressure
below the specification when the tires
cool down. Also, tires that are inflated to
the specified pressure in a warm garage
may have pressure below the specifica-
tion when the vehicle is driven outside in
very cold temperature. If you adjust the
tire pressure in a garage that is warmer
than the outside temperature, you
should add 1 psi to the recommended
cold tire inflation pressure for every 10°F
difference between garage temperature
and outside temperature.
For tire inflation pressure information, refer
to “Tire Inflation Pressure” in the “INSPEC-
TION AND MAINTENANCE” section.
TPMS Malfunction Indicator
WARNING
Your vehicle has also been equipped
with a TPMS malfunction indicator to
indicate when the system is not oper-
ating properly.
WARNING
The TPMS malfunction indicator is
combined with the low tire pressure
telltale. When the system detects a
malfunction, the telltale will flash for
approximately one minute and then
remain continuously illuminated.
This sequence will continue upon
subsequent vehicle start-ups as long
as the malfunction exists.