2010 SUZUKI SX4 ignition
[x] Cancel search: ignitionPage 88 of 297

2-71BEFORE DRIVING
80J23-03E
You can turn off or on the indication of
instantaneous fuel consumption according
to the following instruction.
80J2027
1) Change the display (B) to the driving
range by pushing the indicator selector
knob (2).
80J2028
2) While pushing and holding the trip
meter selector knob (1), turn the indica-
tor selector knob (2) to turn off or on theindication of instantaneous fuel con-
sumption.
NOTE:
When you reconnect the negative (–) ter-
minal to the battery, the indication of the
instantaneous fuel consumption will be
reinitialized. Change the indication again to
your preference.
Trip meter / Average Fuel Consumption /
Driving Range / Thermometer
When the ignition switch is in the “ON”
position, the display (B) shows one of the
following five indications, trip meter A, trip
meter B, average fuel consumption, driving
range or thermometer.
To switch the display indication (B), push
the trip meter selector knob (1) or the indi-
cator selector knob (2) quickly.
80J2029
EXAMPLEEXAMPLE
(Initial
setting)
WARNING
If you attempt to adjust the display
while driving, you could lose control
of the vehicle.
Do not attempt to adjust the display
while driving.
Push the trip meter selector
knob (1).
Push the indicator selector
knob (2).
(a)
(b)
(c)
(d)
(e)EXAMPLE
Page 89 of 297

2-72
BEFORE DRIVING
80J23-03E
(a) Trip meter A
(b) Trip meter B
(c) Average fuel consumption
(d) Driving range
(e) Thermometer
NOTE:
Indications will change when you push
and release a knob.
The display shows estimated values.
Indications may not be the same as
actual values.
Trip meter
The trip meter can be used to measure the
distance traveled on short trips or between
fuel stops.
You can use the trip meter A or trip meter B
independently.
To reset the trip meter to zero, push and
hold the trip meter selector knob (1) for a
while when the display shows the trip
meter.NOTE:
The indicated maximum value of the trip
meter is 9999.9. When you run past the
maximum value, the indicated value will
return to 0.0.
Average fuel consumption
If you selected average fuel consumption
the last time you drove the vehicle, the dis-
play shows the last value of average fuel
consumption from previous driving when
the ignition switch is turned to the “ON”
position. Unless you reset the value of
average fuel consumption, the display indi-
cates the value of average fuel consump-
tion which includes average fuel
consumption during previous driving.
To reset the average fuel consumption to
zero, push and hold the indicator selector
knob (2) for a while when the display
shows the average fuel consumption.
NOTE:
When you reset the indication or reconnect
the negative (–) terminal to the battery, the
value of average fuel consumption will be
shown after driving for a while.Driving range
If you selected driving range the last time
you drove the vehicle, the display indicates
“---” for a few seconds and then indicates
the current driving range when the ignition
switch is turned to the “ON” position.
The driving range shown in the display is
the approximate distance you can drive
until the fuel gauge indicates “E”, based on
current driving conditions.
When the remaining fuel in fuel tank
reaches a low level, the display “---” will
appear.
If the low fuel warning light comes on, fill
the fuel tank immediately regardless of the
value of driving range shown in the display.
As the driving range after refueling is cal-
culated based on the most recent driving
condition, the value is different each time
you refuel.
NOTE:
If you refuel when the ignition switch is in
the “ON” position, the driving range may
not indicate the correct value.
When you reconnect the negative (–) ter-
minal to the battery, the value of driving
range will be shown after driving for a
while.
WARNING
If you attempt to adjust the display
while driving, you could lose control
of the vehicle.
Do not attempt to adjust the display
while driving.
Page 90 of 297

2-73BEFORE DRIVING
80J23-03E
Thermometer
The thermometer indicates the outside
temperature.
80J2030
If the outside temperature nears freezing,
the mark (f) will appear on the display.
NOTE:
The outside temperature indication is not
the actual outside temperature when
driving at low speed, or when stopped.
If there is something wrong with the ther-
mometer, or just after the ignition switch
is turned to the “ON” position, the display
may not indicate the outside tempera-
ture.
The mark (f) will appear whenever the
outside temperature is near freezing,
even if the display does not show the
thermometer.
To change the unit of temperature, while
pushing and holding the trip meter selector
knob (1), turn the indicator selector knob
(2).
80J2031
NOTE:
When you reconnect the negative (–) ter-
minal to the battery, the unit of temperature
will be reinitialized. Change the unit again
to your preference.Transaxle selector position indicator
(for CVT)
80J2032
When the ignition switch is in the “ON”
position, the display (C) indicates the gear
position (g).
When using the manual mode, the display
(C) indicates the manual mode indicator
(h).
For details on how to use the transaxle,
refer to “Using the Transaxle” in the
“OPERATING YOUR VEHICLE” section.
(f)
EXAMPLE
EXAMPLE
(Initial
setting)
(h)
(g)
EXAMPLE
Page 91 of 297

2-74
BEFORE DRIVING
80J23-03E
Odometer / Illumination Control Setting
When the ignition switch is in the “ON”
position, the display (D) shows the odome-
ter.
If you turn the indicator selector knob (2)
clockwise or counterclockwise, the display
will change to the illumination control set-
ting.
Odometer
The odometer records the total distance
the vehicle has been driven.Illumination control setting
When the ignition switch is turned to the
“ON” position, the instrument panel lights
come on.
Your vehicle has a system to automatically
dim the brightness of the instrument panel
lights when the position lights or headlights
are on.
You can change the brightness of the
instrument panel lights regardless of
whether the position lights or headlights
are off or on.
To increase the brightness of the instru-
ment panel lights, turn the indicator selec-
tor knob (1) clockwise.
To reduce the brightness of the instrument
panel lights, turn the indicator selector
knob (1) counterclockwise.
80JM039
CAUTION
Keep track of your odometer reading
and check the maintenance schedule
regularly for required services.
Increased wear or damage to certain
parts can result from failure to per-
form required services at the proper
mileage intervals.
(Brightest)
(Initial setting)
(Dimmest)
Page 92 of 297

2-75BEFORE DRIVING
80J23-03E
NOTE:
If you push the indicator selector knob or
do not turn the knob for more than 5 sec-
onds while activating the illumination
control, the illumination control will be
canceled automatically and the display
(D) will show the odometer indication.
You can change the brightness when the
position lights or headlights are on even
if the ignition switch is in the “ACC” or
“LOCK” position.
When you reconnect the negative (–) ter-
minal to the battery, the brightness of the
instrument panel lights will be reinitial-
ized. Readjust the brightness according
to your preference.
NOTE:
If you select the lowest brightness level
when the position lights or headlights are
on, the instrument panel lights other than
meter lights are turned off.
Clock (if equipped)
When the ignition switch is in the “ON”
position, the display (E) shows the time.To change the time indication:
1) Push the trip meter selector knob (1)
and the indicator selector knob (2)
together.
2) To change the hour indication, turn the
indicator selector knob (2) left or right
repeatedly when the hour indication
flashes. To change the hour indication
quickly, turn and hold the indicator
selector knob (2). To set the hour indi-
cation, push the the indicator selector
knob (2) and the minute indication will
flash.
3) To change the minute indication, turn
the indicator selector knob (2) left or
right repeatedly when the minute indi-
cation flashes. To change the minute
indication quickly, turn and hold the
indicator selector knob (2). To set the
minute indication, push the indicator
selector knob (2).
NOTE:
When you reconnect the negative (–) ter-
minal to the battery, the clock indication will
be reinitialized. Change the indication
again to your preference.
Lighting Control Lever
65D611
WARNING
If you attempt to adjust the display
while driving, you could lose control
of the vehicle.
Do not attempt to adjust the display
while driving.
WARNING
If you attempt to adjust the display
while driving, you could lose control
of the vehicle.
Do not attempt to adjust the display
while driving.
WARNING
To avoid possible injury, do not oper-
ate controls by reaching through the
steering wheel.
Page 93 of 297

2-76
BEFORE DRIVING
80J23-03E
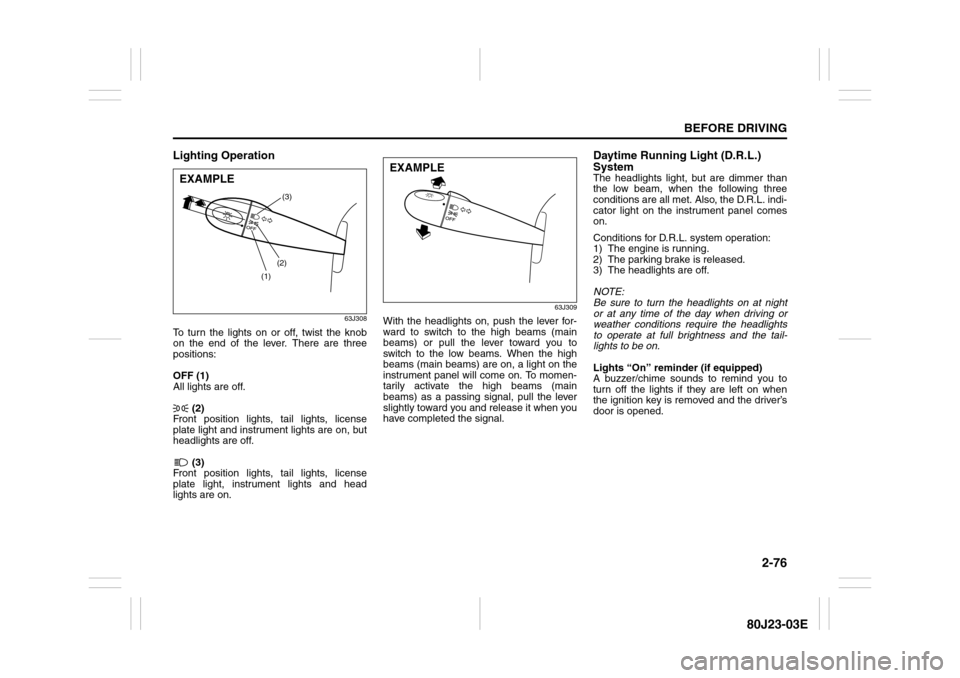
Lighting Operation
63J308
To turn the lights on or off, twist the knob
on the end of the lever. There are three
positions:
OFF (1)
All lights are off.
(2)
Front position lights, tail lights, license
plate light and instrument lights are on, but
headlights are off.
(3)
Front position lights, tail lights, license
plate light, instrument lights and head
lights are on.
63J309
With the headlights on, push the lever for-
ward to switch to the high beams (main
beams) or pull the lever toward you to
switch to the low beams. When the high
beams (main beams) are on, a light on the
instrument panel will come on. To momen-
tarily activate the high beams (main
beams) as a passing signal, pull the lever
slightly toward you and release it when you
have completed the signal.
Daytime Running Light (D.R.L.)
SystemThe headlights light, but are dimmer than
the low beam, when the following three
conditions are all met. Also, the D.R.L. indi-
cator light on the instrument panel comes
on.
Conditions for D.R.L. system operation:
1) The engine is running.
2) The parking brake is released.
3) The headlights are off.
NOTE:
Be sure to turn the headlights on at night
or at any time of the day when driving or
weather conditions require the headlights
to operate at full brightness and the tail-
lights to be on.
Lights “On” reminder (if equipped)
A buzzer/chime sounds to remind you to
turn off the lights if they are left on when
the ignition key is removed and the driver’s
door is opened.
(1)(2)(3)
EXAMPLE
EXAMPLE
Page 94 of 297

2-77BEFORE DRIVING
80J23-03E
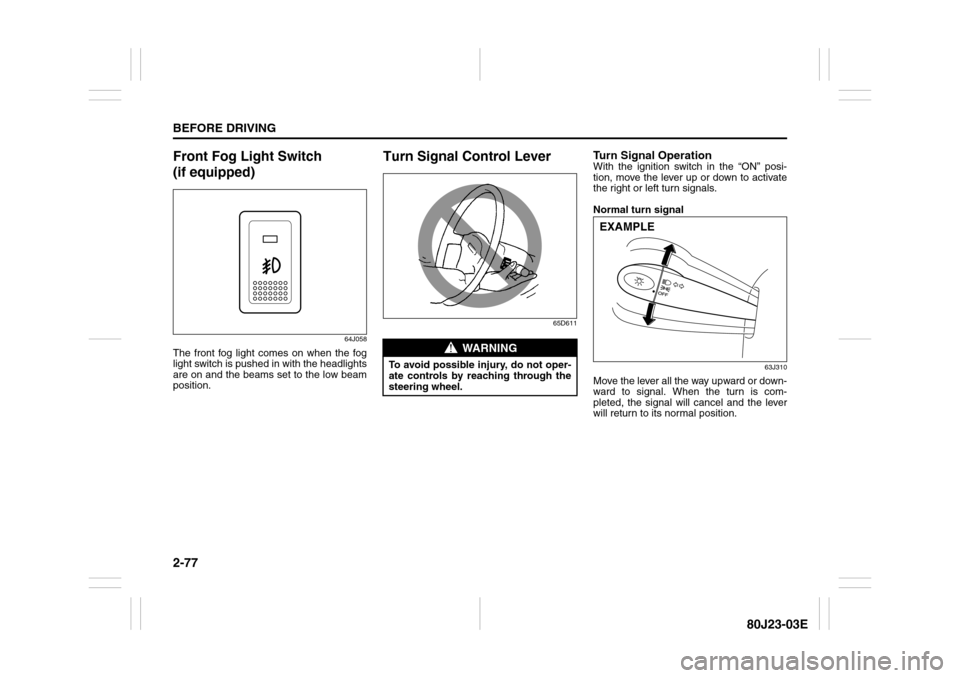
Front Fog Light Switch
(if equipped)
64J058
The front fog light comes on when the fog
light switch is pushed in with the headlights
are on and the beams set to the low beam
position.
Turn Signal Control Lever
65D611
Turn Signal OperationWith the ignition switch in the “ON” posi-
tion, move the lever up or down to activate
the right or left turn signals.
Normal turn signal
63J310
Move the lever all the way upward or down-
ward to signal. When the turn is com-
pleted, the signal will cancel and the lever
will return to its normal position.
WARNING
To avoid possible injury, do not oper-
ate controls by reaching through the
steering wheel.
EXAMPLE
Page 98 of 297

2-81BEFORE DRIVING
80J23-03E
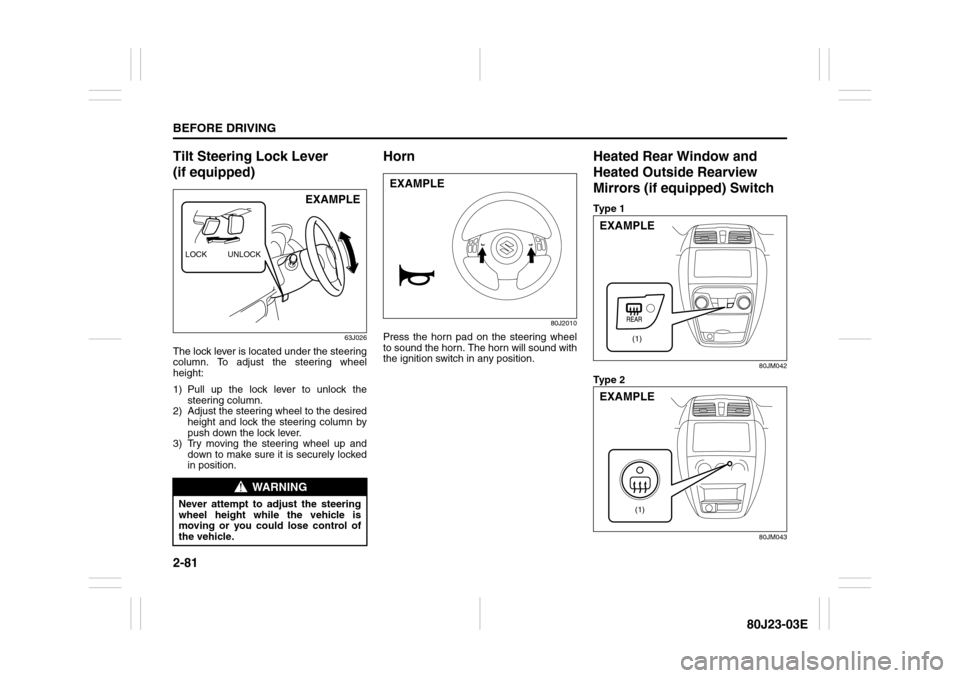
Tilt Steering Lock Lever
(if equipped)
63J026
The lock lever is located under the steering
column. To adjust the steering wheel
height:
1) Pull up the lock lever to unlock the
steering column.
2) Adjust the steering wheel to the desired
height and lock the steering column by
push down the lock lever.
3) Try moving the steering wheel up and
down to make sure it is securely locked
in position.
Horn
80J2010
Press the horn pad on the steering wheel
to sound the horn. The horn will sound with
the ignition switch in any position.
Heated Rear Window and
Heated Outside Rearview
Mirrors (if equipped) SwitchTy p e 1
80JM042
Ty p e 2
80JM043
WARNING
Never attempt to adjust the steering
wheel height while the vehicle is
moving or you could lose control of
the vehicle.LOCK UNLOCK
EXAMPLE
EXAMPLE
(1)
EXAMPLE
(1)
EXAMPLE