2010 SUZUKI SX4 wheel
[x] Cancel search: wheelPage 106 of 297
3-5OPERATING YOUR VEHICLE
80J23-03E
If you leave any of the doors open with the
ignition switch in the “ACC” position for a
while (and no key inserted), the engine
may not start when you turn the ignition
switch to “START”. If the engine does not
start, close all doors completely or turn the
ignition switch back to the “LOCK” position,
then start the engine.
The ignition switch has the following four
positions:
LOCK (1)
This is the normal parking position. It is the
only position in which the key can be
removed. It locks the ignition, and prevents
normal use of the steering wheel.
For vehicles with a CVT, the gearshift lever
must be in the “P” (Park) position to turn
the key to the “LOCK” position.
To release the steering lock, turn the igni-
tion switch clockwise to one of the other
positions. If you have trouble turning the
ignition switch to unlock the steering, try
turning the steering wheel slightly to the
right or left while turning the switch.
Manual transaxle vehicle
You must push in the ignition switch to
turn it from the “LOCK” position to the
“ACC” position. To return to the “LOCK”
position from the “ACC” position, turn the
ignition switch counterclockwise while
pushing in the switch.CVT vehicle
To turn the ignition switch, push the
switch.
ACC (2)
Accessories such as the radio can oper-
ate, but the engine is off.
ON (3)
This is the normal operating position. All
electrical systems are on.
START (4)
This is the position for starting the engine
using the starter motor. The switch should
be released from this position as soon as
the engine starts.
Ignition switch reminder
(When using the keyless start system)
A buzzer sounds intermittently to remind
you to return the ignition switch to the
“LOCK” position if it is in the “ACC” position
when the driver’s door is opened.You can also turn the ignition switch by
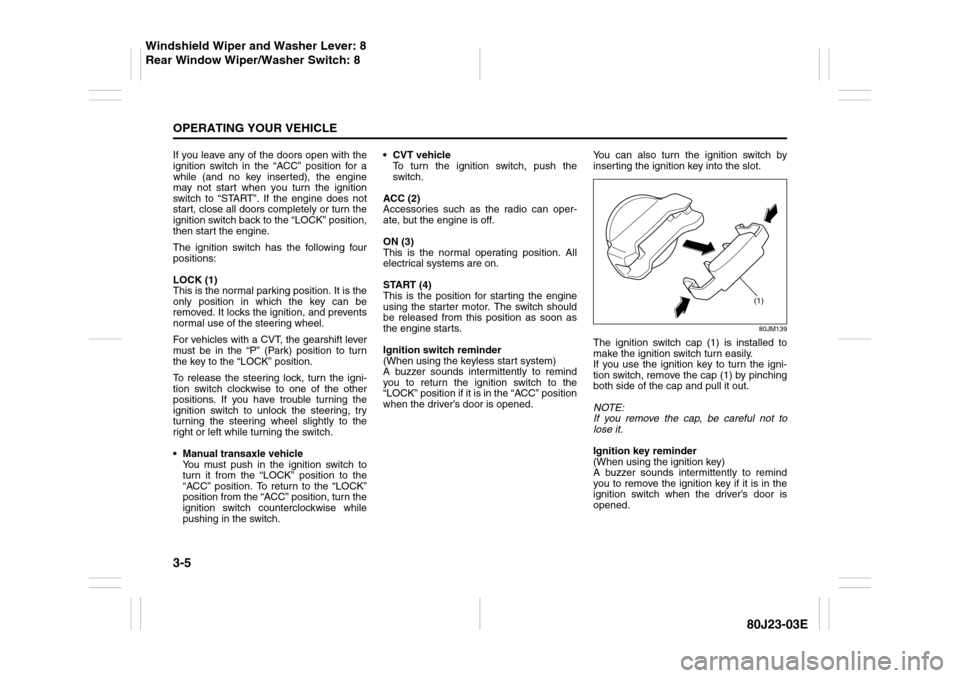
inserting the ignition key into the slot.
80JM139
The ignition switch cap (1) is installed to
make the ignition switch turn easily.
If you use the ignition key to turn the igni-
tion switch, remove the cap (1) by pinching
both side of the cap and pull it out.
NOTE:
If you remove the cap, be careful not to
lose it.
Ignition key reminder
(When using the ignition key)
A buzzer sounds intermittently to remind
you to remove the ignition key if it is in the
ignition switch when the driver’s door is
opened.
(1)
Windshield Wiper and Washer Lever: 8
Rear Window Wiper/Washer Switch: 8
Page 107 of 297
3-6
OPERATING YOUR VEHICLE
80J23-03E
81A297S
Parking Brake Lever
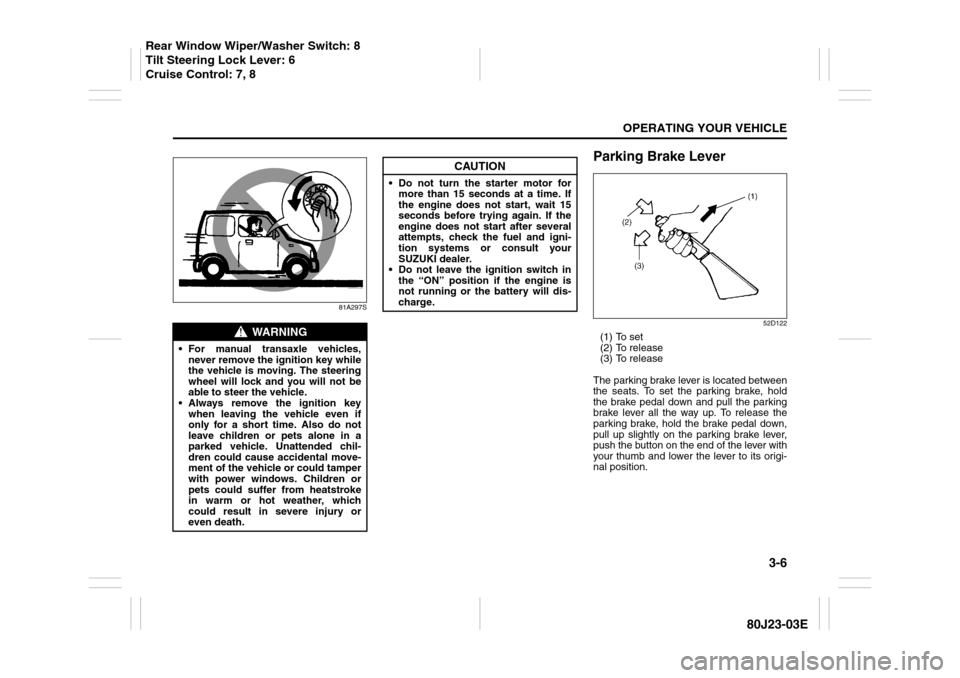
52D122
(1) To set
(2) To release
(3) To release
The parking brake lever is located between
the seats. To set the parking brake, hold
the brake pedal down and pull the parking
brake lever all the way up. To release the
parking brake, hold the brake pedal down,
pull up slightly on the parking brake lever,
push the button on the end of the lever with
your thumb and lower the lever to its origi-
nal position.
WARNING
For manual transaxle vehicles,
never remove the ignition key while
the vehicle is moving. The steering
wheel will lock and you will not be
able to steer the vehicle.
Always remove the ignition key
when leaving the vehicle even if
only for a short time. Also do not
leave children or pets alone in a
parked vehicle. Unattended chil-
dren could cause accidental move-
ment of the vehicle or could tamper
with power windows. Children or
pets could suffer from heatstroke
in warm or hot weather, which
could result in severe injury or
even death.
CAUTION
Do not turn the starter motor for
more than 15 seconds at a time. If
the engine does not start, wait 15
seconds before trying again. If the
engine does not start after several
attempts, check the fuel and igni-
tion systems or consult your
SUZUKI dealer.
Do not leave the ignition switch in
the “ON” position if the engine is
not running or the battery will dis-
charge.
Rear Window Wiper/Washer Switch: 8
Tilt Steering Lock Lever: 6
Cruise Control: 7, 8
Page 109 of 297
3-8
OPERATING YOUR VEHICLE
80J23-03E
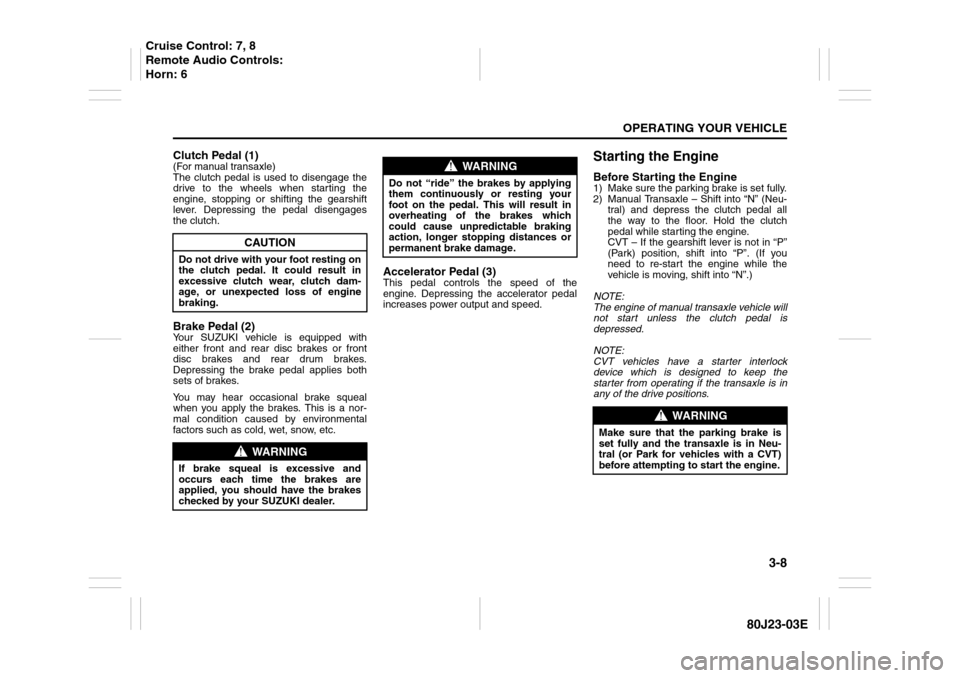
Clutch Pedal (1)(For manual transaxle)
The clutch pedal is used to disengage the
drive to the wheels when starting the
engine, stopping or shifting the gearshift
lever. Depressing the pedal disengages
the clutch.Brake Pedal (2)Your SUZUKI vehicle is equipped with
either front and rear disc brakes or front
disc brakes and rear drum brakes.
Depressing the brake pedal applies both
sets of brakes.
You may hear occasional brake squeal
when you apply the brakes. This is a nor-
mal condition caused by environmental
factors such as cold, wet, snow, etc.
Accelerator Pedal (3)This pedal controls the speed of the
engine. Depressing the accelerator pedal
increases power output and speed.
Starting the EngineBefore Starting the Engine1) Make sure the parking brake is set fully.
2) Manual Transaxle – Shift into “N” (Neu-
tral) and depress the clutch pedal all
the way to the floor. Hold the clutch
pedal while starting the engine.
CVT – If the gearshift lever is not in “P”
(Park) position, shift into “P”. (If you
need to re-start the engine while the
vehicle is moving, shift into “N”.)
NOTE:
The engine of manual transaxle vehicle will
not start unless the clutch pedal is
depressed.
NOTE:
CVT vehicles have a starter interlock
device which is designed to keep the
starter from operating if the transaxle is in
any of the drive positions.
CAUTION
Do not drive with your foot resting on
the clutch pedal. It could result in
excessive clutch wear, clutch dam-
age, or unexpected loss of engine
braking.
WARNING
If brake squeal is excessive and
occurs each time the brakes are
applied, you should have the brakes
checked by your SUZUKI dealer.
WARNING
Do not “ride” the brakes by applying
them continuously or resting your
foot on the pedal. This will result in
overheating of the brakes which
could cause unpredictable braking
action, longer stopping distances or
permanent brake damage.
WARNING
Make sure that the parking brake is
set fully and the transaxle is in Neu-
tral (or Park for vehicles with a CVT)
before attempting to start the engine.
Cruise Control: 7, 8
Remote Audio Controls:
Horn: 6
Page 114 of 297
3-13OPERATING YOUR VEHICLE
80J23-03E
D (Drive)
Use this position for all normal driving.
With the gearshift lever in “D” range you
can get an automatic downshift by press-
ing the accelerator pedal. The higher the
vehicle speed is, the more you need to
press the accelerator pedal to get a down-
shift.
M (manual mode)
Use this position for driving in the manual
mode.
Refer to “Manual mode” later in this section
for details on how to use the manual mode.Manual mode
The CVT can shift gears automatically.
When using the manual mode, you can
shift gears in the same manner as conven-
tional manual transaxle.
To use the manual mode, shift the gearshift
lever from “D” to “M”.
80J2037
80J2073
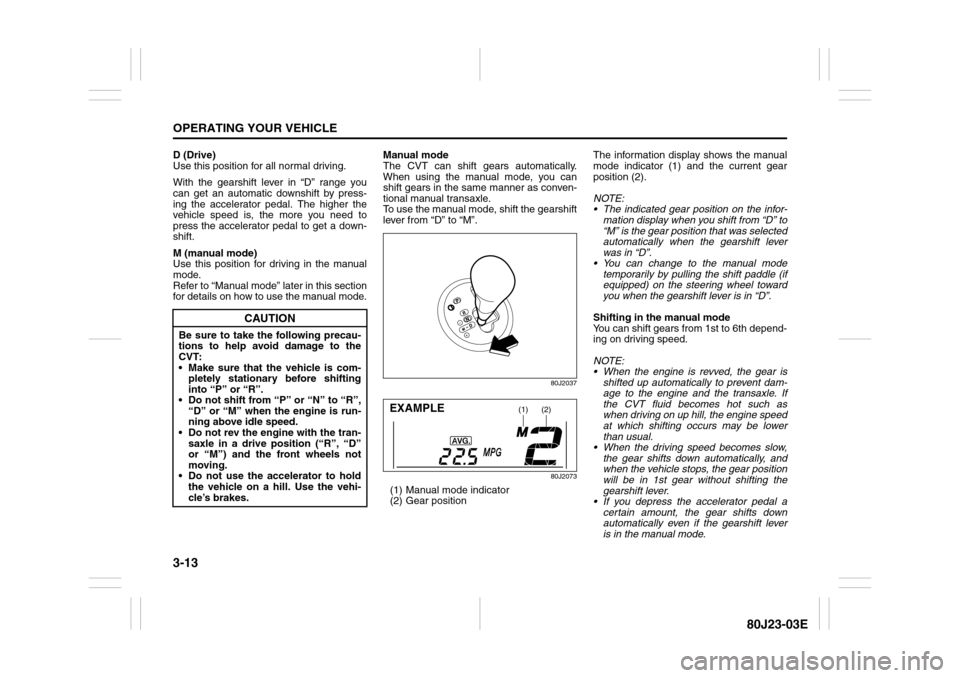
(1) Manual mode indicator
(2) Gear positionThe information display shows the manual
mode indicator (1) and the current gear
position (2).
NOTE:
The indicated gear position on the infor-
mation display when you shift from “D” to
“M” is the gear position that was selected
automatically when the gearshift lever
was in “D”.
You can change to the manual mode
temporarily by pulling the shift paddle (if
equipped) on the steering wheel toward
you when the gearshift lever is in “D”.
Shifting in the manual mode
You can shift gears from 1st to 6th depend-
ing on driving speed.
NOTE:
When the engine is revved, the gear is
shifted up automatically to prevent dam-
age to the engine and the transaxle. If
the CVT fluid becomes hot such as
when driving on up hill, the engine speed
at which shifting occurs may be lower
than usual.
When the driving speed becomes slow,
the gear shifts down automatically, and
when the vehicle stops, the gear position
will be in 1st gear without shifting the
gearshift lever.
If you depress the accelerator pedal a
certain amount, the gear shifts down
automatically even if the gearshift lever
is in the manual mode.
CAUTION
Be sure to take the following precau-
tions to help avoid damage to the
CVT:
Make sure that the vehicle is com-
pletely stationary before shifting
into “P” or “R”.
Do not shift from “P” or “N” to “R”,
“D” or “M” when the engine is run-
ning above idle speed.
Do not rev the engine with the tran-
saxle in a drive position (“R”, “D”
or “M”) and the front wheels not
moving.
Do not use the accelerator to hold
the vehicle on a hill. Use the vehi-
cle’s brakes.
(1)
(2)
EXAMPLE
Page 115 of 297
3-14
OPERATING YOUR VEHICLE
80J23-03E
NOTE:
When you shift gears, the gear may not
shift to the desired position. This is to
maintain good drivability and to protect the
transaxle.
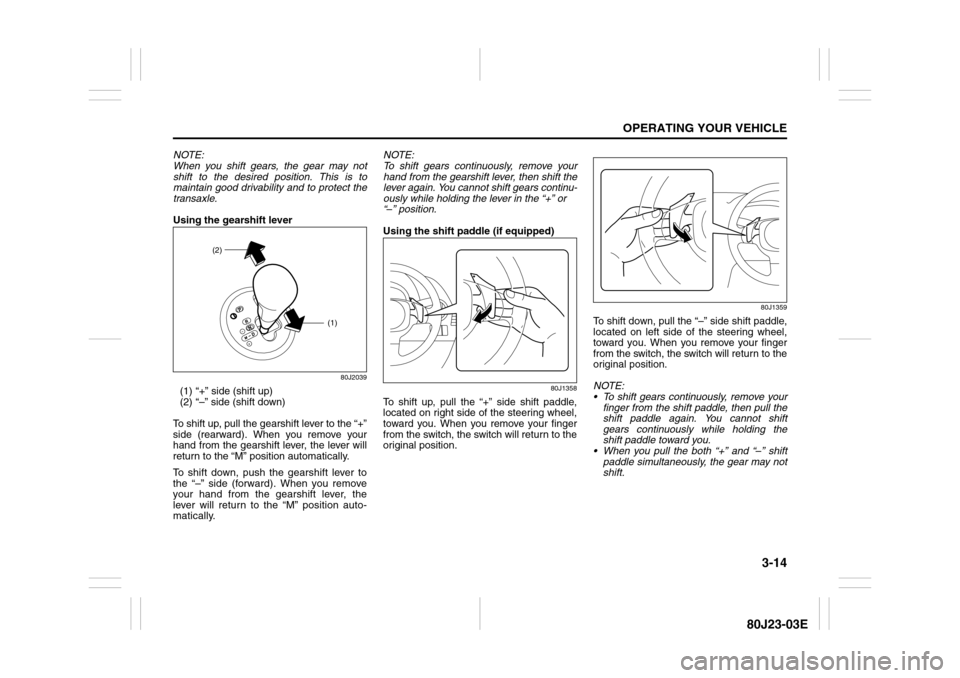
Using the gearshift lever
80J2039
(1) “+” side (shift up)
(2) “–” side (shift down)
To shift up, pull the gearshift lever to the “+”
side (rearward). When you remove your
hand from the gearshift lever, the lever will
return to the “M” position automatically.
To shift down, push the gearshift lever to
the “–” side (forward). When you remove
your hand from the gearshift lever, the
lever will return to the “M” position auto-
matically.NOTE:
To shift gears continuously, remove your
hand from the gearshift lever, then shift the
lever again. You cannot shift gears continu-
ously while holding the lever in the “+” or
“–” position.
Using the shift paddle (if equipped)
80J1358
To shift up, pull the “+” side shift paddle,
located on right side of the steering wheel,
toward you. When you remove your finger
from the switch, the switch will return to the
original position.
80J1359
To shift down, pull the “–” side shift paddle,
located on left side of the steering wheel,
toward you. When you remove your finger
from the switch, the switch will return to the
original position.
NOTE:
To shift gears continuously, remove your
finger from the shift paddle, then pull the
shift paddle again. You cannot shift
gears continuously while holding the
shift paddle toward you.
When you pull the both “+” and “–” shift
paddle simultaneously, the gear may not
shift.
(1)
(2)
Page 117 of 297

3-16
OPERATING YOUR VEHICLE
80J23-03E
Using the 2WD/i-AWD
(intelligent All Wheel Drive)
Switch (if equipped)
80J009
This i-AWD system enables you to select
the driving mode according to the driving
conditions by operating the 2WD/i-AWD
switch. With this feature, you can select 3
mode positions, “2WD”, “i-AWD AUTO”
and “i-AWD LOCK” by operating the 2WD/
i-AWD switch even when the vehicle is
moving, provided the front wheels are in
the straight ahead position.Description of 3 Mode 4 x 4 System
Positions2WD
In this position, engine power is supplied to
the front axle only. Use this position for
normal driving (on dry, hard surfaces).i-AWD AUTO
In this position, engine power is supplied to
the front and rear axles at normal speed,
providing greater traction than 2-wheel
drive. Use this position for driving on paved
roads or on slippery roads (icy, snow-cov-
ered, muddy, etc.).
In the AUTO mode, the i-AWD controller
judges the driving conditions using signals
from sensors.
When slipping of the front wheels is
detected, the electronically controlled cou-
pling supplies optimum driving force to the
rear wheels. This function improves driving
stability and running through performance
on rough roads and stabilizes driving per-
formance even on a snow covered up-hill
road or the like.
Also, during normal driving on paved
roads, torque distribution to the rear
wheels is reduced to achieve the nearly
front wheel drive condition, thereby fuel
consumption is improved.
i-AWD LOCK
In this position, engine power is supplied to
the front and rear axles at reduced speed.
Use this position when it is hard to start off
in the “i-AWD AUTO” mode such as in
mud, sand or on snow.
NOTE:
Avoid operating your vehicle in the “i-
AWD LOCK” on wet pavement as much
as possible. Operating your vehicle in
the “i-AWD LOCK” on wet pavementmay cause severe damage to the drive
train.
As the vehicle speed increases, the “i-
AWD LOCK” mode is automatically can-
celed and the “i-AWD AUTO” mode is
selected.
When the ignition switch is turned to the
“OFF” position, the “i-AWD LOCK” mode
is canceled.
2WD/i-AWD Switch OperationOperate the 2WD/i-AWD switch according
to the appropriate procedure described
below:
How to turn on 2WD/i-AWD switch
2WD/i-AWD switch will activate when the
ignition switch is turned on.
From 2WD to i-AWD AUTO
Turn the 2WD/i-AWD switch to the neutral
position, and the “i-AWD AUTO” indicator
will come on.
79J040
Page 118 of 297
3-17OPERATING YOUR VEHICLE
80J23-03E
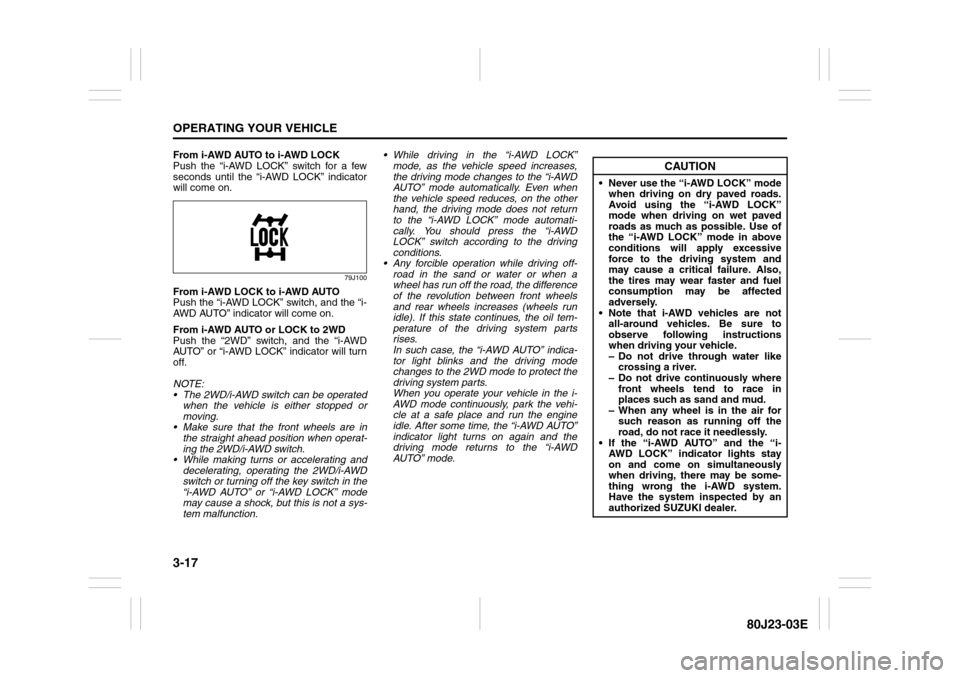
From i-AWD AUTO to i-AWD LOCK
Push the “i-AWD LOCK” switch for a few
seconds until the “i-AWD LOCK” indicator
will come on.
79J100
From i-AWD LOCK to i-AWD AUTO
Push the “i-AWD LOCK” switch, and the “i-
AWD AUTO” indicator will come on.
From i-AWD AUTO or LOCK to 2WD
Push the “2WD” switch, and the “i-AWD
AUTO” or “i-AWD LOCK” indicator will turn
off.
NOTE:
The 2WD/i-AWD switch can be operated
when the vehicle is either stopped or
moving.
Make sure that the front wheels are in
the straight ahead position when operat-
ing the 2WD/i-AWD switch.
While making turns or accelerating and
decelerating, operating the 2WD/i-AWD
switch or turning off the key switch in the
“i-AWD AUTO” or “i-AWD LOCK” mode
may cause a shock, but this is not a sys-
tem malfunction. While driving in the “i-AWD LOCK”
mode, as the vehicle speed increases,
the driving mode changes to the “i-AWD
AUTO” mode automatically. Even when
the vehicle speed reduces, on the other
hand, the driving mode does not return
to the “i-AWD LOCK” mode automati-
cally. You should press the “i-AWD
LOCK” switch according to the driving
conditions.
Any forcible operation while driving off-
road in the sand or water or when a
wheel has run off the road, the difference
of the revolution between front wheels
and rear wheels increases (wheels run
idle). If this state continues, the oil tem-
perature of the driving system parts
rises.
In such case, the “i-AWD AUTO” indica-
tor light blinks and the driving mode
changes to the 2WD mode to protect the
driving system parts.
When you operate your vehicle in the i-
AWD mode continuously, park the vehi-
cle at a safe place and run the engine
idle. After some time, the “i-AWD AUTO”
indicator light turns on again and the
driving mode returns to the “i-AWD
AUTO” mode.
CAUTION
Never use the “i-AWD LOCK” mode
when driving on dry paved roads.
Avoid using the “i-AWD LOCK”
mode when driving on wet paved
roads as much as possible. Use of
the “i-AWD LOCK” mode in above
conditions will apply excessive
force to the driving system and
may cause a critical failure. Also,
the tires may wear faster and fuel
consumption may be affected
adversely.
Note that i-AWD vehicles are not
all-around vehicles. Be sure to
observe following instructions
when driving your vehicle.
– Do not drive through water like
crossing a river.
– Do not drive continuously where
front wheels tend to race in
places such as sand and mud.
– When any wheel is in the air for
such reason as running off the
road, do not race it needlessly.
If the “i-AWD AUTO” and the “i-
AWD LOCK” indicator lights stay
on and come on simultaneously
when driving, there may be some-
thing wrong the i-AWD system.
Have the system inspected by an
authorized SUZUKI dealer.
Page 119 of 297
3-18
OPERATING YOUR VEHICLE
80J23-03E
Cruise Control (if equipped)
79JM005
The cruise control system allows you to
maintain a steady speed without keeping
your foot on the accelerator pedal. The
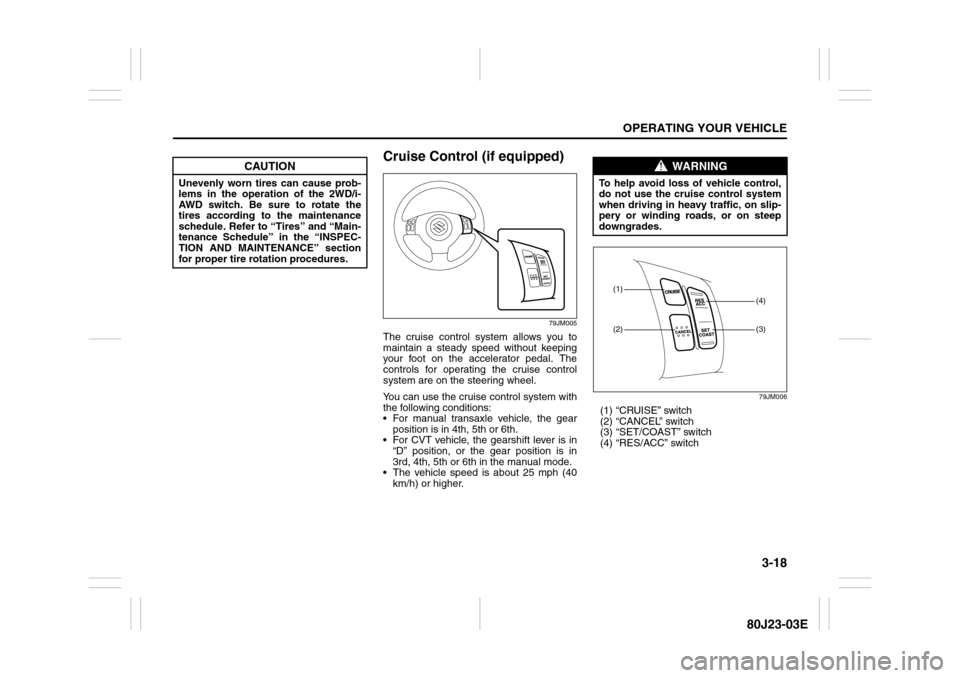
controls for operating the cruise control
system are on the steering wheel.
You can use the cruise control system with
the following conditions:
For manual transaxle vehicle, the gear
position is in 4th, 5th or 6th.
For CVT vehicle, the gearshift lever is in
“D” position, or the gear position is in
3rd, 4th, 5th or 6th in the manual mode.
The vehicle speed is about 25 mph (40
km/h) or higher.
79JM006
(1) “CRUISE” switch
(2) “CANCEL” switch
(3) “SET/COAST” switch
(4) “RES/ACC” switch
CAUTION
Unevenly worn tires can cause prob-
lems in the operation of the 2WD/i-
AWD switch. Be sure to rotate the
tires according to the maintenance
schedule. Refer to “Tires” and “Main-
tenance Schedule” in the “INSPEC-
TION AND MAINTENANCE” section
for proper tire rotation procedures.
WARNING
To help avoid loss of vehicle control,
do not use the cruise control system
when driving in heavy traffic, on slip-
pery or winding roads, or on steep
downgrades.
(1)(2)
(3)(4)