2010 SUZUKI KIZASHI brake
[x] Cancel search: brakePage 146 of 388

3-15OPERATING YOUR VEHICLE
57L20-03E
Continuously Variable Transaxle
(CVT)
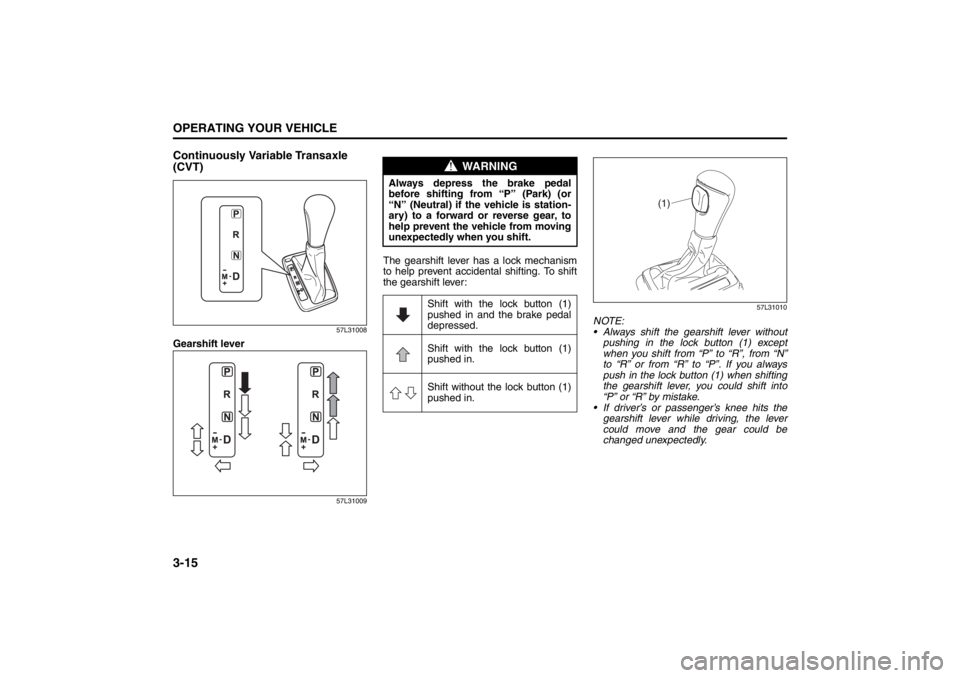
57L31008
Gearshift lever
57L31009
The gearshift lever has a lock mechanism
to help prevent accidental shifting. To shift
the gearshift lever:
57L31010
NOTE:
Always shift the gearshift lever without
pushing in the lock button (1) except
when you shift from “P” to “R”, from “N”
to “R” or from “R” to “P”. If you always
push in the lock button (1) when shifting
the gearshift lever, you could shift into
“P” or “R” by mistake.
If driver’s or passenger’s knee hits the
gearshift lever while driving, the lever
could move and the gear could be
changed unexpectedly.
WARNING
Always depress the brake pedal
before shifting from “P” (Park) (or
“N” (Neutral) if the vehicle is station-
ary) to a forward or reverse gear, to
help prevent the vehicle from moving
unexpectedly when you shift.
Shift with the lock button (1)
pushed in and the brake pedal
depressed.
Shift with the lock button (1)
pushed in.
Shift without the lock button (1)
pushed in.
(1)
Page 147 of 388

3-16
OPERATING YOUR VEHICLE
57L20-03E
Use the gearshift lever positions as follows:
P (Park)
Use this position to lock the transaxle
when the vehicle is parked or when start-
ing the engine. Shift into Park only when
the vehicle is completely stationary.
R (Reverse)
Use this position to reverse the vehicle
from stop. Make sure that vehicle is com-
pletely stationary before shifting into
Reverse.
N (Neutral)
Use this position for starting the engine if
the engine stalls and you need to restart it
while the vehicle is moving. You may also
shift into Neutral and depress the brake
pedal to hold the vehicle stationary during
idling.D (Drive)
Use this position for all normal driving.
With the gearshift lever in “D” range you
can get an automatic downshift by press-
ing the accelerator pedal. The higher the
vehicle speed is, the more you need to
press the accelerator pedal to get a down-
shift.
M (manual mode)
Use this position for driving in the manual
mode.
Refer to “Manual mode” later in this section
for details on how to use the manual mode.Manual mode
The CVT can shift gears automatically.
When using the manual mode, you can
shift gears in the same manner as conven-
tional manual transaxle.
To use the manual mode, shift the gearshift
lever from “D” to “M”.
57L31011
57L31012
(1) Manual mode indicator
(2) Gear position
The information display shows the manual
mode indicator (1) and the current gear
position (2).
CAUTION
Do not shift the gearshift lever into
“R” while moving forward, or the
transaxle may be damaged. If you
shift into “R” when the vehicle speed
is over 6mph (10km/h), the transaxle
will not shift into reverse.
CAUTION
Be sure to take the following precau-
tions to help avoid damage to the
CVT:
Make sure that the vehicle is com-
pletely stationary before shifting
into “P” or “R”.
Do not shift from “P” or “N” to “R”,
“D” or “M” when the engine is run-
ning above idle speed.
Do not rev the engine with the tran-
saxle in a drive position (“R”, “D”
or “M”) and the front wheels not
moving.
Do not use the accelerator to hold
the vehicle on a hill. Use the vehi-
cle’s brakes.
(1)(2)
Page 149 of 388

3-18
OPERATING YOUR VEHICLE
57L20-03E
57L40011
To shift down, pull the “–” side shift paddle,
located on left side of the steering wheel,
toward you. When you remove your finger
from the switch, the switch will return to the
original position.
NOTE:
To shift gears continuously, remove your
finger from the shift paddle, then pull the
shift paddle again. You cannot shift
gears continuously while holding the
shift paddle toward you.
When you pull the both “+” and “–” shift
paddle simultaneously, the gear may not
shift.Canceling the manual mode
To cancel the manual mode, shift the gear-
shift lever from “M” to “D”.
Temporary manual mode
Pull the shift paddle (if equipped) toward
you when driving with the gearshift lever in
the “D” position. The information display
shows the manual mode indicator (1) and
the current gear position (2).
57L31012
(1) Manual mode indicator
(2) Gear position
The temporary manual mode will be can-
celed automatically in the following situa-
tions.
When you press and hold the accelera-
tor pedal for a certain period of time with-
out shifting gears.
When driving speed becomes slow.If You Cannot Shift CVT Gearshift Lever
Out of “P” (PARK)
57L31015
Vehicles with a CVT have an electrically
operated park-lock feature. If the vehicle’s
battery is discharged, or there is some
other electrical failure, the CVT cannot be
shifted out of Park in the normal way. Jump
starting may correct the condition. If not,
follow the procedure described below. This
procedure will permit changing the tran-
saxle out of Park.
1) Be sure the parking brake is firmly
applied.
2) If the engine is running, stop the
engine.
3) Remove the cover (1) over the button.
4) With pushing the release button by the
key or the flat end rod, shift the gear-
shift lever to the desired position.
(1)(2)
(1)
Page 153 of 388

3-22
OPERATING YOUR VEHICLE
57L20-03E
To Set Cruising Speed1) Turn on the cruise control system by
pushing the “CRUISE” switch (1). When
the “CRUISE” indicator light comes on,
you can set cruising speed.
2) Accelerate or decelerate to the desired
speed.
3) Push down the “RES +/SET –” switch
(3) and turn on the “SET” indicator light.
Take your foot off the accelerator pedal
and the set speed will be maintained.
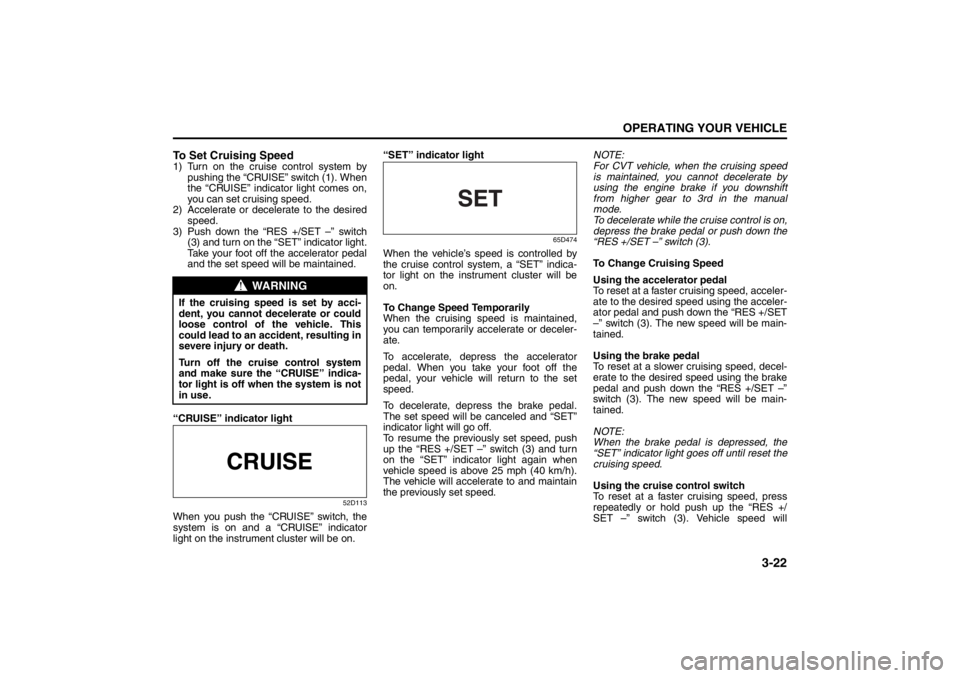
“CRUISE” indicator light
52D113
When you push the “CRUISE” switch, the
system is on and a “CRUISE” indicator
light on the instrument cluster will be on.“SET” indicator light
65D474
When the vehicle’s speed is controlled by
the cruise control system, a “SET” indica-
tor light on the instrument cluster will be
on.
To Change Speed Temporarily
When the cruising speed is maintained,
you can temporarily accelerate or deceler-
ate.
To accelerate, depress the accelerator
pedal. When you take your foot off the
pedal, your vehicle will return to the set
speed.
To decelerate, depress the brake pedal.
The set speed will be canceled and “SET”
indicator light will go off.
To resume the previously set speed, push
up the “RES +/SET –” switch (3) and turn
on the “SET” indicator light again when
vehicle speed is above 25 mph (40 km/h).
The vehicle will accelerate to and maintain
the previously set speed.NOTE:
For CVT vehicle, when the cruising speed
is maintained, you cannot decelerate by
using the engine brake if you downshift
from higher gear to 3rd in the manual
mode.
To decelerate while the cruise control is on,
depress the brake pedal or push down the
“RES +/SET –” switch (3).
To Change Cruising Speed
Using the accelerator pedal
To reset at a faster cruising speed, acceler-
ate to the desired speed using the acceler-
ator pedal and push down the “RES +/SET
–” switch (3). The new speed will be main-
tained.
Using the brake pedal
To reset at a slower cruising speed, decel-
erate to the desired speed using the brake
pedal and push down the “RES +/SET –”
switch (3). The new speed will be main-
tained.
NOTE:
When the brake pedal is depressed, the
“SET” indicator light goes off until reset the
cruising speed.
Using the cruise control switch
To reset at a faster cruising speed, press
repeatedly or hold push up the “RES +/
SET –” switch (3). Vehicle speed will
WARNING
If the cruising speed is set by acci-
dent, you cannot decelerate or could
loose control of the vehicle. This
could lead to an accident, resulting in
severe injury or death.
Turn off the cruise control system
and make sure the “CRUISE” indica-
tor light is off when the system is not
in use.
Page 154 of 388

3-23OPERATING YOUR VEHICLE
57L20-03E
steadily increase. When you release the
switch, the new speed will be maintained.
To reset at a slower cruising speed, press
repeatedly or hold push down the “RES +/
SET –” switch (3) until the vehicle has
slowed to the desired speed, then release
the switch. The new speed will be main-
tained.
NOTE:
You can adjust the set speed by approxi-
mately 1.0 mph (1.6 km/h) by pushing a
cruise control switch quickly.
Cancellation of the Cruise Control
The “SET” indicator light will go off and the
cruise control will be canceled temporarily
with following procedures:
Push the “CANCEL” switch (2).
Depress the brake pedal.
For manual transaxle, depress the clutch
pedal.
For CVT, downshift from 3rd to 2nd in the
manual mode.
The vehicle speed falls more than about
20 percent from the set speed.
Any time the vehicle speed falls below
25 mph (40 km/h).
When the vehicle skids and ESP
® (if
equipped) is activated.
To resume the previously set speed, push
up the “RES +/SET –” switch (3) and turn
on the “SET” indicator light. Besides, the
vehicle speed has to be above 25 mph (40km/h) when the vehicle is not in the above
conditions.
To turn off the cruise control system, push
the “CRUISE” switch (1) and make sure
the “CRUISE” indicator light is off.
Also, if the malfunction indicator light in the
instrument cluster comes on or blinks, the
cruise control system will be turned off.
NOTE:
If you turn off the cruise control system, the
previously set speed in the memory is
cleared. Reset your cruising speed again.
Parking Sensors
(if equipped)
57L40019
(1) Symbol representing an obstacle
detected by parking sensor*
* This symbol represents an obstacle that
is located to the right rear at the vehicle.
The parking sensor system uses ultra-
sonic sensors to detect obstacles near
the rear bumper. If obstacles are sensed
while you are parking or moving the
vehicle slowly, the system warns you by
sounding a buzzer and displaying sym-
bols representing the obstacles on the
information display in the instrument
cluster.
The system emits an ultrasonic wave
and the relevant sensor detects the
return of the wave reflected by an obsta-
cle. The system measures the time
(1)
Page 159 of 388

3-28
OPERATING YOUR VEHICLE
57L20-03E
Braking
60G165
The distance needed to bring any vehicle
to a halt increases with the speed of the
vehicle. The braking distance needed, for
example, at 60 km/h (37 mph) will be
approximately 4 times greater than the
braking distance needed at 30 km/h (19
mph). Start to brake the vehicle when there
is plenty of distance between your vehicle
and the stopping point, and slow down
gradually.
Power-Assisted BrakesYour vehicle has power-assisted brakes. If
power assistance is lost due to a stalled
engine or other failures, the system is still
fully operational on reserve power and you
can bring the vehicle to a complete stop by
pressing the brake pedal once and holding
it down. The reserve power is partly used
up when you depress the brake pedal and
reduces each time the pedal is pressed.
Apply smooth and even pressure to the
pedal. Do not pump the pedal.
Brake Assist SystemWhen you slam the brakes on, the brake
assist system judges as an emergency
stop and provides more powerful braking
for a driver who cannot hold down the
brake pedal firmly.
NOTE:
If you quickly and forcefully depress the
brakes, you may hear a clicking sound in
the brake pedal. This is normal and indi-
cates that the brake assist system is acti-
vated properly.
WARNING
If water gets into the brake drums,
brake performance may become poor
and unpredictable.
After driving through water or wash-
ing the underside of the vehicle, test
the brakes while driving at a slow
speed to see if they have maintained
their normal effectiveness. If the
brakes are less effective than normal,
dry them by repeatedly applying the
brakes while driving slowly until the
brakes have regained their normal
effectiveness.
WARNING
Even without reserve power in the
brake system, you can still stop the
vehicle by pressing the brake pedal
harder than normally required. How-
ever, the stopping distance may be
longer.
Page 160 of 388

3-29OPERATING YOUR VEHICLE
57L20-03E
Anti-Lock Brake System (ABS)
(if equipped)ABS will help you avoid skidding by elec-
tronically controlling braking pressure. It
will also help you maintain steering control
when braking on slippery surfaces or when
braking hard.
The ABS works automatically, so you do
not need any special braking technique.
Just push the brake pedal down without
pumping. The ABS will operate whenever it
senses that the wheels are locking up.
You may feel the brake pedal pulsate while
the ABS is operating.
NOTE:
The ABS will not work if vehicle speed is
under about 10 km/h (6 mph).
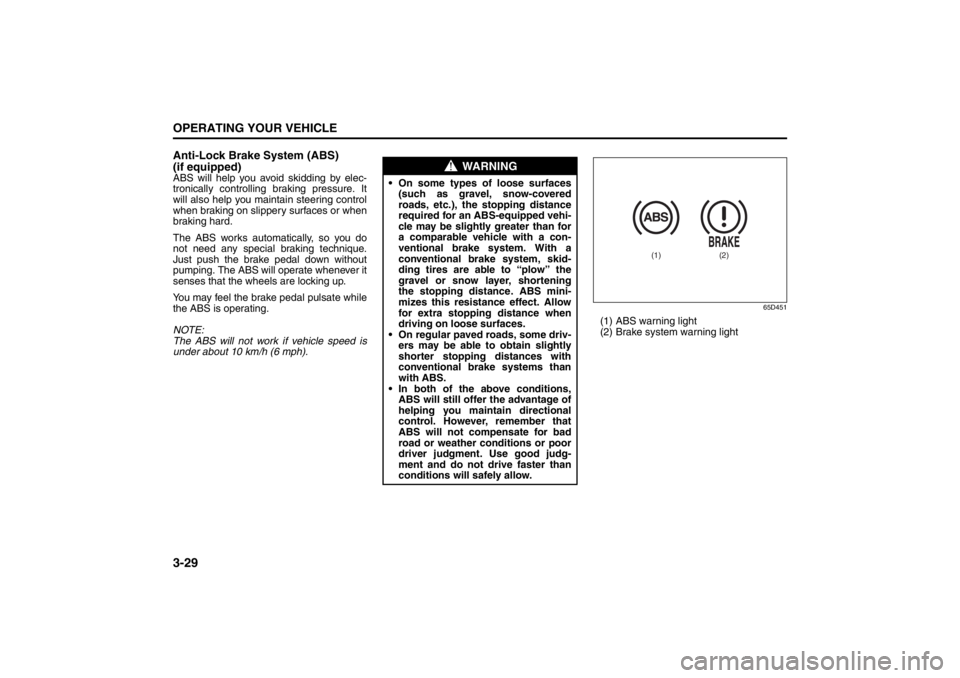
65D451
(1) ABS warning light
(2) Brake system warning light
WARNING
On some types of loose surfaces
(such as gravel, snow-covered
roads, etc.), the stopping distance
required for an ABS-equipped vehi-
cle may be slightly greater than for
a comparable vehicle with a con-
ventional brake system. With a
conventional brake system, skid-
ding tires are able to “plow” the
gravel or snow layer, shortening
the stopping distance. ABS mini-
mizes this resistance effect. Allow
for extra stopping distance when
driving on loose surfaces.
On regular paved roads, some driv-
ers may be able to obtain slightly
shorter stopping distances with
conventional brake systems than
with ABS.
In both of the above conditions,
ABS will still offer the advantage of
helping you maintain directional
control. However, remember that
ABS will not compensate for bad
road or weather conditions or poor
driver judgment. Use good judg-
ment and do not drive faster than
conditions will safely allow.
(1)
(2)
Page 161 of 388

3-30
OPERATING YOUR VEHICLE
57L20-03E
How the ABS WorksA computer continuously monitors wheel
speed. The computer compares the
changes in wheel speed when braking. If
the wheels slow suddenly, indicating a
skidding situation, the computer will
change braking pressure several times
each second to prevent the wheels from
locking. When you start your vehicle or
when you accelerate after a hard stop, you
may hear a momentary motor or clicking
noise as the system resets or checks itself.
WARNING
If the ABS warning light (1) on the
instrument panel comes on and stays
on while driving, there may be a prob-
lem with the ABS system.
If this happens:
1) Pull off the road and stop care-
fully.
2) Press the engine switch to change
the ignition mode to “LOCK”
(OFF) and then start the engine
again.
If the warning light comes on briefly
then turns off, the system is normal.
If the warning light still stays on,
have the system inspected by your
SUZUKI dealer immediately. If the
ABS system becomes inoperative,
the brake system will function as an
ordinary brake system that has no
ABS.
WARNING
If the ABS warning light (1) and the
Brake system warning light (2) on the
instrument panel simultaneously stay
on or come on when driving, both
anti-lock function and rear brake
force control function (proportioning
valve function) of the ABS system
may have failed. This could cause the
rear wheels to skid or the vehicle to
spin during braking on a slippery
road or hard braking on a dry paved
road. If both warning lights come on,
drive carefully, avoiding hard braking
as much as possible, and ask your
SUZUKI dealer to inspect the ABS
system immediately.
WARNING
The ABS may not work properly if
tires or wheels other than those
specified in the owner’s manual are
used. This is because the ABS works
by comparing changes in wheel
speed. When replacing tires or
wheels, use only the size and type
specified in this owner’s manual.