2010 SUBARU OUTBACK key
[x] Cancel search: keyPage 117 of 448
&Moonroof switches
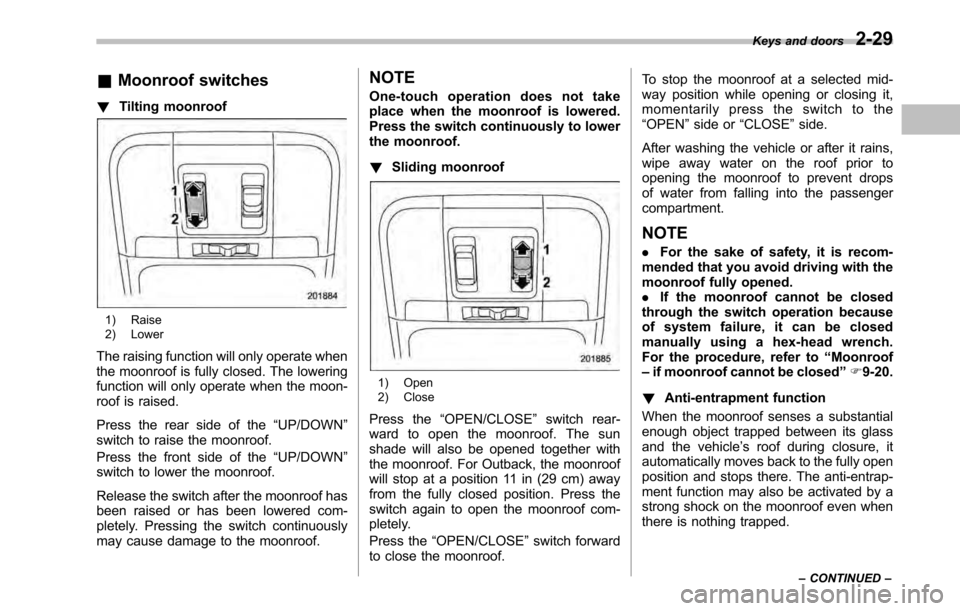
! Tilting moonroof
1) Raise
2) Lower
The raising function will only operate when
the moonroof is fully closed. The lowering
function will only operate when the moon-
roof is raised.
Press the rear side of the “UP/DOWN ”
switch to raise the moonroof.
Press the front side of the “UP/DOWN ”
switch to lower the moonroof.
Release the switch after the moonroof has
been raised or has been lowered com-
pletely. Pressing the switch continuously
may cause damage to the moonroof. NOTE
One-touch operation does not take
place when the moonroof is lowered.
Press the switch continuously to lower
the moonroof. !
Sliding moonroof
1) Open
2) Close
Press the “OPEN/CLOSE ”switch rear-
ward to open the moonroof. The sun
shade will also be opened together with
the moonroof. For Outback, the moonroof
will stop at a position 11 in (29 cm) away
from the fully closed position. Press the
switch again to open the moonroof com-
pletely.
Press the “OPEN/CLOSE ”switch forward
to close the moonroof. To stop the moonroof at a selected mid-
way position while opening or closing it,
momentarily press the switch to the“
OPEN ”side or “CLOSE ”side.
After washing the vehicle or after it rains,
wipe away water on the roof prior to
opening the moonroof to prevent drops
of water from falling into the passengercompartment.
NOTE . For the sake of safety, it is recom-
mended that you avoid driving with the
moonroof fully opened.. If the moonroof cannot be closed
through the switch operation because
of system failure, it can be closed
manually using a hex-head wrench.
For the procedure, refer to “Moonroof
– if moonroof cannot be closed ”F 9-20.
! Anti-entrapment function
When the moonroof senses a substantial
enough object trapped between its glass
and the vehicle ’s roof during closure, it
automatically moves back to the fully open
position and stops there. The anti-entrap-
ment function may also be activated by a
strong shock on the moonroof even when
there is nothing trapped. Keys and doors
2-29
– CONTINUED –
Page 118 of 448

2-30Keys and doors
CAUTION
Never attempt to test this function
using fingers, hands or other parts
of your body.
& Sun shade
The sun shade can be slid forward or
backward by hand while the moonroof isclosed.
If the moonroof is opened, the sun shade
also moves back.
Page 119 of 448

Ignition switch..................................................... 3-3
LOCK .................................................................. 3-3
Acc..................................................................... 3-4
ON...................................................................... 3-4
START ................................................................ 3-4
Key reminder chime ............................................ 3-4
Ignition switch light ............................................. 3-4
Hazard warning flasher ....................................... 3-5
Meters and gauges. ............................................. 3-5
Combination meter illumination ........................... 3-5
Canceling the function for meter/gauge needle movement upon turning on the ignition switch ............................................................... 3-5
Speedometer ....................................................... 3-6
Odometer ............................................................ 3-6
Double trip meter ................................................ 3-6
Tachometer ......................................................... 3-7
Fuel gauge .......................................................... 3-7
ECO gauge ......................................................... 3-8
Warning and indicator lights .............................. 3-9
Seatbelt warning light and chime ........................ 3-10
SRS airbag system warning light ........................ 3-11
Front passenger ’s frontal airbag ON and OFF
indicators ......................................................... 3-12
CHECK ENGINE warning light/Malfunction indicator lamp .................................................. 3-12
Coolant temperature low indicator light/Coolant temperature high warning light ......................... 3-13
Charge warning light .......................................... 3-14
Oil pressure warning light .................................. 3-14
Engine low oil level warning light ....................... 3-14AT OIL TEMP warning light
(AT and CVT models) ....................................... 3-15
Low tire pressure warning light (U.S.-spec. models) .......................................... 3-15
ABS warning light .............................................. 3-16
Brake system warning light ................................ 3-17
Hill Holder indicator light ................................... 3-19
Low fuel warning light ....................................... 3-19
Door open warning light .................................... 3-20
Door open indicator light ................................... 3-20
Windshield washer fluid warning light ................ 3-20
All-Wheel Drive warning light (AT and CVT models) ........................................................... 3-20
Vehicle Dynamics Control warning light/Vehicle Dynamics Control operation indicator light .. ..... 3-20
Vehicle Dynamics Control OFF indicator light ..... 3-21
Security indicator light ....................................... 3-22
Select lever/gear position indicator ..................... 3-22
Turn signal indicator lights ................................. 3-23
High beam indicator light ................................... 3-23
Cruise control indicator light .............................. 3-23
Cruise control set indicator light ........................ 3-23
Headlight indicator light ..................................... 3-23
Front fog light indicator light (if equipped) ..... ..... 3-23
Clock .................................................................. 3-24
Multi function display ........................................ 3-24
Outside temperature indicator .. .......................... 3-25
Average fuel consumption ................................. 3-25
Current fuel consumption .................................. 3-26
Driving range on remaining fuel ......................... 3-26
Instruments and controls
3
Page 121 of 448
Ignition switch
WARNING
. Never turn the ignition switch to
“ LOCK ”while the vehicle is
being driven or towed because
that will lock the steering wheel,
preventing steering control. And
when the engine is turned off, it
takes a much greater effort than
usual to steer.
. Before leaving the vehicle, al-
ways remove the key from the
ignition switch for safety and
never allow an unattended child
to remain in the vehicle. Failure
to follow this procedure could
result in injury to a child or
others. Children could operate
the power windows, the sunroof
or other controls or even make
the vehicle move.
CAUTION
Do not attach a large key holder or
key case to either key. If it banged
against your knees or hands while
you are driving, it could turn the
ignition switch from the “ON ”posi- tion to the
“Acc ”or “LOCK ”posi-
tion, thereby stopping the engine.
Also, if the key is attached to a
keyholder or to a large bunch of
other keys, centrifugal force may act
on it as the vehicle moves, resulting
in unwanted turning of the ignitionswitch.
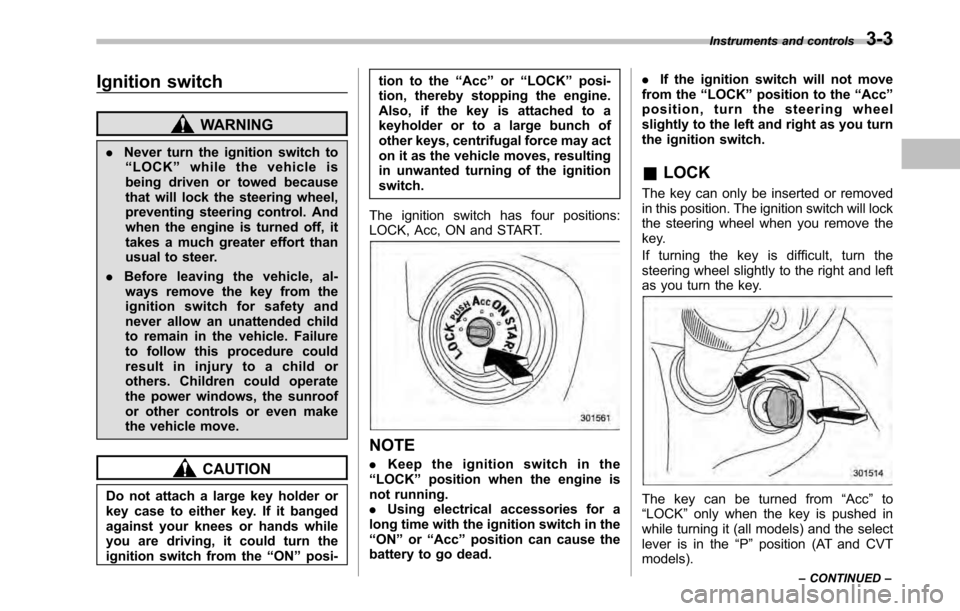
The ignition switch has four positions:
LOCK, Acc, ON and START.
NOTE . Keep the ignition switch in the
“ LOCK ”position when the engine is
not running. . Using electrical accessories for a
long time with the ignition switch in the“ ON ”or “Acc ”position can cause the
battery to go dead. .
If the ignition switch will not move
from the “LOCK ”position to the “Acc ”
position, turn the steering wheel
slightly to the left and right as you turn
the ignition switch.
& LOCK
The key can only be inserted or removed
in this position. The ignition switch will lock
the steering wheel when you remove the
key.
If turning the key is difficult, turn the
steering wheel slightly to the right and left
as you turn the key.
The key can be turned from “Acc ”to
“ LOCK ”only when the key is pushed in
while turning it (all models) and the select
lever is in the “P ” position (AT and CVT
models). Instruments and controls
3-3
– CONTINUED –
Page 122 of 448
3-4Instruments and controls
&Acc
In this position the electrical accessories
(radio, accessory power outlet, etc.) can
be used. & ON
This is the normal operating position after
the engine is started. & START
CAUTION
Do not turn the ignition switch to the “ START ”position while the engine
is running.
The engine is started in this position. The
starter cranks the engine to start it. When
the key is released (after the engine has
started), the key automatically returns tothe “ON ”position.
If the engine does not start with your
registered key, pull out the key once (at
this time, the security indicator light will
blink), wait for at least 10 seconds,
reinsert the key in the ignition switch and
then try to start the engine again.
NOTE
The engine may not start in the follow-
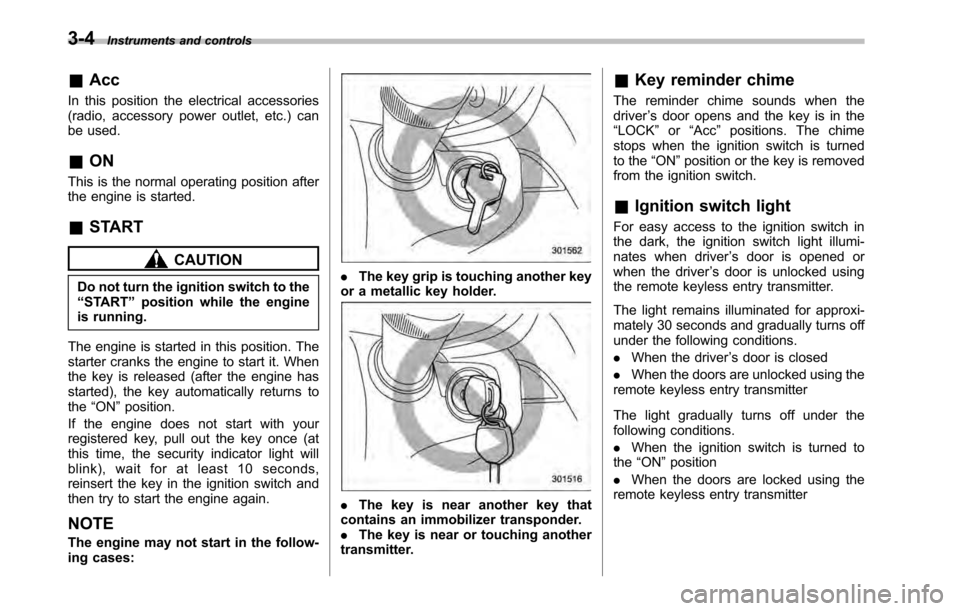
ing cases:. The key grip is touching another key
or a metallic key holder.
. The key is near another key that
contains an immobilizer transponder. . The key is near or touching another
transmitter. &
Key reminder chime
The reminder chime sounds when thedriver ’s door opens and the key is in the
“ LOCK ”or “Acc ”positions. The chime
stops when the ignition switch is turned
to the “ON ”position or the key is removed
from the ignition switch.
& Ignition switch light
For easy access to the ignition switch in
the dark, the ignition switch light illumi-
nates when driver ’s door is opened or
when the driver ’s door is unlocked using
the remote keyless entry transmitter.
The light remains illuminated for approxi-
mately 30 seconds and gradually turns off
under the following conditions. . When the driver ’s door is closed
. When the doors are unlocked using the
remote keyless entry transmitter
The light gradually turns off under the
following conditions. . When the ignition switch is turned to
the “ON ”position
. When the doors are locked using the
remote keyless entry transmitter
Page 138 of 448

3-20Instruments and controls
&Door open warning light
When the ignition switch is in the “ON ”
position, the door open warning light
illuminates for approximately 2 seconds
and then turns off.
The door open warning light illuminates if
any door, the rear gate (Outback) or trunk
lid (Legacy) is not fully closed. This
function is effective even if the ignition
switch is in the “LOCK ”or “Acc ”position or
thekeyisremovedfromtheignitionswitch.
Always make sure this light is not illumi-
nated before you start to drive. & Door open indicator light
When any of the doors, the rear gate
(Outback) or the trunk lid (Legacy) is not
fully closed, the door open indicator light
illuminates. This function is effective even
if the ignition switch is in the “LOCK ”or
“ Acc ”position or the key is removed from
the ignition switch.
The open door is indicated by the corre-
sponding part of the door open warninglight.
Always make sure this light is not illumi-
nated before you start to drive. &
Windshield washer
fluid warning light
This light illuminates when the fluid level in
the windshield washer fluid tank de-
creases to the lower limit (approximately
0.6 US qt, 0.6 liter, 0.5 Imp qt). &All-Wheel Drive
warning light (AT and
CVT models)
WARNING
Continued driving with the AWD
warning light flashing can lead to
powertrain damage. If the AWD
warning light flashes, promptly park
in a safe place then check whether
all four tires are the same diameter
and whether any of the tires has a
puncture or has lost air pressure for
some other reason.
The All-Wheel Drive warning light illumi-
nates when the ignition switch is turned tothe “ON ”position and turns off after the
engine has started. ! For AT models
This light flashes if the vehicle is driven
with tires of different diameters fitted on its
wheels or with the air pressure exces- sively low in any of its tires. !
For CVT models
This light illuminates when All-Wheel
Drive is disengaged and the drive me-
chanism is switched to Front Wheel Drive
for maintenance or similar purposes.
This light flashes if the vehicle is driven
with tires of different diameters fitted on its
wheels or with the air pressure exces-
sively low in any of its tires.
& Vehicle Dynamics
Control warning light/
Vehicle Dynamics Con-
trol operation indicator light
The light illuminates when the ignition
switch is turned to the “ON ”position and
turns off several seconds after the engine
has started. This lighting pattern indicates
that the Vehicle Dynamics Control system
is operating normally. ! Vehicle Dynamics Control warning light
CAUTION
The Vehicle Dynamics Control sys-
tem provides its ABS control
through the electrical circuit of the
Page 140 of 448
3-22Instruments and controls
The Vehicle Dynamics Control system is
probably malfunctioning under any of the
following conditions. Have your vehicle
checked at a SUBARU dealer immedi-
ately. . The light does not illuminate when the
ignition switch is turned to the “ON ”
position.. The light does not turn off even after a
period of approximately 2 seconds after
the ignition switch has been turned to the“ ON ”position.
& Security indicator light
This indicator light shows the status of the
alarm system. It also indicates operation
of the immobilizer system. !Alarm system
It blinks to show the driver the operational
status of the alarm system. For detailed
information, refer to “Alarm system ”F 2-
16. ! Immobilizer system
This light blinks approximately 60 seconds
after the ignition switch is turned from“ ON ”position to the “Acc ”or “LOCK ”
position or immediately after the key is
pulled out. Refer to “Immobilizer ”F 2-3.
If the indicator light does not flash, it may
indicate that immobilizer system may be faulty. Contact your nearest SUBARU
dealer immediately.
In the event that an unauthorized key (for
example, an unauthorized duplicate) is
used, the security indicator light illumi- nates.
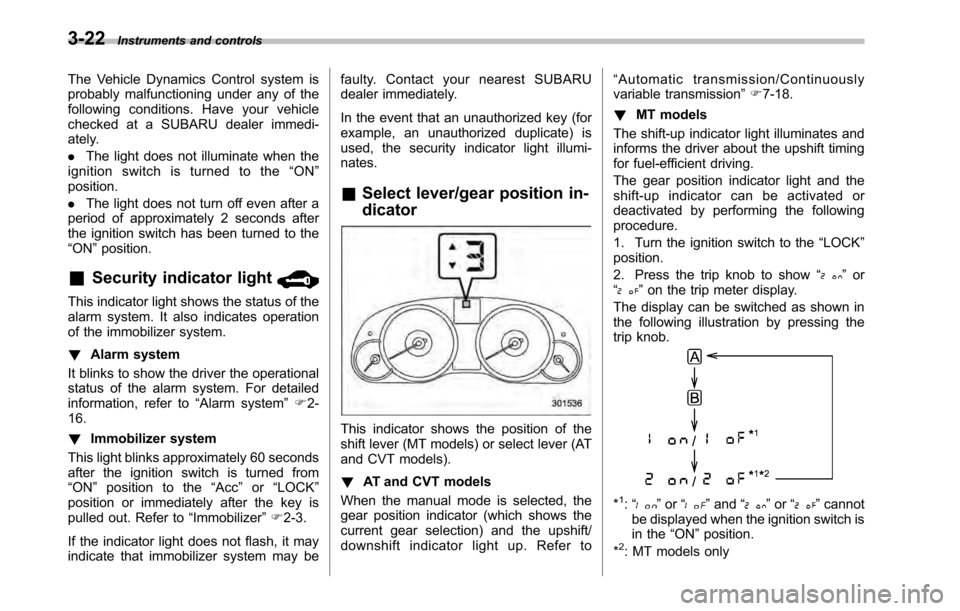
& Select lever/gear position in- dicator
This indicator shows the position of the
shift lever (MT models) or select lever (AT
and CVT models). ! AT and CVT models
When the manual mode is selected, the
gear position indicator (which shows the
current gear selection) and the upshift/
downshift indicator light up. Refer to “
Automatic transmission/Continuously
variable transmission ”F 7-18.
! MT models
The shift-up indicator light illuminates and
informs the driver about the upshift timing
for fuel-efficient driving.
The gear position indicator light and the
shift-up indicator can be activated or
deactivated by performing the followingprocedure.
1. Turn the ignition switch to the “LOCK ”
position.
2. Press the trip knob to show “
”or
“” on the trip meter display.
The display can be switched as shown in
the following illustration by pressing the
trip knob.
*1: “” or “”and “”or “”cannot
be displayed when the ignition switch is
in the “ON ”position.
*
2: MT models only
Page 145 of 448
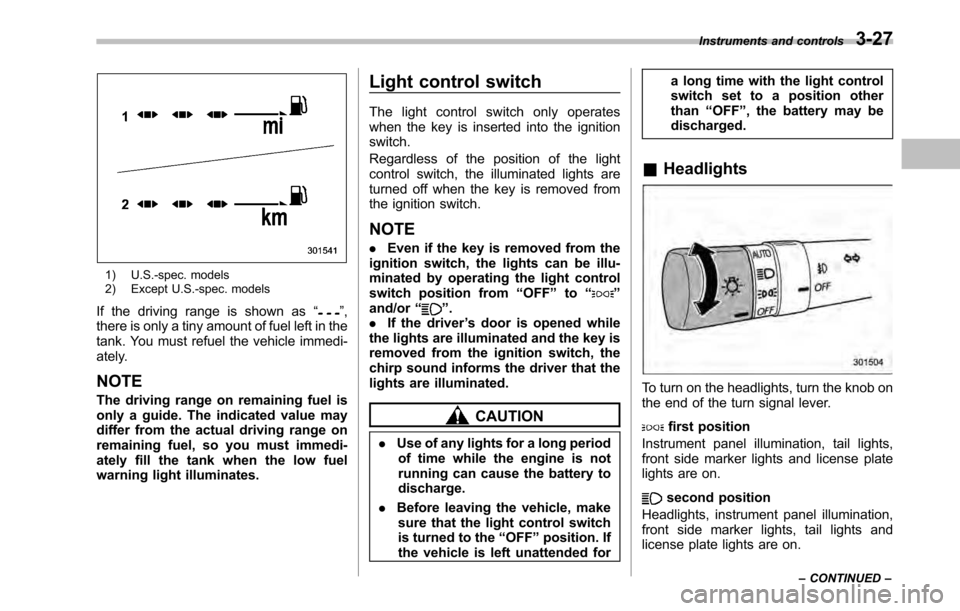
1) U.S.-spec. models
2) Except U.S.-spec. models
If the driving range is shown as “
”,
there is only a tiny amount of fuel left in the
tank. You must refuel the vehicle immedi-
ately.
NOTE
The driving range on remaining fuel is
only a guide. The indicated value may
differ from the actual driving range on
remaining fuel, so you must immedi-
ately fill the tank when the low fuel
warning light illuminates. Light control switch
The light control switch only operates
when the key is inserted into the ignitionswitch.
Regardless of the position of the light
control switch, the illuminated lights are
turned off when the key is removed from
the ignition switch. NOTE .
Even if the key is removed from the
ignition switch, the lights can be illu-
minated by operating the light control
switch position from “OFF ”to “
”
and/or “”.
. If the driver ’s door is opened while
the lights are illuminated and the key is
removed from the ignition switch, the
chirp sound informs the driver that the
lights are illuminated.
CAUTION
. Use of any lights for a long period
of time while the engine is not
running can cause the battery todischarge.
. Before leaving the vehicle, make
sure that the light control switch
is turned to the “OFF ”position. If
the vehicle is left unattended for a long time with the light control
switch set to a position otherthan
“OFF ”, the battery may be
discharged.
& Headlights
To turn on the headlights, turn the knob on
the end of the turn signal lever.
first position
Instrument panel illumination, tail lights,
front side marker lights and license plate
lights are on.
second position
Headlights, instrument panel illumination,
front side marker lights, tail lights and
license plate lights are on. Instruments and controls
3-27
– CONTINUED –