2010 SUBARU OUTBACK battery
[x] Cancel search: batteryPage 145 of 448
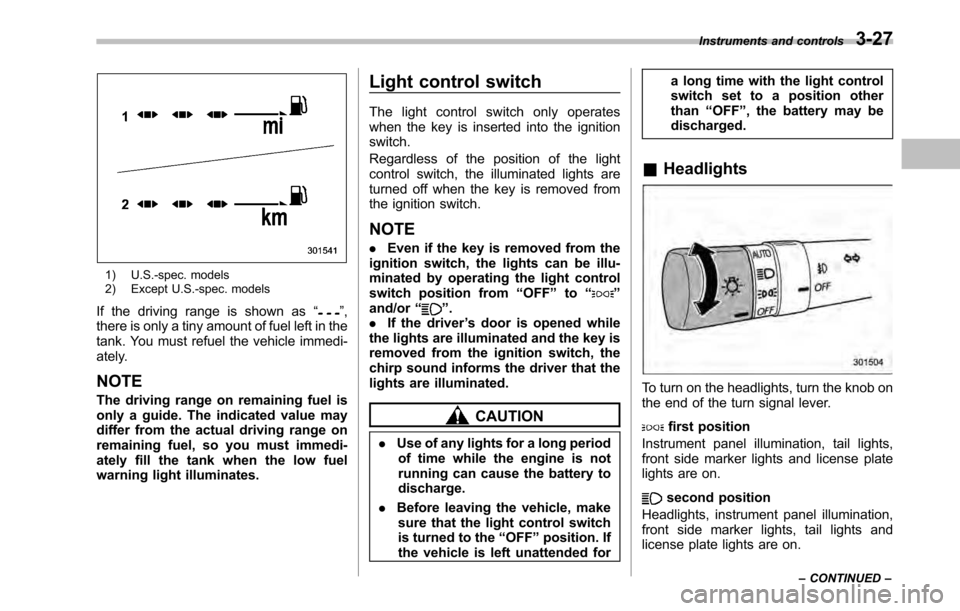
1) U.S.-spec. models
2) Except U.S.-spec. models
If the driving range is shown as “
”,
there is only a tiny amount of fuel left in the
tank. You must refuel the vehicle immedi-
ately.
NOTE
The driving range on remaining fuel is
only a guide. The indicated value may
differ from the actual driving range on
remaining fuel, so you must immedi-
ately fill the tank when the low fuel
warning light illuminates. Light control switch
The light control switch only operates
when the key is inserted into the ignitionswitch.
Regardless of the position of the light
control switch, the illuminated lights are
turned off when the key is removed from
the ignition switch. NOTE .
Even if the key is removed from the
ignition switch, the lights can be illu-
minated by operating the light control
switch position from “OFF ”to “
”
and/or “”.
. If the driver ’s door is opened while
the lights are illuminated and the key is
removed from the ignition switch, the
chirp sound informs the driver that the
lights are illuminated.
CAUTION
. Use of any lights for a long period
of time while the engine is not
running can cause the battery todischarge.
. Before leaving the vehicle, make
sure that the light control switch
is turned to the “OFF ”position. If
the vehicle is left unattended for a long time with the light control
switch set to a position otherthan
“OFF ”, the battery may be
discharged.
& Headlights
To turn on the headlights, turn the knob on
the end of the turn signal lever.
first position
Instrument panel illumination, tail lights,
front side marker lights and license plate
lights are on.
second position
Headlights, instrument panel illumination,
front side marker lights, tail lights and
license plate lights are on. Instruments and controls
3-27
– CONTINUED –
Page 153 of 448
window defogger. Some models are also
equipped with an outside mirror defogger
and/or windshield wiper deicer. The de-
fogger and deicer system is activated only
when the ignition switch is in the“ON ”
position.
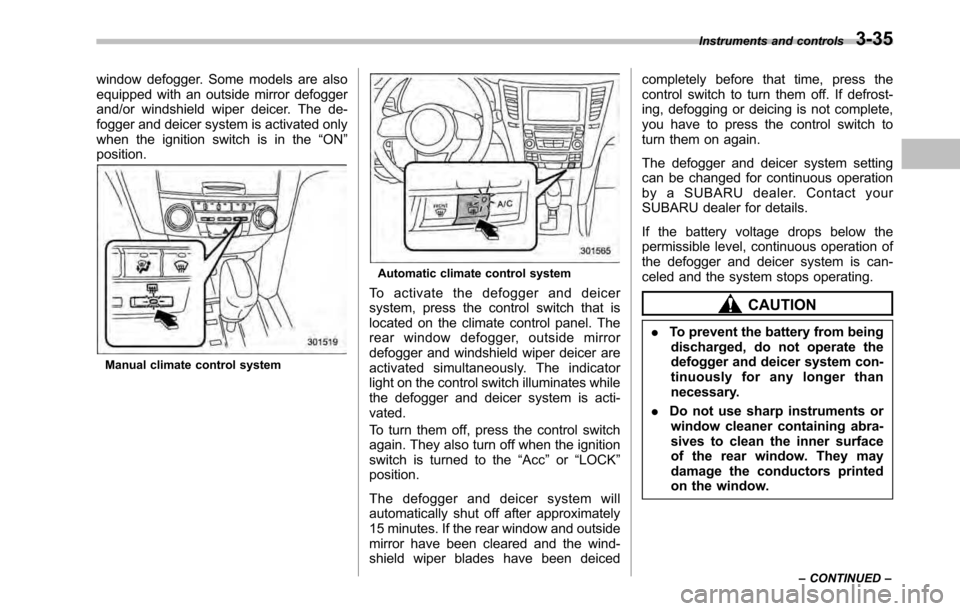
Manual climate control system
Automatic climate control system
To activate the defogger and deicer
system, press the control switch that is
located on the climate control panel. The
rear window defogger, outside mirror
defogger and windshield wiper deicer are
activated simultaneously. The indicator
light on the control switch illuminates while
the defogger and deicer system is acti-vated.
To turn them off, press the control switch
again. They also turn off when the ignition
switch is turned to the “Acc ”or “LOCK ”
position.
The defogger and deicer system will
automatically shut off after approximately
15 minutes. If the rear window and outside
mirror have been cleared and the wind-
shield wiper blades have been deiced completely before that time, press the
control switch to turn them off. If defrost-
ing, defogging or deicing is not complete,
you have to press the control switch to
turn them on again.
The defogger and deicer system setting
can be changed for continuous operation
by a SUBARU dealer. Contact your
SUBARU dealer for details.
If the battery voltage drops below the
permissible level, continuous operation of
the defogger and deicer system is can-
celed and the system stops operating.
CAUTION
. To prevent the battery from being
discharged, do not operate the
defogger and deicer system con-
tinuously for any longer than
necessary.
. Do not use sharp instruments or
window cleaner containing abra-
sives to clean the inner surface
of the rear window. They may
damage the conductors printed
on the window. Instruments and controls
3-35
– CONTINUED –
Page 189 of 448

&Station preset
Preset buttons
! How to preset stations
1. Press the “FM ”or “AM ”button to select
FM1, FM2, FM3 or AM reception.
2. Press the “
”or “”side of the
“ SEEK ”button or tune the radio manually
until the desired station frequency is displayed.
3. Press one of the preset buttons for
more than 1.5 seconds to store the
frequency. If the button is pressed for less
than 1.5 seconds, the preceding selection
will remain in memory. NOTE .
If the connection between the radio
and battery is broken for any reason
such as vehicle maintenance or radio
removal, all stations stored in the
preset buttons are cleared. If this
occurs, it is necessary to reset the
preset stations.. If a cell phone is placed near the
radio, it may cause the radio to emit
noise when the phone receives calls.
This noise does not indicate a radiofault. ! Selecting preset stations
Presetting a station with a preset button
allows you to select that station in a single
operation. Up to six AM, FM1, FM2 and
FM3 stations each may be preset. !
Auto-store
Using the Auto-store function, you can
automatically store 6 stations on the
current waveband by pressing the “A.S ”
button for more than 2 seconds. Use Auto-
store to quickly find the strongest stations,
for example when traveling through differ-
ent reception areas.
NOTE . When you use Auto-store, the new
stations replace any stations pre-
viously stored.. Interrupting Auto-store: If you acci-
dentally press the “A.S ”(Auto-store)
button, you can cancel the Auto-store
function before it has been completed
as follows.
–Switching to the other source Audio
5-13
– CONTINUED –
Page 193 of 448
pressing the“FOLDER ”button “”
changes the category up by one step. Pressing “
”changes the category down
by one step.
When a category is selected, pressing the “ SEEK ”button selects channels only with-
in the selected category.
The control function returns to the normal
mode after approximately 10 seconds. ! Channel scan
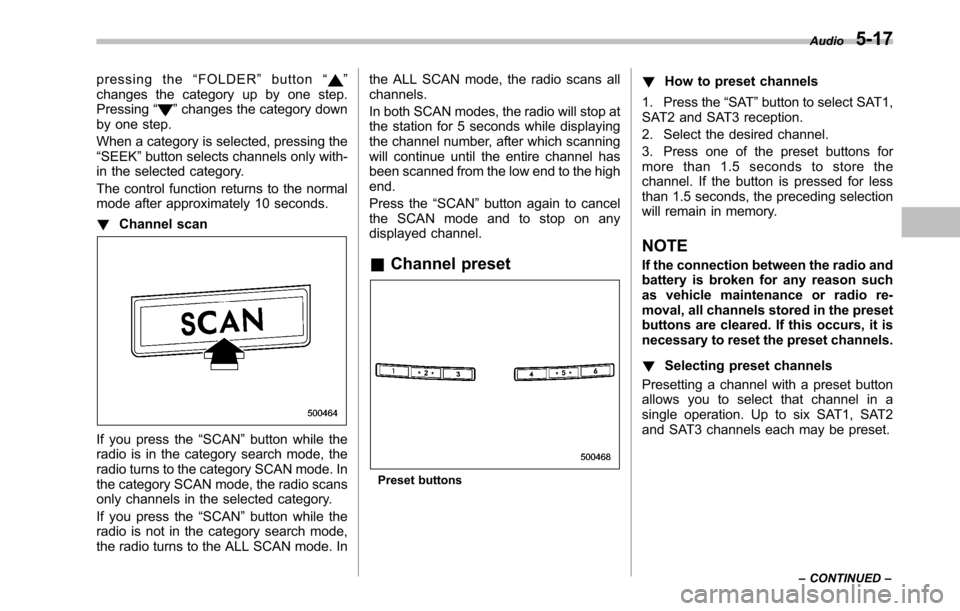
If you press the “SCAN ”button while the
radio is in the category search mode, the
radio turns to the category SCAN mode. In
the category SCAN mode, the radio scans
only channels in the selected category.
If you press the “SCAN ”button while the
radio is not in the category search mode,
the radio turns to the ALL SCAN mode. In the ALL SCAN mode, the radio scans allchannels.
In both SCAN modes, the radio will stop at
the station for 5 seconds while displaying
the channel number, after which scanning
will continue until the entire channel has
been scanned from the low end to the highend.
Press the
“SCAN ”button again to cancel
the SCAN mode and to stop on any
displayed channel.
& Channel preset
Preset buttons !
How to preset channels
1. Press the “SAT ”button to select SAT1,
SAT2 and SAT3 reception.
2. Select the desired channel.
3. Press one of the preset buttons for
more than 1.5 seconds to store the
channel. If the button is pressed for less
than 1.5 seconds, the preceding selection
will remain in memory.
NOTE
If the connection between the radio and
battery is broken for any reason such
as vehicle maintenance or radio re-
moval, all channels stored in the preset
buttons are cleared. If this occurs, it is
necessary to reset the preset channels. ! Selecting preset channels
Presetting a channel with a preset button
allows you to select that channel in a
single operation. Up to six SAT1, SAT2
and SAT3 channels each may be preset. Audio
5-17
– CONTINUED –
Page 209 of 448
with it left in the breast pocket or bag. NOTE
The Hands-free system may not oper-
ate properly under the following condi-tions. .The cell phone is turned off.
. The cell phone is not in the phone
call area. . The battery of the call phone has run
down.. The cell phone is not connected to
the Hands-free system.. The cell phone is behind the seat or
in the glove box.. A metal material covers or touches
the cell phone. ! Corresponding profiles for the cell phone
. HFP (Hands Free Profile): Ver. 1.0
. OPP (Object Push Profile): Ver. 1.1
& Certification for the Hands-
free system
NOTE
This device complies with Part 15 of
the FCC Rules and with RSS-Gen of IC
Rules. Operation is subject to the
following two conditions: (1) This de-
vice may not cause harmful interfer- ence, and (2) this device must accept
any interference received, including
interference that may cause undesiredoperation.
Changes or modifications not ex-
pressly approved by the party respon-
sible for compliance could void theuser
’s authority to operate the equip-
ment.
NOTE
This equipment has been tested and
found to comply with the limits for a
Class B digital device, pursuant to Part
15 of the FCC Rules. These limits are
designed to provide reasonable protec-
tion against harmful interference in a
residential installation. This equipment
may cause harmful interference to
radio communications, if it is not
installed and used in accordance with
the instructions. However, there is no
guarantee that interference will not
occur in a particular installation. If this
equipment does cause harmful inter-
ference to radio or television reception,
which can be determined by turning the
equipment off and on, the user is
encouraged to try to correct the inter-
ference by one or more of the followingmeasures. .
Reorient or relocate the receiving
antenna.. Increase the separation between the
equipment and receiver.. Connect the equipment into an out-
let on a circuit different from that to
which the receiver is connected.. Consult the dealer or an experi-
enced radio/TV technician for help.
& Safety precautions
WARNING
. For safety reasons, avoid operat-
ing of the cell phone while driv- ing.
. Do not make a phone call while
driving. When you have an in-
coming call, stop the vehicle in a
safe location before taking the
incoming phone call. When you
have to absolutely take a phone
call, tell the caller “I’ll call you
back ”. And then call the caller
back after stopping the vehicle in
a safe location.
. Part 15 FCC Rules
FCC Warning:
Any unauthorized changes of
modifications to this equipment Audio
5-33
– CONTINUED –
Page 220 of 448
6-2Interior equipment
Interior light
When leaving your vehicle, make sure the
light is turned off to avoid battery dis-charge. &Dome light
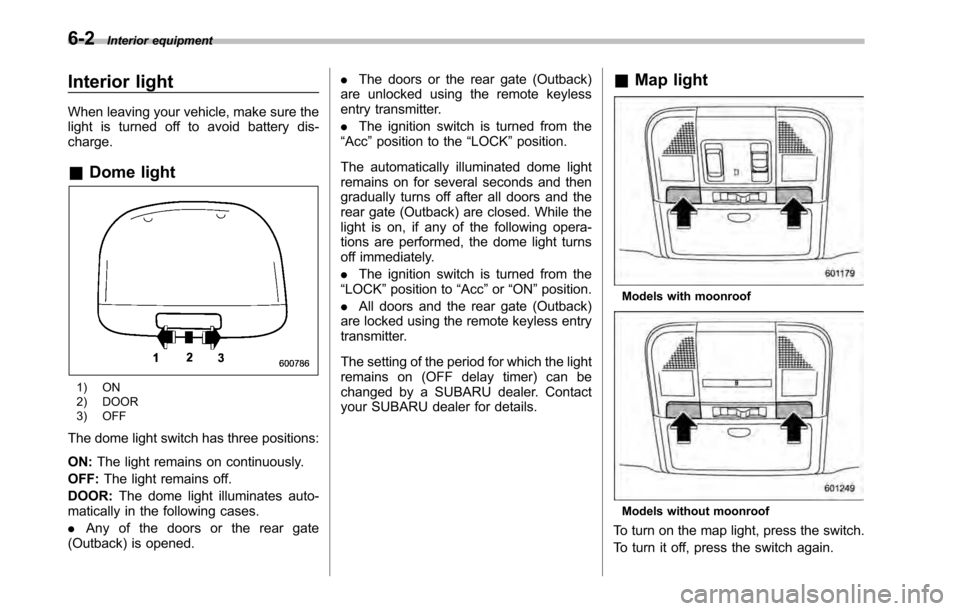
1) ON
2) DOOR
3) OFF
The dome light switch has three positions: ON: The light remains on continuously.
OFF: The light remains off.
DOOR: The dome light illuminates auto-
matically in the following cases. . Any of the doors or the rear gate
(Outback) is opened. .
The doors or the rear gate (Outback)
are unlocked using the remote keyless
entry transmitter. . The ignition switch is turned from the
“ Acc ”position to the “LOCK ”position.
The automatically illuminated dome light
remains on for several seconds and then
gradually turns off after all doors and the
rear gate (Outback) are closed. While the
light is on, if any of the following opera-
tions are performed, the dome light turns
off immediately. . The ignition switch is turned from the
“ LOCK ”position to “Acc ”or “ON ”position.
. All doors and the rear gate (Outback)
are locked using the remote keyless entry
transmitter.
The setting of the period for which the light
remains on (OFF delay timer) can be
changed by a SUBARU dealer. Contact
your SUBARU dealer for details. &
Map light
Models with moonroof
Models without moonroof
To turn on the map light, press the switch.
To turn it off, press the switch again.
Page 221 of 448
When leaving the vehicle, make sure the
light is turned off to avoid battery dis-charge. !Door interlock switch
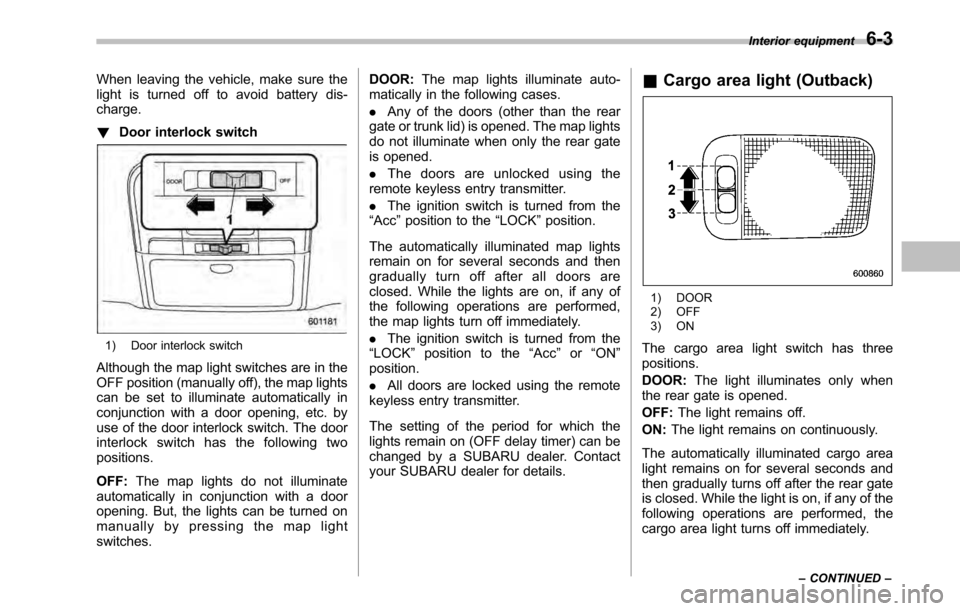
1) Door interlock switch
Although the map light switches are in the
OFF position (manually off), the map lights
can be set to illuminate automatically in
conjunction with a door opening, etc. by
use of the door interlock switch. The door
interlock switch has the following twopositions. OFF: The map lights do not illuminate
automatically in conjunction with a door
opening. But, the lights can be turned on
manually by pressing the map lightswitches. DOOR:
The map lights illuminate auto-
matically in the following cases. . Any of the doors (other than the rear
gate or trunk lid) is opened. The map lights
do not illuminate when only the rear gate
is opened. . The doors are unlocked using the
remote keyless entry transmitter.. The ignition switch is turned from the
“ Acc ”position to the “LOCK ”position.
The automatically illuminated map lights
remain on for several seconds and then
gradually turn off after all doors are
closed. While the lights are on, if any of
the following operations are performed,
the map lights turn off immediately. . The ignition switch is turned from the
“ LOCK ”position to the “Acc ”or “ON ”
position. . All doors are locked using the remote
keyless entry transmitter.
The setting of the period for which the
lights remain on (OFF delay timer) can be
changed by a SUBARU dealer. Contact
your SUBARU dealer for details. &
Cargo area light (Outback)
1) DOOR
2) OFF
3) ON
The cargo area light switch has three positions. DOOR: The light illuminates only when
the rear gate is opened.OFF: The light remains off.
ON: The light remains on continuously.
The automatically illuminated cargo area
light remains on for several seconds and
then gradually turns off after the rear gate
is closed. While the light is on, if any of the
following operations are performed, the
cargo area light turns off immediately. Interior equipment
6-3
– CONTINUED –
Page 223 of 448
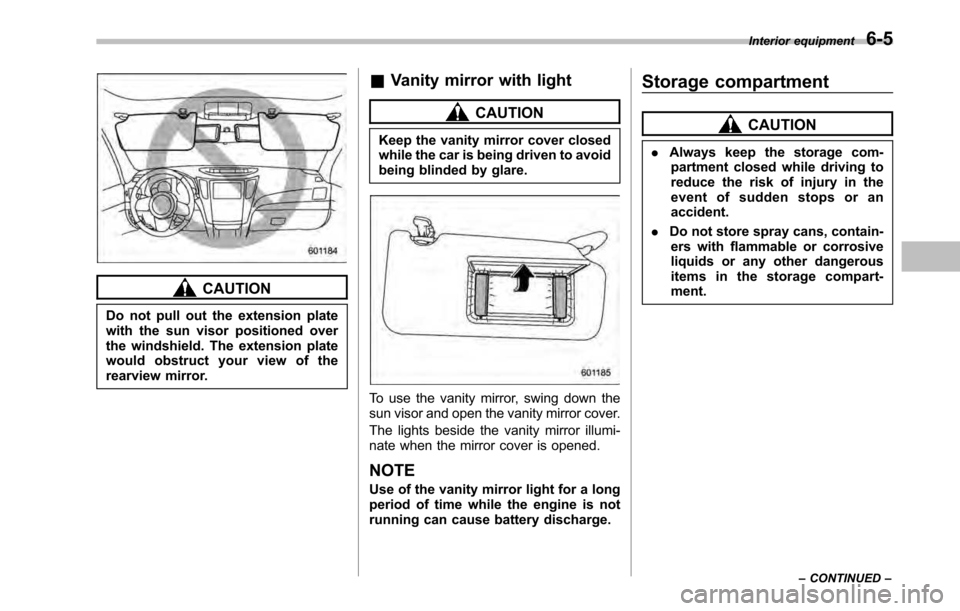
CAUTION
Do not pull out the extension plate
with the sun visor positioned over
the windshield. The extension plate
would obstruct your view of the
rearview mirror. &
Vanity mirror with light
CAUTION
Keep the vanity mirror cover closed
while the car is being driven to avoid
being blinded by glare.
To use the vanity mirror, swing down the
sun visor and open the vanity mirror cover.
The lights beside the vanity mirror illumi-
nate when the mirror cover is opened. NOTE
Use of the vanity mirror light for a long
period of time while the engine is not
running can cause battery discharge. Storage compartment
CAUTION
. Always keep the storage com-
partment closed while driving to
reduce the risk of injury in the
event of sudden stops or anaccident.
. Do not store spray cans, contain-
ers with flammable or corrosive
liquids or any other dangerous
items in the storage compart-ment. Interior equipment
6-5
– CONTINUED –