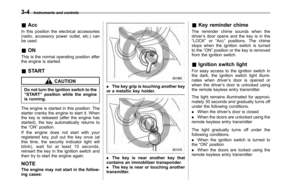
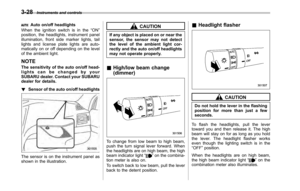
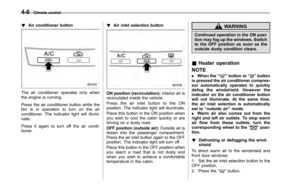
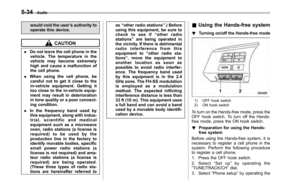
Page 25 of 448

According to accident statistics,
children are safer when properly
restrained in the rear seating posi-
tions than in the front seating posi-
tions. For instructions and precau-
tions concerning child restraint sys-
tems, refer to“Child restraint sys-
tems ”F 1-25.
& Manual seat
! Forward and backward adjustment
Pull the lever upward and slide the seat to
the desired position. Then release the
lever and move the seat back and forth to
make sure that it is securely locked intoplace. !
Reclining the seatback
WARNING
To prevent the passenger from slid-
ing under the seatbelt in the event of
a collision, always put the seatback
in the upright position while the
vehicle is in motion. Also, do not
place objects such as cushions
between the passenger and the
seatback. If you do so, the risk of
sliding under the lap belt and of the
lap belt sliding up over the abdomen
will increase, and both can result in
serious internal injury or death.
Pull the reclining lever up and adjust the
seatback to the desired position. Then
release the lever and make sure the
seatback is securely locked into place.
The seatback placed in a reclined position
can spring back upward with force when
the lever is pulled. When operating the
reclining lever to return the seatback, hold
the seatback lightly so that it may be
raised back gradually. Seat, seatbelt and SRS airbags
1-3
– CONTINUED –
Page 26 of 448
1-4Seat, seatbelt and SRS airbags
!Seat height adjustment (driver ’s
seat)
The height of the seat can be adjusted by
moving the seat cushion adjustment lever
up and down.
When the lever is pushed down, the seat
is lowered.
When the lever is pulled up, the seat rises. &
Power seat (if equipped)WARNING
To prevent the passenger from slid-
ing under the seatbelt in the event of
a collision, always put the seatback
in the upright position while the
vehicle is in motion. Also, do not
place objects such as cushions
between the passenger and the
seatback. If you do so, the risk of
sliding under the lap belt and of the
lap belt sliding up over the abdomen
will increase, and both can result in
serious internal injury or death. !
Driver ’s seat
1) Seat position forward/backward con-
trol switch
To adjust the seat forward or backward,
move the control switch forward or
backward. During forward/backward ad-
justment of the seat, you cannot adjust
Page 27 of 448

the seat cushion angle or seat cushion height.
2) Seat cushion angle control switch
To adjust the seat cushion angle, pull up
or push down the front end of the control switch.
3) Seatback angle (reclining) control switch
To adjust the angle of the seatback,
move the control switch.
4) Seat height control switch
To adjust the seat height, pull up or push
down the rear end of the control switch.
5) Lumbar support control switch
To increase lower back support, push the
front side of the switch. To decrease
lower back support, push the rear side of
the switch. !
Front passenger ’s seat (if
equipped)
1) Seat position forward/backward con-
trol switch
To adjust the seat forward or backward,
move the control switch forward or
backward.
2) Seatback angle (reclining) control switch
To adjust the angle of the seatback,
move the control switch. &
Head restraint adjustment1) Head restraint
2) Release button
Both the driver ’s seat and the front
passenger ’s seat are equipped with head
restraints.
The head restraint should be adjusted so
that the center of the head restraint is
closest to the top of the occupant ’s ears.
To raise:
Pull the head restraint up.
To lower:
Push the head restraint down while
pressing the release button on the top of
the seatback. Seat, seatbelt and SRS airbags
1-5
– CONTINUED –
Page 28 of 448

1-6Seat, seatbelt and SRS airbags
To remove:
While pressing the release button, pull out
the head restraint.
To install:
Install the head restraint into the holes that
are located on the top of the seatback until
the head restraint locks.
WARNING
. Never drive the vehicle with the
head restraints removed because
they are designed to reduce the
risk of serious neck injury in the
event that the vehicle is struck
from the rear. Therefore, when
you remove the head restraints,
you must reinstall all head re-
straints to protect vehicle occu-pants.
. All occupants, including the dri-
ver, should not operate a vehicle
or sit in a vehicle ’s seat until the
head restraints are placed in their
proper positions in order to mini-
mize the risk of neck injury in the
event of a collision. Seat heater (if equipped)
1)
HIGH –Rapid heating
2) LOW –Normal heating
3) OFF –Off
A) Left-hand side
B) Right-hand side The seat heater operates when the igni-
tion switch is either in the
“Acc ”or “ON ”
position.
To turn on the seat heater, press the “ LOW ”or “HIGH ”position on the switch,
as desired, depending on the tempera-ture.
Selecting the “HIGH ”position will cause
the seat to heat up quicker.
To turn off the seat heater, slightly press
the opposite side of the current position.
The indicator located on the switch illumi-
nates when the seat heater is in operation.
When the vehicle ’s interior is warmed
enough or before you leave the vehicle,
be sure to turn the switch off.
CAUTION
. There is a possibility that people
with delicate skin may suffer
slight burns even at low tempera-
tures if they use the seat heater
for a long period of time. When
using the heater, always be sure
to warn the persons concerned.
Page 29 of 448
.Do not put anything on the seat
which insulates against heat,
such as a blanket, cushion, or
similar items. This may cause the
seat heater to overheat.
NOTE
Use of the seat heater for a long period
of time while the engine is not running
can cause battery discharge. Rear seats
WARNING
Seatbelts provide maximum re-
straint when the occupant sits well
back and upright in the seat. Do not
put cushions or any other materials
between occupants and seatbacks
or seat cushions. If you do so, the
risk of sliding under the lap belt and
of the lap belt sliding up over the
abdomen will increase, and both can
result in serious internal injury ordeath.
WARNING
Never stack luggage or other cargo
higher than the top of the seatback
because it could tumble forward and
injure passengers in the event of a
sudden stop or accident. Seat, seatbelt and SRS airbags
1-7
– CONTINUED –
Page 30 of 448

1-8Seat, seatbelt and SRS airbags
&Reclining the seatback (Out- back)
WARNING
To prevent the passenger from slid-
ing under the seatbelt in the event of
a collision, always put the seatback
in the upright position while the
vehicle is in motion.
CAUTION
If the vehicle is equipped with a
cargo area cover, observe the fol-
lowing precautions. . Be careful not to pinch your hand
between the headrest and the cargo area cover when you re-
cline the rear seat.
. Move the front cover of the cargo
area cover backward so that the
cover is not damaged by the
reclined seatback. Refer to “Car-
go area cover ”F 6-15.
Pull the lever and adjust the seatback to
the desired position.
Then release the lever and make sure the
seatback is securely locked into place. &
Folding down the rear seat- back
WARNING
. After returning the rear seat to its
original position, be certain to
place all of the seatbelts and the
tab attached to the seat cushion
above the seat cushion. And
make certain that the shoulder
belts are fully visible.
. Never allow passengers to ride
on the folded rear seatback or in
the cargo area or trunk. Doing so
may result in serious injury ordeath.
. Secure all objects and especially
long items properly to prevent
them from being thrown around
inside the vehicle and causing
serious injury during a sudden
stop, a sudden steering maneu-
ver or a rapid acceleration.
Page 31 of 448

CAUTION
The rear seatback may fold down
quickly due to the internal spring.
Hold the seatback while pulling the
release lever to slow it down.
! Legacy
CAUTION
Before folding down the rear seats,
make sure that no one is sitting and
nothing is placed on the rear seats.
Otherwise, the seatback may fold
down suddenly and an unexpected
accident may occur.
To fold down the seatback, perform the
following procedure.
1. Open the trunk lid. Refer to “Opening
the trunk lid (Legacy) ”F 2-10 or “To open
the trunk lid from inside ”F 2-24.
1) Release lever
2. Pull the release lever on the side that
you want to fold down.
3. Fold the seatback down.
To return the seatback to its original
position, raise the seatback until it locks
into place and make sure that it is securelylocked. !
Outback
Unlock the seatback by pulling the release
lever and then fold the seatback down.
To return the seatback to its original
position, raise the seatback until it locks
into place and make sure that it is securelylocked. Seat, seatbelt and SRS airbags
1-9
– CONTINUED –
Page 32 of 448

1-10Seat, seatbelt and SRS airbags
&Head restraint adjustment
Both the rear window side seats and the
rear center seat are equipped with headrestraints.
WARNING
. Never drive the vehicle with the
head restraints removed because
they are designed to reduce the
risk of serious neck injury in the
event that the vehicle is struck
from the rear. Therefore, when
you remove the head restraints,
you must reinstall all head re-
straints to protect vehicle occu-pants.
. All occupants, including the dri-
ver, should not operate a vehicle
or sit in a vehicle ’s seat until the
head restraints are placed in their
proper positions in order to mini-
mize the risk of neck injury in the
event of a collision. !
Rear window side seating position
1) Head restraint
2) Release button
To raise:
Pull the head restraint up.
To lower:
Push the head restraint down while
pressing the release button on the top of
the seatback.
To remove:
While pressing the release button, pull out
the head restraint.
To install:
Install the head restraint into the holes that
are located on the top of the seatback until
the head restraint locks.
The head restraint should be adjusted so that the center of the head restraint is
closest to the top of the occupant
’s ears.
When the seats are not occupied, lower
the head restraints to improve rearward
visibility.
NOTE
For Legacy, it is not possible to remove
or install the head restraint without
folding down the rear seatback. Fold
down the rear seatback and then
remove or install the head restraint.