2010 SUBARU FORESTER manual transmission
[x] Cancel search: manual transmissionPage 237 of 402

7-20Starting and operating
. If you attempt to shift up when the
vehicle speed is too low, the transmis-
sion will not respond.. You can perform a skip-shift (for
example, from 4th to 2nd) by operating
the select lever twice in rapid succes-sion.. The transmission automatically se-
lects 1st gear when the vehicle stopsmoving.. If the temperature of the automatic
transmission fluid becomes too high,the “AT OIL TEMP ”warning light will
illuminate and upshifts to 4th gear will
not be possible. Immediately stop the
vehicle in a safe place and let the
engine idle until the warning light turns off.
& Driving tips
. On a road surface where there is a risk
of wheelspin (for example, a snow- or
gravel-covered road), you can pull away
from a standstill (safely and easily) by first
selecting the 2nd gear of the manual mode. . Always apply the foot or parking brake
when the vehicle is stopped in the “D ”or
“ R ”position.
. Always set the parking brake when
parking your vehicle. Do not hold the
vehicle with only the transmission. .
Do not keep the vehicle in a stationary
position on an uphill grade by using the“ D ”position. Use the brake instead.
. The engine may, on rare occasions,
knock when the vehicle rapidly acceler-
ates or rapidly pulls away from a standstill.
This phenomenon does not indicate aproblem.
& SPORT mode
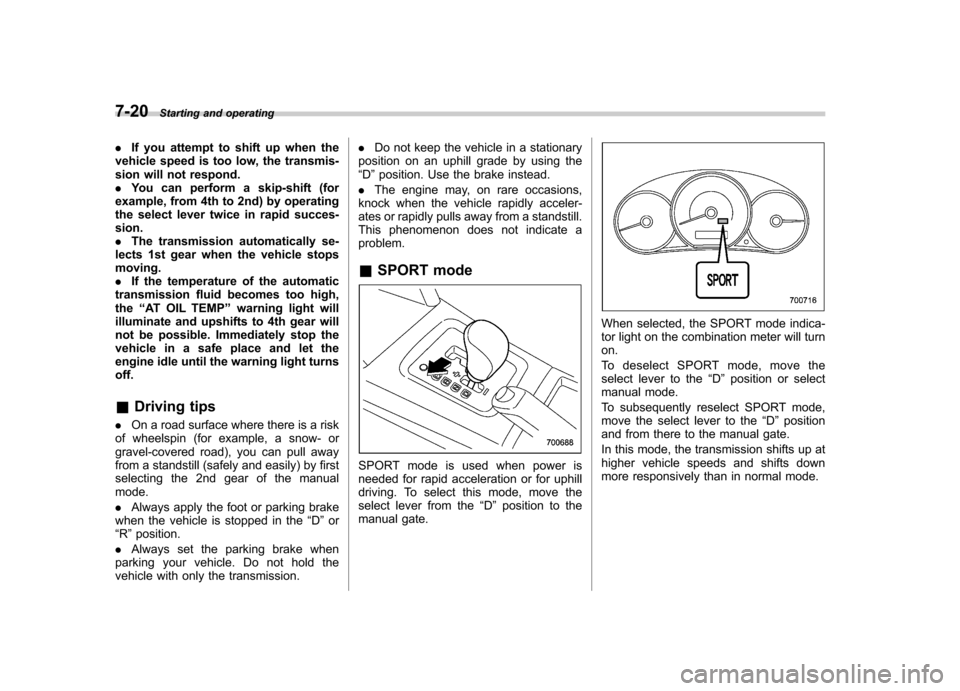
SPORT mode is used when power is
needed for rapid acceleration or for uphill
driving. To select this mode, move the
select lever from the “D ” position to the
manual gate.
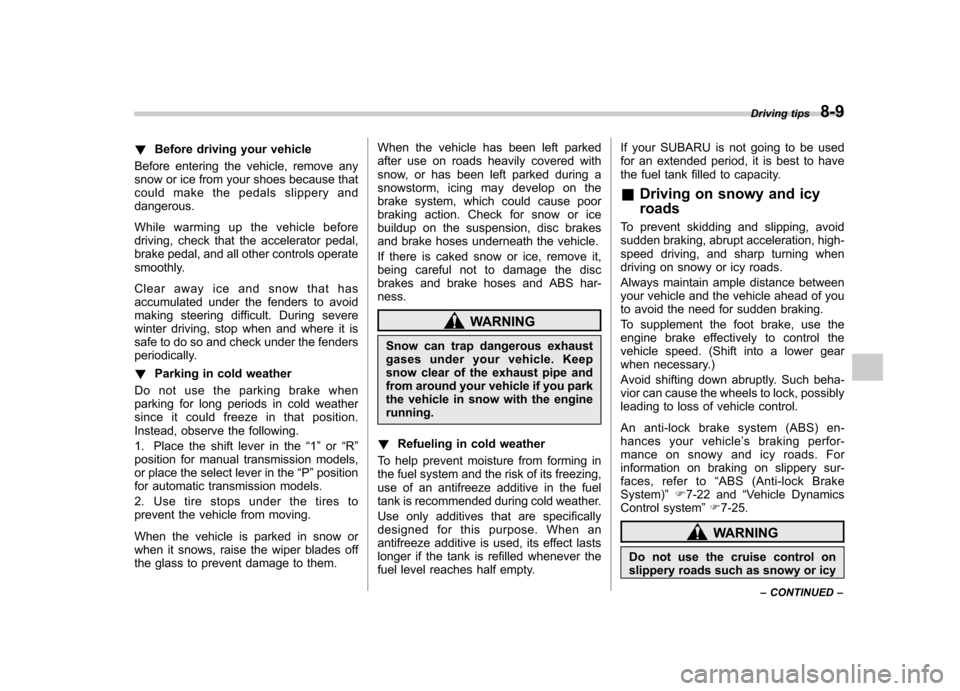
When selected, the SPORT mode indica-
tor light on the combination meter will turnon.
To deselect SPORT mode, move the
select lever to the “D ” position or select
manual mode.
To subsequently reselect SPORT mode,
move the select lever to the “D ” position
and from there to the manual gate.
In this mode, the transmission shifts up at
higher vehicle speeds and shifts down
more responsively than in normal mode.
Page 262 of 402

crossing shallow streams, first check the
depth of the water and the bottom of the
stream bed for firmness and ensure that
the bed of the stream is flat. Drive slowly
and completely through the stream. The
water should be shallow enough that it
does not reach the vehicle’s undercar-
riage. Water entering the engine air intake
or the exhaust pipe or water splashing
onto electrical parts may damage your
vehicle and may cause it to stall. Never
attempt to drive through rushing water;
regardless of its depth, it can wash away
the ground from under your tires, resulting
in possible loss of traction and even
vehicle rollover. . Always check your brakes for effec-
tiveness immediately after driving in sand,
mud or water. Do this by driving slowly
and stepping on the brake pedal. Repeat
that process several times to dry out the
brake discs and brake pads. . Do not drive or park over or near
flammable materials such as dry grass or
fallen leaves, as they may burn easily. The
exhaust system is very hot while the
engine is running and right after engine
stops. This could create a fire hazard. . After driving through tall grass, mud,
rocks, sand, rivers, etc., check that there
is no grass, bush, paper, rags, stones,
sand, etc. adhering to or trapped on the underbody. Clear off any such matter from
the underbody. If the vehicle is used with
these materials trapped or adhering to the
underbody, a mechanical breakdown or
fire could occur. .
Secure all cargo carried inside the
vehicle and make certain that it is not
piled higher than the seatbacks. During
sudden stops or jolts, unsecured cargo
could be thrown around in the vehicle and
cause injury. Do not pile heavy loads on
the roof. Those loads raise the vehicle ’s
center of gravity and make it more prone
to tip over. . If you must rock the vehicle to free it
from sand or mud, depress the accelerator
pedal slightly and move the select lever
back and forth between “D ” and “R ”
repeatedly. Do not race the engine. For
the best possible traction, avoid spinning
the wheels when trying to free the vehicle. . When the road surface is extremely
slippery, you can obtain better traction by
starting the vehicle with the transmission
in 2nd than 1st. . Never equip your vehicle with tires
larger than those specified in this manual.. Wash the vehicle ’s underbody after off-
road driving. Suspension components are
particularly prone to dirt buildup, so they
need to be washed thoroughly. . Frequent driving of an AWD model under hard-driving conditions such as
rough roads or off roads will necessitate
more frequent replacement of engine oil,
brake fluid and transmission oil than that
specified in the maintenance schedule
described in the
“Warranty and Mainte-
nance Booklet ”.
Remember that damage done to your
SUBARU while operating it off-road and
not using common sense precautions
such as those listed above is not eligible
for warranty coverage. Driving tips
8-7
Page 264 of 402

!Before driving your vehicle
Before entering the vehicle, remove any
snow or ice from your shoes because that
could make the pedals slippery anddangerous.
While warming up the vehicle before
driving, check that the accelerator pedal,
brake pedal, and all other controls operate
smoothly.
Clear away ice and snow that has
accumulated under the fenders to avoid
making steering difficult. During severe
winter driving, stop when and where it is
safe to do so and check under the fenders
periodically. ! Parking in cold weather
Do not use the parking brake when
parking for long periods in cold weather
since it could freeze in that position.
Instead, observe the following.
1. Place the shift lever in the “1 ” or “R ”
position for manual transmission models,
or place the select lever in the “P ”position
for automatic transmission models.
2. Use tire stops under the tires to
prevent the vehicle from moving.
When the vehicle is parked in snow or
when it snows, raise the wiper blades off
the glass to prevent damage to them. When the vehicle has been left parked
after use on roads heavily covered with
snow, or has been left parked during a
snowstorm, icing may develop on the
brake system, which could cause poor
braking action. Check for snow or ice
buildup on the suspension, disc brakes
and brake hoses underneath the vehicle.
If there is caked snow or ice, remove it,
being careful not to damage the disc
brakes and brake hoses and ABS har-ness.
WARNING
Snow can trap dangerous exhaust
gases under your vehicle. Keep
snow clear of the exhaust pipe and
from around your vehicle if you park
the vehicle in snow with the enginerunning.
! Refueling in cold weather
To help prevent moisture from forming in
the fuel system and the risk of its freezing,
use of an antifreeze additive in the fuel
tank is recommended during cold weather.
Use only additives that are specifically
designed for this purpose. When an
antifreeze additive is used, its effect lasts
longer if the tank is refilled whenever the
fuel level reaches half empty. If your SUBARU is not going to be used
for an extended period, it is best to have
the fuel tank filled to capacity. &
Driving on snowy and icy roads
To prevent skidding and slipping, avoid
sudden braking, abrupt acceleration, high-
speed driving, and sharp turning when
driving on snowy or icy roads.
Always maintain ample distance between
your vehicle and the vehicle ahead of you
to avoid the need for sudden braking.
To supplement the foot brake, use the
engine brake effectively to control the
vehicle speed. (Shift into a lower gear
when necessary.)
Avoid shifting down abruptly. Such beha-
vior can cause the wheels to lock, possibly
leading to loss of vehicle control.
An anti-lock brake system (ABS) en-
hances your vehicle ’s braking perfor-
manceonsnowyandicyroads.For
information on braking on slippery sur-
faces, refer to “ABS (Anti-lock Brake
System) ”F 7-22 and “Vehicle Dynamics
Control system ”F 7-25.
WARNING
Do not use the cruise control on
slippery roads such as snowy or icy Driving tips
8-9
– CONTINUED –
Page 266 of 402

.Do not use a combination of
radial, belted bias or bias tires
since it may cause dangerous
handling characteristics and lead
to an accident.
Your vehicle is equipped with “all season
tires ”as original equipment, which are
designed to provide an adequate measure
of traction, handling and braking perfor-
mance in year-round driving. In winter, it
may be possible to enhance performance
through use of tires designed specifically
for winter driving conditions.
When you choose to install winter tires on
your vehicle, be sure to use the correct tire
size and type. You must install four winter
tires that are of the same size, construc-
tion, brand and load range and you should
never mix radial, belted bias or bias tires
since this may result in dangerous hand-
ling characteristics. When you choose a
tire, make sure that there is enough
clearance between the tire and vehicle
body.
Remember to drive with care at all times
regardless of the type of tires on yourvehicle. &
Tire chains
CAUTION
Tire chains cannot be used on your
vehicle because of the lack of
clearance between the tires and
vehicle body.
NOTE
When tire chains cannot be used, use
of another type of traction device (such
as spring chains) may be acceptable if
use on your vehicle is recommended
by the device manufacturer, taking into
account tire size and road conditions.
Follow the device manufacturer ’s in-
structions, especially regarding max-
imum vehicle speed.
To help avoid damage to your vehicle,
drive slowly, readjust or remove the
device if it is contacting your vehicle,
and do not spin your wheels. Damage
caused to your vehicle by use of a
traction device is not covered under
warranty.
Make certain that any traction device
you use is an SAE class S device, and
use it on the front wheels only. Always
use the utmost care when driving with
a traction device. Overconfidence be- cause you are using a traction device
could easily lead to a serious accident. &
Rocking the vehicle
If you must rock the vehicle to free it from
snow, sand, or mud, depress the accel-
erator pedal slightly and move the select
lever back and forth between “D ”and “R ”
repeatedly. Do not race the engine. For
the best possible traction, avoid spinning
the wheels when trying to free the vehicle.
When the road surface is extremely
slippery, you can obtain better traction by
starting the vehicle with the transmission
in 2nd than 1st (both for MT and AT).
If your vehicle is an AT model, for
information about holding the transmission
in the 2nd position, refer to “Selection of
manual mode ”F 7-19 and “Driving tips ”
F 7-20. Driving tips
8-11
Page 279 of 402

8-24Driving tips
nificant blind spot.
. Sufficient time should be taken to learn
the “feel ”of the vehicle/trailer combination
before starting out on a trip. In an area free
of traffic, practice turning, stopping and
backing up. ! Driving with a trailer
. You should allow for considerably more
stopping distance when towing a trailer.
Avoid sudden braking because it may
result in skidding or jackknifing and loss ofcontrol. . Avoid abrupt starts and sudden accel-
erations. If your vehicle has a manual
transmission, always start out in first gear
and release the clutch at moderate enginerevolution. . Avoid uneven steering, sharp turns and
rapid lane changes.. Slow down before turning. Make a
longer than normal turning radius because
the trailer wheels will be closer than the
vehicle wheels to the inside of the turn. In
a tight turn, the trailer could hit yourvehicle. . Crosswinds will adversely affect the
handling of your vehicle and trailer, caus-
ing sway. Crosswinds can be due to
weather conditions or the passing of large
trucks or buses. If swaying occurs, firmly
grip the steering wheel and slow down immediately but gradually. .
When passing other vehicles, consid-
erable distance is required because of the
added weight and length caused by
attaching the trailer to your vehicle.
1) Left turn
2) Right turn
. Backing up with a trailer is difficult and
takes practice. When backing up with a
trailer, never accelerate or steer rapidly.
When turning back, grip the bottom of the
steering wheel with one hand and turn it to
the left for a left turn, and turn it to the right
for a right turn. . If the ABS warning light illuminates
while the vehicle is in motion, stop towing
the trailer and have repairs performed
immediately by the nearest SUBARU
dealer. !
Driving on grades
. Before going down a steep hill, slow
down and shift into lower gear (if neces-
sary, use 1st gear) in order to utilize the
engine braking effect and prevent over-
heating of your vehicle ’s brakes. Do not
make sudden downshifts. . When driving uphill in hot weather, the
air conditioner may turn off automatically
to protect the engine from overheating. . When driving uphill in hot weather, pay
attention to the coolant temperature high
warning light (for all models) and AT OIL
TEMP warning light (for AT models)
because the engine and transmission are
relatively prone to overheating under
these conditions. If the coolant tempera-
ture high warning light or the AT OIL TEMP
warning light illuminates, immediately turn
off the air conditioner and stop the vehicle
in the nearest safe location. For further
instructions and additional information,
refer to the following sections.
–“If you park your vehicle in case of
an emergency ”F 9-2
–“ Engine overheating ”F 9-12
–“ Coolant temperature low indicator
light/Coolant temperature high warn-
ing light ”F 3-13
–“ AT OIL TEMP warning light (AT
models) ”F 3-14
. If your vehicle has an automatic trans-
Page 280 of 402

mission, avoid using the accelerator pedal
to stay stationary on an uphill slope
instead of using the parking brake or foot
brake. That may cause the transmission
fluid to overheat. .If your vehicle has an automatic trans-
mission, place the select lever as follows.
Uphill slopes: “D ”position
Downhill slopes: A low-speed gear posi-
tion to use engine braking ! Parking on a grade
Always block the wheels under both
vehicle and trailer when parking. Apply
the parking brake firmly. You should not
park on a hill or slope. But if parking on a
hill or slope cannot be avoided, you
should take the following steps.
1. Apply the brakes and hold the pedal down.
2. Have someone place wheel blocks
under both the vehicle and trailer wheels.
3. When the wheel blocks are in place,
release the regular brakes slowly until the
blocks absorb the load.
4. Apply the regular brakes and then
apply the parking brake; slowly release
the regular brakes.
5. Shift into 1st or reverse gear (manual
transmission models) or the “P ” position
(automatic transmission models) and shut
off the engine. Driving tips
8-25
Page 296 of 402

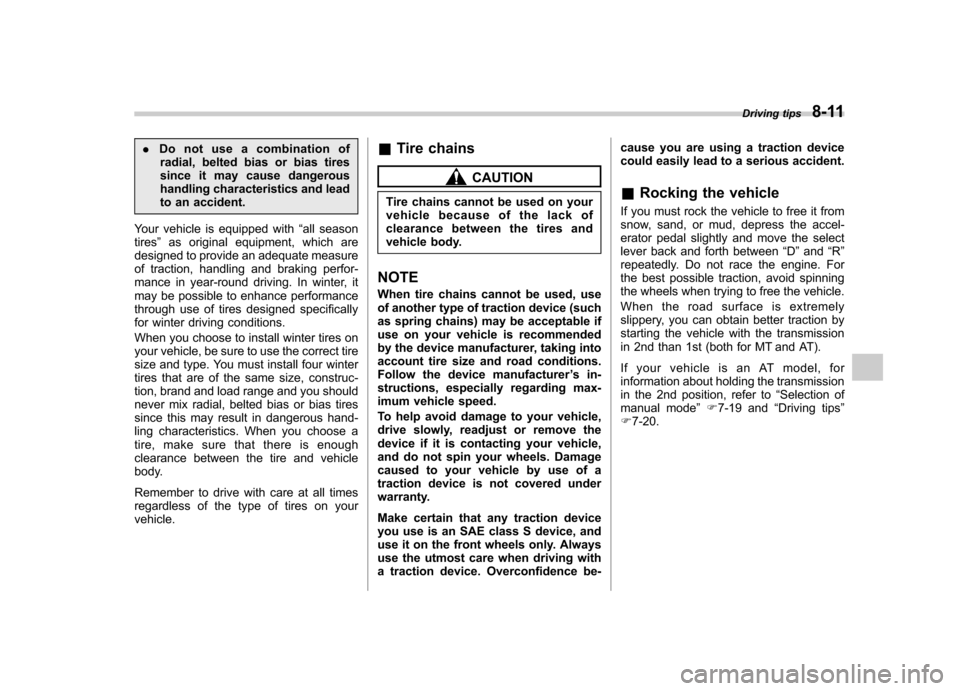
Front tie-down hooks:
The front tie-down hooks are located
between each of the front tires and the
front bumper.Rear tie-down hooks:The rear tie-down hooks are located near
each of the jack-up reinforcements.
WARNING
Use the rear tie-down hooks only for
downward anchoring. If they are
used to anchor the vehicle in any
other direction, cables may slip off
the hooks, possibly causing a dan-
gerous situation. &
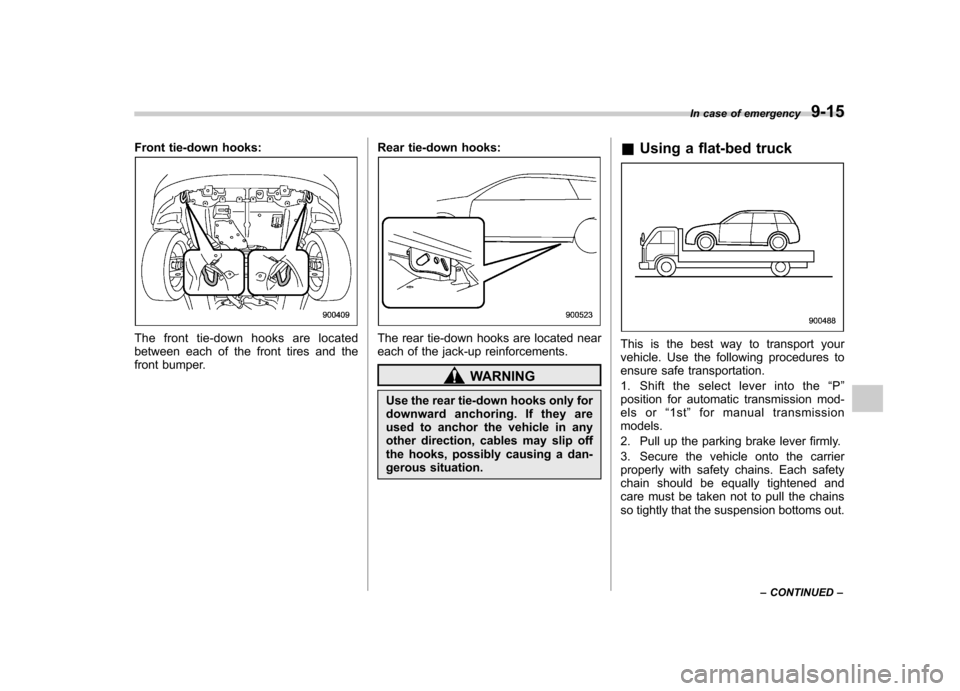
Using a flat-bed truck
This is the best way to transport your
vehicle. Use the following procedures to
ensure safe transportation.
1. Shift the select lever into the “P ”
position for automatic transmission mod-
els or “1st ”for manual transmission
models.
2. Pull up the parking brake lever firmly.
3. Secure the vehicle onto the carrier
properly with safety chains. Each safety
chain should be equally tightened and
care must be taken not to pull the chains
so tightly that the suspension bottoms out. In case of emergency
9-15
– CONTINUED –
Page 306 of 402

Maintenance schedule....................................... 11-3
Maintenance precautions ................................... 11-3
Before checking or servicing in the engine compartment .................................................... 11-4
When you do checking or servicing in the engine compartment while the engine is running .......... 11-4
Engine hood ....................................................... 11-5
Engine compartment overview .......................... 11-6
Non-turbo models .............................................. 11-6
Turbo models ..................................................... 11-7
Engine oil ............................................................ 11-8
Checking the oil level ......................................... 11-8
Changing the oil and oil filter .............................. 11-9
Recommended grade and viscosity .................. 11-11
Recommended grade and viscosity under severe driving conditions ............................... 11-12
Synthetic oil ..................................................... 11-12
Cooling system ................................................ 11-12
Cooling fan, hose and connections ................... 11-12
Engine coolant ................................................. 11-13
Air cleaner element .......................................... 11-15
Replacing the air cleaner element ..................... 11-16
Spark plugs ...................................................... 11-18
Recommended spark plugs .............................. 11-18
Drive belts ........................................................ 11-18
Manual transmission oil .................................. 11-19
Checking the oil level ....................................... 11-19
Recommended grade and viscosity .................. 11-20
Automatic transmission fluid .......................... 11-20
Checking the fluid level .................................... 11-20 Recommended fluid
......................................... 11-21
Front differential gear oil (AT models) ........... 11-21
Checking the oil level ...................................... 11-21
Recommended grade and viscosity .................. 11-22
Rear differential gear oil .................................. 11-22
Checking the gear oil level ............................... 11-22
Recommended grade and viscosity .................. 11-22
Power steering fluid ........................................ 11-23
Checking the fluid level .................................... 11-23
Recommended fluid ......................................... 11-24
Brake fluid ........................................................ 11-24
Checking the fluid level .................................... 11-24
Recommended brake fluid ............................... 11-25
Clutch fluid (MT models) ................................. 11-25
Checking the fluid level .................................... 11-25
Recommended clutch fluid ............................... 11-26
Brake booster .................................................. 11-26
Brake pedal ...................................................... 11-27
Checking the brake pedal free play .................. 11-27
Checking the brake pedal reserve distance....... 11-27
Clutch pedal (MT models) ............................... 11-27
Checking the clutch function ............................ 11-27
Checking the clutch pedal free play .................. 11-28
Hill start assist system (MT models) .............. 11-28
Replacement of brake pad and lining ............ 11-28
Breaking-in of new brake pads and linings ....... 11-29
Parking brake stroke ....................................... 11-29
Tires and wheels .............................................. 11-30
Types of tires ................................................... 11-30
Maintenance and service
11