2010 SKODA OCTAVIA TOUR change time
[x] Cancel search: change timePage 19 of 199

Instruments and Indicator/Warning Lights
18
Digital clockYou can set the time with the rotary knob page 15, fig. 15.
Select the information which you wish to change by turning the button and carry
out the change of the selected information by pressing the button.
WARNING
The clock should not be adjusted while dr iving for safety reasons but only when
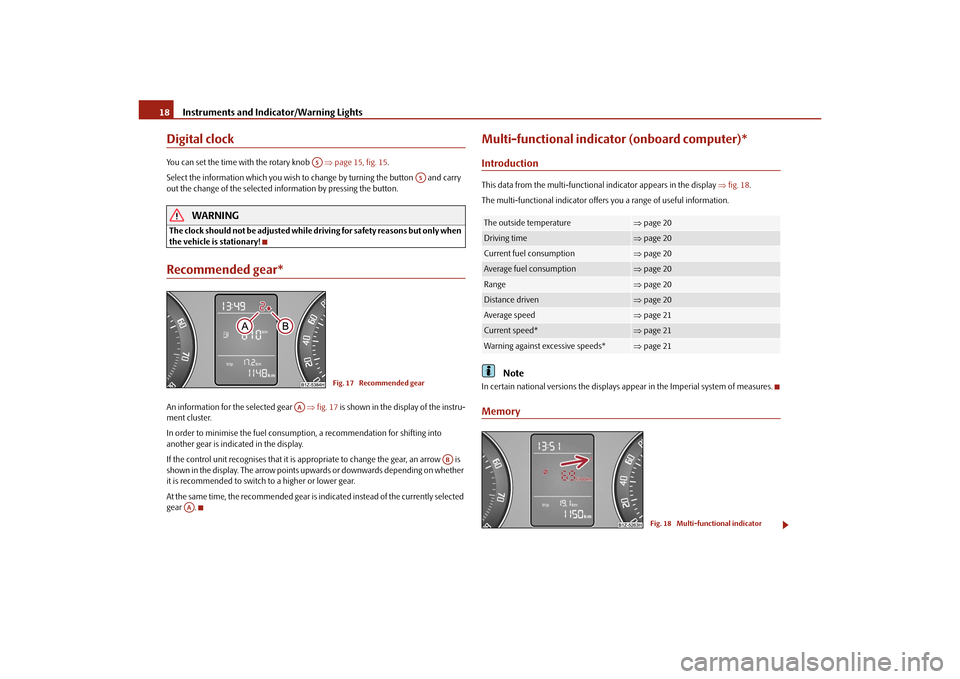
the vehicle is stationary!Recommended gear*An information for the selected gear fig. 17 is shown in the display of the instru-
ment cluster.
In order to minimise the fuel consumptio n, a recommendation for shifting into
another gear is indicated in the display.
If the control unit recognises that it is a ppropriate to change the gear, an arrow is
shown in the display. The arrow points upwards or downwards depending on whether
it is recommended to switch to a higher or lower gear.
At the same time, the recommended gear is indicated instead of the currently selected
gear .
Multi-functional indica tor (onboard computer)*IntroductionThis data from the multi-functional indicator appears in the display fig. 18 .
The multi-functional indicator offers you a range of useful information.
Note
In certain national versions the displays a ppear in the Imperial system of measures.Memory
A5
A5
Fig. 17 Recommended gear
AA
AB
AA
The outside temperature
page 20
Driving time
page 20
Current fuel consumption
page 20
Average fuel consumption
page 20
Range
page 20
Distance driven
page 20
Average speed
page 21
Current speed*
page 21
Warning against excessive speeds*
page 21
Fig. 18 Multi-functional indicator
s2bs.2.book Page 18 Monday, September 27, 2010 9:53 AM
Page 22 of 199

Instruments and Indicator/Warning Lights21
Using the system
Safety
Driving Tips
General Maintenance
Breakdown assistance
Technical Data
The maximum distance indicated in both switch positions is 1,999 km. The indicator is
set back to null if this
period is exceeded.
Average speedThe average speed since the memory was last erased is shown in the display in
km/hour page 18. If you wish to determine the average speed over a certain period
of time, you must set the memory at the start of the new measurement to zero using
the button on the windshield wiper lever page 19, fig. 19 .
Dashes appear in the display for the first 100 m you drive after erasing the memory.
The indicated value will be updated every 5 seconds while you are driving.Current speed*The current speed is displayed on the display. It is identical to the display on the
tachometer (speedometer) page 15, fig. 15 .
Note
If the display of the second speed is activa ted in mph, the current speed* is not indi-
cated in km/h on the display.Warning against excessive speeds*This function enables you to set a speed li mit and will notify you if you exceed this
speed limit.Configuring the speed limit while the vehicle is stationary– With switch page 19, fig. 19 , choose the menu point Warning against
excessive speeds .
– Press the switch to activate configurat ion of the speed limit (the value flashes).
– Use switch to set the required speed limit, e.g. 50 km/h.
– Confirm the speed limit that was set with button , or wait 5 seconds until the setting is saved automatically (the value stops flashing). In this way you can set the limit in 5 km/h steps.
Configuring the speed limit while the vehicle is moving– With switch , choose the menu point
Warning against excessive speeds.
– Drive e.°g at a speed of 50 km/h.
– Press the switch to accept the curr ent speed as the speed limit (the value
flashes).
If you wish to change the speed limit that was set, it is changed in 5 km/h intervals (e.g.
the accepted speed of 47 km/h increases to 50 km/h or decreases to 45 km/h).
– Confirm the speed limit that was set by pressing button again, or wait 5 seconds until the setting is saved automati cally (the value stops flashing).Changing or erasing the speed limit– With switch , choose the menu point Warning against excessive speeds.
– When you press the switch ag ain, the speed limit is erased.
– Pressing the switch a further time activates the change mode for the speed limit.
If you exceed the configured speed, an ac oustic signal will sound as a warning. A
Warning against excessive speeds appears together with the set limit on the display.
The set speed limit remains stored even after switching off the ignition.
WARNING
Pay attention primarily to the traffic situation! As the driver you are fully
responsible for road safety.
AB
A2
AA
AB
AA
AB
AA
AB
AB
AA
AB
AB
s2bs.2.book Page 21 Monday, September 27, 2010 9:53 AM
Page 31 of 199

Unlocking and locking
30
Unlocking and lockingKeyFig. 21 Set of keys without remote control/set of keys with remote control keyTwo keys are provided with the vehicle. De pending on the equipment, your vehicle can
be equipped with keys without radio remote control fig. 21 - left, or with radio
remote control* fig. 21 - right.
WARNING
Always withdraw the key whenever you leave the vehicle - even if it is only
for a short time. This is particularly important if children are left in the vehicle.
The children might otherwise start the en gine or operate electrical equipment
(e.g. power windows) - risk of injury!
Do not withdraw the ignition key from the ignition lock until the vehicle has
come to a stop. The steerin g lock might otherwise enga ge unintentionally - risk
of accident!Caution
Each key contains electronic components; therefore protect them against moisture
and severe shocks.
Keep the groove of the keys absolutely clean as impurities (textile fibres, dust etc.)
have a negative effect on the proper operation of the locking cylinder and the ignition
lock.
Note
Please approach an authorised Škoda Servic e Partner if you lose a key since he can
obtain a new one for you.Changing the battery in the remote control keyFig. 22 Remote control key - remove cover/remove batteryEach remote control key contains a batt ery which is housed under the cover
fig. 22 . If the battery is discharged, the red in dicator light does not light up after
pressing a button on the remote control fig. 21 . Change the battery as follows:
– Fold open the key.
– Carefully press off the battery cover at the points of the arrows fig. 22 .
– Remove the discharged battery from the key by pressing the battery downwards at the point of the arrow fig. 22 .
– Insert the new battery. Ensure that the “+” symbol on the battery is facing upwards. The correct polarity is shown on the battery cover.
– Position the battery cover on the key and pres s on it until it is heard to lock in place.
For the sake of the environment
Dispose of a used battery in accordance with environmental regulations.
AB
AA
A1
A2
s2bs.2.book Page 30 Monday, September 27, 2010 9:53 AM
Page 49 of 199

Lights and Visibility
48
Automatic wipe/wash for windscreen
– Pull the lever towards the steering wheel into sprung position , the wash system
sprays immediately, the windscreen wiper starts wiping a little later. The wash
system and the windscreen wiper operate simultaneously at a speed of more than
120 km/h.
– Release the lever. The windscreen wash system stops and the wiper continues for another 3 - 4 wiper strokes (depending on the period of spraying of the wind-
screen). At a speed of more than 2 km/h , the wiper wipes once again* 5 seconds
after the last wiper stroke in order to wipe the last drops from the windscreen. This
function can be activated/deacti vated by a specialist garage.Wiping the rear window pane*– Push the lever away from the steering wheel into position - the widescreen
wiper will operate every 6 seconds.Automatic wipe/wash for the rear window pane*– Press the lever from the steering wheel forward into the sprung position , the
wash system sprays immediately, the windscreen wiper starts wiping a little later.
As long as you hold the lever in this position, the wiper operates as well as the wash
system.
– Letting go of the lever will cause the windscreen wash system to stop and the wiper to continue for another 2 - 3 wiper strokes (depending on the period of spraying of
the windscreen). The lever will stay in position after releasing it .Switching windscreen wipers off– Move the lever back into its home position .
After the windscreen wiper switches off each time or the ignition switches off for the
third time, the position of the windscreen wiper changes, this counteracts an early
fatigue of the wiper rubbers.
The windscreen wipers and the wash system only operate if the ignition is switched on
and the bonnet is closed
4). If the intermittent wipe is switched on, the intervals are also controlled depending on
speed.
The rear window will be wiped again if the
front window wipers are on when reverse
gear is selected.
The windscreen washer nozzles are heated* when the ignition is switched on.
Top up with wash liquid page 150.
Winter position
If the windscreen wipers are in rest position, they cannot be folded out from the wind-
screen. For this reason we recommend adjust ing the windscreen wipers in winter so
that they can be folded out from the windscre en easily. You can set this rest position as
follows:
Switch on the windscreen wipers.
Switch off the ignition. The windscreen wipers remain in the position in which they
were when switching off the ignition.
You can also use the service position page 49 as a winter position.
WARNING
Properly maintained windscreen wiper blades are essential for clear visi-
bility and safe driving page 49.
Do not use the windscreen washer sy stem at low temperatures, without
heating the windscreen beforehand. Otherwise the window cleaner could
freeze on the windscreen and re strict the view to the front.
The rain sensor only operates as a su pport. The driver is not released from
the responsibility to set the function of the windscreen wipers manually
depending on the visibility conditions.Caution
In frosty weather, please firs t of all check whether the windscreen wiper blades are not
frozen to the windscreen before switching them on. Switching on windscreen wipers
when the blades are frozen to the windscreen may result in damage both to the blades
and the motor of the windscreen wipers!
4)On vehicles which do not have a contact switch for the bonnet, the windshield wiper and wash
system operates also when the bonnet is opened.
A5
A6
A7
A6
A0
s2bs.2.book Page 48 Monday, September 27, 2010 9:53 AM
Page 89 of 199

Passive Safety
88
Keep your feet in the footwell at al l times while driving. Never place your
feet out of the window or on the seats. You will be exposed to increased risk of
injury if it becomes necessary to apply the brake or in the event of an accident.
If an airbag is deployed, you may suffer fatal injuries when adopting an incor-
rect seated position!
If the occupants on the rear seats are not sitting upright, the risk of injury is
increased due to incorrect routing of the seat belt.
Examples of an incorrect seated position
An incorrect seated position can lead to severe injuries or death for the
occupants.Seat belts offer their optimum protection only if the webbing of the seat belts is prop-
erly routed. Incorrect seated positions considerably reduce the protective functions of
the seat belts and therefore increase the risk of injury due to an incorrect routing of the
seat belt. The driver is fully responsible for himself and the occupants, in particular for
the children. Do not permit an occupant to adopt an incorrect seated position when
the car is moving.
The following list contains the examples of seated positions which are dangerous for
the occupants. This list is not complete, however we would like you to get familiar with
this subject.
Therefore, while the car is moving never:
stand up in the vehicle,
stand up on the seats,
kneel onto the seats,
tilt the seat backrest fully to the back,
lean against the dash panel,
lie on the rear seats,
only sit on the front area of the seat,
sit to the side,
lean out of the window,
put the feet out of the window,
put the feet on the dash panel,
put the feet on the seat upholstery,
occupy the footwell,
have the seat belt not fastened,
occupy the luggage compartment.
WARNING
If the occupant adopts an incorrect seated position, he is exposed to life-
threatening injuries, in case he is hit by a deployed airbag.
Before setting off, please adopt the correct seated position and do not
change this seated position while the car is moving. Also advise your occupants
to adopt the correct seated position and not to change this seated position
while the car is moving.
WARNING (continued)
s2bs.2.book Page 88 Monday, September 27, 2010 9:53 AM
Page 91 of 199

Seat belts
90
The speed of the vehicle is, nevertheless, the most important factor. Doubling the
speed of the vehicle from 25 km/h up to 50 km/hour increases the kinetic energy four
times.
The common opinion that it is possible to su pport your body in a minor accident with
your hands, is incorrect. Even in a collision at only a low speed, the forces acting on the
body are such that it is no longer possible to support your body.
Even if you only drive at a speed within the range from 30 km/hour to 50 km/hour, the
forces which are produced on your body in the event of an accident can easily exceed
10.000 N (Newton). This equals a weight of one tonne (1 000 kg).
In the event of a frontal collision, occupants of the vehicle not wearing a seat belt, are
thrown forward and strike in an uncontrolled way parts of the interior of the vehicle,
such as steering wheel, dash panel, windscreen, page 89, fig. 91 - left. The occu-
pants of a vehicle who have not fastened their seat belts may even be thrown out of
the vehicle. This can result in fatal injuries.
It is also important that rear seat occupants fasten their seat belts as they will otherwise
be thrown through the vehicle in an uncontr olled manner in the event of an accident
A rear seat passenger who has not fastened the s eat bel t i s a dang er not o nl y to hims elf
but also for those seated at the front page 89, fig. 91 - right.Important safety information regarding the use of seat beltsThe correct use of the seat belts cons iderably reduces the risk of injury!
WARNING
The belt webbing must not be jammed in-between at any point or twisted,
or chafe against any sharp edges.
It is important that the belt webbing is properly routed if the seat belts are
to offer their maximum protection page 91.
No two persons (also not children) should ever use a single seat belt
together.
The maximum protection which seat belts can offer is only achieved if you
are correctly seated page 86, “Correct seated position”.
The belt webbing must not run across solid or fragile objects (e.g. specta-
cles, ball-point pens, keys etc.) as this may be a cause of injuries.
Bulky, loose clothing (e.g. a winter coat over a jacket) does not allow you to
be correctly seated and impairs proper operation of the seat belts.
It is prohibited to use clamps or other objects to adjust seat belts (e.g. for
shortening the belts for smaller persons).
The lock tongue should only be inserted into the lock which is the correct
one for your seat. Wrong use of the safety belt will reduce its capacity to protect
and the risk of injury increases.
The seat backrests of the front seats must not be tilted too far to the rear
otherwise the seatbelts can lose their effectiveness.
The belt webbing must always be kept clean. A soiled belt webbing may
impair proper operation of the inertia reel page 135, “Seat belts”.
The slot of the belt tongue must not be blocked by paper or similar objects
otherwise the belt tongue will not lock in place properly.
Inspect the seat belts regula rly to ensure they are in good condition. If you
find seat belts which have damage to the seat belt webbing, seat belt connec-
tions, to the inertia reels or to the lock, the relevant safety belt must be replaced
by a specialist garage.
The seat belts must not be removed or changed in any way. Do not make an
attempt to repair the seat belts yourself.
Damaged seat belts which have been subjected to stress in an accident and
were therefore stretched, must be replaced - this is best done by a specialist
garage. The anchorage points of the belts must also be inspected. The
anchorage points for the belts should also be checked.
In certain countries it is possible to use seat belts which differ in terms of
their operation from the seat belts which are described on the pages which
follow.WARNING (continued)
s2bs.2.book Page 90 Monday, September 27, 2010 9:53 AM
Page 98 of 199

Airbag system97
Using the system
Safety
Driving Tips
General Maintenance
Breakdown assistance
Technical Data
the direction of travel)
page 101, “Deactivating an airbag”. If this is not done,
there is a risk of the child suffering seve re or even fatal injuries if the front
passenger airbag is deployed. The national legal provisions in certain countries
require that both the front, side and head airbags be deactivated. When trans-
porting a child on the front passenger se at, please comply with the appropriate
national legal provisions regarding the use of child safety seats.
There must not by any further persons, animals or objects positioned
between the front seated occupants and the deployment area of the airbag.
The steering wheel and the surface of the airbag module in the dash panel
on the passenger side must not be stuck onto, covered or modified in any other
way. These parts should only be cleaned with a dry cloth or a cloth moistened
with water. No objects such as cup holders, mobile phone mounts, etc. may be
attached to the covers of the airbag modules or be located within the imme-
diate area.
No modifications of any kind may be made to parts of the airbag system.
Any work on the airbag system includ ing installing and removing system
components because of other repair wo rk (e.g. removing the steering wheel)
must only be carried out by a specialist garage.
Never carry out changes on the front bumper or on the body.
Never place any objects on the surface of the front passenger airbag module
in the dash panel.
side airbags*Description of the side airbags
The side airbag together with the head airbag offers enhanced occu-
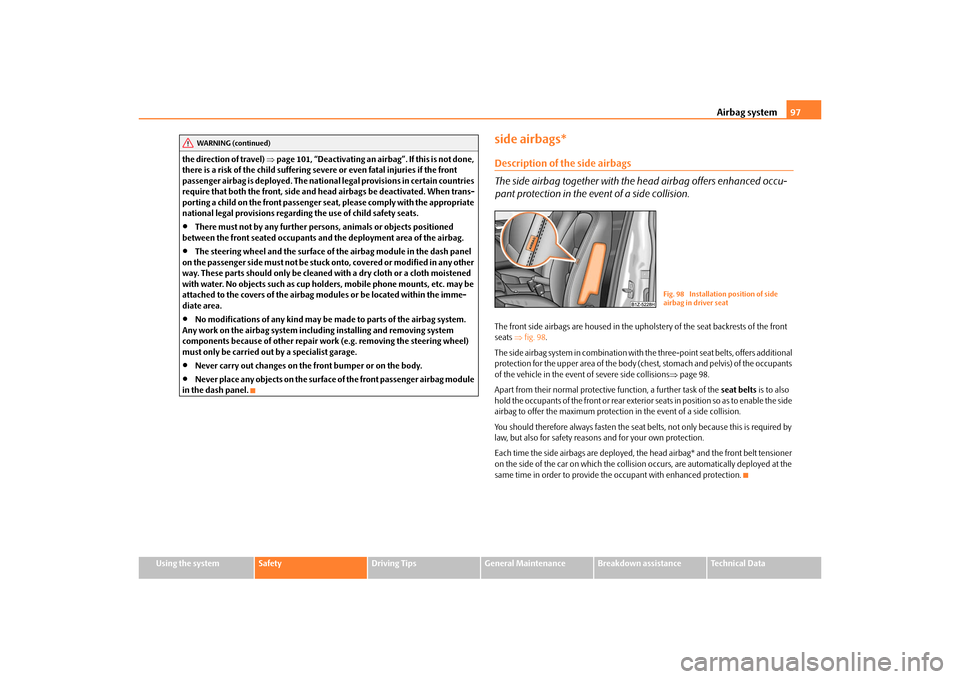
pant protection in the event of a side collision.The front side airbags are housed in the upholstery of the seat backrests of the front
seats fig. 98 .
The side airbag system in combination with the three-point seat belts, offers additional
protection for the upper area of the body (chest, stomach and pelvis) of the occupants
of the vehicle in the event of severe side collisions page 98.
Apart from their normal protective function, a further task of the seat belts is to also
hold the occupants of the front or rear exterior seats in position so as to enable the side
airbag to offer the maximum protection in the event of a side collision.
You should therefore always fasten the seat belts, not only because this is required by
law, but also for safety reasons and for your own protection.
Each time the side airbags are deployed, th e head airbag* and the front belt tensioner
on the side of the car on which the collision occurs, are automatically deployed at the
same time in order to provide the occupant with enhanced protection.
WARNING (continued)
Fig. 98 Installation position of side
airbag in driver seat
s2bs.2.book Page 97 Monday, September 27, 2010 9:53 AM
Page 113 of 199

Intelligent Technology
112
offered must not tempt you to take greater risks than otherwise - risk of an acci-
dent!
Note
All four wheels must be fitted with the same tyres in order to achieve problem-free
operation of the ESP. Differing rolling circum ferences of the tyres can lead to an unde-
sirable reduction in the engine output.
Changes to vehicle (e.g. on engine, on th e brakes, on chassis or another combina-
tion of tyres and wheels) can influence the function of the ESP page 157, “Accesso-
ries, changing and replacing parts”.
Electronic Differential Lock (EDL)*
The electronic differential lock prev ents an individual wheel from slip-
ping.Models fitted with ESP ar e equipped with electronic differential lock (EDL).
General
The EDL makes it much easier, and sometimes at all possible, to start off, accelerate
and climb a steep hill when the conditions of the road surface are unfavourable.
Operating principle
The EDL is activated automaticall y, that is without any action on the part of the driver.
It monitors the speeds of the driven wheels with the aid of the ABS sensors. Should
only one drive wheel begin spinning on a slippery surface there will be an appreciable
difference in the speed of the driven wheels. The EDL function brakes the slipping
wheel and the differential transmits a greate r driving force to the other driven wheel.
This control process is also accompanied by noises.
Overheating of the brakes
The EDL switches off automatica lly if unusually severe stresses exist in order to avoid
excessive heat generation in the disc brake on the wheel which is being braked. The
vehicle can continue to be driven and has the same characteristics as a vehicle not
fitted with EDL. The EDL switches on again automatically
as soon as the brake has cooled down.
WARNING
Carefully depress the accelerator when accelerating on uniformly slippery
road surfaces, such as ice and snow. Th e driven wheels might still spin despite
the EDL and affect the stability of the vehicle - risk of an accident!
You should always adapt your style of driving to the condition of road
surface and to the traffic situation even when your vehicle is fitted with EDL.
The increased safety offered must not tempt you to take greater risks than
otherwise - risk of an accident!Note
If the ABS or ESP warning light comes on, this may also indicate a fault in the EDL.
Please have the vehicle inspected as soon as possible by a specialist garage.
Changes to vehicle (e.g. on engine, on the brakes, on chassis or another combina-
tion of tyres and wheels) can influence the function of the EDL page 157, “Accesso-
ries, changing and replacing parts”.
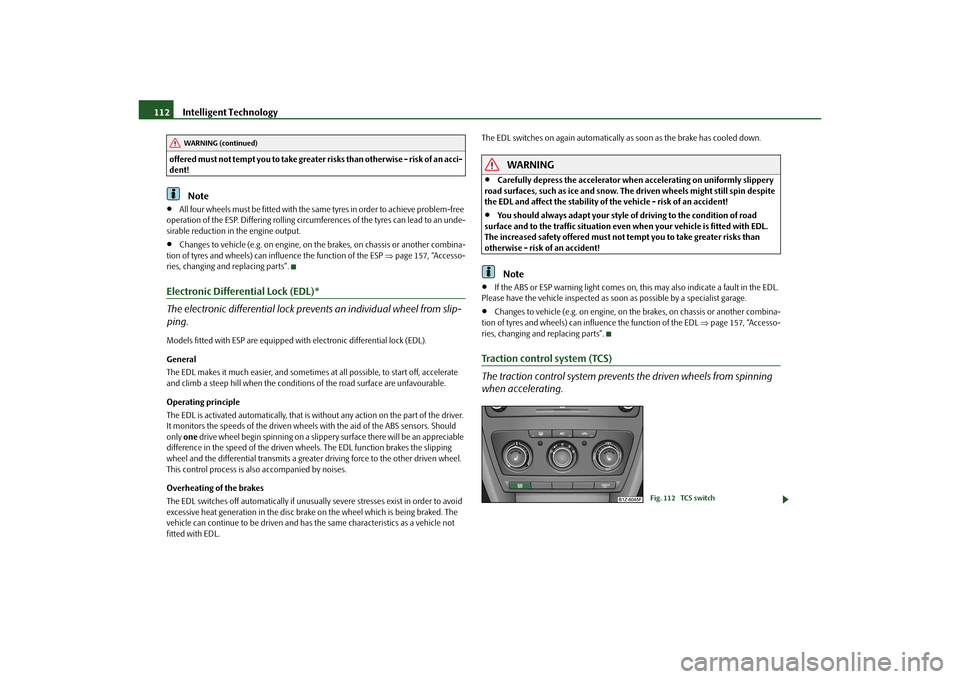
Traction control system (TCS)
The traction control system prevents the driven wheels from spinning
when accelerating.
WARNING (continued)
Fig. 112 TCS switch
s2bs.2.book Page 112 Monday, September 27, 2010 9:53 AM