2010 SKODA FABIA ABS
[x] Cancel search: ABSPage 167 of 244

Inspecting and replenishing
166
Working in the engine compartment Particular care is required when carrying out any work in the engine compartment!There is a risk of injuries, scalding, acci
dents and fire when working in the engine
compartment, e.g. inspecting and replenishing oil and other fluids. For this reason, it is essential to comply with the warning instructions stated below and with the general applicable rules of safe
ty. The engine compartment of your car
is a hazardous area
.
WARNING
Never open the bonnet if
you see that steam or coolant is flowing out of the
engine compartment - risk of scalding!
Wait long enough until the steam or
coolant has stopped escaping.
Switch off the engine and pull out the ignition key.
Apply the handbrake firmly.
If your vehicle is fitted with a manual
gearbox, move the gearshift lever into
Neutral, or if it is fitted with automatic gearbox, move the selector lever into position P.
Allow the engine to cool down.
Keep children clear of the engine compartment.
Do not touch any hot engine parts - risk of burns!
Never spill oil and other fluids over the hot engine. Such fluids (e.g. the anti-
freeze contained in the wash liquid) may ignite!
Avoid short circuits in the electrical system - particularly on the battery.
Never place your hand into the radiator fan as long as the engine is still
warm. The fan might suddenly start running!
Never open the cap of the coolant expans
ion bottle as long as the engine is
still warm. The cooling
system is pressurized!
Cover over the cap of the coolant expansion reservoir with a large cloth
when opening it as protection for your
face, hands and arms from hot steam or
hot coolant.
Do not let objects, such as e.g cleaning cloth or tools lie in the engine
compartment.
If you wish to work under the vehicl
e, you must secure the vehicle from
rolling away and support it with suitable supporting blocks: the car jack is not sufficient for this - risk of injury!
In cases where it be necessary to carry out inspection work when the engine
is running there is an additional risk fr
om rotating parts (e.g. the V-ribbed belt,
alternator, radiator fan) and from the high-voltage ignition system. Please observe in addition the following:
Never touch the electrical cabl
es of the ignition system.
Absolutely avoid any jewellery, loose it
ems of clothing or long hair from
getting into the rotating parts of the
engine - Hazard! Therefore remove any
jewellery beforehand, tie up your hair and wear tight fitting clothing.
Please also comply with the warnin
g instructions st
ated below when
carrying out any essential work on the fu
el system or on th
e electrical system:
Always separate the car battery from the electrical system. Do not smoke. Never carry out any work close to naked flames. Always keep a working fire
extinguisher at hand.
Caution
When replenishing fluids in the engine, always
ensure that the fluids are on no account
mixed up. This may result in major oper
ating problems and also vehicle damage!
WARNING (continued)
s3j8.a.book Page 166 Tuesday, April 20, 2010 1:10 PM
Page 173 of 244

Inspecting and replenishing
172
WARNING
Read and observe the warning notes
page 166, “Working in the engine
compartment” before working in the engine compartment.
If the fluid level has dropped below the MIN marking, do not drive any
further - risk of accident! Obtain professional assistance.Replacing brake fluidBrake fluid absorbs moisture. This causes the fluid to absorb moisture from the surrounding air over a period of time. Excessive water in the brake fluid may be the cause of corrosion in the brake system. The
water content also lowers the boiling point
of the brake fluid. One may only use new brake fluid approved
by Škoda Auto. The brake fluid must
comply with one of the following standards or specifications:
VW 501 14,
FMVSS 116 DOT4,
DIN ISO 4925 CLASS 4.
We recommend that you have the brake fluid replaced by an
authorised Škoda
Service Partner
as part of an Inspection Service.
WARNING
Using old brake fluid can result in severe
stress on the brakes because of the
formation of vapour bubbles in the br
ake system. This greatly impairs the
braking efficiency and thus also the safety of your vehicle.
Brake fluid is toxic! It must therefor
e be kept safely in closed original
containers and well away from children and unauthorized persons.
Caution
Brake fluid damages the paintwork of the vehicle.
For the sake of the environment
In view of the problems involved with proper
disposal of brake fluid, the special tools
and the professional knowledge required, we recommend you have the brake fluid replaced by a specialist garage.BatteryWorking on the batteryFig. 144 The battery: Pull up the cove
r (automatic gearbox) / (manual gearbox)
The battery is located in the engi
ne compartment below a plastic box.
– Unlock the interlock on the positive terminal side of the battery
fig. 144
- left.
– Pull up the cover in direction of arrow
fig. 144
- left (automatic gearbox) or
fig. 144
- right (manual gearbox).
– The installation of the battery cover on th
e positive terminal side takes place in the
reverse order.
Removal and installation of the battery is
not recommended since it can, under certain
circumstances, lead to ma
jor damage to the battery and fuse boxes. Contact a
specialist garage. There is a risk of injuries, scalding, accidents and burns when carrying out any work on the battery and on the electrical system. For th
is reason, it is essential to comply with
the warning instructions
stated below and with the general applicable rules of
safety.
s3j8.a.book Page 172 Tuesday, April 20, 2010 1:10 PM
Page 197 of 244

Fuses and light bulbs
196
Fuse assignment in the dash panelFig. 162 Schematic representation of the fuse
box for vehicles with left-hand steering / right-
hand steeringCertain electrical components are only standard on certain vehicle model versions or only suppliable as optional
equipment for certain models.
No.
Power consumer
Amperes
1
Not assigned
2
START - STOP
5
3
Instrument cluster, headlamp beam adjustment
7,5
4
ABS control unit
5
5
Petrol engine: Cruise control system
5
6
Reversing light (manual gearbox)
10
7
Ignition
15
Engine control unit, automatic gearbox
7,5
8
Brake pedal switch, coolant fan
5
9
Operating controls for the heating, control unit for air condi- tioning system, parking aid, control unit for cornering lights, coolant fan
5
10
Air conditioning
a)
7,5
11
Mirror adjustment
5
12
Control unit for trailer detection
5
13
Control unit for automatic gearbox
5
14
Motor for halogen projector headlights with cornering light function
10
15
Navigation PDA
5
16
Electrohydraulic power steering
5
17
START - STOP - radio
10
Daylight driving lights
7,5
18
Mirror heater
5
19
S-contact
5
20
Engine control unit
5
Engine control unit
7,5
Fuel pump relay
15
Fuel pump control unit
15
21
Reversing light, fog lights with the function “CORNER”
10
22
Operating controls for the heating, control unit for air condi- tioning system, parking aid, mobi
le phone, instrument cluster,
steering angle sender
, ESP, vehicle voltage control unit, multi-
function stee
ring wheel
7,5
23
Interior lighting, storage compartment and luggage compart- ment, side lights
15
24
Central control unit of the vehicle
5
25
Seat heaters
20
26
Rear window wiper
10
27
Not assigned
28
Petrol engine: AKF valve, petrol engine: Control flap
10
29
Injection, water pump
10
No.
Power consumer
Amperes
s3j8.a.book Page 196 Tuesday, April 20, 2010 1:10 PM
Page 198 of 244

Fuses and light bulbs
197
Using the system
Safety
Driving Tips
General Maintenance
Breakdown assistance
Technical Data
Replacing fuses at the battery (manual gearbox, automatic gearbox DSG)Fig. 163 The battery: Fuse cover
30
Fuel pump
15
Ignition
20
Cruise control system, operation of PTC relay
5
31
Lambda probe
10
32
High pressure pump, pressure valve
15
33
Engine control unit
30/15
34
Engine control unit
15
Vacuum pump
20
35
Power supply of ignition lock
5
36
Main beam light
15
37
Rear fog light
7,5
38
Fog lights
10
39
Blower
30
40
Heatable windscreen washing no
zzles, windscreen cleaning
system
15
41
Not assigned
42
Rear window heater
25
43
Horn
20
44
Front window wiper
20
45
Central control unit fo
r convenience system
25/10
46
Anti-theft alarm system
15
47
Cigarette lighter, power socket in the luggage compartment
b)
15
48
ABS, START-STOP - DC/DC converter ESP
15
49
Turn signal lights, brake lights
15
No.
Power consumer
Amperes
50
START-STOP - DC/DC converter infotainment
30
Radio
10
51
Electrical power window (front and rear) - left side
25
52
Electrical power window (front and rear) - right side
25
53
Parking light - left side
5
Electric sliding/tilting roof
25
54
START-STOP - instrument cluster
5
Anti-theft alarm system
15
55
Control unit for automatic gearbox DSG
30
56
Headlight cleaning system
25
Parking light - right side
5
57
Left low beam, headlight range adjustment
15
58
Low beam on the right
15
a)Only valid for some countries.b)If the engine is switched off already one electr
ical component which is
connected can discharge
the battery.No.
Power consumer
Amperes
s3j8.a.book Page 197 Tuesday, April 20, 2010 1:10 PM
Page 199 of 244

Fuses and light bulbs
198
– Press together the interlocks of the fuse
cover simultaneously in direction of arrow
page 197, fig. 163
and push out the cover in direction of arrow .
– Release the fixtures in the openings using a flat screwdriver and fold the cover
upwards in direction of arrow .
– Find out which fuse belongs to th
e component which is not operating.
– Defect fuses can be detected by their melted metal strips. Replace the defect fuse
by a new fuse of the
same
ampere number.
Caution
Never attempt to “repair” fuses and also do
not replace them with a fuse of a higher
amperage - risk of fire! This
may also cause damage at an
other part of the electrical
system.
Have the electrical system checked as quickl
y as possible by a specialist garage if a
newly inserted fuse blows again after a short time.
Note
We recommend that you have these fuse
s replaced by a specialist garage.
Fuse assignment at the battery (manual gearbox, automatic gearbox DSG)Certain electrical components are only standard on certain vehicle model versions or only suppliable as optional
equipment for certain models.
Caution
Observe the following guidelines
in “Replacing fuses at the battery (manual
gearbox, automatic gearbox DSG)” on page 197.
Note
The fuses 1 - 7 can be replac
ed by a specialist garage.
AA
AB
AC
AD
Fig. 164 Schematic representation of fuse assignment at battery
No.
Power consumer
Amperes
1
Dynamo
175
2
Not assigned
3
Interior
80
4
Electrical auxiliary heating system
60
5
Interior
40
6
Glow plugs, coolant fan
50
7
Electrohydraulic power steering
50
8
ABS or TCS or ESP
25
9
The radiator fan
30
10
The radiator fan
5
11
ABS or TCS or ESP
40
12
Central control unit
5
13
Automatic gearbox electrical auxiliary heating system
540
s3j8.a.book Page 198 Tuesday, April 20, 2010 1:10 PM
Page 200 of 244

Fuses and light bulbs
199
Using the system
Safety
Driving Tips
General Maintenance
Breakdown assistance
Technical Data
Replace fuses at the battery (automatic gearbox)Fig. 165 The battery: Open the posi
tive terminal cover / fuse cover
– Open the positive terminal cover (+)
fig. 165
- left.
– Press onto the interlocks of the fuse covers
fig. 165
on the right and open the
covers.
– Press together the interlocks of the fuse
cover simultaneously and push out the
cover in the direction of the arrow.
– Find out which fuse belongs to th
e component which is not operating
page 199,
“Fuse assignment at the ba
ttery (automatic gearbox)”.
– Defect fuses can be detected by their melted metal strips. Replace the defect fuse
by a new fuse of the
same
ampere number.
Caution
Never attempt to “repair” fuses and also do
not replace them with a fuse of a higher
amperage - risk of fire! This
may also cause damage at an
other part of the electrical
system.
Have the electrical system checked as quickl
y as possible by a specialist garage if a
newly inserted fuse blows again after a short time.
Note
We recommend that you have these fuse
s replaced by a specialist garage.
Some vehicles are only fitted with the cover
fig. 165
.
Fuse assignment at the battery (automatic gearbox)Certain electrical components are only stan
dard on certain vehicl
e model versions or
only suppliable as optional
equipment for certain models.
AAABAB
No.
Power consumer
Amperes
1
Dynamo
175
2
Interior
80
3
Electrical auxiliary heating system
60
4
ESP
40
5
Electrohydraulic power steering
50
6
Glow plugs
50
7
ESP
25
8
The radiator fan
30
9
Air conditioning system
5
10
ABS
40
11
Central control unit
5
12
Automatic gearbox electrical auxiliary heating system
540
Fig. 166 Schematic representation of fuse assignment at battery
s3j8.a.book Page 199 Tuesday, April 20, 2010 1:10 PM
Page 209 of 244

Technical Data
208
Gearbox code, paint number, interior eq
uipment number, engine output, engine
code Partial description of the vehicle 7GG, 7MB, 7MG - vehicles with DPF
page 143
Vehicle identification number (VIN) The vehicle identification number - VIN (veh
icle body number) is stamped into the
engine compartment on the right hand sh
ock absorber dome. This number is also
located on a sign on the lowe
r left hand edge below the windscreen (together with a
VIN bar code). Engine number The engine number is stam
ped into the engine block.
Type plate (production plate) The type plate is located in
the engine compartment at the front on the left hand shock
absorber dome. Sticker on inside of fuel filler flap The sticker is affixed to the inside of the fuel filler flap. They contain the following data:
the prescribed type of fuel;
tyre size;
tyre pressure.
Fuel consumption according to the ECE standards and EU guidelinesDepending on the range of the special equipment, style of driving, traffic situation, weather influences and vehicl
e condition, the consumption
values which in practice
result when using the vehicle can deviate from the indicated values. Urban traffic The consumption measurement in urban traffic
begins with starting of the cold engine.
Afterwards the normal ur
ban traffic is simulated.
Non-urban traffic For the consumption measurement in non-ur
ban traffic the vehicle, as in daily
motoring, is accelerated and braked severa
l times in all gears. The vehicle speed
changes within the range from 0 to 120 km/h. Combined traffic The consumption value in the combined traffic consists of 37% from the value for the urban traffic and of 63% from th
e value for the non-urban traffic.
Note
Please note that the information stated in the
official vehicle r
egistration docu-
ments
always takes priority.
A3A4A5s3j8.a.book Page 208 Tuesday, April 20, 2010 1:10 PM
Page 236 of 244
Index235
Using the system
Safety
Driving Tips
General Maintenance
Breakdown assistance
Technical Data
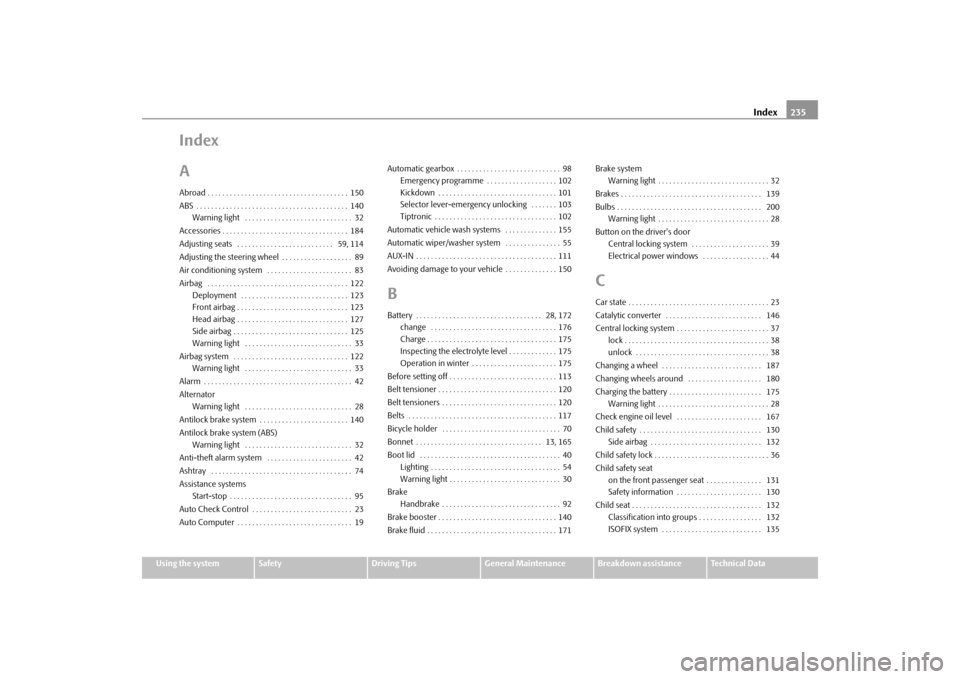
Index
AAbroad . . . . . . . . . . . . . . . . . . . . . . . . . . . . . . . . . . . . . . 150
ABS . . . . . . . . . . . . . . . . . . . . . . . . . . . . . . . . . . . . . . . . . 140
Warning light . . . . . . . . . . . . . . . . . . . . . . . . . . . . . 32
Accessories . . . . . . . . . . . . . . . . . . . . . . . . . . . . . . . . . . 184
Adjusting seats . . . . . . . . . . . . . . . . . . . . . . . . . . 59, 114
Adjusting the steering wheel . . . . . . . . . . . . . . . . . . . 89
Air conditioning system . . . . . . . . . . . . . . . . . . . . . . . 83
Airbag . . . . . . . . . . . . . . . . . . . . . . . . . . . . . . . . . . . . . . 122
Deployment . . . . . . . . . . . . . . . . . . . . . . . . . . . . . 123
Front airbag . . . . . . . . . . . . . . . . . . . . . . . . . . . . . . 123
Head airbag . . . . . . . . . . . . . . . . . . . . . . . . . . . . . . 127
Side airbag . . . . . . . . . . . . . . . . . . . . . . . . . . . . . . . 125
Warning light . . . . . . . . . . . . . . . . . . . . . . . . . . . . . 33
Airbag system . . . . . . . . . . . . . . . . . . . . . . . . . . . . . . . 122
Warning light . . . . . . . . . . . . . . . . . . . . . . . . . . . . . 33
Alarm . . . . . . . . . . . . . . . . . . . . . . . . . . . . . . . . . . . . . . . . 42
Alternator
Warning light . . . . . . . . . . . . . . . . . . . . . . . . . . . . . 28
Antilock brake system . . . . . . . . . . . . . . . . . . . . . . . . 140
Antilock brake system (ABS)
Warning light . . . . . . . . . . . . . . . . . . . . . . . . . . . . . 32
Anti-theft alarm system . . . . . . . . . . . . . . . . . . . . . . . 42
Ashtray . . . . . . . . . . . . . . . . . . . . . . . . . . . . . . . . . . . . . . 74
Assistance systems
Start-stop . . . . . . . . . . . . . . . . . . . . . . . . . . . . . . . . . 95
Auto Check Control . . . . . . . . . . . . . . . . . . . . . . . . . . . 23
Auto Computer . . . . . . . . . . . . . . . . . . . . . . . . . . . . . . . 19Automatic gearbox . . . . . . . . . . . . . . . . . . . . . . . . . . . . 98
Emergency programme . . . . . . . . . . . . . . . . . . . 102
Kickdown . . . . . . . . . . . . . . . . . . . . . . . . . . . . . . . . 101
Selector lever-emergency unlocking . . . . . . . 103
Tiptronic . . . . . . . . . . . . . . . . . . . . . . . . . . . . . . . . . 102
Automatic vehicle wash systems . . . . . . . . . . . . . . 155
Automatic wiper/washer system . . . . . . . . . . . . . . . 55
AUX-IN . . . . . . . . . . . . . . . . . . . . . . . . . . . . . . . . . . . . . . 111
Avoiding damage to your vehicle . . . . . . . . . . . . . . 150
BBattery . . . . . . . . . . . . . . . . . . . . . . . . . . . . . . . . . . 28, 172
change . . . . . . . . . . . . . . . . . . . . . . . . . . . . . . . . . . 176
Charge . . . . . . . . . . . . . . . . . . . . . . . . . . . . . . . . . . . 175
Inspecting the electrolyte level . . . . . . . . . . . . . 175
Operation in winter . . . . . . . . . . . . . . . . . . . . . . . 175
Before setting off . . . . . . . . . . . . . . . . . . . . . . . . . . . . . 113
Belt tensioner . . . . . . . . . . . . . . . . . . . . . . . . . . . . . . . . 120
Belt tensioners . . . . . . . . . . . . . . . . . . . . . . . . . . . . . . . 120
Belts . . . . . . . . . . . . . . . . . . . . . . . . . . . . . . . . . . . . . . . . 117
Bicycle holder . . . . . . . . . . . . . . . . . . . . . . . . . . . . . . . . 70
Bonnet . . . . . . . . . . . . . . . . . . . . . . . . . . . . . . . . . . 13, 165
Boot lid . . . . . . . . . . . . . . . . . . . . . . . . . . . . . . . . . . . . . . 40
Lighting . . . . . . . . . . . . . . . . . . . . . . . . . . . . . . . . . . . 54
Warning light . . . . . . . . . . . . . . . . . . . . . . . . . . . . . . 30
Brake
Handbrake . . . . . . . . . . . . . . . . . . . . . . . . . . . . . . . . 92
Brake booster . . . . . . . . . . . . . . . . . . . . . . . . . . . . . . . . 140
Brake fluid . . . . . . . . . . . . . . . . . . . . . . . . . . . . . . . . . . . 171Brake system
Warning light . . . . . . . . . . . . . . . . . . . . . . . . . . . . . . 32
Brakes . . . . . . . . . . . . . . . . . . . . . . . . . . . . . . . . . . . . . . 139
Bulbs . . . . . . . . . . . . . . . . . . . . . . . . . . . . . . . . . . . . . . . 200
Warning light . . . . . . . . . . . . . . . . . . . . . . . . . . . . . . 28
Button on the driver's door
Central locking system . . . . . . . . . . . . . . . . . . . . . 39
Electrical power windows . . . . . . . . . . . . . . . . . . 44
CCar state . . . . . . . . . . . . . . . . . . . . . . . . . . . . . . . . . . . . . . 23
Catalytic converter . . . . . . . . . . . . . . . . . . . . . . . . . . 146
Central locking system . . . . . . . . . . . . . . . . . . . . . . . . . 37
lock . . . . . . . . . . . . . . . . . . . . . . . . . . . . . . . . . . . . . . . 38
unlock . . . . . . . . . . . . . . . . . . . . . . . . . . . . . . . . . . . . 38
Changing a wheel . . . . . . . . . . . . . . . . . . . . . . . . . . . 187
Changing wheels around . . . . . . . . . . . . . . . . . . . . 180
Charging the battery . . . . . . . . . . . . . . . . . . . . . . . . . 175
Warning light . . . . . . . . . . . . . . . . . . . . . . . . . . . . . . 28
Check engine oil level . . . . . . . . . . . . . . . . . . . . . . . 167
Child safety . . . . . . . . . . . . . . . . . . . . . . . . . . . . . . . . . 130
Side airbag . . . . . . . . . . . . . . . . . . . . . . . . . . . . . . 132
Child safety lock . . . . . . . . . . . . . . . . . . . . . . . . . . . . . . . 36
Child safety seat
on the front passenger seat . . . . . . . . . . . . . . . 131
Safety information . . . . . . . . . . . . . . . . . . . . . . . 130
Child seat . . . . . . . . . . . . . . . . . . . . . . . . . . . . . . . . . . . 132
Classification into groups . . . . . . . . . . . . . . . . . 132
ISOFIX system . . . . . . . . . . . . . . . . . . . . . . . . . . . 135
s3j8.a.book Page 235 Tuesday, April 20, 2010 1:10 PM