2010 Seat Leon 5D stop start
[x] Cancel search: stop startPage 41 of 99

Audio mode
40Starting and stopping a playback mode
The range of playback modes available depends on the selected media
source and the type of audio files played.•During playback, press the function button in the MEDIA main
menu.•In the pop-up window, press one of the playback modes listed by turning
and pressing the setting knob ⇒page 8, fig. 1 .•The pop-up window will close. The selected playback mode is indicated in
the function button ( page 39, fig. 37 ).•Briefly pressing this function button ends the playback mode and
resumes normal playback at the current track.
Refer to the information on the playing order of files and folders ⇒ page 30.
The scan function can also be started or stopped by briefly pressing the
setting knob ⇒ page 8, fig. 1 .
Available playback modes
Setup Menu Media (SETUP)In Media mode, press the unit button to open the Media setup menu.
The selection options depend on the type of unit and equipment.
Function button: Result
: Each track of the current folder or current media source will be
played for 10 seconds. The scan function starts at the next track.: The tracks of the current audio CD will be played in random order.
: The tracks of the current folder will be played in random order.: The tracks of the current data medium will be played in random
order.
: Repeats the currently playing title.
Extras
A10
Mix all
A10
ScanMixMix folderMix allRepeat track
: At the end of the current audio CD, its tracks will be played
again.: At the end of the current folder, its tracks will be played
again.
The random play and repeat functions remain active for the corresponding
media source until they are closed for that source.Function button: Result
: Subfolders are included in the selected play-
back mode ⇒page 39.
This setting must be defined before the playback mode is activated.
: Adjust the input volume for an external audio source in the
AUX-IN multimedia socket ⇒page 8, fig. 1 to the output volume of the
other audio sources ⇒ page 33.: Adjust the input volume for an iPod
® or iPhone
® connected
to the MEDIA-IN multimedia interface to the playback volume of the other
audio sources ⇒ page 42.
a): Adjust the input volume for a Bluetooth audio source to
the playback volume of the other audio sources.
a)These functions can only be selected if the unit has the function.
: Adjust the input volume for an AUX2 external audio source
to the ⇒ table on page 40 playback volume of the other audio sources
⇒ page 33.
Function button: ResultRepeat CDRepeat folder
SETUP
�’Scan/Mix/Repeat incl. �G�bAUX volume
A9
�b MDI volumeBT-Audio volume�bAUX2 volume
MediaSystem2.1_EN.book Seite 40 Donnerstag, 29. April 2010 4:18 16
Page 49 of 99

Navigation
48longer be up-to-date. This may lead to inaccurate or incorrect route
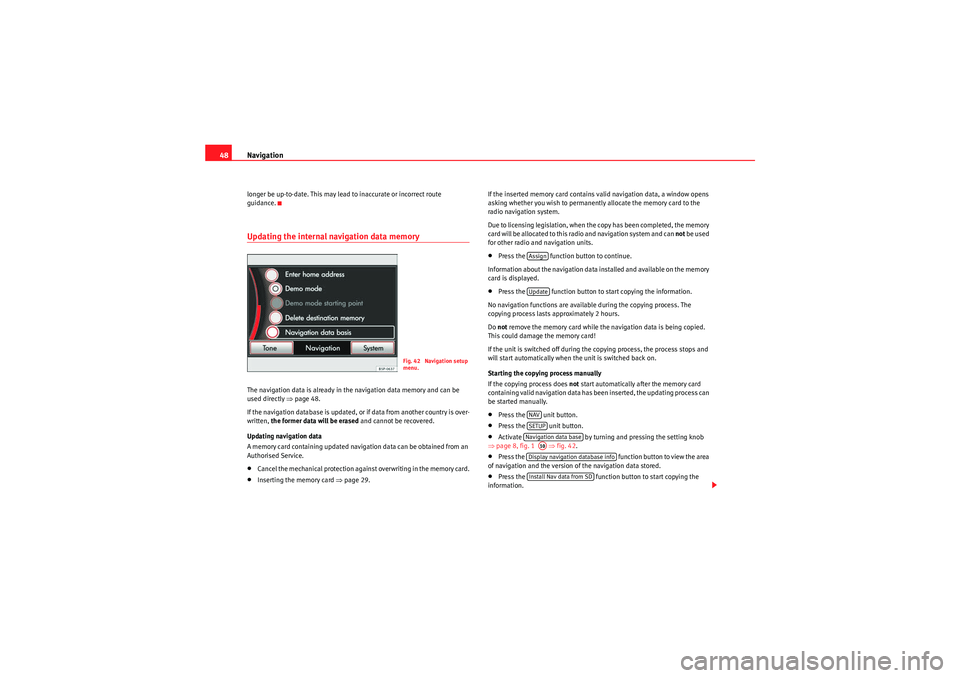
guidance.Updating the internal navigation data memoryThe navigation data is already in the navigation data memory and can be
used directly ⇒page 48.
If the navigation database is updated, or if data from another country is over-
written, the former data will be erased and cannot be recovered.
Updating navigation data
A memory card containing updated navigation data can be obtained from an
Authorised Service.•Cancel the mechanical protection against overwriting in the memory card.•Inserting the memory card ⇒page 29. If the inserted memory card contains valid navigation data, a window opens
asking whether you wish to permanently allocate the memory card to the
radio navigation system.
Due to licensing legislation, when the copy has been completed, the memory
card will be allocated to this radio and navigation system and can
not be used
for other radio and navigation units.
•Press the function button to continue.
Information about the navigation data installed and available on the memory
card is displayed.•Press the function button to start copying the information.
No navigation functions are available during the copying process. The
copying process lasts approximately 2 hours.
Do not remove the memory card while the navigation data is being copied.
This could damage the memory card!
If the unit is switched off during the copying process, the process stops and
will start automatically when the unit is switched back on.
Starting the copying process manually
If the copying process does not start automatically after the memory card
containing valid navigation data has been inserted, the updating process can
be started manually.•Press the unit button.•Press the unit button.•Activate by turning and pressing the setting knob
⇒ page 8, fig. 1 ⇒ fig. 42.•Press the function button to view the area
of navigation and the version of the navigation data stored.•Press the function button to start copying the
information.
Fig. 42 Navigation setup
menu.
AssignUpdateNAVSETUPNavigation data base
A10Display navigation database infoInstall Nav data from SD
MediaSystem2.1_EN.book Seite 48 Donnerstag, 29. April 2010 4:18 16
Page 57 of 99

Navigation
56Selecting a point of interest as a destinationDefining the search area
The search area covers a radius of roughly 75 km from the chosen “search
area centre”.
•Open the Navigation main menu.•Select the Point of interest function button.•Press the function button in the pop-up window, select a town as
the search area centre ⇒page 52 and press the function button
⇒ fig. 54•ALTERNATIVELY: Press the function button in the pop-up window to
set the current vehicle position as the search area centre.
The POI search input window opens.
POI search: Entering a keyword
A keyword is a word or a combination of digits and letters that occurs in the
name or the detailed information of the desired point of interest.
A keyword may be the known part of a name, e.g. “Lakeside”.
Starting from the search area centre, the unit searches for points of interest
which contain the keyword in their name or address. Possible results for the
keyword “Lakeside” would be, for example, “Lakeside Hotel” or points of
interest on “ Lakeside” Avenue.
The POI search input window allows free text input ⇒page 51. Correct
spelling is therefore important!
Starting the search•When you have entered the keyword, press the function button.•The search radius is displayed and gradually enlarged. When several
matching points of interest are found, the display switches straight to the list
view.
The search ends automatically when it has covered a radius of roughly 100
kilometres from the defined search area centre.
A message appears to inform the user if no matching point of interest was
found.
Depending on the unit (RNS 310), you can stop the search for a point of
interest by pressing the function button.
Fig. 54 Setting a location
as the search area centre.Fig. 55 List of points of
interest found (keyword:
SEE).
�–To w n
Find
Here
Find
Stop
MediaSystem2.1_EN.book Seite 56 Donnerstag, 29. April 2010 4:18 16
Page 68 of 99

Navigation67
Stopping and resuming route guidanceActive route guidance can be stopped and later resumed from the new vehicle
position at any time. Stopping route guidance
•In the
map view , briefly press the bottom-right or bottom-left area of the
screen to display the function buttons.•Press the function button ⇒fig. 67 .•ALTERNATIVELY: Switch to the main menu Navigation and press the
function button.
Resume route guidance to the last destination•In the map view , pressing the function button always automatically
resumes route guidance to the last destination ⇒fig. 68 .Entering a stopover destinationIt is possible to enter one additional destination as a stopover destination
while route guidance is in progress. You will then always be guided to the
stopover destination first before route guidance continues to the final desti-
nation. The final destination is always the destination to which route guid-
Fig. 67 Stopping route
guidance.Fig. 68 Route guidance
interrupted.
Stop
Stop
Start
Fig. 69 Information
window showing a stop-
over destination during
route guidance.
MediaSystem2.1_EN.book Seite 67 Donnerstag, 29. April 2010 4:18 16
Page 69 of 99

Navigation
68ance is first started. To enter a final destination and stopover destination,
please note the required steps.•To enter a stopover destination, first select a final destination and start
route guidance ⇒page 52.•Press the unit button.•In the Navigation main menu, select an additional destination, following
the same procedure as for selection of a final destination.•When you start route guidance to the additional destination, a pop-up
window opens.•Press the function button to be guided to the newly entered
destination as a stopover destination, before continuing to the final destina-
tion.•Alternatively: press the function button to cancel the
current route guidance and start a new route guidance to the newly entered
destination only.
To view the stopover destination in the information window ⇒page 67,
fig. 69 , press the ⇒page 8, fig. 1 unit button.
An announcement is given when you reach the stopover destination. After a
few seconds, route guidance is resumed to the final destination. You may
then enter another stopover destination.
If the function button is selected during route guidance to a stopover
destination ⇒page 67, you have the option of deleting the stopover
destination.
Display the information window and the list with the routeInformation window during route guidance•Press the unit button from any navigation menu (except SETUP) to open
the information window ⇒ page 58.
During route guidance, the final destination is displayed in the information
window . If a stopover destination has also been entered, this is displayed
above the final destination ⇒page 67, fig. 69.
Inserting the route list
During route guidance, a route list can be inserted via the information
window .•In the information window , press the function button.•Press the function button in the pop-up window.•The route list for the active route guidance will be calculated and
displayed ⇒fig. 70 .
NAVStopover
New destination
�º
A7
Stop
Fig. 70 Route list during
route guidance.
�º
Route
Route list
MediaSystem2.1_EN.book Seite 68 Donnerstag, 29. April 2010 4:18 16
Page 74 of 99

Navigation73
Ending demonstration mode
A s a ge ne ral r ule , th e D em o m od e sh ould b e s wi tche d of f a f ter use , o the r wis e
you will always have to select between virtual navigation or normal naviga-
tion before starting navigation to a destination.
Normally, the demonstration mode automatically ends on completion of the
route guidance programme or when a new navigation destination (not stop-
over) is entered. When the vehicle starts to move, or when the unit is switched
off, the demonstration mode ends.
If necessary, switch off the demonstration mode in the navigation setup
menu.•Press the unit button in one of the navigation menus.•Untick the checkbox for the function button.Setup menu Navigation
Press the unit button from any navigation menu to open the
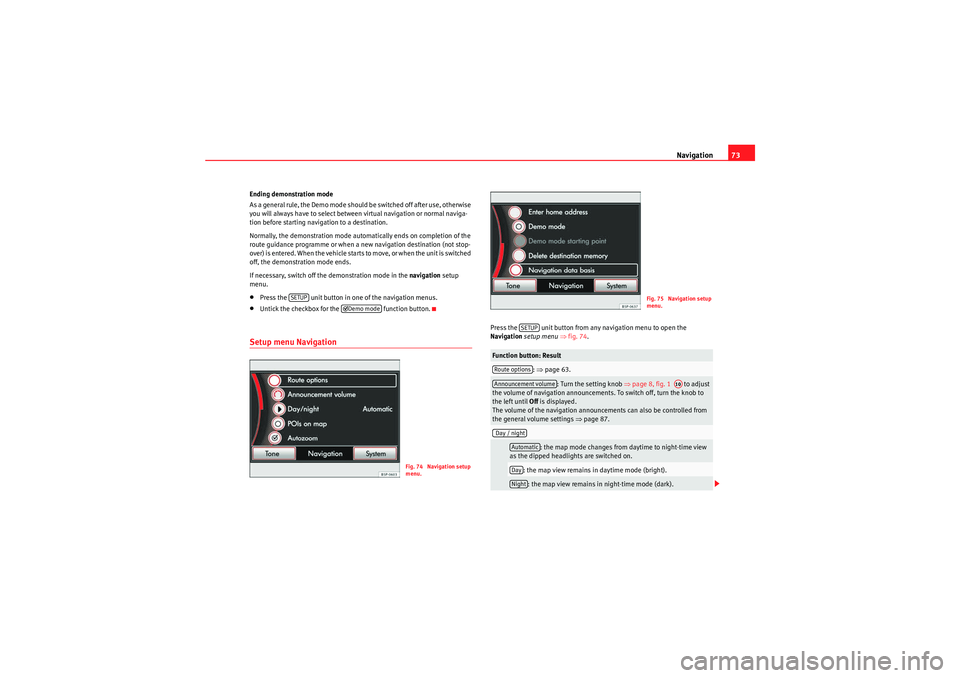
Navigation setup menu ⇒ fig. 74 .
SETUP
�’Demo mode
Fig. 74 Navigation setup
menu.
Function button: Result
: ⇒ page 63.
: Turn the setting knob ⇒page 8, fig. 1 to adjust
the volume of navigation announcements. To switch off, turn the knob to
the left until Off is displayed.
The volume of the navigation announcements can also be controlled from
the general volume settings ⇒page 87.
: the map mode changes from daytime to night-time view
as the dipped headlights are switched on.
: the map view remains in daytime mode (bright).: the map view remains in night-time mode (dark).
Fig. 75 Navigation setup
menu.
SETUP
Route optionsAnnouncement volume
A10
Day / night
AutomaticDayNight
MediaSystem2.1_EN.book Seite 73 Donnerstag, 29. April 2010 4:18 16