2010 Seat Ibiza 5D stop start
[x] Cancel search: stop startPage 138 of 266
Driving
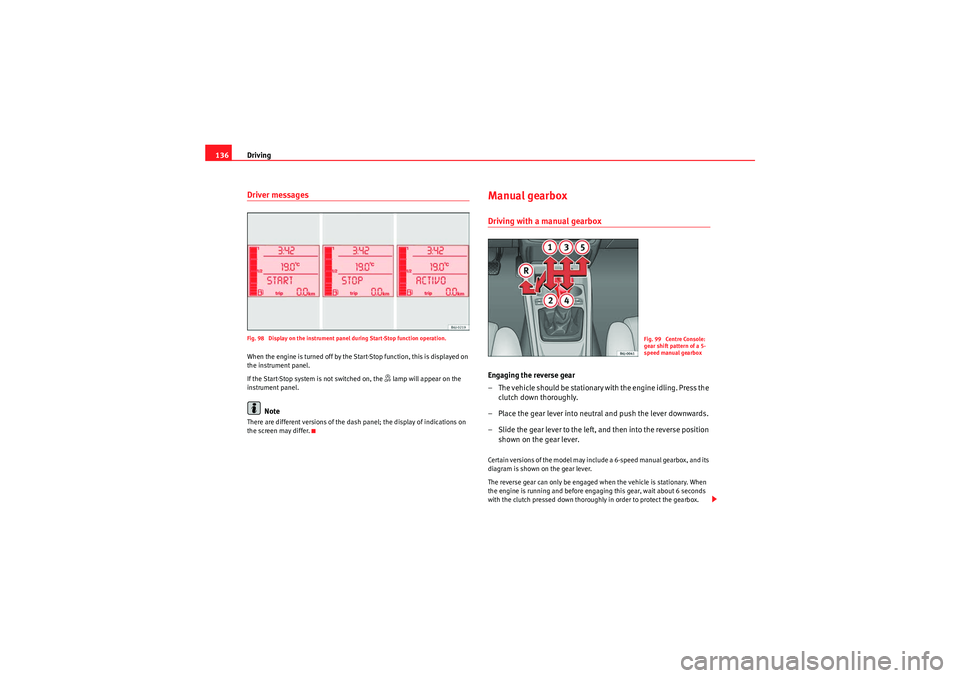
136Driver messagesFig. 98 Display on the instrument panel during Start-Stop function operation.When the engine is turned off by the Start-Stop function, this is displayed on
the instrument panel.
If the Start-Stop system is not switched on, the
› lamp will appear on the
instrument panel.
Note
There are different versions of the dash panel; the display of indications on
the screen may differ.
Manual gearboxDriving with a manual gearboxEngaging the reverse gear
– The vehicle should be stationary with the engine idling. Press the clutch down thoroughly.
– Place the gear lever into neutral and push the lever downwards.
– Slide the gear lever to the left, and then into the reverse position shown on the gear lever.Certain versions of the model may include a 6-speed manual gearbox, and its
diagram is shown on the gear lever.
The reverse gear can only be engaged when the vehicle is stationary. When
the engine is running and before engaging this gear, wait about 6 seconds
with the clutch pressed down thoroughly in order to protect the gearbox.
Fig. 99 Centre Console:
gear shift pattern of a 5-
speed manual gearbox
Ibiza_EN.book Seite 136 Mittwoch, 1. September 2010 5:24 17
Page 141 of 266

Driving139
Safety First
Operating Instructions
Practical Tips
Technical Specifications
Driving a car with an automatic gearbox
The gearbox changes gear ratios automatically as the vehicle
moves.Starting
– Start the engine with the selector lever in position P or N.
Driving
– Hold the brake pedal pressed down.
– By holding the lock button (button on the left in the selector lever), select R, or D.
– Release the lever and wait a little for the gearbox to engage the gear (a slight movement can be felt).
– Release the brake and press the accelerator ⇒. Stopping briefly
– If stopping for a short time, keep the vehicle stationary by
pressing the foot brake hard to prevent the car moving back-
wards on a slope or “creeping” forwards, e.g. at traffic lights. The
selector lever does not need to be put into the positions P or N.
– Do not press the accelerator.
Parking the vehicle
– Press and hold the brake pedal until the vehicle comes to a standstill ⇒.
– Apply the handbrake.
– By pressing the lock button down, move the selector lever to P
and release the lock button.
Driving up and down hills
– Press the selector lever from position “D” to the right into the tiptronic selector gate.
– Lightly press the selector lever back to change down.
Holding the car on a hill
– The brake must be always pressed down to prevent the vehicle from rolling backwards ⇒. Do not try to prevent the vehicle
from rolling backwards by increa sing the engine speed while a
range of gears is selected.
Starting the vehicle up hills
– Apply the handbrake.
Fig. 103 Automatic
gearbox
Ibiza_EN.book Seite 139 Mittwoch, 1. September 2010 5:24 17
Page 147 of 266

Driving145
Safety First
Operating Instructions
Practical Tips
Technical Specifications
Applying the handbrake
– Pull the handbrake lever up firmly ⇒ fig. 107.
Releasing the handbrake
– Pull the lever up slightly and press the release knob in the direc- tion of the arrow ⇒fig. 107 and guide the handbrake lever down
fully ⇒ .Always apply the handbrake as far as it will go in order to prevent you from
driving with the handbrake applied by mistake ⇒ .
The handbrake warning lamp
H lights up when the handbrake is applied
and the ignition switched on. The warning turns off when the handbrake is
released.
WARNING
•Never use the handbrake to stop the vehicle when it is in motion. The
braking distance is considerably longer, because braking is only applied to
the rear wheels. Risk of accident!•If it is only partially released, this will cause rear brakes overheating,
which can impair the function of the brake system and could lead to an acci-
dent. This also causes premature wear on the rear brake pads.Caution
Always apply the handbrake before you leave the vehicle. The 1st gear should
also be selected.
Parking
The handbrake should always be firmly applied when the
vehicle is parked.Always note the following points when parking the vehicle:
– Use the brake pedal to stop the vehicle.
– Apply the handbrake.
– The 1st gear should also be selected.
– Switch the engine off and remove the key from the ignition. Turn the steering wheel slightly to engage the steering lock.
– Always take you car keys with you when you leave the vehicle ⇒ .Additional notes on parking the vehicle on gradients:
Turn the steering wheel so that the vehicle rolls against the kerb if it started
to roll.•If the vehicle is parked facing downhill, turn the front wheels so that they
point towards the kerb .•If the vehicle is parked facing uphill, turn the front wheels so that they
point away from the kerb .•Secure the vehicle as normal by applying the handbrake firmly and
engaging 1st gear.WARNING
•Take measures to reduce the risk of injury when you leave your vehicle
unattended.
Ibiza_EN.book Seite 145 Mittwoch, 1. September 2010 5:24 17
Page 149 of 266

Driving147
Safety First
Operating Instructions
Practical Tips
Technical Specifications
Reverse gear
The distance warning will begin as soon as an obstacle is detected by the
system. The frequency of the bleeps emitted by the system will increase
rapidly as the vehicle approaches the obstacle.
Within a short distance of about 30cm, a continuous signal sounds (stop
signal). The driver should not reverse any further.
Models with a factory-fitted towing bracket: When the vehicle is less than
0.35 m away from the obstacle the warning tone will sound continuously. The
driver should then not reverse any further.
The warning tone decreases by 30% after 3 seconds from the start of the
system.
Provided that it is not in continuous mode, the tone on the parking aid system
stops when it detects a wall parallel to the vehicle.
Trailer towing
For vehicles factory-fitted with a towing bar, the parking aid system will not
be activated by the engagement of the reverse gear when pulling a trailer, as
the trailer’s electric connector will be plugged into the vehicle.
Possible faults
If a continuous beep sounds for some seconds when the reverse gear is
engaged, this indicates that there is a fault in the parking aid system.
If the fault continues until the ignition is turned off, the acoustic signal
warning of the fault will not be emitted every time the system is reactivated
(by engaging the reverse gear). Thus, the system ready indication will not
sound either. Have the fault repaired by an Authorised Service Centre as soon
as possible.
If there is no ready signal or no acoustic warning signal, then the parking aid
loudspeaker is faulty and may not warn of obstacles.
To ensure that the system works properly, the sensors must be kept clean and
free of ice and snow.
WARNING
•The sensors have blind spots in which obstacles may not be detected.•Always look out for small children and animals because the system will
not always detect them. Always pay attention when reversing to avoid acci-
dents.•The parking aid is not a replacement for driver awareness. The driver
must take full responsibility for parking and other manoeuvres.Caution
•Please note that low obstacles detected by the system may no longer be
registered by the sensors as the car moves closer, so the system will not give
any further warning. Certain kinds of obstacles (such as wire fences, chains,
thin posts or trailer draw bars, high kerbs or painted railings etc) may not
always be detected by the system, so there is a risk of damaging the vehicle
in such cases.•In some cases, obstacles with uniform edges and bumps may not be
detected immediately by the system due to their geometry. Take special care
of this type of obstacle (corners, rectangular objects, etc.), as they can cause
damage to the vehicle.•Be especially careful when manoeuvring into a corner between two
perpendicular walls. Carefully watch the approach of the wall to the side of
the vehicle (using the mirrors).•The parking aid system does not replace use of the mirrors for manoeu-
vres.•External ultra-sonic sources (pneumatic drills, construction machinery,
other vehicles with PDC) may interfere with the operation of the system.•P e r i o d i c c le a n i n g o f t h e s e ns o r s , ta ke ca r e n o t to d a m a ge o r s cr a tch t h e m .
When cleaning with high pressure washers or steam cleaners, the sensors
should be sprayed for only a very short period and from a distance of more
than 10 cm.
Ibiza_EN.book Seite 147 Mittwoch, 1. September 2010 5:24 17
Page 164 of 266
Driving and the environment
162Do not use winter tyres all year round as they increase fuel consumption by
up to 10%.
Avoid unnecessary weight
Every kilo of extra weight will put up the fuel consumption, so it is worth
checking the luggage compartment occasionally to make sure that no unnec-
essary loads are being transported.
A roof rack is often left in place for the sake of convenience, even when it is
no longer needed. At a speed of 100-120 km/h your vehicle will use about
12% more fuel as a result of the extra wind resistance caused by the roof rack
even when it is not in use.
Save electricity
The engine activates the alternator, which produces electricity. With the need
for electricity, fuel consumption is also increased. Because of this, always
turn off electrical components when you do not need them. Examples of
components that use a lot of electricity are: the fan at high speeds, the rear
window heating or the seat heaters*.
Note
•If you vehicle has Start-Stop, it is not recommended to disconnect this
function.•It is recommended to close the windows when driving at more than 60
km/h•Do not drive with your foot resting on the clutch pedal, as the pressure can
make the plate spin, more fuel will be used and it can burn the clutch plate
lining, causing a serious fault.•Do not hold the vehicle on a hill with the clutch, use the foot brake or hand
brake, using the latter to start. The fuel consumption will be lower and you will
prevent the clutch plate from being damaged.•On descents, use the engine brake, changing to the gear that is more suit-
able for the slope. The fuel consumption will be lower and the brakes will not
suffer.
Environmental friendlinessEnvironmental protection is a top priority in the design, choice of materials
and production of your new Seat.
Design measures for economical recycling•Joints and connections designed for easy dismantling•Modular construction to facilitate dismantling•Increased use of single-grade materials•Plastic parts and elastomers are rated in accordance with ISO 1043, ISO
11469 and ISO 1629
Choice of materials•Nearly all materials used can be recycled•Similar types of plastics grouped together for easy recycling•Recycled materials used in manufacture•Reduction of volatile compounds in plastics•CFC-free refrigerant in air conditioner
Compliance with prohibited materials regulation : cadmium, lead, mercury,
chrome VI.
Manufacturing methods•Use of recycled material for manufacturing plastic parts•Solvent-free cavity sealing•Solvent-free wax for protecting the vehicles in transit•Solvent-free adhesives•No CFCs used in production•Surplus materials used extensively for energy conversion and building
materials•Overall water consumption reduced•Heat recovery systems
Ibiza_EN.book Seite 162 Mittwoch, 1. September 2010 5:24 17
Page 190 of 266
Checking and refilling levels
188
– Briefly run the engine at idle speed until the service temperature is reached and stop.
– Wait two minutes.
– Pull out the dipstick. Wipe the dipstick with a clean cloth and insert it again, pushing it in as far as it will go.
– Then pull it out once more and check the oil level ⇒fig. 118 . Top
up with engine oil if necessary.Oil level in area
–Do not add oil.
Oil level in area
–Oil can be topped up. The indicated oil level should be after the zone
Oil level in area
–Oil must be topped up. The indicated oil level should be after in zone
Depending on how you drive and the conditions in which the vehicle is used,
oil consumption can be up to 0.5 l/1000 km. Oil consumption is likely to be
higher for the first 5000 km. For this reason the engine oil level must be
checked at regular intervals, preferably when filling the tank and before a
journey.
WARNING
Any work carried out in the engine compartment or on the engine must be
carried out cautiously.•When working in the engine compartment, always observe the safety
warnings ⇒page 183.
Caution
If the oil level is above the area do not start the engine. This could result
in damage to the engine and catalytic converter. Contact an Authorised
Service Centre.Topping up engine oil
E
Top up gradually with small quantities of oil.
Before opening the bonnet, read and observe the warnings ⇒ in
“Safety instructions on working in the engine compartment” on
page 183.
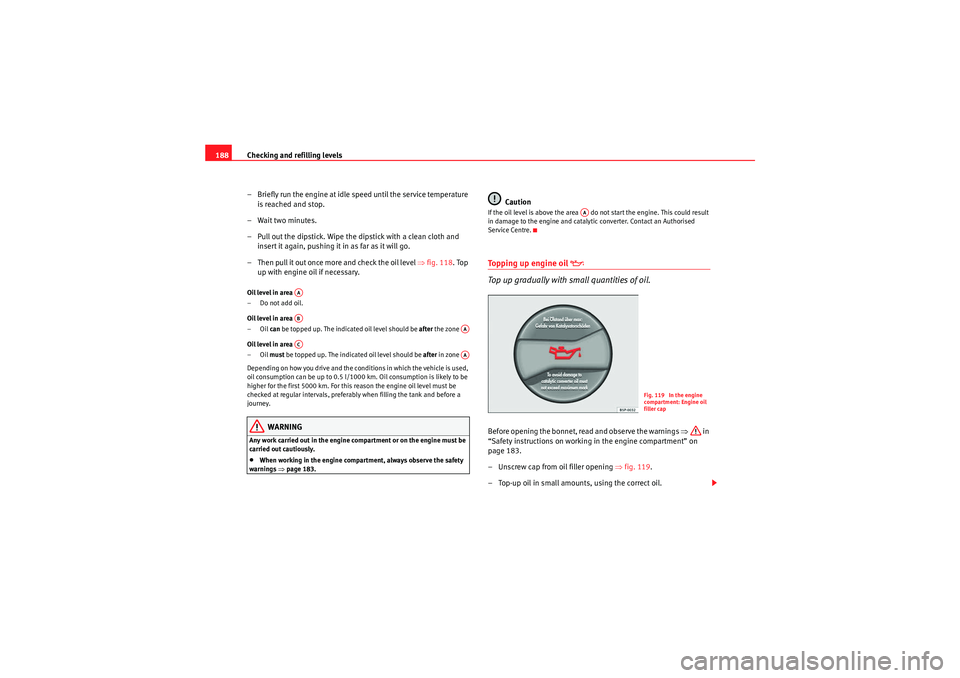
– Unscrew cap from oil filler opening ⇒fig. 119.
– Top-up oil in small amounts, using the correct oil.
AAAB
AA
AC
AA
AA
Fig. 119 In the engine
compartment: Engine oil
filler cap
Ibiza_EN.book Seite 188 Mittwoch, 1. September 2010 5:24 17
Page 201 of 266

Checking and refilling levels199
Safety First
Operating Instructions
Practical Tips
Technical Specifications
– When removed, the wheels and/or tyres should be stored in a
cool, dry and preferably dark location.
– Store tyres in a vertical position if they are not fitted on wheel
rims.New tyres
New tyres must be run in ⇒ page 158.
The tread depth of new tyres may vary, according to the type and make of tyre
and the tread pattern.
Concealed damage
Damage to tyres and rims is often not readily visible. If you notice unusual
vibrations or the vehicle pulling to one side, this may indicate that one of the
tyres is damaged. The tyres should be checked immediately by an Authorised
Service Centre.
Tyres with directional tread pattern
An arrow on the tyre sidewall indicates the direction of rotation on tyres with
directional tread. Always observe the direction of rotation indicated when
fitting the wheel. This guarantees optimum grip and helps to avoid aqua-
planing, excessive noise and wear.
WARNING
•New tyres do not have maximum grip during the first 500 km. Drive
particularly carefully to avoid possible accidents.•Never drive with damaged tyres. This may cause an accident.•If you notice unusual vibrations or if the vehicle pulls to one side when
driving, stop the vehicle immediately and check the tyres for damage.
Checking tyre pressure
The correct tyre pressure can be seen on the sticker on the
inside of the tank flap.1. Read the required tyre inflatio n pressure from the sticker. The
values refer to Summer tyres.
2. The tyre pressures should only be checked when the tyres are cold. The slightly raised pressures of warm tyres must not be
reduced.
3. Adjust the tyre pressure to the load you are carrying.Tyre pressure
The correct tyre pressure is especially important at high speeds. The pressure
should therefore be checked at least once a month and before starting a
journey.
WARNING
A tyre can easily burst if the pressure is too low, causing an accident!•At continuously high speeds, a tyre with insufficient pressure flexes
more. In this way it becomes too hot, and this can cause tread separation
and tyre blow-out. Always observe the recommended tyre pressures.•If the tyre pressure is too low or too high, the tyres will wear prema-
turely and the vehicle will not handle well. Risk of accident!For the sake of the environment
Under-inflated tyres will increase fuel consumption.
Ibiza_EN.book Seite 199 Mittwoch, 1. September 2010 5:24 17
Page 216 of 266

If and when
214
14
Left-hand AFS headlights
15
15
Right-hand AFS headlights
15
16
Vaca n t
17
Number plate light /Dimmer /Side light indicator
light
5
18
Dimmer
5
19
Electronic control unit
5
20
Turn signals
15
21
Lights control, instrument panel
5
22
Electronic control unit, heated mirrors
5
23
Engine injection module/ Rain sensor/ Auto-
matic gear lever/ Starter relay
7.5
24
Glove compartment light, luggage compartment
light, interior light
10
25
Parking aid
5
26
Towing hook
27
Vaca n t
28
Lambda probe
10
29
Engine power supply
20
30
Petrol engine operation
10
31
Petrol engine operation/Glow plugs/Relay
coil/Bi-turbo electric fan
10
32
Engine control unit
15
33
Clutch switch power supply/ Preheating relay/
Servo sensor
5
Number
Consumer
Amps
34
Fuel control unit / Bi-turbo engine supply
15
35
Vaca n t
36
Main beam headlight, right
10
37
Main beam headlight, left/Coming Home
10
38
Electric fan motor
30
39
Vaca n t
40
12 Volt Input/Cigarette lighter
15
41
Heated seats control unit / Cup Holder
25
42
Horn
20
43
Panorama sunroof
30
44
Windscreen wipers
20
45
Heated rear window
30
46
Radio / VDA telephone / Bluetooth / Steering
wheel controls / DC/DC converter for Start/Stop
20
47
Climatronic/autoclimate
5
48
Locking unit
25
49
Front electric window
30
50
Rear electric windows
30
51
Automatic gearbox control unit
30
52
Alarm/Volume sensor
15
53
Electro-kinetic pump relay/bi-turbo fuel control
unit
15
54
Reverse light for automatic gearbox, fog light
15
55
Transformer on
15
Number
Consumer
Amps
Ibiza_EN.book Seite 214 Mittwoch, 1. September 2010 5:24 17