2010 SATURN OUTLOOK inflation pressure
[x] Cancel search: inflation pressurePage 352 of 444
10-46 Vehicle Care
Tire Pressure Monitor
Operation
This vehicle may have a Tire
Pressure Monitor System (TPMS).
The TPMS is designed to warn the
driver when a low tire pressure
condition exists. TPMS sensors are
mounted onto each tire and wheel
assembly, excluding the spare tire
and wheel assembly, if the vehicle
has one. The TPMS sensors
monitor the air pressure in the
vehicle's tires and transmits the tire
pressure readings to a receiver
located in the vehicle.
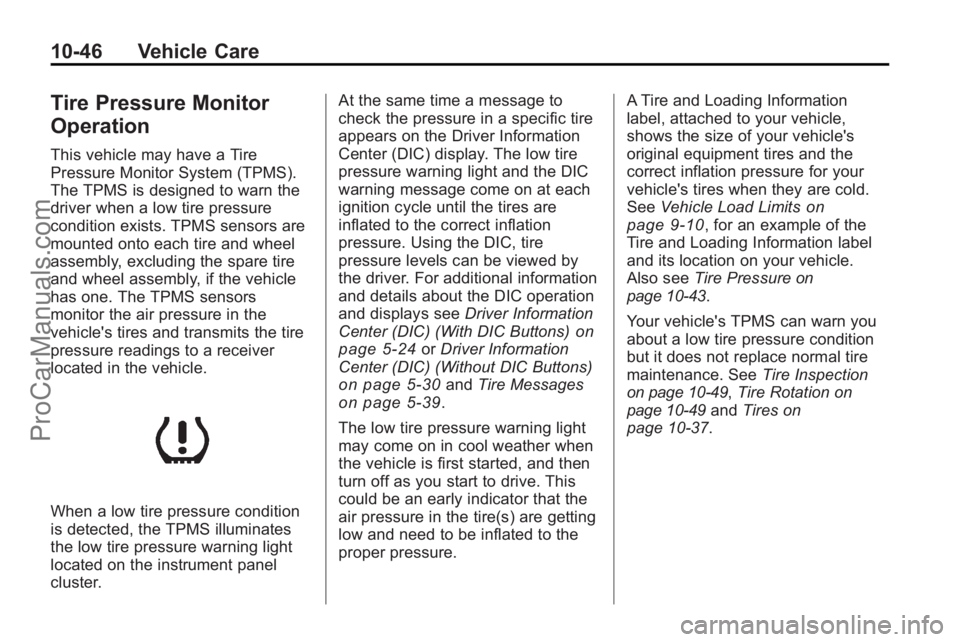
When a low tire pressure condition
is detected, the TPMS illuminates
the low tire pressure warning light
located on the instrument panel
cluster.At the same time a message to
check the pressure in a specific tire
appears on the Driver Information
Center (DIC) display. The low tire
pressure warning light and the DIC
warning message come on at each
ignition cycle until the tires are
inflated to the correct inflation
pressure. Using the DIC, tire
pressure levels can be viewed by
the driver. For additional information
and details about the DIC operation
and displays see
Driver Information
Center (DIC) (With DIC Buttons)
on
page 5‑24or Driver Information
Center (DIC) (Without DIC Buttons)
on page 5‑30and Tire Messageson page 5‑39.
The low tire pressure warning light
may come on in cool weather when
the vehicle is first started, and then
turn off as you start to drive. This
could be an early indicator that the
air pressure in the tire(s) are getting
low and need to be inflated to the
proper pressure. A Tire and Loading Information
label, attached to your vehicle,
shows the size of your vehicle's
original equipment tires and the
correct inflation pressure for your
vehicle's tires when they are cold.
See
Vehicle Load Limits
on
page 9‑10, for an example of the
Tire and Loading Information label
and its location on your vehicle.
Also see Tire Pressure
on
page 10‑43.
Your vehicle's TPMS can warn you
about a low tire pressure condition
but it does not replace normal tire
maintenance. See Tire Inspection
on page 10‑49,Tire Rotationon
page 10‑49and Tires on
page 10‑37.
ProCarManuals.com
Page 354 of 444

10-48 Vehicle Care
.Replacement tires or wheels do
not match your vehicle's original
equipment tires or wheels. Tires
and wheels other than those
recommended for your vehicle
could prevent the TPMS from
functioning properly. SeeBuying
New Tires on page 10‑51.
.Operating electronic devices or
being near facilities using radio
wave frequencies similar to the
TPMS could cause the TPMS
sensors to malfunction.
If the TPMS is not functioning it
cannot detect or signal a low tire
condition. See your dealer/retailer
for service if the TPMS malfunction
light and DIC message comes on
and stays on.
TPMS Sensor Matching
Process
Each TPMS sensor has a unique
identification code. Any time you
rotate your vehicle's tires or replace
one or more of the TPMS sensors,
the identification codes will need to
be matched to the new tire/wheel
position. The sensors are matched
to the tire/wheel positions in the
following order: driver side front tire,
passenger side front tire, passenger
side rear tire, and driver side rear
tire using a TPMS diagnostic tool.
See your dealer/retailer for service.
The TPMS sensors can also be
matched to each tire/wheel position
by increasing or decreasing the
tire's air pressure. If increasing the
tire's air pressure, do not exceed
the maximum inflation pressure
indicated on the tire's sidewall.
To decrease air-pressure out of a
tire you can use the pointed end of
the valve cap, a pencil-style air
pressure gage, or a key. You have two minutes to match the
first tire/wheel position, and
five minutes overall to match all four
tire/wheel positions. If it takes longer
than two minutes, to match the first
tire and wheel, or more than
five minutes to match all four tire
and wheel positions the matching
process stops and you need to
start over.
The TPMS sensor matching process
is outlined below:
1. Set the parking brake.
2. Turn the ignition switch to
ON/RUN with the engine off.
3. Press the Remote Keyless Entry (RKE) transmitter's LOCK and
UNLOCK buttons at the same
time for approximately
five seconds. The horn sounds
twice to signal the receiver is
in relearn mode and TIRE
LEARNING ACTIVE message
displays on the DIC screen.
4. Start with the driver side front tire.
ProCarManuals.com
Page 356 of 444

10-50 Vehicle Care
When rotating the vehicle's tires,
always use the correct rotation
pattern shown here.
If the vehicle has a compact
spare tire, do not include it in the
tire rotation.After the tires have been
rotated, adjust the front and rear
inflation pressures as shown on
the Tire and Loading Information
label. See
Tire Pressure
on
page 10‑43
and Vehicle Load
Limits
on page 9‑10.
Reset the Tire Pressure Monitor
System. See Tire Pressure
Monitor Operation
on page 10‑46.
Make certain that all wheel nuts
are properly tightened. See
“Wheel Nut Torque” under
Capacities and Specifications
on
page 12‑2
.
{WARNING
Rust or dirt on a wheel, or on the
parts to which it is fastened, can
make wheel nuts become loose
after time. The wheel could come
off and cause an accident. When
changing a wheel, remove any
rust or dirt from places where the
wheel attaches to the vehicle. In
an emergency, use a cloth or a
paper towel to do this; but be sure
to use a scraper or wire brush
later, if needed, to get all the rust
or dirt off. See If a Tire Goes Flat
on page 10‑57.
Make sure the spare tire, if the
vehicle has one, is stored
securely. Push, pull, and then try
to rotate or turn the tire. If it
moves, tighten the cable. See
Tire Changing
on page 10‑67.
ProCarManuals.com
Page 357 of 444

Vehicle Care 10-51
When It Is Time for New
Tires
Various factors, such as
maintenance, temperatures, driving
speeds, vehicle loading, and road
conditions influence when you need
new tires.
One way to tell when it is time for
new tires is to check the treadwear
indicators, which appear when the
tires have only 1.6 mm (1/16 inch) or
less of tread remaining.The vehicle needs new tires if any
of the following statements are true:
.You can see the indicators at
three or more places around
the tire.
.You can see cord or fabric
showing through the tire's
rubber.
.The tread or sidewall is cracked,
cut, or snagged deep enough to
show cord or fabric.
.The tire has a bump, bulge,
or split.
.The tire has a puncture, cut,
or other damage that cannot be
repaired well because of the size
or location of the damage.
The rubber in tires degrades over
time. This is also true for the spare
tire, if the vehicle has one, even if it
is not being used. Multiple
conditions affect how fast this aging
takes place, including temperatures,
loading conditions, and inflation
pressure maintenance. With proper care and maintenance tires typically
wear out before they degrade due to
age. If you are unsure about the
need to replace the tires as they get
older, consult the tire manufacturer
for more information.
Buying New Tires
GM has developed and matched
specific tires for your vehicle.
The original equipment tires
installed on your vehicle,
when it was new, were designed
to meet General Motors
Tire Performance Criteria
Specification (TPC Spec)
system rating. If you need
replacement tires, GM strongly
recommends that you get tires
with the same TPC Spec rating.
This way, your vehicle will
continue to have tires that are
designed to give the same
performance and vehicle safety,
during normal use, as the
original tires.
ProCarManuals.com
Page 368 of 444

10-62 Vehicle Care
7. Start the vehicle. The vehiclemust be running while using the
air compressor.
8. Turn the selector switch (A) counterclockwise to the Sealant
+ Air position.
9. Press the on/off (B) button to turn the tire sealant and
compressor kit on.
The compressor will inject
sealant and air into the tire.
The pressure gage (C) will
initially show a high pressure
while the compressor pushes the
sealant into the tire. Once the
sealant is completely dispersed
into the tire, the pressure will
quickly drop and start to rise
again as the tire inflates with
air only.
10. Inflate the tire to the recommended inflation
pressure using the pressure
gage (C). The recommended
inflation pressure can be found on the Tire and Loading
Information label. See
Tire
Pressure on page 10‑43.
The pressure gage (C) may
read higher than the actual tire
pressure while the compressor
is on. Turn the compressor off
to get an accurate pressure
reading. The compressor may
be turned on/off until the
correct pressure is reached.
Notice: If the recommended
pressure cannot be reached after
approximately 25 minutes, the
vehicle should not be driven
farther. The tire is too severely
damaged and the tire sealant and
compressor kit cannot inflate the
tire. Remove the power plug from
the accessory power outlet and
unscrew the inflating hose from
the tire valve. See Roadside
Assistance Program on
page 13‑5.
11. Press the on/off button (B) to turn the tire sealant and
compressor kit off. The tire is not sealed and will
continue to leak air until the
vehicle is driven and the
sealant is distributed in the tire,
therefore, Steps 12 through
18 must be done immediately
after Step 11.
Be careful while handling the
tire sealant and compressor kit
as it could be warm after
usage.
12. Unplug the power plug (H) from the accessory power outlet in
the vehicle.
13. Turn the sealant/air hose (F) counterclockwise to remove it
from the tire valve stem.
14. Replace the tire valve stem cap.
15. Replace the sealant/air hose (F), and the power
plug (H) back in their original
location.
ProCarManuals.com
Page 369 of 444

Vehicle Care 10-63
16. If the flat tire was able to inflateto the recommended inflation
pressure, remove the
maximum speed label from the
sealant canister (E) and place
it in a highly visible location.
The label is a reminder not to
exceed 55 mph (90 km/h) until
the damaged tire is repaired or
replaced.
17. Return the equipment to its original storage location in the
vehicle.
18. Immediately drive the vehicle 5 miles (8 km) to distribute the
sealant in the tire. 19. Stop at a safe location and
check the tire pressure. Refer
to Steps 1 through 11 under
“Using the Tire Sealant and
Compressor Kit without
Sealant to Inflate a Tire
(Not Punctured).”
If the tire pressure has fallen
more than 10 psi (68 kPa)
below the recommended
inflation pressure, stop driving
the vehicle. The tire is too
severely damaged and the tire
sealant cannot seal the tire.
SeeRoadside Assistance
Program on page 13‑5.
If the tire pressure has
not dropped more than
10 psi (68 kPa) from the
recommended inflation
pressure, inflate the tire to
the recommended inflation
pressure. 20. Wipe off any sealant from the
wheel, tire, and vehicle.
21. Dispose of the used sealant canister (E) and sealant/air
hose (F) assembly at a local
dealer/retailer or in accordance
with local state codes and
practices.
22. Replace it with a new canister available from your dealer/
retailer.
23. After temporarily sealing a tire using the tire sealant and
compressor kit, take the
vehicle to an authorized dealer/
retailer within a 100 miles
(161 km) of driving to have the
tire repaired or replaced.
ProCarManuals.com
Page 371 of 444

Vehicle Care 10-65
4. Remove the tire valve stem capfrom the flat tire by turning it
counterclockwise.
5. Attach the air only hose (G) onto the tire valve stem by turning it
clockwise until it is tight.
6. Plug the power plug (H) into the accessory power outlet in the
vehicle. Unplug all items from
other accessory power outlets.
See Power Outlets
on
page 5‑9.
If the vehicle has an accessory
power outlet, do not use the
cigarette lighter.
If the vehicle only has a cigarette
lighter, use the cigarette lighter.
Do not pinch the power plug
cord in the door or window.
7. Start the vehicle. The vehicle must be running while using the
air compressor.
8. Turn the selector switch (A) clockwise to the Air Only
position. 9. Press the on/off (B) button to
turn the compressor on.
The compressor will inflate the
tire with air only.
10. Inflate the tire to the recommended inflation
pressure using the pressure
gage (C). The recommended
inflation pressure can be found
on the Tire and Loading
Information label. See Tire
Pressure on page 10‑43.
The pressure gage (C) may
read higher than the actual tire
pressure while the compressor
is on. Turn the compressor off
to get an accurate reading. The
compressor may be turned on/
off until the correct pressure is
reached.
If you inflate the tire higher
than the recommended
pressure you can adjust the
excess pressure by pressing
the pressure deflation
button (D), if equipped, until the
proper pressure reading is reached. This option is only
functional when using the air
only hose (G).
11. Press the on/off button (B) to turn the tire sealant and
compressor kit off.
Be careful while handling the
tire sealant and compressor kit
as it could be warm after
usage.
12. Unplug the power plug (H) from the accessory power outlet in
the vehicle.
13. Disconnect the air only hose (G) from the tire valve stem, by
turning it counterclockwise, and
replace the tire valve stem cap.
14. Replace the air only hose (G) and the power plug (H) and
cord back in its original
location.
15. Place the equipment in the original storage location in the
vehicle.
ProCarManuals.com
Page 383 of 444

Vehicle Care 10-77
5. Turn the lug wrench clockwise toraise the jack until it lifts the
secondary latch spring.
6. Keep raising the jack until the spare tire stops moving upward
and is held firmly in place. This
lets you know that the secondary
latch has released and the spare
tire is balancing on the jack.
7. Lower the jack by turning the lugwrench counterclockwise. Keep
lowering the jack until the spare
tire slides off the jack.
8. Disconnect the lug wrench fromthe jack and carefully remove
the jack. Use one hand to push
against the spare tire while firmly
pulling the jack out from under
the spare tire with the
other hand.
9. Tilt the retainer and slip it through the wheel opening when
the spare tire has been
completely lowered.
10. Turn the lug wrench clockwise to raise the cable back up if the
cable is hanging. Have the hoist shaft assembly
inspected as soon as you can. You
will not be able to store a spare tire
using the hoist assembly until it has
been repaired or replaced.
Compact Spare Tire
{WARNING
Driving with more than one
compact spare tire at a time could
result in loss of braking and
handling. This could lead to a
crash and you or others could be
injured. Use only one compact
spare tire at a time.
The compact spare tire, if the
vehicle has one, was fully inflated
when the vehicle was new, however,
it can lose air after a time. Check
the inflation pressure regularly.
It should be 60 psi (420 kPa).
ProCarManuals.com